Tuesday, December 3, 2019

Snowflake Frame Dies Focused Cards with Angelica and Juliana

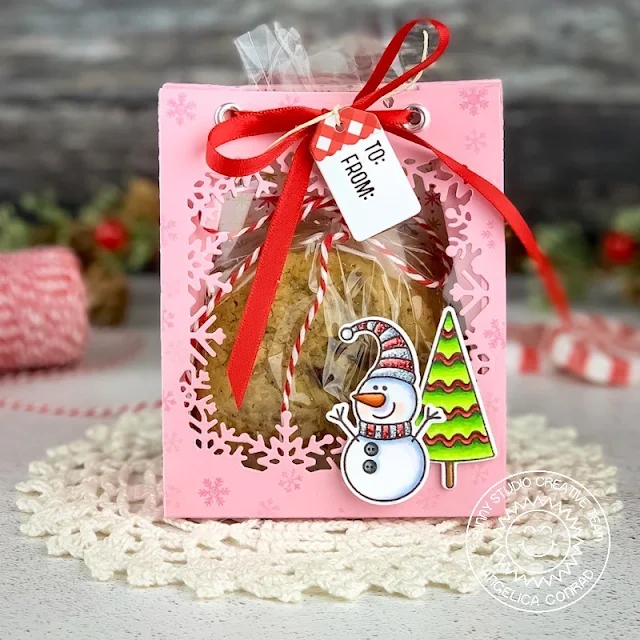
Hi friends! Angelica here. I made a cute treat bag to share today, featuring the Layered Snowflake Frame dies.

Sunny Studio Stamps: Layered Snowflake Frame Dies Circle Snowflake Frame Dies Sweet Treats Gift Bag Feeling Frosty Winter Holiday Gift Bag by Angelica Conrad

I used the Sweet Treat Bag die to die-cut pink card stock, then die cut a window from the bag with the smaller Snowflake Frame. I closed the window with acetate, and attached the bag together. I punched holes out for ribbon, added a cellophane bag of baked cookies, and closed the bag with a bow.

Sunny Studio Stamps: Layered Snowflake Frame Dies Circle Snowflake Frame Dies Sweet Treats Gift Bag Feeling Frosty Winter Holiday Gift Bag by Angelica Conrad

I added a Feeling Frosty snowman and tree with thin foam squares. I finished the bag with a small Sweet Treat Bag tag, using Holiday Cheer pattern paper to decorate the top, and stamps from Season's Greetings stamp set to add the words.

I hope you like my treat bag! That's all that I have for today. Thanks so much for stopping by!

------------------------------------------------------

Hello Sunny Studio Friends! It's Juliana here to share a wintery shadow box card created using the Layered Snowflake Frame Dies.

Sunny Studio Stamps: Layered Snowflake Frame Dies Circle Snowflake Frame Dies Sweet Treats Gift Bag Rustic Winter Card by Juliana Michaels

To get started, I took the Layered Snowflake Frame Dies the large snowflake frame from white cardstock and trimmed it into a square. I then die cut the small snowflake frame from silver cardstock and trimmed it the same size as the white piece. I layered this behind the white frame using strips of foam tape to pop it up. Next, I cut a piece of the wavy paper from the Subtle Grey Tones 6x6 Paper Pad and trimmed it to size of the white frame. I added another layer of foam tape to the edge of the silver snowflake frame before adhering it to the patterned paper to really add to the shadow box look.

I then took the Rustic Winter Dies and cut the deer and trees from white cardstock, and placed them inside the frame to create the wintery scene. To give it a bit of dimension I used double sided foam tape behind the deer. I then used the snowflake dies from the Layered Snowflake Frame Dies and the Snowflake Circle Frame Dies and added a few of them cut from silver cardstock to complete the scene.

Sunny Studio Stamps: Layered Snowflake Frame Dies Circle Snowflake Frame Dies Sweet Treats Gift Bag Rustic Winter Card by Juliana Michaels

I thought about adding a sentiment to the front of the card, but I love how pretty the card looks without it. I think it would make a beautiful display piece sitting out during the holidays and you can add the sentiment and well wishes easily enough on the inside of the card.

Thanks so much for stopping by today! I hope you enjoyed learning how to create a wintery shadow box card featuring the Layered Snowflake Frame Dies

Sunny Studio Supplies Used:

Holiday Cheer 6x6 Paper
Shop at:
Sunny Studio
Rustic Winter Dies
Rustic Winter Dies
Shop at:
Sunny Studio
Subtle Grey Tones Paper
Shop at:
Sunny Studio
Season's Greetings Stamps
Shop at:
Sunny Studio
Feeling Frosty Stamps
Shop at:
Sunny Studio
Feeling Frosty Dies
Feeling Frosty Dies
Shop at:
Sunny Studio
Layered Snowflake Frame
Shop at:
Sunny Studio
Snowflake Circle Frame
Shop at:
Sunny Studio
Sweet Treats Gift Bag
Shop at:
Sunny Studio

Monday, December 2, 2019

Embossing Folder Focused Cards with Leanne and Eloise

Hello everyone, Leanne here! Have you started decorating for the holidays yet? I just love the Farmhouse style of decorating especially for Christmas. It was this decorating trend that inspired my card today. Most of the Farmhouse Christmas decor ideas I've seen include buffalo plaid, so for my card I created a green and black plaid background using the Buffalo Plaid Embossing Folder

Sunny Studio Stamps: Layered Poinsettia Dies Fancy Frames Dies Christmas Garland Frame Dies Christmas Card by Leanne West

To achieve the green and black plaid, I started with green card stock and then I used Onyx Black VersaFine to ink up the embossing folder before running it through my die cut machine. I added the embossed plaid panel to an A2 sized card base. I die cut one of the Fancy Frames Rectangles to place in the center of the plaid background.

Sunny Studio Stamps: Layered Poinsettia Dies Fancy Frames Dies Christmas Garland Frame Dies Christmas Card by Leanne West

The Farmhouse decorating style is known for it's simplicity so I followed suit and kept this card design fairly clean and simple. I die cut the "Merry Christmas", using the Christmas Garland Frame Dies, from black glitter card stock and adhered to the frame at an angle. I then used the Layered Poinsettia dies to create a single flower to add just below the greeting. For a little bit of embellishment, I added a few clear sequins to finish off the card. 

------------------------------------------------

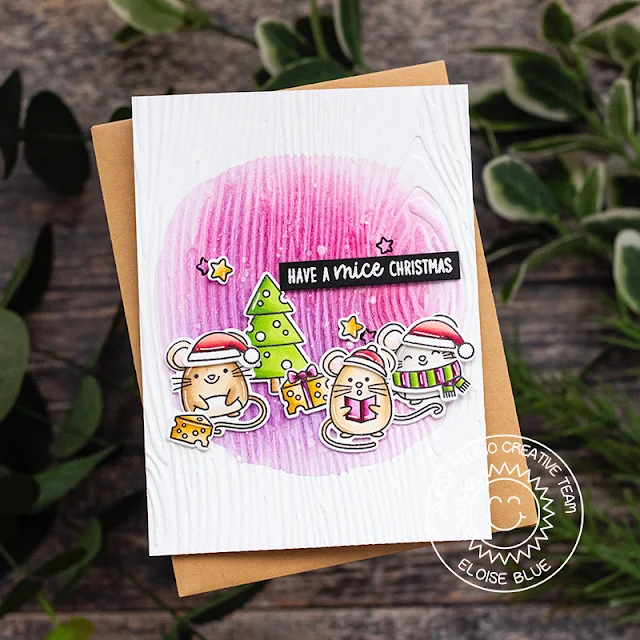
Hi friends, Eloise here and today I’ll be using the Woodgrain Embossing Folder along with Merry Mice to create a Christmas card.

Sunny Studio Stamps: Merry Mice Embossing Folders Christmas Card by Eloise Blue

I started off with stamping out my images and colouring them in with Copic Markers. I cut them out and then added white details using a gel pen.

(Copic Markers Used: B0000, B000 / YG03, YG23, YG25, YG17 / R000, R00 / R32, R35, R37, R39 / YR20, YR21, YR23, YR24 / W00, W0, W1, W3 / E50, E51, E53, E55 / E30, E31, E34, E35 / RV91, RV93, RV95, RV99 / RV63, RV66, RV69, R89 / 0)

Sunny Studio Stamps: Merry Mice Embossing Folders Christmas Card by Eloise Blue

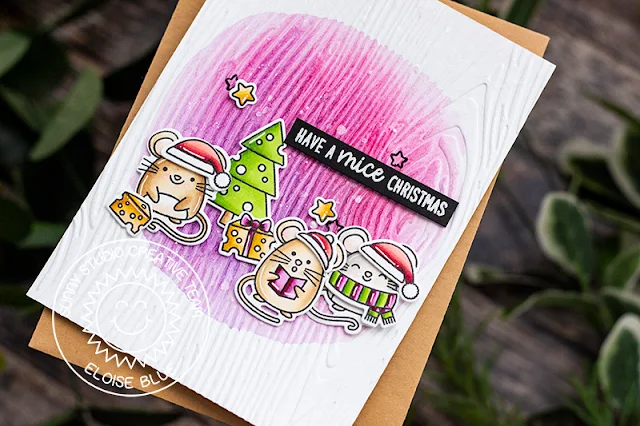
I then took a piece of watercolour cardstock and ran that through my die cutting machine with the Woodgrain Embossing Folder. I then water-coloured a pink/purple circle into the centre.

Lastly, I adhered my images into place and white heat embossed the ‘Have A Mice Christmas’ sentiment onto a thin strip of black cardstock and adhered that on too.

Thanks so much for stopping by today and I’ll see you all next week. 


All retail purchases of any size will have 10% donated to Convoy of Hope to help with children’s feeding initiatives and disaster response.

And as always orders will also come with our mini holiday light bulb die (not pictured).

Sunny Studio Supplies Used:


Fancy Frames- Rectangles
Shop at:
Sunny Studio
Buffalo Plaid Embossing
Shop at:
Sunny Studio
Woodgrain Embossing
Woodgrain Embossing
Shop at:
Sunny Studio
Merry Mice Stamps
Merry Mice Stamps
Shop at:
Sunny Studio
Merry Mice Dies
Merry Mice Dies
Shop at:
Sunny Studio
Layered Poinsettia Dies
Shop at:
Sunny Studio
Christmas Garland Frame
Shop at:
Sunny Studio

Sunday, December 1, 2019

Hedgey Holidays Hedgehog Card with Mendi

Hello there!  I couldn't let this week of festivities pass without sharing a card of my own using our new Black Friday exclusive "Hedgey Holidays" which is only available this holiday season as a free gift with purchase through tomorrow at Midnight PST.  After that it will be back in the vault and saved for another year.  

For my card I colored my images with Copic Markers and added details with a Sharpie White Extra Fine Point Paint Pen.  I created hills for my little roly poly hedgehogs to roll down using our Woodland Border dies which I inked up between the layers using some Tumbled Glass distress ink to help them not blend together. To frame my little scene I used the candy cane striped patterned paper from our Holiday Cheer Paper pack and a pink grid print from our Gingham Pastels paper pack.

For my sentiment, I combined the "Christmas Hedgehugs" with the word "Sending" from our Alpaca Holiday Stamps.  I also added some movement marks to give the sense of my little guys rolling using some images from our Super Duper Stamps.
Sunny Studio: Hedgey Holidays Christmas Card Free Stamps and Die with Black Friday 2019 Purchase

As finishing touches I colored the two tiny hearts from the set, pairing them with the largest heart from our Hogs & Kisses Stamps.  I then added glossy accents to the hearts, candy canes and noses of my hedgehogs.  As my final touch I added some White Neon Amplify to my hats and pom-poms which I then heated with my heat gun to make them puff up.  Love the extra texture these two products add to my fairly simple design.
Sunny Studio: Hedgey Holidays Christmas Card Free Stamps and Die with Black Friday 2019 Purchase

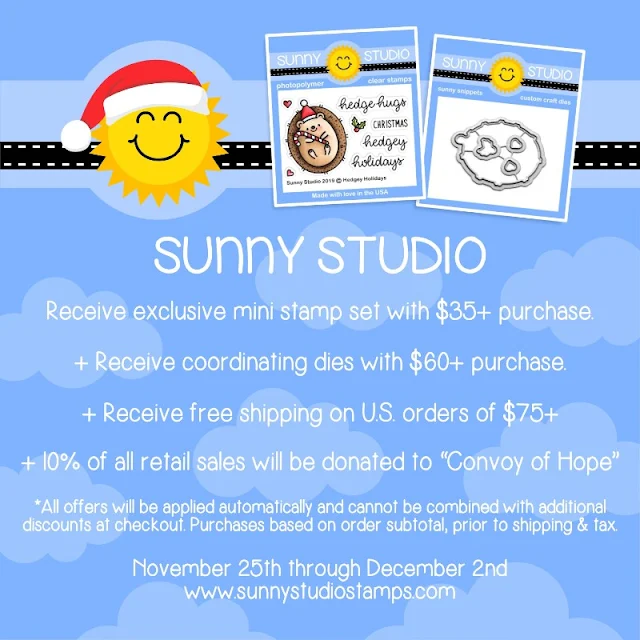
In case you missed it, here's the details about our Holiday week promotion which is good through tomorrow at midnight PST.  


All retail purchases of any size will have 10% donated to Convoy of Hope to help with children’s feeding initiatives and disaster response.  

As always orders will also come with our mini holiday light bulb die which isn't pictured here.


Sunny Studio: Hedgey Holidays Free Stamps and Die with Black Friday 2019 Purchase Promo

Thanks so much for stopping by.  I hope you've enjoyed all the ideas shared with this fun little set.  Big hugs!


Other Sunny Studio Supplies Used:
Memento Tuxedo Black Ink Pad
Shop at:
Sunny Studio
Tsukineko Jumbo Dauber
Shop at:
Sunny Studio
Versafine Onyx Black Ink
Shop at:
Sunny Studio
Woodland Borders Dies
Shop at:
Sunny Studio

Alpaca Holiday Stamps
Shop at:
Sunny Studio
Super Duper Stamps
Super Duper Stamps
Shop at:
Sunny Studio
Hogs & Kisses Stamps
Shop at:
Sunny Studio
Hogs & Kisses Dies
Hogs & Kisses Dies
Shop at:
Sunny Studio
Holiday Cheer 6x6 Paper
Shop at:
Sunny Studio
Neon Amplify-White
Neon Amplify-White
Shop at:
Sunny Studio

Saturday, November 30, 2019

Guest Designer Spotlight: Cards with Keeway Tsao

Hello friends! It’s Keeway Tsao from Kiwi Koncepts and I’m so excited to be here today to share with you some fun holiday inspirations with the Winter 2019 release!

Sunny Studio Stamps: Merry Mice Christmas Garland Frame Die Christmas Cards by Keeway Tsao

My first showcases the Merry Mice stamp and dies and Christmas Garland frame die. I first stamped the mice in stockings in a dark brown hybrid ink and colored them up with copic markers. I then used the matching dies to die cut the images out.

Sunny Studio Stamps: Merry Mice Christmas Garland Frame Die Christmas Cards by Keeway Tsao

Next, I die cut the Christmas Garland frame out of white card stock. I then used a blending brush to ink blend various green distress oxide inks onto the frame. The different green inks add variation and depth to the pine. I ink blended an A2 panel with a lighter green and yellow ink colors to back the frame and also added berries that I had die cut out of red card stock.

Sunny Studio Stamps: Merry Mice Christmas Garland Frame Die Christmas Cards by Keeway Tsao

I stamped the sentiment in the bottom center and added my images above it with foam tape. Finally, I lightly dabbed on glue around each berry and sprinkled chunky glitter onto it to give it a sparkly look. After giving it a few minutes to dry, I used a brush to gently remove any loose glitter remaining on the card.

Sunny Studio Stamps: Christmas Garland Frame Dies Santa Claus Lane Layered Snowflake Frame Dies Christmas Cards by Keeway Tsao

My next card showcases the Santa Claus Lane stamps and dies and Layered Snowflake Frame Die. Again, I stamped my images in a dark brown hybrid ink and colored them with copic markers. I die cut the images out with the matching dies.

Sunny Studio Stamps: Christmas Garland Frame Dies Santa Claus Lane Layered Snowflake Frame Dies Christmas Cards by Keeway Tsao

My background costs of three layers. The bottom layer is ink blended with Blueprint Sketch, Broken China, and Tumbled Glass distress oxide inks and splattered with white paint. The center layer is die cut with the smaller of the two Layered Snowflake Frames out of white card stock and gently blended with Tumbled Glass distress oxide ink. The top layer is die cut with the larger of the two Layered Snowflake Frames out of white card stock and ink blended with Broken China and Tumbled Glass distress oxide inks. These layers were adhered together.

Sunny Studio Stamps: Christmas Garland Frame Dies Santa Claus Lane Layered Snowflake Frame Dies Christmas Cards by Keeway Tsao

I used the large ‘merry christmas’ sentiment die from Christmas Garland frame die out of red card stock. This was added towards the bottom half of the card, with the images right above it with foam tape. Now that I’m in the glittery mood, I decided to dab some clear adhesive around the frame to add some chunky glitter around the snowflake frame for a sparkly final touch!

Hope you enjoy today’s inspiration and see you next time!

------------------------------------------------------


All retail purchases of any size will have 10% donated to Convoy of Hope to help with children’s feeding initiatives and disaster response.

And as always orders will also come with our mini holiday light bulb die (not pictured).

Sunny Studio Supplies Used:

Santa Claus Lane Stamps
Shop at:
Sunny Studio
Santa Claus Lane Dies
Shop at:
Sunny Studio
Merry Mice Stamps
Merry Mice Stamps
Shop at:
Sunny Studio
Merry Mice Dies
Merry Mice Dies
Shop at:
Sunny Studio
Layered Snowflake Frame
Shop at:
Sunny Studio
Christmas Garland Frame
Shop at:
Sunny Studio

Friday, November 29, 2019

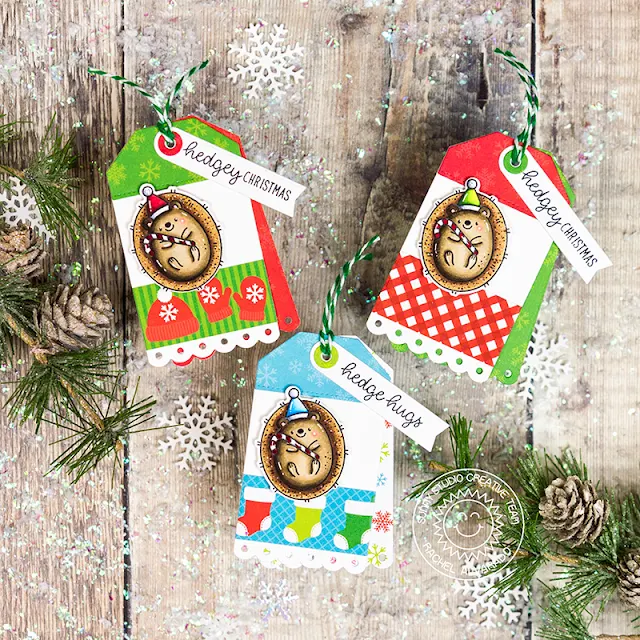
Hedgey Holidays Cards with Rachel and Candice

Hello, crafty friends! It's Rachel here and I have some fun Christmas tags to share with you today featuring the sweetest little hedgehog from the Hedgey Holidays Stamp Set. I combined this cute little mini stamp set with the Build-A-Tag #2 Die Set and the Holiday Cheer 6x6 Paper Pack to create some easy tags that would go great with your Christmas gifts!

Sunny Studio Stamps: Hedgey Holidays Build-A-Tag Dies Holiday Tags by Rachel Alvarado

I stamped my hedgehogs onto a sheet of Neenah Solar White 110lb Card Stock and colored them with Copics. (Colors used: Body: E41, E41, E43, E44; Spines: E31, E23, E25; Reds: R46, R89; Greens: YG01, YG07, YG17, G28; Blues: B0000, B01, B02, B06; Whites: 0, C00, C2, C4.) I used the coordinating Dies to cut them out and attached them to my tags with some 3D Foam Adhesive Tape.

Sunny Studio Stamps: Hedgey Holidays Build-A-Tag Dies Holiday Tags by Rachel Alvarado

I cut a second coordinating tag layer to attach behind all of my tags and stamped each of them with some "To:" and "From:" sentiments from the Christmas Icons Stamp Set. I fished off each tag by stamping the sentiment onto another strip of white card stock and attaching it all together with some green & white striped twine.

I hope you enjoyed my tags today! Thanks so much for stopping by!

-----------------------------------------------------

Hey, it's Candice here. This little cutie is part of the Black Friday deals at Sunny Studio Stamps and I used it to make a cute Christmas card!

Sunny Studio Stamps: Hedgey Holidays Hogs & Kisses Scenic Route Christmas Garland Frame Dies Holiday Card by Candice Fisher

All the Sunny Studio Stamps products I used:
I started my card by creating an 8 1/2 x 3 1/2 card base which fits into a standard or 9A size envelope. For the background, I first inked a trimmed piece with worn lipstick & spun sugar and splattered with red shimmer spray. I then repeatedly stamped the Hedgehogs, colored them with Copic markers and die cut one extra and pop dotted on top of the center one.

Sunny Studio Stamps: Hedgey Holidays Hogs & Kisses Scenic Route Christmas Garland Frame Dies Holiday Card by Candice Fisher

To finish the card, I added some strings of lights that I layered for depth along with the Merry Christmas topped with foil mint paper. I also added the sentiment onto the speech bubble along with the holly colored with Copics.

Make sure you take advantage of the Black Friday deal at Sunny Studio Stamps here!


All retail purchases of any size will have 10% donated to Convoy of Hope to help with children’s feeding initiatives and disaster response.

And as always orders will also come with our mini holiday light bulb die (not pictured).

Sunny Studio Supplies Used:

Christmas Icons Stamps
Shop at:
Sunny Studio
Holiday Cheer 6x6 Paper
Shop at:
Sunny Studio
Build-A-Tag #2 Dies
Build-A-Tag #2 Dies
Shop at:
Sunny Studio
Scenic Route Stamps
Scenic Route Stamps
Shop at:
Sunny Studio
Scenic Route Dies
Scenic Route Dies
Shop at:
Sunny Studio
Hogs & Kisses Stamps
Shop at:
Sunny Studio
Hogs & Kisses Dies
Hogs & Kisses Dies
Shop at:
Sunny Studio
Christmas Garland Frame
Shop at:
Sunny Studio