Today I have one last card to share from the School Time stamp set. This time I wanted to create a card that would be suitable for anyone so I focused on the apple image and coordinating sentiment in the set.
Once again I knew I was going to fussy cut these apples so I was fairly sloppy in my coloring and focused on just getting them nice and blended with my Copic markers. I added my highlights by using lighter colors on the upper right and some darker colors for my shadows on the bottom left. Seriously quick and easy!
To ground my sentiment I stamped it over the notebook paper image which I tied with some red Baker's Twine. Along the bottom of my card I used my favorite Petite Prints paper by Doodlebug.
Check back tomorrow when I will share some of my ideas using the Birthday Smiles set. Hope your day is extra amazing! :)
Thursday, September 10, 2015
Wednesday, September 9, 2015
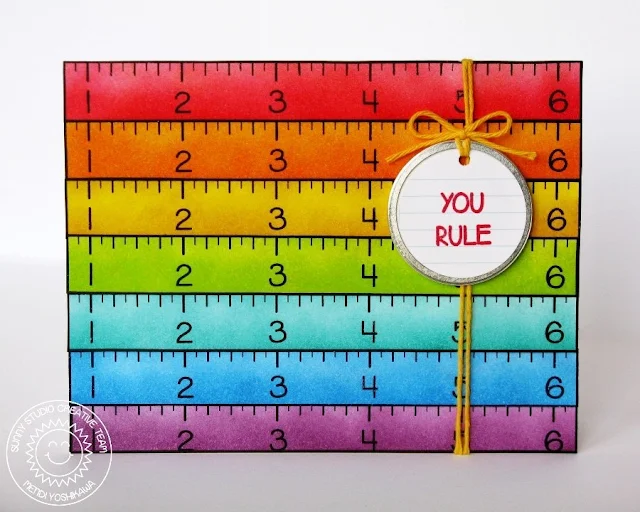
School Time: You Rule Rainbow Ruler Background Card
Hi there! Did you get a chance to check out all the amazing inspiration from our blog hop yesterday? It was thrilling for me to see these talented ladies which I greatly admire creating beautiful projects with stamps I designed! I still can't believe it's real. I was equally touched by all the sweet comments that were left--Thank you for making our debut such a success! You have made my heart happy! If you didn't have time to take a look yesterday, there's still time to hop along and comment for your chance to win one of three stamp sets. :)
With back to school still fresh on everyone's mind, I have another card to share from the School Time stamp set. For this card I stacked the rulers to create a rainbow background using various colors of distress ink. To make lining up everything easier I stamped them individually and cut them out (which was super quick with my paper trimmer since they are all straight lines).
To finish of my card front, I stamped the notebook paper image and stamped the sentiment over the top with red ink. I then punched them out using a circle punch and adhere the circle to a basic metal rimmed tag I purchased at an office supply store.
For the twine I wrapped my card front a couple times with it and then knotted it behind where the tag would go, cutting off the excess. I then popped up my tag with foam tape on either side of the tag (leaving a small channel where the twine would sit) and tied a separate bow around the tag. This gives the appearance that my tag was tied onto the card, but without all the fuss of trying to get my bow just right.
I'll back tomorrow with one last School Time card. Until then, I hope you have a wonderful day! :)
Subscribe to:
Posts (Atom)


