Showing posts with label Stitched Semi-Circle Dies. Show all posts

Wednesday, September 20, 2023

Dotted Diamond Background Die Focused Card with Gladys

Hello crafty friends! Gladys here and I'm excited to be back on the blog. For my card today I'm sharing a cute snow globe shaker. If you would like to learn how to use your dies in a different way, then keep on reading.

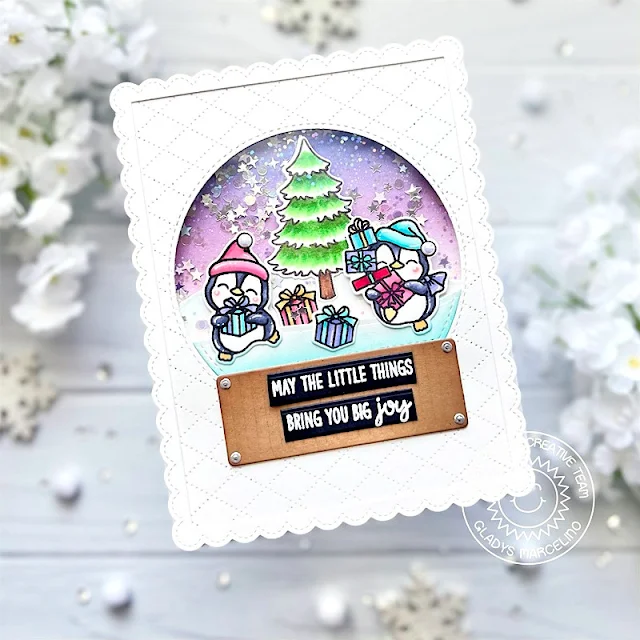
Sunny Studio Stamps: Dotted Diamond Background Die Focused Winter Holiday Card by Gladys Marcelino (featuring Penguin Party, Stitched Semi-Circle Dies, Fancy Frame Dies)

I wanted to use some left-over colored images from another project using Penguin Party set. I stamped them using alcohol friendly ink, colored with Copic markers then cut using their coordinating dies. I also used a tree from the Seasonal Trees stamp set.  

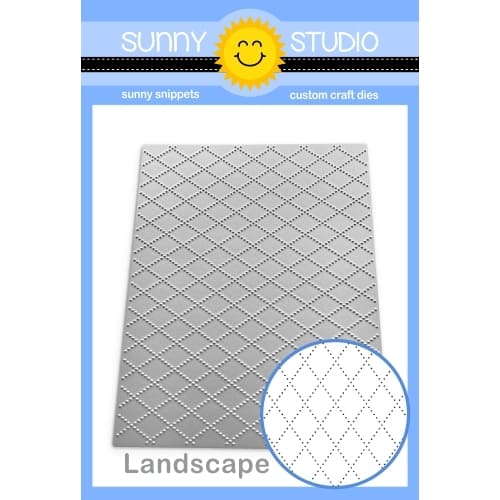
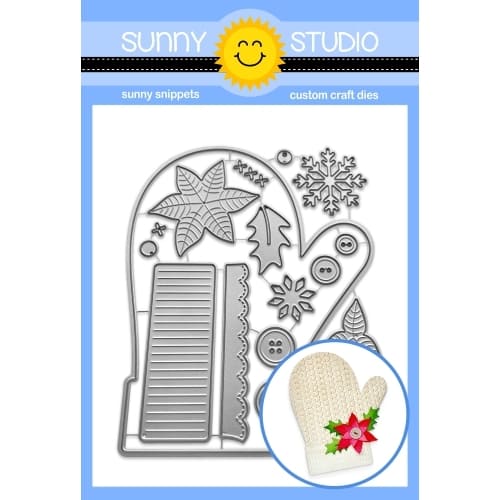
To create the snow globe, I cut a piece of white cardstock slightly smaller than an A2 size panel. I used the second largest die from the Stitched Semi-Circle to create the windowFor the base, I used the rectangle piece with score lines from the Woolen Mitten cut from dark brown cardstock. I inked the edges with vintage photo to add some depth. For more interest on the panel, I used the Dotted Diamonds Landscape die which create a gorgeous stitching all over.

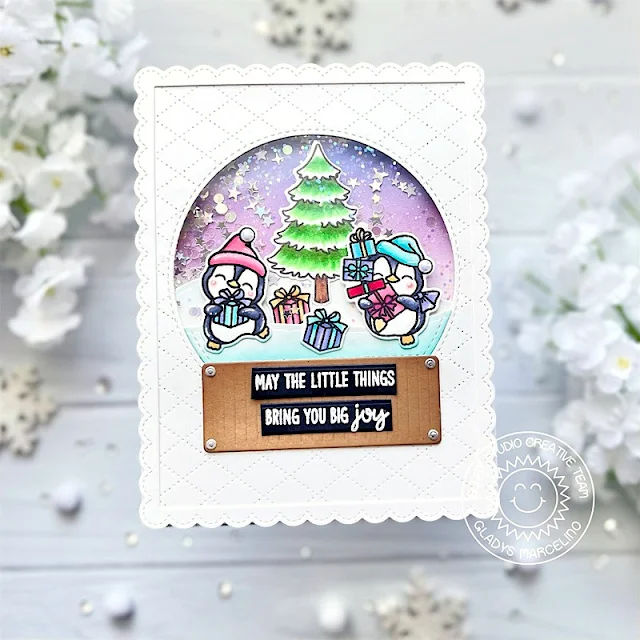
Sunny Studio Stamps: Dotted Diamond Background Die Focused Winter Holiday Card by Gladys Marcelino (featuring Penguin Party, Stitched Semi-Circle Dies, Fancy Frame Dies)

For the shaker, I first inked a piece of Bristol smooth paper to create the background. I used milled lavender, dusty concord and blueprint sketch distress oxide inks. I adhered acetate and double-sided foam tape behind the white panel. I placed some images and a snow hill behind the acetate then it was time to add all the pretty sequins and glitter. I mounted the inked panel to secure the shaker elements and glued the entire panel on a top folding card base.

Sunny Studio Stamps: Dotted Diamond Background Die Focused Winter Holiday Card by Gladys Marcelino (featuring Penguin Party, Stitched Semi-Circle Dies, Fancy Frame Dies)

To finish the scene on the front I adhered the rest of the colored images, base for the snow globe and snow hill inked with peacock feathers. For the sentiment I white heat embossed on black cardstock and trimmed to fit on the base of the snow globe. To add details, I used a white gel pen for highlights on some of the images and flat back pearls on the penguin's hat. To complete my card, I added a scalloped frame using the Fancy Frames Rectangle dies

That is all for me, I hope you found some inspiration. I'll be back with another project soon. Have a wonderful day!

Sunny Studio Supplies Used:

Fancy Frames- Rectangles
Shop at:
Sunny Studio
Seasonal Trees Stamps
Shop at:
Sunny Studio
Seaonal Trees Dies
Seaonal Trees Dies
Shop at:
Sunny Studio
Stitched Semi-Circle Dies
Shop at:
Sunny Studio
Penguin Party Stamps
Shop at:
Sunny Studio
Penguin Party Dies
Penguin Party Dies
Shop at:
Sunny Studio
Dotted Diamond Landscape
Shop at:
Sunny Studio
Woolen Mitten Dies
Woolen Mitten Dies
Shop at:
Sunny Studio

Friday, September 1, 2023

Truckloads of Love Card with Tina

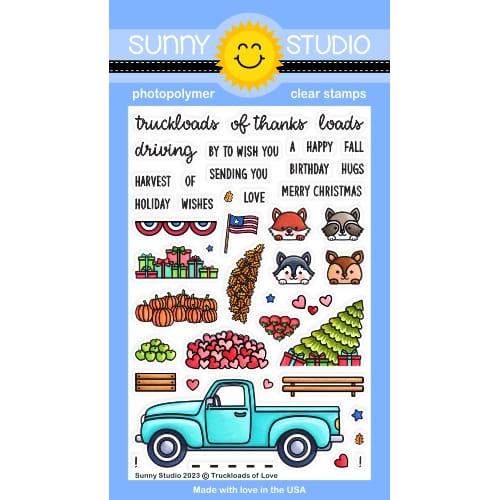
Hello crafty friends, Tina here featuring the fun and versatile Truckloads of Love stamp and die set! I love that this set can be used for so many occasions throughout the whole year. For my card today, I am creating a sweet Fall scene with the adorable Squirrel Friends! They are busy loading their truck with lots of pumpkins.

Sunny Studio Stamps: Truckload of Love Fall Themed Card by Tina Henkens (featuring Squirrel Friends, Frilly Frame Dies, Autumn Tree Dies, Dotted Diamond Dies, Stitched Semi-Circle Dies)

Creating a full scene card can be intimidating for me and it helps if I build up my design using shape dies. For my background I cut a panel from white Neenah paper using the new Dotted Diamond cover die in landscape. It gives that extra subtle touch and doesn’t distract from the focal point! I used the outer die of the Frilly Frames Stripes to create the scalloped border.

Next, I cut the two largest of the Stitched Semi Circles dies from the same white card stock. I kept the largest one plain white and inked up the smaller one with Distress Oxides in Antique Linen, Scattered Straw and Saltwater Taffy. After splattering some water droplets for extra interest, I glued both semi circles directly to the white card panel. Then, I adhered this panel to a red card base.

Sunny Studio Stamps: Truckload of Love Fall Themed Card by Tina Henkens (featuring Squirrel Friends, Frilly Frame Dies, Autumn Tree Dies, Dotted Diamond Dies, Stitched Semi-Circle Dies)

I stamped and die cut all the cute squirrels, truck and pumpkins (Squirrel Friends, Truckloads of Love stamp) and colored them with my Copics. As always, I added some highlights with my white gel pen, it really makes a difference! To complete the scene, I cut and colored the tree and leaves from the Autumn Tree die. This tree is great to use in any of your Fall scene cards!

Finally, I arranged all my images and glued them in place, using foam tape were needed for dimension. The combined sentiment from the Truckloads of Love stamp was stamped onto a small white banner and added to the right upper corner. To embellish the card I sprinkled a few gems from the Chrystal Clear Jewels around the sentiment. 

And that finishes my card for today, I hope you will have fun creating with this amazing new set! Thank you for visiting the blog and happy crafting!

Sunny Studio Supplies Used:

Frilly Frames Stripes Die
Shop at:
Sunny Studio
Stitched Semi-Circle Dies
Shop at:
Sunny Studio
Squirrel Friends Stamps
Shop at:
Sunny Studio
Squirrel Friends Dies
Shop at:
Sunny Studio
Autumn Tree Die
Autumn Tree Die
Shop at:
Sunny Studio
Dotted Diamond Landscape
Shop at:
Sunny Studio
Truckloads of Love Stamps
Shop at:
Sunny Studio
Truckloads of Love Dies
Shop at:
Sunny Studio

Sunday, July 30, 2023

Scrumptious Cupcakes Cards with Cathy

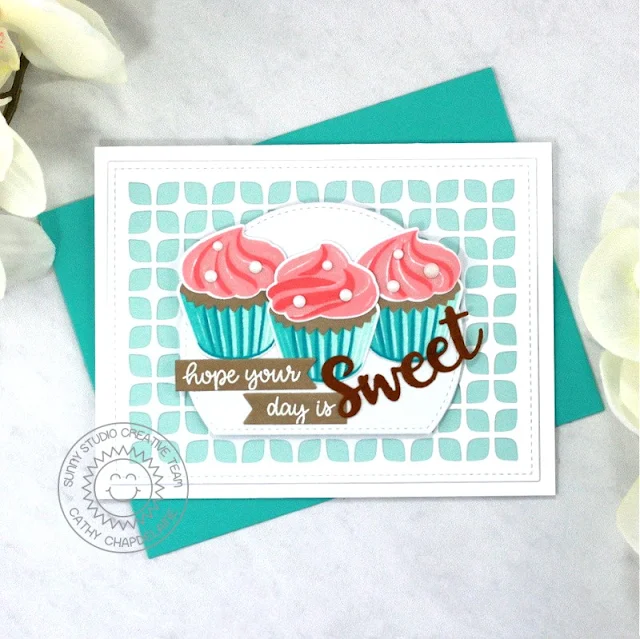
Hey friends! Cathy here today and I've got a deliciously sweet CAS card for you featuring the Scrumptious Cupcakes Stamps!

Sunny Studio Stamps: Scrumptious Cupcakes Card by Cathy Chapdelaine (featuring Frilly Frame Dies, Stitched Semi-Circle Dies)

This is an A2 card and I started by die-cutting a piece of white cardstock using the Frilly Frames Retro Petals Die. I cut a piece of aqua cardstock 3 1/2" x 5" and adhered the white frame over it on the card front.

Next, I die-cut a piece of white cardstock using the second largest Stitched Semi-Circle Die and adhered it to the center of the card front using foam dimensional tape. I stamped the cupcakes from the Scrumptious Cupcakes Stamps and die-cut them using the coordinating dies. I added Pure White Jewels to the frosting as little candy pieces.

Sunny Studio Stamps: Scrumptious Cupcakes Card by Cathy Chapdelaine (featuring Frilly Frame Dies, Stitched Semi-Circle Dies)

To finish, I die-cut 2 pieces of kraft cardstock using a die from the Notebook Photo Corners Dies. I heat embossed the "hope your day is" sentiment with white embossing powder using stamps from the Savanna Safari Stamps and cut along one edge of each piece close to the sentiment. I die-cut the "Sweet" sentiment from dark brown cardstock using the Hayley Uppercase and Hayley Lowercase Dies.

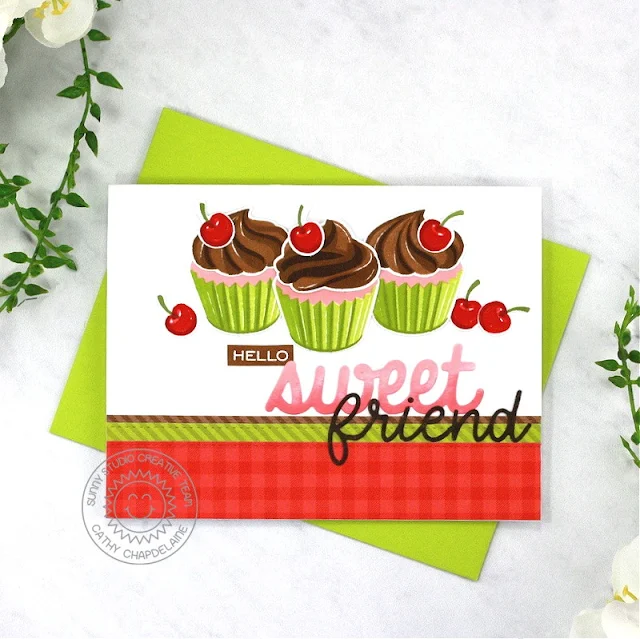
Sunny Studio Stamps: Scrumptious Cupcakes Card by Cathy Chapdelaine (featuring Ribbon & Lace Border Dies, Hayley Alphabet Dies)

For my second A2 card and I adhered all the elements directly to the card front. First, I added 3 papers to the bottom. I die-cut 6" long strips of the brown and green papers from the Dots & Stripes Jewel Tones Paper using the ribbon die from the Ribbon & Lace Border Dies. I overlapped and adhered the green strip on the brown and adhered them 1 1/4" from the bottom edge. I trimmed them on the left and right edges of the card. I then cut a piece of red paper from the Joyful Holiday Paper 1" x 6", die-cut one edge using a die from the Ribbon & Lace Border Dies and adhered it even with the bottom edge of the card. I trimmed the excess from the left and right edges.

Sunny Studio Stamps: Scrumptious Cupcakes Card by Cathy Chapdelaine (featuring Ribbon & Lace Border Dies, Hayley Alphabet Dies)

Next, I die-cut a piece of white cardstock using the Sweet Word Die and inked it with Spun Sugar and Kitsch Flamingo Distress inks. I adhered it above the brown paper and slightly off center. I die-cut the "friend" sentiment from white cardstock using the Loopy Letters Dies, inked the letters with Ground Espresso Distress ink and adhered them along the top of the red paper as shown. I heat embossed the "HELLO" sentiment from the Radiant Plumeria Stamps with white embossing powder on brown cardstock, fussy cut around it and adhered it above and to the left of the sweet sentiment.

To finish, I stamped the cupcakes and cherries from the Scrumptious Cupcakes Stamps and die-cut them using the coordinating dies. I just love the detail in these sweet stamps!

I hope you enjoyed and thanks for stopping by! For more inspiration, please visit my blog www.inkredibleadventures.com and you can also find me on Instagram as @cathy.chapdelaine.

Sunny Studio Supplies Used:

Sweet Word Die
Sweet Word Die
Shop at:
Sunny Studio
Dots & Stripes Jewel Tones 6x6 Paper
Shop at:
Sunny Studio
Loopy Letters Dies
Loopy Letters Dies
Shop at:
Sunny Studio
Frilly Frames Retro Petals Dies
Shop at:
Sunny Studio
Radiant Plumeria Stamps
Shop at:
Sunny Studio
Savanna Safari Stamps
Shop at:
Sunny Studio
Stitched Semi-Circle Dies
Shop at:
Sunny Studio
Joyful Holiday Paper
Shop at:
Sunny Studio
Hayley Lowercase Alphabet Dies
Shop at:
Sunny Studio
Hayley Uppercase Alphabet Dies
Shop at:
Sunny Studio
Ribbon & Lace Dies
Ribbon & Lace Dies
Shop at:
Sunny Studio
Notebook Photo Corners Dies
Shop at:
Sunny Studio
Scrumptious Cupcakes Stamps
Shop at:
Sunny Studio
Scrumptious Cupcakes Dies
Shop at:
Sunny Studio

Tuesday, February 28, 2023

Clucky Chickens Cards with Lien and Isha

Hi crafty friends! It's Lien here, back with another spring card! I adore these little chickens, I had so much fun putting this scene together.

Sunny Studio Stamps: Clucky Chickens Card by Lien Leysen (featuring Picket Fence Border dies)

My mom loves anything chicken-themed, so I knew this card with all these Clucky Chickens was going to be for her, I'm just not sure about the occasion yet. That's why I left so much blank space at the top of the card so I can add any sentiment later on. I do this pretty often and it's a fun trick to keep in mind if you make a lot of cards. 

I started out by stamping all of the images from the Clucky Chickens stamp set in alcohol marker friendly ink. I stamped all of them together with my Misti and I left the stamps in place while I colored them with my Ohuhu markers. Once the coloring is done, I can put the paper back in my Misti to stamp once more with Versafine Onyx Black ink. This is a pigment ink and I love to add Clear Gloss embossing powder to it for a shiny embossed outline. I die cut all the images out with the coordinating die

Sunny Studio Stamps: Clucky Chickens Card by Lien Leysen (featuring Picket Fence Border dies)

While I had my die cutting machine out, I also cut the Picket Fence Border die and the included grass border. I cut the picket fence from brown cardstock and a few times from white cardstock, layering them up for dimension and stability. Then I sprayed it white with the Picket Fence Distress Spray Stain. You can still see the brown peeking through in some places and I even sprayed a little bit of green ink at the bottom of the fence to resemble moss or grass stains. 

For the grass, I cut it from light green cardstock and blended some darker green ink over it at the bottom of the grassy hill to add depth. For the sky I also used a very light blue cardstock and blended the top edges with a slightly more pigmented blue ink. I glued all my scene elements onto a card base and then propped the chickens up on some foam tape. 

I don't make scene cards often, but this was so much fun to do!

-----------------------------------------------

Hello everyone! Isha here with a clean and simple card featuring the Clucky Chickens stamps and dies. Such an adorable and versatile stamp set.

Sunny Studio Stamps: Clucky Chickens Card by Isha Gupta

I started by die-cutting a semi circle using the Stitched Semi-Circle dies. Sponge peacock feathers distress ink. Flick some ink and white splatters.

Stamp the images, color using alcohol markers and die-cut.
Hens and Coop - Clucky Chickens stamps and dies
Clouds - Baby Elephants stamps and dies
Sun - Balloon Rides stamps and dies

Sunny Studio Stamps: Clucky Chickens Card by Isha Gupta

Adhere the semi-circle and all the images to the card. Thanks for dropping by and have a nice day!

Sunny Studio Supplies Used:

Picket Fence Border Dies
Shop at:
Sunny Studio
Stitched Semi-Circle Dies
Shop at:
Sunny Studio
Balloon Rides Stamps
Shop at:
Sunny Studio
Balloon Rides Dies
Balloon Rides Dies
Shop at:
Sunny Studio
Baby Elephants Stamps
Shop at:
Sunny Studio
Baby Elephants Dies
Baby Elephants Dies
Shop at:
Sunny Studio
Clucky Chickens Stamps
Shop at:
Sunny Studio
Clucky Chickens Dies
Shop at:
Sunny Studio

Monday, February 27, 2023

Rainy Day Die Focused Cards with Cathy and Bobbi

Hey friends! Cathy here today and Spring has already sprung where I live with plenty of rain showers greening up that grass! I had great inspiration for my card today featuring the Rainy Days Dies.

Sunny Studio Stamps: Rainy Day Die Focused Card by Cathy Chapdelaine (featuring Fluffy Cloud Border Dies, Stitched Rectangle Dies, Haley Alphabet Dies)

I wanted to keep this card light and bright even though I’ve got some Spring showers going on, so I started with a cloud background lightly inked with Tumbled Glass Distress ink. First, I die-cut a piece of white cardstock with a Stitched Rectangles Die, inked the very top with Tumbled Glass and adhered it centered on an A2 card front. I then die-cut 2 more pieces of white cardstock using the same Stitched Rectangle Die and die-cut them 3 times using the Fluffy Clouds Border Dies. (the die-cut cloud pieces measure 1 1/4" high, 2 1/4” high and 3 1/4" high) I inked each piece near the cloud edge with Tumbled Glass and layered/adhered the pieces to the card front.

Next, I die-cut a piece of white cardstock with a Stitched Semi-Circle Die and inked the top half with Tumbled Glass and Broken China Distress ink. I die-cut a second piece of white cardstock with the same Stitched Semi-Circle Die and then die-cut across the bottom of the semi-circle with the grass border die from the Picket Fence Border Die. I inked the grass with Twisted Citron and Mowed Lawn Distress ink and adhered it to the bottom of the semi-circle. I adhered the semi-circle to the card front even with the bottom stitched line of the rectangle and centered.

Sunny Studio Stamps: Rainy Day Die Focused Card by Bobbi Lemanski (featuring Fluffy Cloud Border Dies, Stitched Rectangle Dies, Haley Alphabet Dies)

I die-cut the cute rain boots from the Rainy Days Dies from white cardstock. I colored the main boot portion with Copics and inked the base piece underneath and the top of the boot with Twisted Citron Distress ink. I inked the sole of the boot with Broken China Distress ink. I also inked the raindrops (die-cut using the Rainy Days Dies) with Broken China Distress ink and heat embossed them with clear embossing powder to give them a wet look.

To finish, I stamped the “wishing you” and “of happiness” sentiments from the Over the Rainbow Stamps in teal ink on blue cardstock and die-cut them using the ribbon die from the Ribbon & Lace Border Dies and a flag die from the Stitched Rectangles Dies to notch the ends. I die-cut the “showers” sentiment using the Hayley Lowercase Alphabet Dies from ivory cardstock and teal cardstock and layered them slightly overlapping to help it stand out a bit more.

I hope you enjoyed and thanks for stopping by today! For more inspiration, please visit my blog www.inkredibleadventures.com and you can also find me on Instagram as @cathy.chapdelaine.

-----------------------------------------

Hi friends! It’s Bobbi here with a card to celebrate just about anything. There’s something so fun about brightly colored umbrellas. I was inspired by a trip to the s where we visited Calle de las Sombrillas, a street of brightly hanging umbrellas. When I saw this Rainy Days Dies set, it reminded me of all those hanging umbrellas over the street.


Sunny Studio Stamps: Rainy Day Die Focused Card by Bobbi Lemanski (featuring Hayley Alphabet Dies)


I’m using three new sets from the latest release including Rainy Days Dies and the Hayley Alphabet dies – Uppercase dies and Lowercase dies.


This 5″ X 7″ card begins with a watercolor background in blues, greens and aquas on watercolor paper. Once my base layer was dry, I splattered blue watercolor paint over it to look like tiny raindrops. Next, I cut twelve colors of umbrellas in bold brights and combined two tones of each color to make the six umbrellas you see on the card. I glued all the pieces together and added a few highlight marks using a white Gelly Roll pen. I assembled all of my remaining die cut pieces and made six more umbrellas to use on a later project.


Sunny Studio Stamps: Rainy Day Die Focused Card by Bobbi Lemanski (featuring Hayley Alphabet Dies)


Using some white cording, I attached two strings diagonally across the card front. I attached the six umbrellas, positioning them so that they look like they are hanging from the strings. I attached them using Scrapbook Adhesives foam tabs to make them stand out, too. I cut the Hayley letters to spell out, “OH, happy day” and attached them to the card front. Lastly, I attached blue and white die cut teardrops to the front and added some clear drops using Pearl Pen transparent.


Thanks for stopping by today. If you want to see more ideas and inspiration from me, subscribe to my blog, BobbiHartDesign.com. I’ll send you updates on new posts! You can also find me on Instagram as @BobbiHartDesign and on Facebook as BobbiHartDesign.


Sunny Studio Supplies Used:

Picket Fence Border Dies
Shop at:
Sunny Studio
Stitched Rectangle Dies
Shop at:
Sunny Studio
Over The Rainbow Stamps
Shop at:
Sunny Studio
Fluffy Clouds Border Dies
Shop at:
Sunny Studio
Stitched Semi-Circle Dies
Shop at:
Sunny Studio
Hayley Lowercase Alphabet Dies
Shop at:
Sunny Studio
Hayley Uppercase Alphabet Dies
Shop at:
Sunny Studio
Rainy Days Dies
Rainy Days Dies
Shop at:
Sunny Studio
Ribbon & Lace Dies
Ribbon & Lace Dies
Shop at:
Sunny Studio