Showing posts with label Frosty Flurries. Show all posts

Thursday, November 14, 2019

Merry Mice Cards with Anja and Vanessa

Hello everyone, Anja here and today's card features the adorable Merry Mice Stamps. I combined them with the beautiful Layered Snowflake Frame Die to create a winter scene.

Sunny Studio Stamps: Merry Mice Layered Snowflake Frame Die Winter Themed Holiday Card by Anja Bytyqi

First, I did an ink blended background with Distress Oxide Inks. I sprinkled on water droplets to lift the color in some spots. For the falling snow, I added white paint splatters with a brush.

I die cut the larger snowflake frame from a 5"×5" white cardstock panel. Due to the intricate details, I used a metal shim while running it through my die-cutting machine. I created a snow hill by die cutting a piece of white pearlescent paper and popped up the snowflake frame with foam tape.

Sunny Studio Stamps: Merry Mice Layered Snowflake Frame Die Winter Themed Holiday Card by Anja Bytyqi

Next, I stamped the mice and accessories in Memento Tuxedo Black Ink and did some coloring with Copic Markers. I used the coordinating dies to cut out the images and adhered them with liquid glue.

For the sentiment, I white heat embossed the small word 'HELLO' (from the Fabulous Flamingos set) on a little strip of lavender cardstock. I die cut the word 'Winter' (which is also included in the Layered Snowflake Frame Die set) from purple glitter cardstock. I assembled my card and added Blue & White Clay Snowflake Confetti as embellishments.

Thank you so much for stopping by! Hope you're having a fabulous day!

---------------------------------------------------

Hello to you! Vanessa here today with a card using the adorable Merry Mice set. This set makes my heart happy!

Sunny Studio Stamps: Merry Mice Frosty Flurries Frilly Frames Winter Themed Christmas Card by Vanessa Menhorn

First, I covered the front of my card base with red striped patterned paper from the Very Merry 6x6 paper. Now I die-cut the Frilly Frames Chevron die from Kraft cardstock, stamped the Frosty Flurries with white pigment ink and adhered the panel to the card.
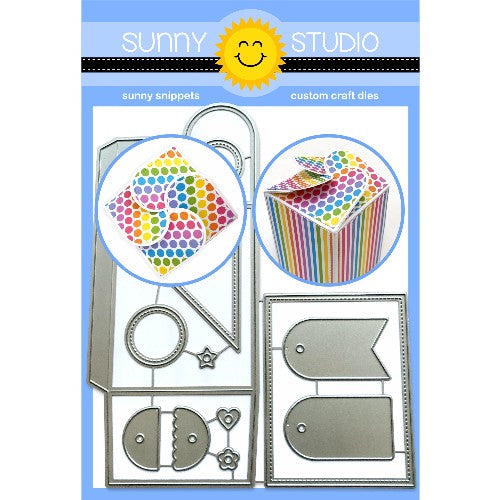
I die-cut the tiny tags from the Wrap Around Box Dies from white cardstock, inked the bottom edges with red Distress Oxide Inks, tied-on baker's twine and adhered the tags to the card.

Sunny Studio Stamps: Merry Mice Frosty Flurries Frilly Frames Winter Themed Christmas Card by Vanessa Menhorn

Then I stamped the images onto white cardstock, colored them with Copics, die-cut the pieces with the matching dies and adhered everything to the card, raising some parts with foam tape. Finally, I stamped and heat-embossed the sentiment onto a strip of green cardstock, notched the ends and adhered it.

I can't get over how cute these mice are!! What a gang :) Thanks for stopping by today!

Sunny Studio Supplies Used:

Frosty Flurries Stamps
Shop at:
Sunny Studio
Frilly Frames Stripes Die
Shop at:
Sunny Studio
Wrap Around Box Die
Wrap Around Box Die
Shop at:
Sunny Studio
Fabulous Flamingos Stamps
Shop at:
Sunny Studio
Very Merry 6x6 Paper
Shop at:
Sunny Studio
Merry Mice Stamps
Merry Mice Stamps
Shop at:
Sunny Studio
Merry Mice Dies
Merry Mice Dies
Shop at:
Sunny Studio
Layered Snowflake Frame
Shop at:
Sunny Studio

Tuesday, November 6, 2018

Eskimo Kisses Friendship Christmas Card with Juliana

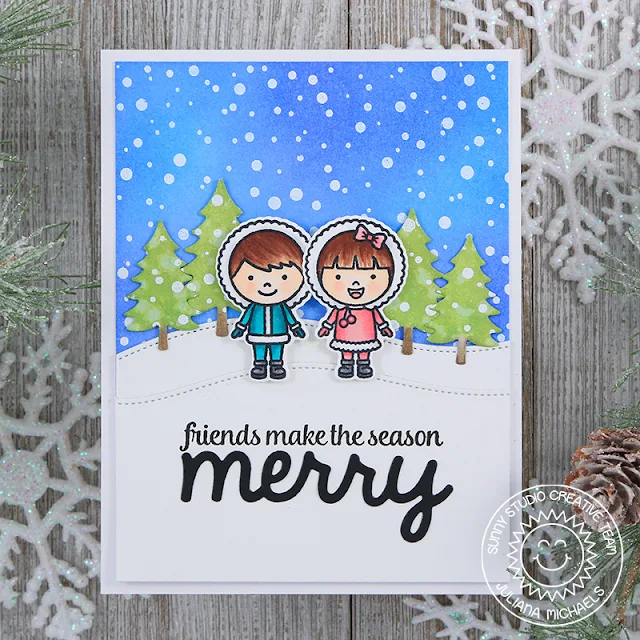
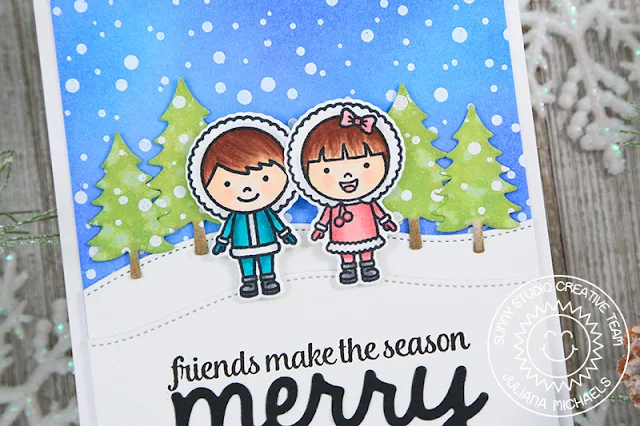
Hello friends! It's Juliana Michaels and today I'm sharing a merry little Christmas card I created using the Eskimo Kisses stamp set.

Sunny Studio Stamps: Eskimo Kisses Frosty Flurries Merry Sentiments Woodland Borders Friendship Christmas Card by Juliana Michaels

I began by stamping and coloring the winter cuties with Copic markers. I then die cut them with the coordinating dies. Next, I took the Woodland Borders die set and cut out four trees from Bristol Paper and inked them up using Distress Oxide Ink in Peeled Paint, Mowed Grass and Espresso. I then took the same die and cut out two snowy hills from white cardstock.

Sunny Studio Stamps: Eskimo Kisses Frosty Flurries Merry Sentiments Woodland Borders Friendship Christmas Card by Juliana Michaels

For the background, I repeatedly stamped the Frosty Flurries stamp set onto a piece of Bristol Paper with Versamark Embossing Ink and heat embossed it with white embossing powder. Once the entire background was stamped and embossed, I inked it with a mix of Distress Oxide Ink in Salty Ocean and Blueprint Sketch. I wanted to add a touch of snow to the evergreen trees, so I stamped them with the Frosty Flurries stamp set too and heat embossed them with white embossing powder as well.

Sunny Studio Stamps: Eskimo Kisses Frosty Flurries Merry Sentiments Woodland Borders Friendship Christmas Card by Juliana Michaels

To finish off the card, I stamped the sentiment from the Merry Sentiments stamp set. I then die cut a piece of black cardstock using the Merry Word die.

Thanks so much for stopping by today! I hope you enjoyed this merry little Christmas card using a mix of holiday products from Sunny Studio Stamps!

Sunny Studio Supplies Used:

Merry Sentiments Stamps
Shop at:
Sunny Studio
Merry Word Die
Merry Word Die
Shop at:
Sunny Studio
Frosty Flurries Stamps
Shop at:
Sunny Studio
Woodland Borders Dies
Shop at:
Sunny Studio
Eskimo Kisses Stamps
Shop at:
Sunny Studio
Eskimo Kisses Dies
Eskimo Kisses Dies
Shop at:
Sunny Studio

Tuesday, October 16, 2018

Alpaca Holiday Framed Snowy Scene Christmas Card with Juliana

Hello friends! It's Juliana Michaels and I'm excited to share a sweet little Christmas card I created using the Alpaca Holiday stamp set! These adorable little alpacas just bring a smile to my face and I'm pretty sure this Christmas card will do the same for it's recipient.

Sunny Studio Stamps: Alpaca Holiday Fancy Frames Rectangles Frosty Flurries Snowy Scene Christmas Card by Juliana Michaels

I began by stamping and coloring the images from the Alpaca Holiday stamp set with Copic markers. I then die cut them using the coordinating die set. Once the coloring and cutting was complete, I set these to the side to start working on the snowy scene I wanted to create.

Sunny Studio Stamps: Alpaca Holiday Fancy Frames Rectangles Frosty Flurries Snowy Scene Christmas Card by Juliana Michaels

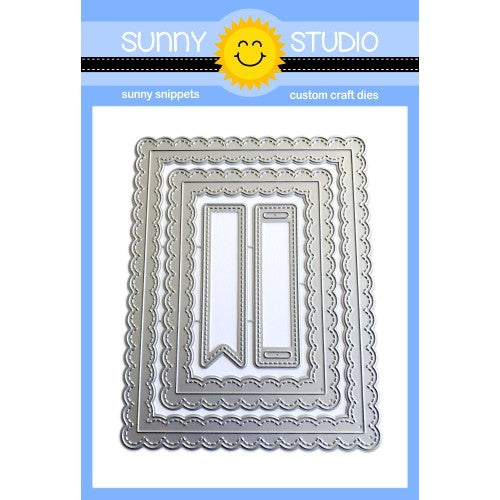
To create the framed scene, I took the smaller of the rectangle dies from the Fancy Frames Rectangles die set and cut if from white cardstock. I then cut a rectangle from Bristol Paper that was sized to layer behind the frame. I inked this up with Distress Oxide in Blueprint Sketch and Salty Ocean. To make it look like snow, I lightly sprinkled water onto the paper and dabbed it dry. I still wanted a more snowy look, so I grabbed the the Frosty Flurries stamp. I wipe the inked paper with an embossing powder tool and then stamped the image with Versamark embossing ink (the embossing powder tool will prevent any extra embossing powder from sticking to the paper in areas where you might not want it). I then heat set it with white embossing powder. Now, I had the snowy background I was looking for!


Sunny Studio Stamps: Alpaca Holiday Fancy Frames Rectangles Frosty Flurries Snowy Scene Christmas Card by Juliana Michaels

Next, I cut a thin strip of white cardstock and adhered that to the bottom edge of the snowy background. I then layered on the stamped and colored images to create the scene. For the sentiment, I stamped it onto a piece of white cardstock that I die cut using the pennant die from the Fancy Frames Rectangles die set. To complete the card, I adhered the framed snowy scene to a piece of patterned paper from the Holiday Cheer 6x6 paper pad.

I hope this card inspires you to pull out the Alpaca Holiday stamp set and start creating some Christmas cards with it! We can't wait to see what you create and share with us!

Sunny Studio Supplies Used:

Frosty Flurries Stamps
Shop at:
Sunny Studio
Fancy Frames- Rectangles
Shop at:
Sunny Studio
Alpaca Holiday Stamps
Shop at:
Sunny Studio
Alpaca Holiday Dies
Alpaca Holiday Dies
Shop at:
Sunny Studio

Friday, December 22, 2017

Christmas Themed Gift Tags with Lexa

Hello everyone! Lexa here with you today. Have you got all of your presents wrapped up? Don’t forget the gift tags too. This time of the year is the most wonderful and hectic at the same time. So today I will share some inspiration for last minute tags that can maybe save you a little time in these last few days before Christmas.


Sunny Studio Stamps: Gleeful Reindeer and Jolly Gingerbread Christmas Themed Gift Tags by Lexa Levana

I used the Tag Toppers Traditional Dies together with the Fishtail Banner II Dies. Attached them to the paper with low tack tape and die cut them at the same time. Such a time saver. I blend Distress Inks for the background, Spun Sugar, Worn Lipstick, Cracked Pistachio, Peacock Feathers. After I'm happy with the blending I stamped Frosty Flurries with matching dye inks.


Sunny Studio Stamps: Gleeful Reindeer and Jolly Gingerbread Christmas Themed Gift Tags by Lexa Levana

I stamped all of the images with Versafine black ink and watercolored them with Distress markers. The Gleeful Reindeers are so adorable, and no one can get enough of the cute gingerbread boy from Jolly Gingerbread. After I finished putting them all together, now it's time to tie up some ribbons and twines to finish the tags.


Sunny Studio Stamps: Gleeful Reindeer and Jolly Gingerbread Christmas Themed Gift Tags by Lexa Levana

Thank you so much for visiting the blog today! I hope you enjoy today's post and have an amazing holiday.

Sunny Studio Supplies Used:

Fishtail Banner II Dies
Shop at:
Sunny Studio
Gleeful Reindeer Dies
Shop at:
Sunny Studio
Gleeful Reindeer Stamps
Shop at:
Sunny Studio
Tag Topper Dies-Traditional
Shop at:
Sunny Studio
Frosty Flurries Stamps
Shop at:
Sunny Studio
Jolly Gingerbread Stamps
Shop at:
Sunny Studio
Jolly Gingerbread Dies
Shop at:
Sunny Studio

Wednesday, December 13, 2017

Gleeful Reindeer Christmas Ornaments and Treat Bags with Franci

Hi there, happy Wednesday! It's Franci here with you today with a little Christmas party! 


Sunny Studio Stamps: Gleeful Reindeer Christmas Ornaments and Treat Bags by Franci Vignoli

"Rudolph the red-nosed reindeer had a very shine nose". And that's where my inspiration came from! I love the Gleeful Reindeer stamp set so much that I thought it would have been perfect for my little party! So first of all - the little Christmas tree.


Sunny Studio Stamps: Gleeful Reindeer Christmas Ornaments and Treat Bags by Franci Vignoli

I found this little Christmas tree at one of my local stores and loved how tiny and festive it is. I wrapped it in some gold starry twine and then I created my ornaments. I stamped all of my reindeer in memento black ink, colored them with Copics, and drew some details with a white gel pen. I then added some Wink of Stella sparkle and die cut them with the coordinating dies

Then I die cut some circles out of white cardstock and embossed the Frosty Flurries in white on the top of them. I let them cool and then sponged some Peacock Feathers distress ink to create the sky and make them pop.


Sunny Studio Stamps: Gleeful Reindeer Christmas Ornaments and Treat Bags by Franci Vignoli

This mini background is amazing, and I love the beautiful snowy effect! To complete my ornaments, I glued down all my reindeer with foam tape to give extra dimension and I also added a little clear twine. 


Sunny Studio Stamps: Gleeful Reindeer Christmas Ornaments and Treat Bags by Franci Vignoli

Then of course I had to make treat bags! For these I took some clear plastic bags and I cut 2 rectangles out of some white cardstock to match in size. I decorated them as I did for my ornament with the embossed Frosty Flurries and Distress ink. Then I created a mini tag out of white cardstock with the Tag Topper dies, stamping my little reindeer on them and coloring them with Copics. 

Then I filled my bags with treats and closed them with my decorated rectangles, gluing down the little tags on top with foam tape and adding a little red bow. So festive, right! For the treats, I took some salted dried pretzels, coated them with chocolate and let them cool. I sprinkled them with powdered sugar to finish them off. Super easy. Nothing fancy, but oh they are so yummy!


Sunny Studio Stamps: Gleeful Reindeer Christmas Ornaments and Treat Bags by Franci Vignoli

And speaking about yummy Christmas treats, here they come. Last, but not least, my reindeer cupcakes! How cute are these? And they perfectly match my reindeer! YAY! If you would like to create these too, here's how I made them. I just decorated some vanilla cupcakes with some chocolate. Then I cut some salted dried pretzels in a half to create the horns, and added some eye candies and a little mini red chocolate peanut for my Rudolph nose!

This party was so, so, sooo much fun to make. I hope you enjoyed it and host a little reindeer themed party too! Thank you so much for stopping by and have a lovely day! 

Sunny Studio Supplies Used:

Gleeful Reindeer Dies
Shop at:
Sunny Studio
Gleeful Reindeer Stamps
Shop at:
Sunny Studio
Tag Topper Dies-Traditional
Shop at:
Sunny Studio
Frosty Flurries Stamps
Shop at:
Sunny Studio

Thursday, November 23, 2017

Frosty Flurries Winter Sky Background Card with Vanessa

Hey everybody! Vanessa here with a winter card using Frosty Flurries and Playful Polar Bears

Sunny Studio Stamps: Frosty Flurries and Playful Polar Bears Winter Sky Background Card by Vanessa Menhorn

I started with a panel of watercolor paper and applied various watercolors to create the winter sky. After it had dried, I stamped and heat-embossed the Frosty Flurries and adhered the panel to my card base. Now I hand-cut a snow hill from white cardstock and adhered it. I die-cut a rectangle from a panel of white cardstock and covered the card with it.

Then I stamped the polar bear image, colored it with Copics, fussy-cut it and adhered it to the card with foam-tape.

Sunny Studio Stamps: Frosty Flurries and Playful Polar Bears Winter Sky Background Card by Vanessa Menhorn

Now I die-cut three snowflakes with the complimentary mini snowflake die and adhered them. I stamped and heat-embossed the sentiment onto a strip of turquoise cardstock, trimmed it and adhered it. Finally, I added matching sequins to the sky.

Well, winter has arrived in my part of the world. What is it like in yours? I'll be glad when it's over, but creating cute winter themed cards with my beloved Sunny Studio goodies makes it bearable for me :) Thanks for stopping by today!

Sunny Studio Supplies Used:

Frosty Flurries Stamps
Shop at:
Sunny Studio
Playful Polar Bears Stamps
Shop at:
Sunny Studio
Playful Polar Bears Dies
Shop at:
Sunny Studio