Monday, October 26, 2020

Winter Scenes Cards with Ashley and Mayra

Hello friends! It's Ashley with a soft watercolor scene today featuring one of the Winter Scenes stamps! I love how these scene stamps make it so easy to compose a card!

Sunny Studio Stamps: Winter Scenes Feeling Frosty Inside Greetings Winter Holiday Card by Ashley Ebben

I started by stamping my images onto white watercolor cardstock. I wanted a soft scene, so I decided to give no-line watercolor a try. I stamped the snowmen from Feeling Frosty in Inkon3 Fade Out ink, then masked them. I stamped a scene from Winter Scenes on top also using Fade Out ink, then removed the masks. I slowly painted everything in using my Zig Clean Color Real Brush markers, a paint brush, and water. I probably should have gone with a less detailed stamp for my first attempt at no-line watercoloring, but I am happy with the result!

Sunny Studio Stamps: Winter Scenes Feeling Frosty Inside Greetings Winter Holiday Card by Ashley Ebben

Once I was done with watercoloring, I splattered the whole piece with a bit of watered down white acrylic paint to mimic snow. I die cut the piece with the stitched frame from Frilly Frames Retro Petals and added it to a dark gray card base. I added a sentiment from Inside Greetings Holiday stamped in Pinkfresh Studio Rocky Slope from the Urban Raincoat cube pack. I know these sentiments were designed for the inside of cards, but I just can't stop using them on the front!

Thank you so much for stopping by! Have a wonderful day!

---------------------------------------------------

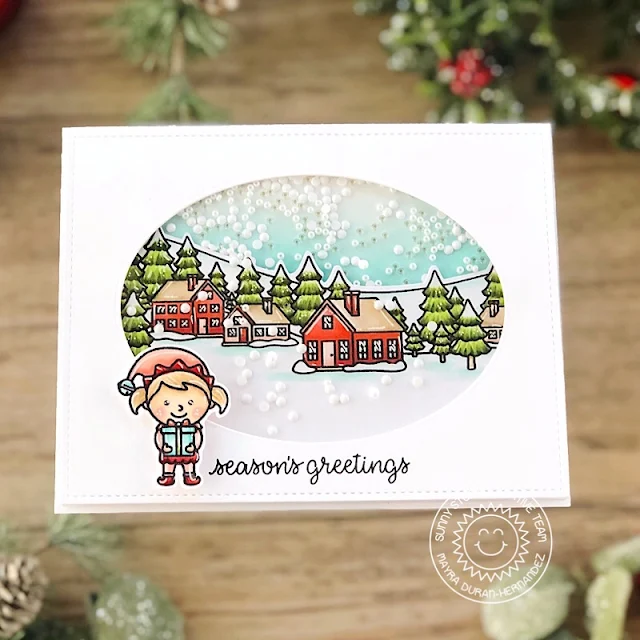
Happy Monday everyone, Mayra here with you today. I have a super fun card to share with you. I used the super cute Winter Scenes stamp set. 

Sunny Studio Stamps: Winter Scenes North Pole Inside Greetings Winter Holiday Card by Mayra Duran-Hernandez

I began by die-cutting a piece of white cardstock using the large stitched rectangle from the Frilly Frames Quatrefoil dies set. I also cut a second rectangle using Bristol Smooth cardstock.  Next, I stamped the image I would be using onto the white die-cut panel using Copic safe black ink. I then colored in my images. For the red areas, I used R05, R22, R17, and R46. For the soft pink areas, R00, R01, and R21. For the trees, I used YG01, BG90, G29, G94, YG99, and YG17. I added a bit of color to the snowy areas by using my Copic markers in BG000, and G000. I also colored one of the cute little elves from the North Pole stamp set. 

Sunny Studio Stamps: Winter Scenes North Pole Inside Greetings Winter Holiday Card by Mayra Duran-Hernandez

Next, I added a bit of color to the panel die cut from Bristol Smooth cardstock. I used Peacock Feathers Distress Oxide ink. I then used the Winter Scenes Dies to die cut the image. I adhered it to the base panel using foam tape. I then die cut another stitched rectangle using the Frilly Frames Quatrefoil dies set from white cardstock. This would be the top layer. I used the Stitched Oval Dies set to create a window. I then stamped the sentiment from the Inside Greetings Holiday stamp set onto the top layer. I added acetate and foam tape to create a shaker card. I wanted to give it a snow globe effect. 

I hope you enjoy the card I created to share with you and feel inspired to create. Thank you very much for taking the time to stop by. I hope you each have a wonderful and blessed day. 

Sunny Studio Supplies Used:

Stitched Oval Dies
Stitched Oval Dies
Shop at:
Sunny Studio
Frilly Frames Retro Petals Dies
Shop at:
Sunny Studio
Feeling Frosty Stamps
Shop at:
Sunny Studio
Frilly Frames Quatrefoil
Shop at:
Sunny Studio
Inside Greetings-Holidays
Shop at:
Sunny Studio
North Pole Stamps
North Pole Stamps
Shop at:
Sunny Studio
North Pole Dies
North Pole Dies
Shop at:
Sunny Studio
Winter Scenes Stamps
Shop at:
Sunny Studio
Winter Scenes Dies
Winter Scenes Dies
Shop at:
Sunny Studio

Saturday, October 24, 2020

Harvest Mice Cards with Tammy

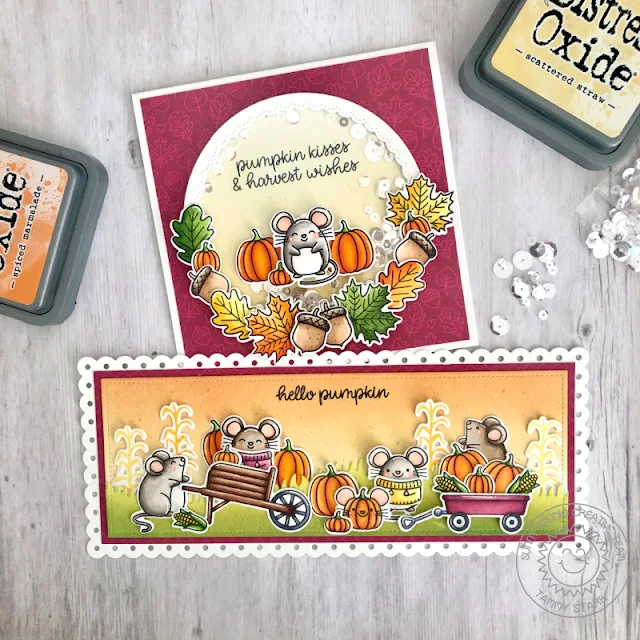
Hello friends! Tammy here with a card duo, featuring the adorable Harvest Mice StampsNow that the weather has cooled down a bit here in the Vegas area, I'm ready for everything Fall!!

Sunny Studio Stamps: Harvest Mice Bountiful Autumn Slimline Dies Fancy Frame Dies Fall Themed Cards by Tammy Stark

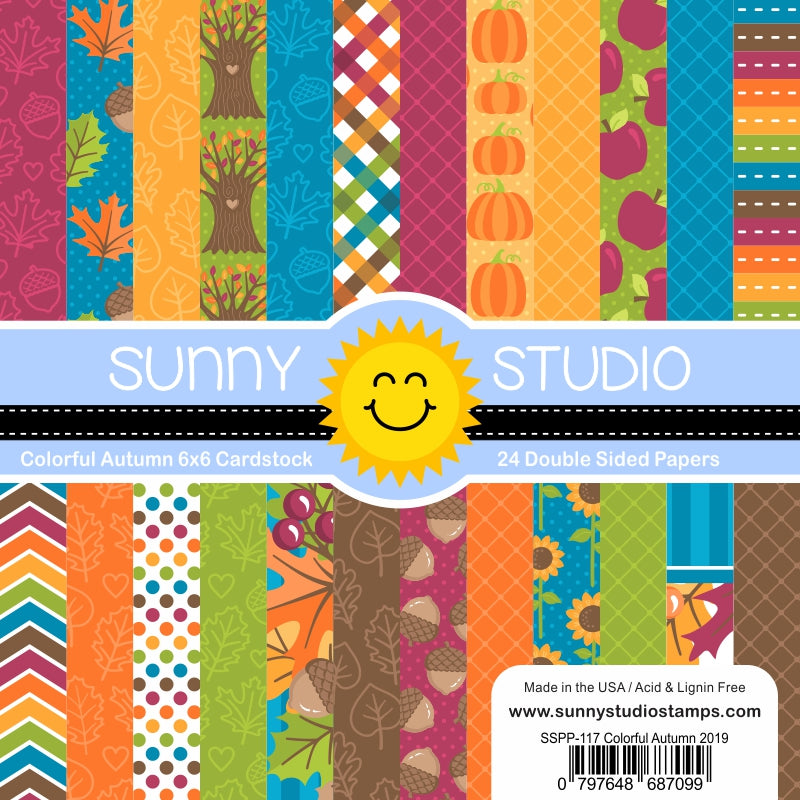
The first card I made is a fun shaker card. To begin, I cut a card base, measuring 5 X 5". Next, I cut a piece of the gorgeous paper from the Colorful Autumn Paper to 4.75 X 4.75" and adhered it to my card base. Next, I stamped, colored with Copic markers, and die cut images from the following sets:

Harvest MiceCoordinating Dies
Beautiful AutumnCoordinating Dies

To create the shaker, I die cut white cardstock using the Fancy Frames Circle Dies. I cut 5 frames, layered them together, attaching a piece of acetate to the top frame. Next, I die cut a circle and ink blended it with Scattered Straw Distress Oxide Ink. I then stamped my sentiment from Harvest Mice in black ink, added some Majestic Fusion sequins, and attached the frame with the acetate with strong adhesive to complete my shaker. 

Next, I arranged the leaves, acorns, and pumpkins around the shaker to create the look of a Fall wreath. To complete my card, I added some pumpkins and the darling mouse on top of the acetate with foam tape.

Sunny Studio Stamps: Harvest Mice Bountiful Autumn Slimline Dies Fancy Frame Dies Fall Themed Cards by Tammy Stark

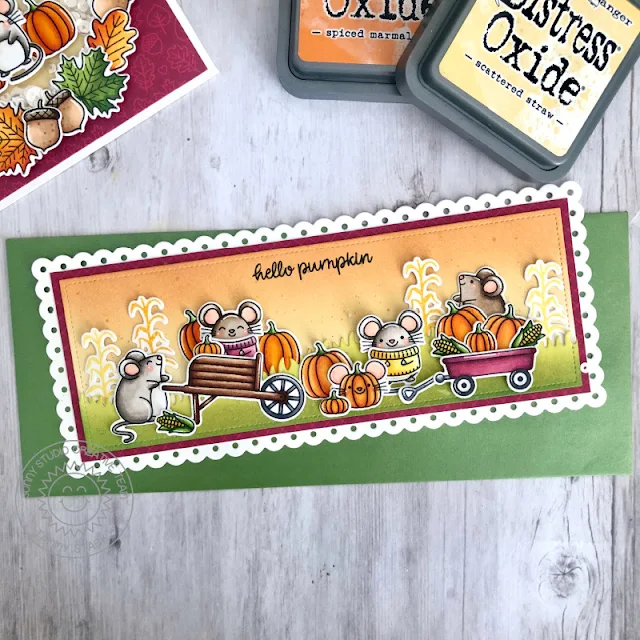
For my next card, I made a slimline card to create a fun Fall scene. To begin, I used the Slimline Scalloped Frame Dies to cut the scalloped base and the Stitched Mat Die. I ink blended the background with Spiced Marmalade and Scattered Straw Distress Oxide inks. Next, I cut a grassy border using the Slimline Nature Borders Dies, ink blended it with Twisted Citron and Peeled Paint Distress Oxide inks, and attached to the background. I wanted to bring in that gorgeous Colorful Autumn Paper again, so I created a thin mat by cutting my paper in half, piecing it together, and attaching it to the scalloped die. 

Next, I stamped, colored with Copic markers, and die cut images from Harvest Mice/ Coordinating Dies. The cornstalks were inked with Marigold ink from the PinkFresh Studio ink cubes - Rise & Shine. I arranged the stamped images onto my card, attaching some with foam tape for dimension. To complete my card, I stamped the sentiment across the top in black ink and attached my finished card front to a white card base.

Sunny Studio Stamps: Harvest Mice Bountiful Autumn Slimline Dies Fancy Frame Dies Fall Themed Cards by Tammy Stark

Thanks so much for stopping by! Have a great day!!

Sunny Studio Supplies Used:

Fancy Frames-Circle Dies
Shop at:
Sunny Studio
Colorful Autumn 6x6 Paper
Shop at:
Sunny Studio
Slimline Nature Borders
Shop at:
Sunny Studio
Slimline Scalloped Frame
Shop at:
Sunny Studio
Bountiful Autumn Stamps
Shop at:
Sunny Studio
Bountiful Autumn Dies
Shop at:
Sunny Studio
Harvest Mice Stamps
Harvest Mice Stamps
Shop at:
Sunny Studio
Harvest Mice Dies
Harvest Mice Dies
Shop at:
Sunny Studio

Friday, October 23, 2020

Holy Night Cards with Rachel and Candice

Hello friends! It's Rachel here with a nativity-themed box card featuring the new Holy Night Stamp Set

Sunny Studio Stamps: Holy Night Christmas Cards by Rachel Alvarado

I created a half-front box card to feature my scene. I stamped all of my images with Tuxedo Memento Black Ink, colored them with Copic Markers, and used the coordinating Holy Night Die Set to cut them out.

Copic Color Combos Used: Skin: E0000, E000, E21, E04; Greens: YG61, YG63, YG67; Blues: B21, B24, B37; Browns: E30, E31, E23, E25, E29; Hay: E50, E53, E55; Yellows: Y13, Y15, V12; Reds: R14, R46, R89; Purples: V01, V04, V17, V09; White: 0, C00, C2, C4; Dark Grays: W0, W2, W4, W5, W7; Light Grays: W0, W2, W4; Camel: E40, E41, E42, E43

Sunny Studio Stamps: Holy Night Christmas Cards by Rachel Alvarado

For my starry night sky background, I blended a small piece of smooth white card stock with Stormy Sky, Faded Jeans, Blueprint Sketch, and Black Soot Distress Inks. I then splattered this piece lightly with water using a #4 round paint brush and blotted it dry with a clean paper towel. Once my entire ink blended area was dry, I then splattered it again but this time with diluted Opaque White Paint.

Thank you all so much for stopping by! Wishing you the most safe and wonderful weekend!

----------------------------------------------------

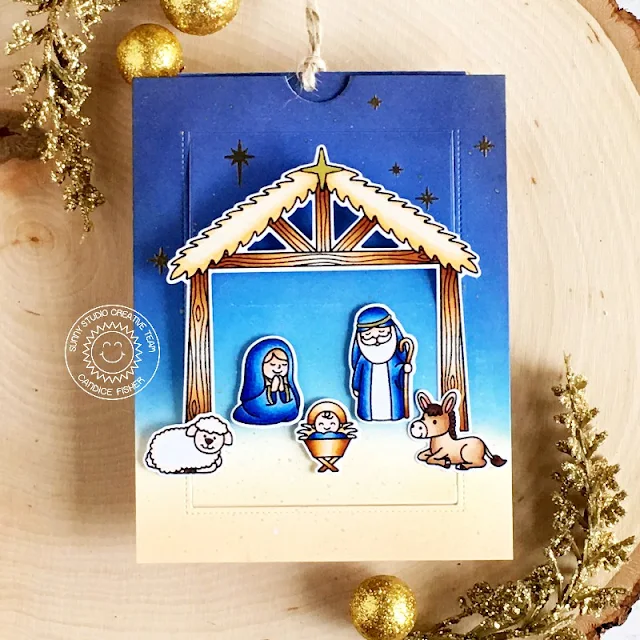
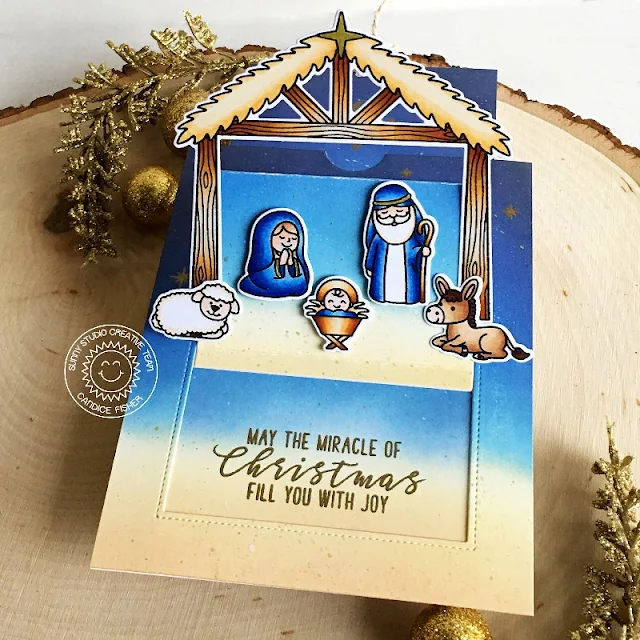
Hello! Candice with you this Friday sharing a meaningful Christmas card using the wonderful seasonal stamp set, Holy Night!

Sunny Studio Stamps: Holy Night Sliding Window Dies Inside Greetings Christmas Card by Candice Fisher

I used a few great Sunny Studio products for my interactive card:

First, I cut all my pieces following the instructions here to for making the sliding window card base and inked them with Black Soot, Chipped Sapphire, Blueprint Sketch, Salty Ocean and Tumbled Glass for the night sky and tea dye and antique linen for the sand. I then heat embossed the stars in gold on the top layer, the sentiment on the bottom layer and O Holy Night on the tag in gold and then splatter them all with gold and white shimmer spray using a damp paintbrush.

Sunny Studio Stamps: Holy Night Sliding Window Dies Inside Greetings Christmas Card by Candice Fisher

Next, I stamped all the images from the Holy Night stamp set, colored them with Copic markers and used the coordinating dies to cut them out. I adhered them to the sliding frame, making sure to only add adhesive to the parts that on the sliding frame. I finished by punching a hole for my twine and adding gold accents to my images with a pen!

Thank you so much for stopping by today!

Sunny Studio Supplies Used:

Sliding Window Dies
Sliding Window Dies
Shop at:
Sunny Studio
Holy Night Stamps
Holy Night Stamps
Shop at:
Sunny Studio
Holy Night Dies
Holy Night Dies
Shop at:
Sunny Studio
Inside Greetings-Christmas
Shop at:
Sunny Studio
Seasonal Trees Stamps
Shop at:
Sunny Studio
Seaonal Trees Dies
Seaonal Trees Dies
Shop at:
Sunny Studio
Sending Sunshine Stamps
Shop at:
Sunny Studio
Sending Sunshine Dies
Shop at:
Sunny Studio
Woodland Borders Dies
Shop at:
Sunny Studio

Thursday, October 22, 2020

Retro Ornaments Cards with Vanessa and Anja

Hello to you! Vanessa here with a slimline card using the wonderful Retro Ornaments set. This set makes it easy to create quick, beautiful Christmas cards!

Sunny Studio Stamps: Retro Ornaments Slimline Dies Season's Greetings Holiday Cards by Vanessa Menhorn

I first created a red card base using the Slimline Scalloped Frame Dies. Then I trimmed a panel of Kraft cardstock slightly smaller than the base, stamped and heat-embossed the sentiment and the strings and adhered it to the card. Now I stamped the ornaments, using Festive Berries, Spun Sugar, Picked Raspberry and Brushed Corduroy Distress Oxide Inks.

Stamps and dies used:
Retro Ornaments stamps dies
Season's Greetings stamps dies
Slimline Scalloped Frame dies

Sunny Studio Stamps: Retro Ornaments Slimline Dies Season's Greetings Holiday Cards by Vanessa Menhorn

I die-cut the pieces with the matching dies and adhered them to the card, raising some with foam tape. I stamped the tree sprigs from Season's Greetings with Lucky Clover Distress Oxide Inks, die-cut them and adhered them, too. Finally, I made little bows from white twine and added these to the ornaments and twigs.

I hope you like today's inspiration! Thanks for stopping by, see you next week!

--------------------------------------------

Hi everyone, Anja here and today I'm featuring the Retro Ornaments Stamps from another great layering stamp set. I tried to use it in a more modern way with a different color scheme. I really like non-traditional colors like pink and turquoise for Christmas.

Sunny Studio Stamps: Retro Ornaments Frilly Frame Classy Christmas Holiday Card by Anja Bytyqi

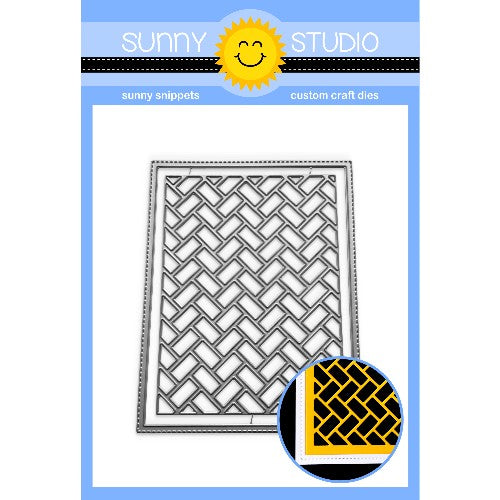
I started off with a card base that measures 4.5" x 5.75" and also cut an extra white cardstock panel to the same size. To create a frame, I used the stitched die from the Frilly Frames Herringbone Die set. I covered the front of the card with one of the Subtle Grey Tones papers.

Next, I stamped the layered ornaments with dye inks (you can find the colors listed below). For the hanger thingies at the top, I did some heat embossing with Ranger Liquid Platinum embossing powder. I used the coordinating dies to cut out the ornaments.

Altenew Dye Inks used: pink ornament: Pinkalicious, Rubellite; turquoise ornament: Dew Drop, Aqualicious, Teal Cave; patterned ornament: Cotton Candy, Ruby Red, Galactic Stream; pine tree sprigs: Sweet Leaf, Just Green, Hunter Green

Sunny Studio Stamps: Retro Ornaments Frilly Frame Classy Christmas Holiday Card by Anja Bytyqi

Of course, I needed something to attach them to, so I stamped a couple of pine tree sprigs from the Classy Christmas set in green inks mixing the shades directly on the stamp. I cut them out with the matching dies and arranged them to a cluster that stretches over the top of the card.

I attached shiny aqua strings to the ornaments and adhered them to the card background. I heat embossed the sentiment from the Surfing Santa set with Liquid Platinum as well. For some dimension, I popped up the sprigs and the white frame with foam tape. To finish off my card, I added two mirrored stars as embellishments.

Thank you so much for stopping by! Hope you're having a fabulous day!

Sunny Studio Supplies Used:

Subtle Grey Tones Paper
Shop at:
Sunny Studio
Season's Greetings Stamps
Shop at:
Sunny Studio
Season's Greetings Dies
Shop at:
Sunny Studio
Frilly Frames Herringbone
Shop at:
Sunny Studio
Slimline Scalloped Frame
Shop at:
Sunny Studio
Classy Christmas Stamps
Shop at:
Sunny Studio
Classy Christmas Dies
Shop at:
Sunny Studio
Retro Ornaments Stamps
Shop at:
Sunny Studio
Retro Ornaments Dies
Shop at:
Sunny Studio
Surfing Santa Stamps
Shop at:
Sunny Studio