Hello Sunny
Studio Friends! It's Juliana here and
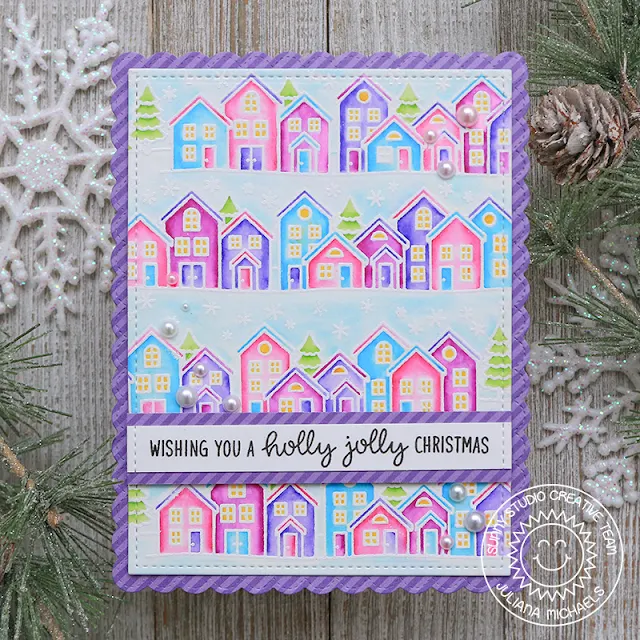
today I'm sharing a Christmas card with a nontraditional color scheme using the
Scenic
Route Stamp Set.
One of the
first ideas that came to mind when I saw the Scenic
Route Stamp Set was to create a repeat background with it. To do this, I
stamped the image multiple times down a piece of watercolor paper cut to 4.25 x
5.5 inches. Because the stamp was wider than the paper, I was able to shift the
stamp slightly so that each image looked slightly different than the one above
or below it.
I stamped the image with embossing ink and heat embossed each image with white embossing powder. Once all of the stamping and embossing was complete, I grabbed my Zig Clean Color Real Brush Markers in a mix of pinks, purples, blues and greens to achieve a nontraditional color scheme. I colored in the houses by adding a touch of color to the edges and I used a water brush to blend the colors and give it some shading.
I stamped the image with embossing ink and heat embossed each image with white embossing powder. Once all of the stamping and embossing was complete, I grabbed my Zig Clean Color Real Brush Markers in a mix of pinks, purples, blues and greens to achieve a nontraditional color scheme. I colored in the houses by adding a touch of color to the edges and I used a water brush to blend the colors and give it some shading.
Once the
coloring was complete, I die cut the panel with the stitched rectangle from the
Frilly
Frames Retro Petals Die. I then cut a piece of striped purple paper from
the Striped
Silly 6x6 Paper Pad using the scalloped edged die from the Frilly
Frames Hexagon Die.
The sentiment
was stamped using words from the Santa
Claus Lane Stamp Set. To finish it off, I added some pink pearls from the Rainbow
Pearls.
Thanks so much for stopping by today! I hope you enjoyed learning how to create this card with a nontraditional color scheme and the Scenic Route Stamp Set.
---------------------------------------------------
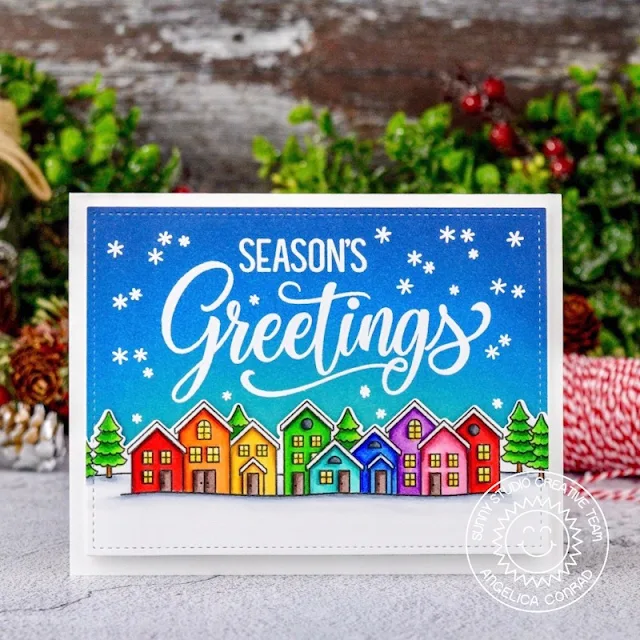
Hi friends, Angelica here with a cheerful holiday card featuring the new Scenic Route Stamp Set.
This stamp set comes with four holiday borders that you can use to
build scenes. I used the row of houses for my card, stamping it onto white card
stock. I colored the scene with Copic Markers, and used the coordinating die to
die cut the top of the image. I added a stitched border with the large
rectangle from Frilly Frames Retro Petals Die Set.
For the background, I ink-blended Mermaid Lagoon, Salty Ocean, and
Chipped Sapphire Distress Oxide inks onto Bristol Smooth paper. Once the ink
was dry, I stamped and white heat-embossed Season's Greetings from the Season's Greetings Stamp Set.
I stamped and white heat-embossed snow flakes from Scenic Route, then trimmed
the panel with the same stitched rectangle die. I attached the homes with thin
foam squares to the panel, and attached the card to a card base with foam
adhesive.
I love this bold sentiment, and it just pops on the bright background! I hope I have helped with ideas for Scenic Route stamp set. That's all for today. Thanks for stopping by!
I love this bold sentiment, and it just pops on the bright background! I hope I have helped with ideas for Scenic Route stamp set. That's all for today. Thanks for stopping by!
Sunny Studio Supplies Used:
 Striped Silly 6x6 Paper Shop at: Sunny Studio |
 Frilly Frames Hexagon Dies Shop at: Sunny Studio |
 Frilly Frames Retro Petals Dies Shop at: Sunny Studio |
 Season's Greetings Stamps Shop at: Sunny Studio |
 Santa Claus Lane Stamps Shop at: Sunny Studio |
 Scenic Route Stamps Shop at: Sunny Studio |
 Scenic Route Dies Shop at: Sunny Studio |


Fantastic colouring on both these lovely cards!
ReplyDelete