Friday, June 30, 2023

Radiant Plumeria Card with Tina

Hello crafty friends, Tina here featuring the gorgeous ‘Radiant Plumeria’ flowers! I really enjoyed creating with this layered stamp and die set!

Sunny Studio Stamps: Radiant Plumeria Summer Themed Card by Tina Henkens (featuring Fabulous Flamingos, Scalloped Oval Mat Dies)

As always with stamp layering, I used the backing sheet the stamps come on to help me with my placement. I find this ‘trick’ so incredibly useful! This time I selected some Memento inks from my stash, these dye inks are great for layering. They dry instantly, so no risk of smudging when you are placing the next layering stamp! I stamped and cut three flowers and several of the leaves.

Whenever I can, I love to add some adorable critters to my cards! The cuties from Fabulous Flamingos were a perfect match for the bright flowers and tropical theme for this weeks project. I colored them with some flashy pink copic markers.

Also included in the Radiant Plumeria set is a nice bold ‘Summer’ stamp and I knew I wanted to use this as my main sentiment. Because this stamp is a bit rounded, I opted for an oval shaped card.

Sunny Studio Stamps: Radiant Plumeria Summer Themed Card by Tina Henkens (featuring Fabulous Flamingos, Scalloped Oval Mat Dies)

The largest die of the Scalloped Oval mat 1 was cut from some white Neenah card stock. Today I opted for a bright yellow background spritzed with Distress Oxide spray Squeezed Lemonade. I really should use my sprays more, they create beautiful backgrounds in no time! Next, I splattered some white droplets for extra dimension.

It was easy to create an oval card base with one of the Infinity dies from my stash that was slightly smaller than my oval card panel. After adhering my card panel to the base, I stamped (in Versafine Onyx black ink) a little word banner using the ‘greetings’ sentiment from the Radiant Plumeria set.

Then it was time to create a layout with all my card elements. I started with the two sentiments and placed the flamingos underneath in the center of the card. Next, I layered the leaves and flowers on both sides, using foam tape for dimension where needed. A few from the Magic Gold Jewels were placed in the centers of the flowers.

I am sure you will love these beautiful flowers as much as I do! Can’t wait to see all your creations! Thank you for visiting the blog and happy crafting!

Sunny Studio Supplies Used:

Fabulous Flamingos Stamps
Shop at:
Sunny Studio
Fabulous Flamingos Dies
Shop at:
Sunny Studio
Radiant Plumeria Stamps
Shop at:
Sunny Studio
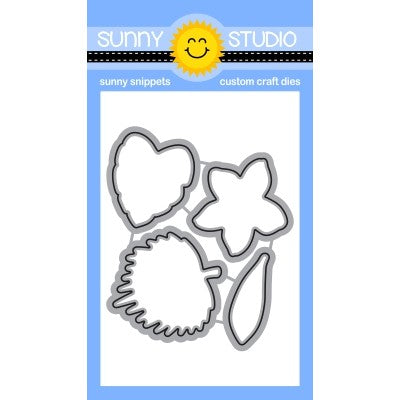
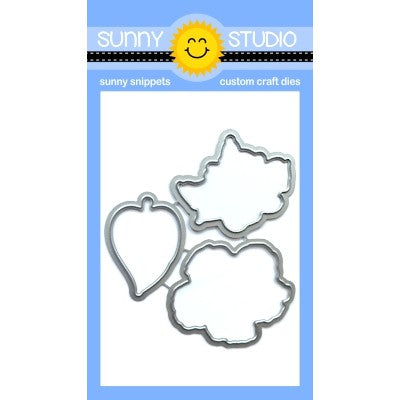
Radiant Plumeria Dies
Shop at:
Sunny Studio
Scalloped Oval Mat 1 Dies
Shop at:
Sunny Studio

Thursday, June 29, 2023

Sealiously Sweet Card with Marine

Hello crafty friends, Marine here with you today! I'm super happy to be back on the blog with this new summer card featuring three cuties from Sealiously Sweet. I wanted the one on the rubber ring to float and move on the water, so I followed the same process as the Penguin Party card I made back in November to create today's card.

Sunny Studio Stamps: Sealiously Sweet Summer Themed Card by Marine Simon

I started off by cutting my panel out of Strathmore bristol smooth cardstock, and I stenciled it using oxide inks: squeezed lemonade + dried marigold + kitsch flamingo for the sky, antique linen + vintage photo for the sand, and salvaged patina + peacock feathers + blueprint sketch for the ocean. And once the panel was dry, I white heat embossed my "Have an awesome summer" greeting from Sealiously Sweet at the bottom.

I built the whole mechanism, attached my interactive panel on a slightly bigger pink panel, and then the pink panel on a slightly bigger Dots & Stripes pastels yellow pattern paper, and then I moved on to the coloring.

Sunny Studio Stamps: Sealiously Sweet Summer Themed Card by Marine Simon

I picked three lovely seals and some water splatters from Sealiously Sweet, the coconuts and palm tree from Seasonal Trees and the one from Sending Sunshine, the flowers from Chickie Baby, the tiny shovel from Beach Babies, the sun from Balloon Rides, and the fish from Penguin Pals.

I stamped all those images on Transotype perfect coloring paper using an alcohol marker friendly black ink, cut them all using the coordinating dies, and colored everything using my Graph'it brush markers and Spectrum Noir Illustrator markers. Once all my images were done, I attached them all on my panel using 1mm foam squares, and finally added highlights and details using a white gel pen.

And that's it! What would I give to be floating on a rubber ring, bouncing in the waves... *sigh* I hope that you like this cute and fun summer card! Thanks so much for stopping by, and see you next week!

Sunny Studio Supplies Used:

Dots & Stripes Pastels 6x6 Paper
Shop at:
Sunny Studio
Seasonal Trees Stamps
Shop at:
Sunny Studio
Seaonal Trees Dies
Seaonal Trees Dies
Shop at:
Sunny Studio
Sending Sunshine Stamps
Shop at:
Sunny Studio
Sending Sunshine Dies
Shop at:
Sunny Studio
Sealiously Sweet Stamps
Shop at:
Sunny Studio
Sealiously Sweet Dies
Shop at:
Sunny Studio

Wednesday, June 28, 2023

Hawaiian Hibiscus Card with Catherine

Hello Crafty Friends! It’s Catherine here! Today, I am sharing an Aloha card perfect for the summer season created with Hawaiian Hibiscus Stamps and Radiant Plumeria Stamps!

Sunny Studio Stamps: Hawaiian Hibiscus Summer Themed Shaker Card by Catherine Cohen (featuring Frilly Frame Dies, Stitched Oval Dies, Scalloped Oval Mat Dies, Summer Greenery, Tiki Time)

For the back panel, I die cut A2 white cardstock with the largest rectangle from Stitched Rectangle Dies. Next, I die cut the Frilly Frames Stripes Dies out of white cardstock. I adhered the stripes die onto the stitched back panel.

I die cut the hibiscus and leaves using Hawaiian Hibiscus Dies and Radiant Plumera Dies. I placed the negative back into my Misti and began stamping the Hibiscus and leaves with the following inks:

Pinks: Altenew Rose Quartz, Frosty Pink, Pink Diamond, Coral Berry
Yellows: Citrus Burst, Lemon Ice
Greens: Just Green, Green Fields, Sweet Leaf

I added some palm leaves using Summer Greenery Dies ink blended with Mowed Lawn Distress Oxide. I stamped the Macaw bird from Tiki Time Stamps, die cut with Tiki Time Dies, and colored with Copic Markers listed in my blog link below. For the back of the  shaker, I die cut an oval, 3 7/8” x 2 ¾” from Stitched Oval 2 Dies, added some Party Confetti and Crystal Clear Jewels and put it aside.

Sunny Studio Stamps: Hawaiian Hibiscus Summer Themed Shaker Card by Catherine Cohen (featuring Frilly Frame Dies, Stitched Oval Dies, Scalloped Oval Mat Dies, Summer Greenery, Tiki Time)

To make the frame,  I die cut a scalloped oval 3 3/16” x 4 5/16” from Scalloped Oval Mat 1 Dies. I nested the 3 7/8” x 2 ¾” die inside the scalloped oval and ran it through my die cut machine. Using the same die, I die cut one more oval out of acetate. I adhered the frame on top of the acetate oval. I added foam tape around the edges and adhered it onto the back of the shaker.

I adhered the shaker onto the back panel followed by the flowers, leaves, and the parrot. I finished off the card by adding “ALOHA” die cut from Chloe Alphabet Dies ink blended with Spun Sugar Distress Oxide.

Thank you so much for joining me today!  For a list of Copic Markers used, please visit me at Crafti-Cat. Have a wonderful week!

Sunny Studio Supplies Used:

Tiki Time Stamps
Tiki Time Stamps
Shop at:
Sunny Studio
Tiki Time Dies
Tiki Time Dies
Shop at:
Sunny Studio
Chloe Alphabet Dies
Chloe Alphabet Dies
Shop at:
Sunny Studio
Stitched Rectangle Dies
Shop at:
Sunny Studio
Frilly Frames Stripes Die
Shop at:
Sunny Studio
Hawaiian Hibiscus Stamps
Shop at:
Sunny Studio
Hawaiian Hibiscus  Dies
Hawaiian Hibiscus Dies
Shop at:
Sunny Studio
Radiant Plumeria Stamps
Shop at:
Sunny Studio
Radiant Plumeria Dies
Shop at:
Sunny Studio
Scalloped Oval Mat 1 Dies
Shop at:
Sunny Studio
Stitched Oval 2 Dies
Shop at:
Sunny Studio
Summer Greenery Die
Summer Greenery Die
Shop at:
Sunny Studio

Tuesday, June 27, 2023

Fabulous Flamingos Card with Isha

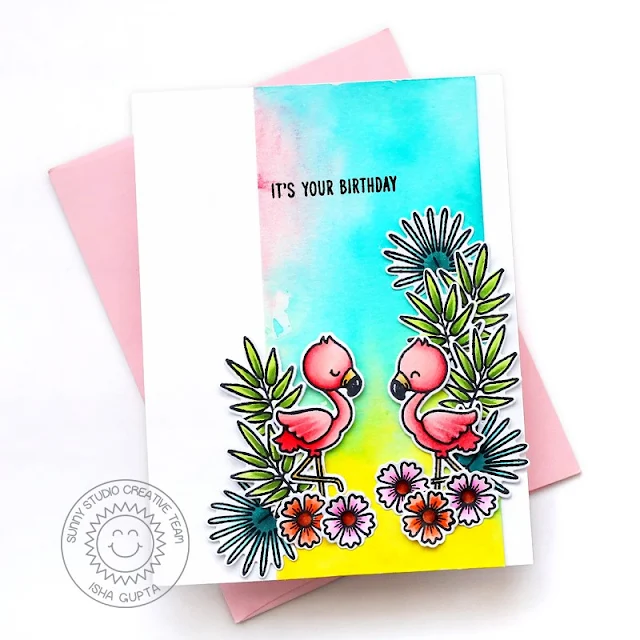
Hello everyone! Isha here today with a happy and fun CAS card featuring the Fabulous Flamingos stamps and coordinating dies. There are so many beautiful images in this stamp so I decided to highlight them and keep the rest of the card clean. I added a watercolor panel for some movement. 

Sunny Studio Stamps: Fabulous Flamingos Summer Themed Birthday Card by Isha Gupta

I started by creating a watercolor panel in fun and bright colors, let it dry. Next I stamped the images from the Fabulous Flamingos stamps onto copic friendly card, colored using copic markers and die-cut using the coordinating dies.

Sunny Studio Stamps: Fabulous Flamingos Summer Themed Birthday Card by Isha Gupta

Adhere the panel to a white cardbase. Next, stamp the sentiment. Now assemble the images to create a scene. Keeping the leaves different height gives added movement to the card.

Thank you for dropping by and have a nice day!

Sunny Studio Supplies Used:

Fabulous Flamingos Stamps
Shop at:
Sunny Studio
Fabulous Flamingos Dies
Shop at:
Sunny Studio

Monday, June 26, 2023

Slice of Summer Card with Bobbi

Hello friends, Bobbi here. It’s another summer day and this week I’m filling it with some fresh fruit from the Sunny garden of stamps! I’m using the Slice of Summer stamps and dies to create this fresh card.

Sunny Studio Stamps: Slice Of Summer Card by Bobbi Lemanski

To create my 5″ X 7″ card, I started with a card front panel cut from watercolor paper. I use Canson XL watercolor paper (blue pad). I hand colored a large pinkish-red heart using Kuretake Gansai Tambi watercolor paints. I added splattering in colors to match the fruit of the set – yellows, lime greens, pinks and reds. I wanted the background to be really organic looking and fresh… just like the fruit!

Sunny Studio Stamps: Slice Of Summer Card by Bobbi Lemanski

I stamped and cut the fruit following the layering guide on the Sunny Studio Stamps web page. It was a great reference to have while stamping the fruit. Like all layered stamping I do, I can’t help but add a few additional markings using Copics for greater shadows and white Gelly Roll pens for more highlights. However, with this set you really don’t need to because Sunny Studios has already included highlights and shadows within the layers. How cool is that?!

The fruit was attached, over the organic heart shape with one of the watermelon slices popped up using foam dots. Did you notice the bite out of one of the watermelon slices? I created the teeth marks using a scallop circle punch I had stash.


Sunny Studio Stamps: Slice Of Summer Card by Bobbi Lemanski

Okay, I’m going to be real with you now. I made a mistake in the lower right corner when stamping the sentiment. My paper shifted in my stamping tool and did not line up exactly with the first layer. Like all mistakes I make, I generally turn it into something I like even better. I tore the watercolor paper at the bottom and added a piece of pattern paper in a lime green sunburst pattern from the Classic Sunburst paper pack to the base and ended up loving the card even more! I stamped the phrase from the same fruit set again and added some white dots for a burst of energy to complete the card.

Thanks for stopping by today. If you want to see more ideas and inspiration from me, subscribe to my blog, BobbiHartDesign.com. I’ll send you updates on new posts! You can also find me on Instagram as @BobbiHartDesign and on Facebook as BobbiHartDesign.

Sunny Studio Supplies Used:

Slice of Summer Stamps
Shop at:
Sunny Studio
Slice of Summer Dies
Shop at:
Sunny Studio
Classic Sunburst Paper
Shop at:
Sunny Studio