Friday, March 19, 2021

Feeling Froggy Cards with Tammy and Candice

Hello friends! Tammy here sharing a fun birthday card, featuring the adorable set, Feeling Froggy

Sunny Studio Stamps: Feeling Froggy Froggy Friends Slimline Dies Frog Themed Birthday Card by Tammy Stark

To begin, I cut a white A2 rectangle and another using the green dot paper from Polka Dot Parade 6X6 Paper. I then cut the polka dot paper using the Fishtail Banner II Dies and attached to the white card base. 

Next, I stamped, colored with Copic markers, and die cut images from the following sets:
Feeling FroggyCoordinating Dies
Froggy FriendsCoordinating Dies

Copic Colors Used: Greens: YG67, YG17, YG13, YG03, YG01, YG00; Browns: E44, E43, E42, E41; Hat: R22, R20, R000, Y18, Y13, Y11

Sunny Studio Stamps: Feeling Froggy Froggy Friends Slimline Dies Frog Themed Birthday Card by Tammy Stark

Next, I cut a white scalloped circle using the Scalloped Circle Mat 2 Dies and layered a Stitched Circle, ink blended with Abandoned Coral, Dried Marigold, and Squeezed Lemonade Distress Oxide inks. I cut another circle then used the Slimline Nature Borders Dies to cut a curved edge for the water, and ink blended it with Tumbled Glass and Salty Ocean. Next, I arranged the images onto my card, using foam tape on some for dimension. 

Lastly, I cut a black cardstock banner using the Slimline Pennant Dies, and white heat embossed the sentiment from Froggy Friends to complete my card. 

Thanks so much for stopping by today!

-------------------------------------------

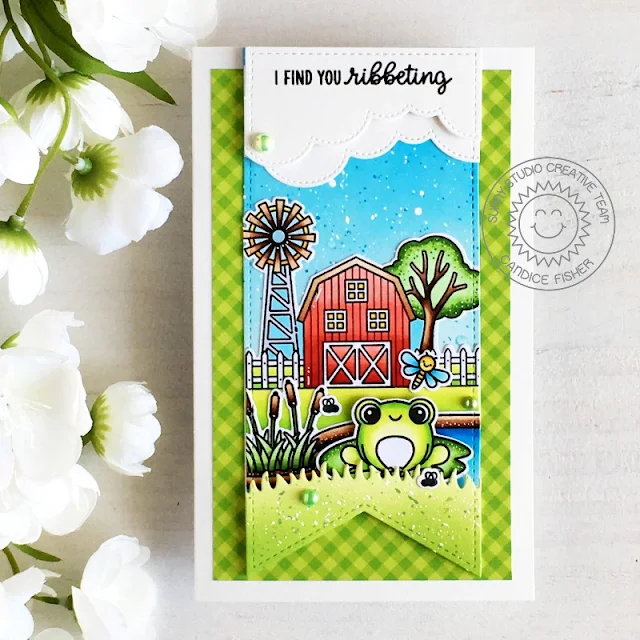
Hello my crafty friends! Candice with you today sharing a fun mini slimline design highlighting the adorable Feeling Froggy stamp set!

Sunny Studio Stamps: Feeling Froggy Slimline Dies Country Scenes Farm Fresh Frog Themed Card by Candice Fisher

I used these Sunny Studio products to create my mini slimline card:

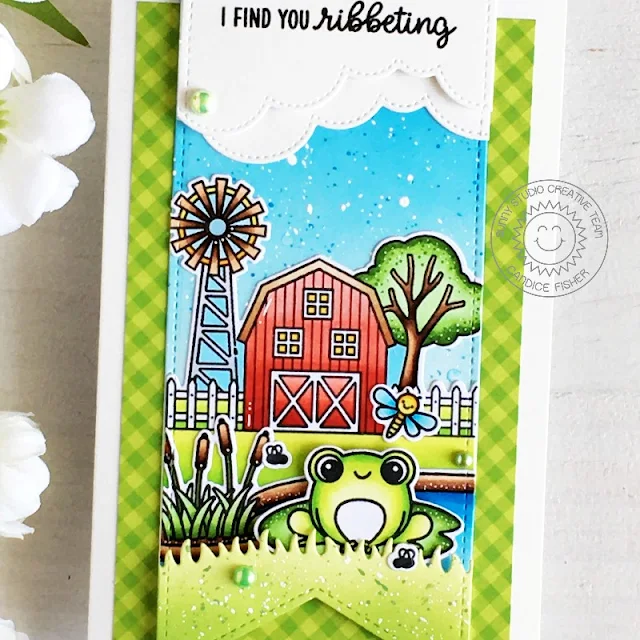
I began my mini slimline with a 6 1/2 x 4. For the background I die cut the stitched pennant from Bristol Smooth cardstock and inked the thirds with Salty Ocean and Tumbled Glass and splattered with the Salty Ocean and white paint using damp paintbrush. While that dried, I die cut the clouds and the grass and then cut a second time from the pennant to give the stitched line all around. On the grass, I inked it with Mowed Lawn and Shabby Shutters and splattered it with the Mowed Lawn and white paint too.

Sunny Studio Stamps: Feeling Froggy Slimline Dies Country Scenes Farm Fresh Frog Themed Card by Candice Fisher

Next, I stamped the barn scenepondfrog and flies, colored them with Copic markers and used the coordinating dies to cut them out. I stamped the sentiment along the top cloud and put the pennant together. I finished by gluing the pennant scene onto a piece of green gingham pattern paper and a few of the green domes!

Thank you so much for visiting with me today!

Sunny Studio Supplies Used:

Fishtail Banner II Dies
Shop at:
Sunny Studio
Froggy Friends Dies
Froggy Friends Dies
Shop at:
Sunny Studio
Froggy Friends Stamps
Shop at:
Sunny Studio
Polka-dot Parade 6x6 Paper
Shop at:
Sunny Studio
Gingham Pastels 6x6 Paper
Shop at:
Sunny Studio
Slimline Nature Borders
Shop at:
Sunny Studio
Farm Fresh Stamps
Farm Fresh Stamps
Shop at:
Sunny Studio
Farm Fresh Dies
Farm Fresh Dies
Shop at:
Sunny Studio
Country Scenes Stamps
Shop at:
Sunny Studio
Country Scenes Dies
Country Scenes Dies
Shop at:
Sunny Studio
Feeling Froggy Stamps
Shop at:
Sunny Studio
Feeling Froggy Dies
Feeling Froggy Dies
Shop at:
Sunny Studio
Scalloped Circle Mat 2 Dies
Shop at:
Sunny Studio
Slimline Pennant Dies
Shop at:
Sunny Studio
Stitched Circle Large Dies
Shop at:
Sunny Studio

Thursday, March 18, 2021

Eggs To Dye For Cards with Vanessa and Anja

Hello to you! Vanessa here with a spring card using Eggs To Dye For. This fun set is too cute!

Sunny Studio Stamps: Eggs To Dye For Stitched Circle Dies Layered Basket Spring Themed Card by Vanessa Menhorn

I started with a panel of white cardstock and applied stripes with an ink blending tool, using Wilted Violet, Carved Pumpkin and Peacock Feathers Distress Oxide Inks. Then I die-cut the grass from light green paper, adhered it to the panel and die-cut the circle from it. Now I adhered the panel to the card base, and added the circle with foam tape. 

Supplies used:
Eggs To Dye For stamps (eggs, bunny)
Lovable Llama stamps (bow)
Layered Basket Dies (spring word)
Slimline Nature Borders Dies (grass border)
Stitched Circle Large Dies (circle)
Birthday Cake Dot Sprinkles
Rainbow Dot Confetti

Sunny Studio Stamps: Eggs To Dye For Stitched Circle Dies Layered Basket Spring Themed Card by Vanessa Menhorn

I stamped the images onto white cardstock, colored them with Copic markers, fussy-cut the pieces and adhered the elements to the card. Now I die-cut the "Spring" and adhered it to the card, then finished it off with matching confetti.

Time for spring! I hope you are enjoying sunshine in your part of the world! Thanks for stopping by!

---------------------------------------------

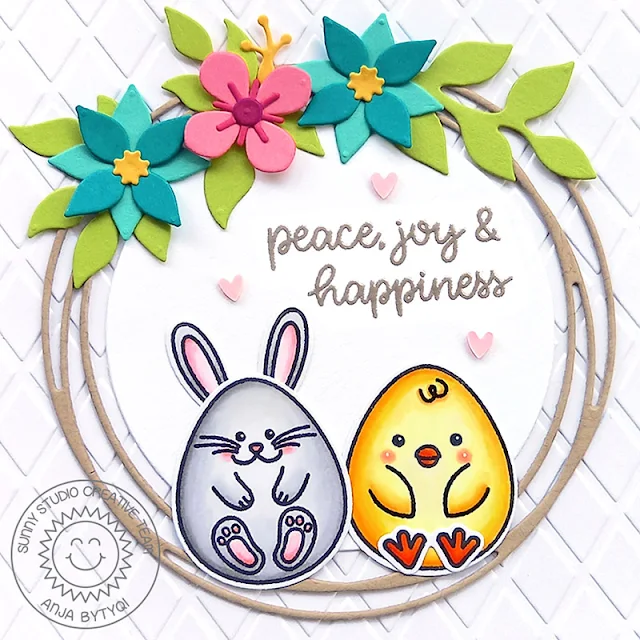
Hi everyone, Anja here and today I'm sharing another Easter card made with the Eggs To Dye For Stamps. This time I used the sweet bunny and chick included in the set and created a Spring wreath out of die-cuts.

Sunny Studio Stamps: Eggs To Dye For Snowflake Circle Dies Spring Themed Card by Anja Bytyqi

I started off with a light pink top-folding card base. Next, I ran a white cardstock panel through my die cutting machine with the Dapper Diamonds Embossing Folder.

I stamped the critters in Memento Tuxedo Black Ink and colored them with Copic Markers. I used the coordinating dies to cut them out. The sentiment was stamped in VersaMark Ink onto a white cardstock circle and I heat embossed it with Ranger Liquid Platinum embossing powder.

Sunny Studio Stamps: Eggs To Dye For Snowflake Circle Dies Spring Themed Card by Anja Bytyqi

For the wreath, I cut the loopy Snowflake Circle Frame Die from Kraft cardstock. The flowers and leaves dies are from the Botanical Backdrop Die set and I cut them from several cardstock scraps. Finally, I assembled my card and adhered three pink clay hearts.

Thank you so much for stopping by! Wishing you a beautiful day!

Sunny Studio Supplies Used:

Botanical Backdrop Die
Shop at:
Sunny Studio
Snowflake Circle Frame
Shop at:
Sunny Studio
Slimline Nature Borders
Shop at:
Sunny Studio
Eggs To Dye For Stamps
Shop at:
Sunny Studio
Eggs To Dye For Dies
Shop at:
Sunny Studio
Layered Basket Dies
Layered Basket Dies
Shop at:
Sunny Studio
Lovable Llama Stamps
Shop at:
Sunny Studio
Stitched Circle Large Dies
Shop at:
Sunny Studio

Wednesday, March 17, 2021

Lovable Llama Cards and Video Tutorial with Julia and Franci

Hey crafty friends! It’s Julia here with a fun interactive birthday card! I used the adorable Lovable Llama stamp set for this one! 

Sunny Studio Stamps: Lovable Llama Spring Scenes Floating By Sliding Window Dies Birthday Card by Julia Englich

To create my scene I also used the Spring Scenes, Floating By and Inside Greetings Birthday stamp sets as well as the Sliding Window and Fluffy Clouds dies. 

Sunny Studio Stamps: Lovable Llama Spring Scenes Floating By Sliding Window Dies Birthday Card by Julia Englich

I really wanted to add a sentiment that read "Llama tell you" so I used Kinsley Alphabet stamps for my custom greeting!

Sunny Studio Stamps: Lovable Llama Spring Scenes Floating By Sliding Window Dies Birthday Card by Julia Englich

I had so much fun with the sliding window mechanism! It's amazing for adding an additional message or a little hidden scene to your cards! If you would like to see how this card came together, you can watch the video below - or on my YouTube channel, Craft Room Adventures.


Inks used: background: Twisted Citron and Mowed Lawn Distress Ink as well as Tumbled Glass and Salty Ocean Distress Oxide. Copic Markers used: YG11, YG13, YG17, BG99; Y11, Y13, Y15, Y17; R20, R22; R24; R27; R29, R39; RV21, RV23, RV25, RV29; B21, B23, B26, B28; BG11, BG13, BG15, BG18; V000, V01, V04, V05, V09; R21; E30, E31, E33, E35, E37, E39; 0.

Thank you so much for stopping by today! Have an amazing day!

-----------------------------------------------

Hi there! Franci here with you, showcasing the new Lovable Llama set, the cutest ever!! So I had to make another rocking card here because I think they are so much fun and they are so easy to make with the new Stitched Circle Large Dies and the Scalloped Circle ones

Sunny Studio Stamps: Lovable Llama Banner Basics Birthday Card by Franci Vignoli

First of all I die cut all the panels: the largest one out of this colorful patterned paper from the Spring Sunburst 6x6 paper set and the smallest out of white cardstock. I later inked it up in the center with some Spiced Marmalade Distress ink Oxide.

Then I started working on my images, I combined lots of elements from these different sets: Lovable Llama + coordinated diesBalloon Rides coordinated diesBanner Basics coordinated dies. I stamped them onto white cardstock, colored them with Copics and cut them out. I also added my sentiment from the Inside Greetings Birthday set.

Sunny Studio Stamps: Lovable Llama Banner Basics Birthday Card by Franci Vignoli

I glued down all my images to the scalloped circle, then folded in half my stitched one and adhered my decorated panel just to one half of my colorful one. As you can see I also added some elements with acetate strips to give my design more interest and the card fit a standard size envelope perfectly so it's super easy to mail! Finally I added some details with a white gel pen and some clear sequins.

I hope you like it and thank you so much for stopping by today! 

Sunny Studio Supplies Used:


Sliding Window Dies
Sliding Window Dies
Shop at:
Sunny Studio
Spring Sunburst 6x6 Paper
Shop at:
Sunny Studio
Fluffy Clouds Dies
Fluffy Clouds Dies
Shop at:
Sunny Studio
Banner Basics Stamps
Shop at:
Sunny Studio
Banner Basics Dies
Banner Basics Dies
Shop at:
Sunny Studio
Floating By Stamps
Floating By Stamps
Shop at:
Sunny Studio
Floating By Dies
Floating By Dies
Shop at:
Sunny Studio
Kinsley Alphabet Stamps
Shop at:
Sunny Studio
Spring Scenes Stamps
Shop at:
Sunny Studio
Spring Scenes Dies
Spring Scenes Dies
Shop at:
Sunny Studio
Balloon Rides Stamps
Shop at:
Sunny Studio
Balloon Rides Dies
Balloon Rides Dies
Shop at:
Sunny Studio
Inside Greetings Birthday
Shop at:
Sunny Studio
Lovable Llama Stamps
Shop at:
Sunny Studio
Lovable Llama Dies
Lovable Llama Dies
Shop at:
Sunny Studio
Scalloped Circle Mat 1 Dies
Shop at:
Sunny Studio
Stitched Circle Large Dies
Shop at:
Sunny Studio

Tuesday, March 16, 2021

Garden Fairy Cards with Isha and Kavya

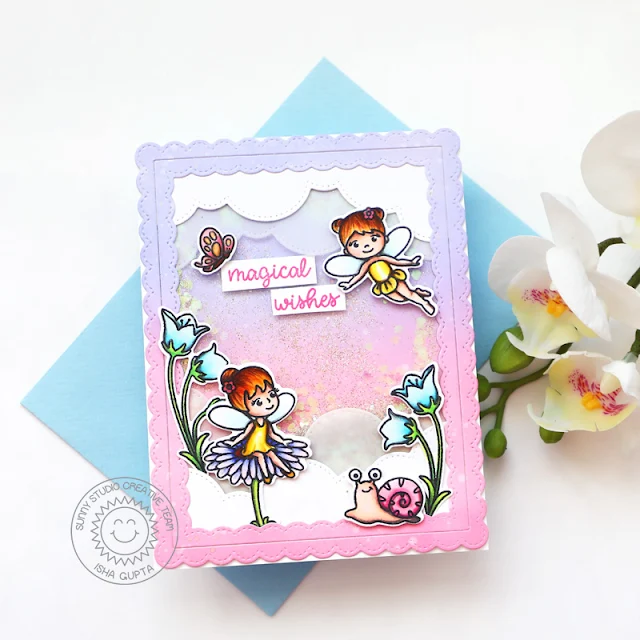
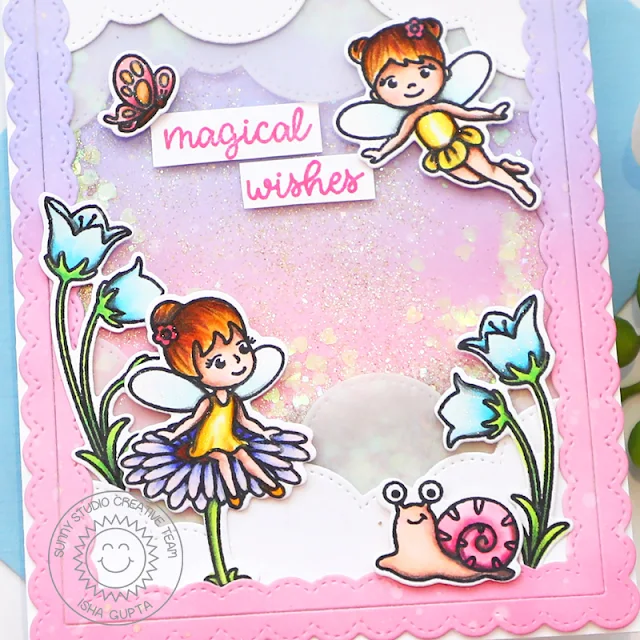
Hello everyone! Isha with you featuring our adorable Garden Fairy stamp set and dies. As you know I really like creating flat shaker cards and I felt this stamp was perfect to make one. It's totally dreamy, magical and added fun of all the glitter as shaker, perfect to give a big smile to any girl including me!

Sunny Studio Stamps: Garden Fairy Slimline Dies Fancy Frame Dies Birthday Cards by Isha Gupt

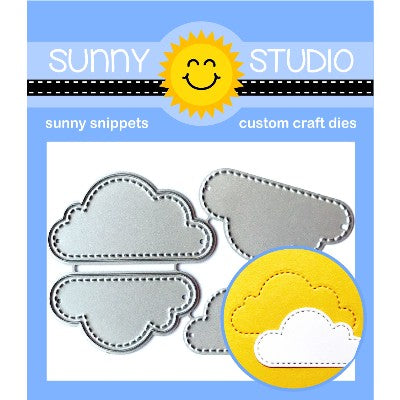
So I started by stamping all the images using the Garden Fairy stamp set, colored using Copic markers. Die-cut using the coordinating dies. Next, I die-cut some cloud borders from the Slimline Nature Borders dies using white cardstock and vellum. 

Sponge a white panel using Shaded Lilac and Kitsch Flamingo Distress Oxide inks, flick water and dab using a kitchen towel. Die-cut using the Fancy Frames Rectangle dies to create a frame. Adhere both the parts of the frame from behind to have a broad frame. Next adhere the white clouds to the top and bottom part of the frame, then goes the vellum cloud border. Now adhere a piece of acetate behind the frame. Add double sided tape to cover all the sides of the frame.

Sunny Studio Stamps: Garden Fairy Slimline Dies Fancy Frame Dies Birthday Cards by Isha Gupt

Adhere the center of the background piece to the white card base. Add some WOW! sparkle glitters Your Carriage Awaits and Crystal. Now remove the lining of the score tape of the frame and adhere this to the card base.

Adhere all the images using glue and 3d foam for various dimension. To finish, add spectrum noir clear sparkle pen to the fairies, butterfly and flowers.

Have a nice day!

------------------------------------------

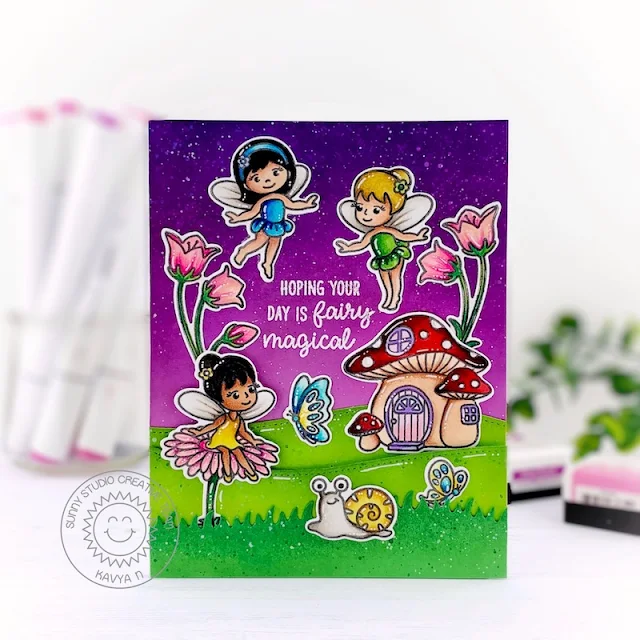
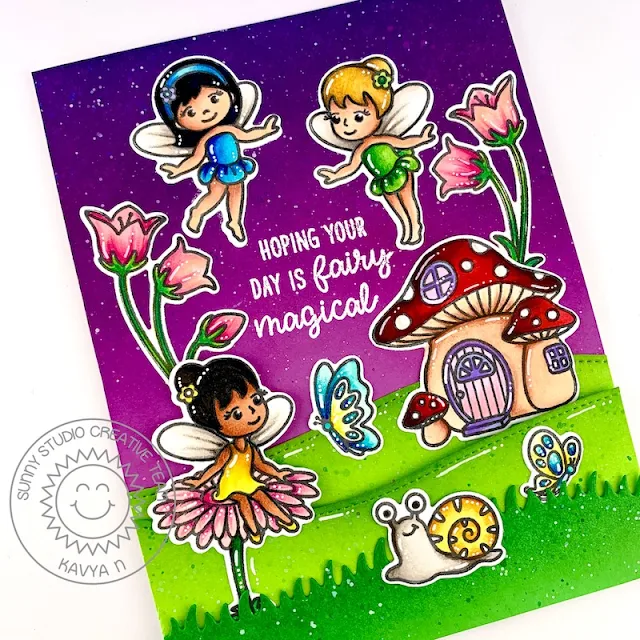
Hi folks, Kavya here. I am back on the blog with another fun card inspired by Disney Fairies using just one stamp set (I know ... I didn’t combine a bunch of stamps this time!), and my staple die set - Slimline Nature Border dies. 

Sunny Studio Stamps: Garden Fairy Slimline Dies Birthday Card by Kavya

I first started off by ink blending light purple cardstock using shades of purple and pink dye ink to create the late evening sky. I then die cut green cardstock using the Slimline Nature Border to create the grass and land. As always, I ink blended the edges using matching dye ink and splattered some white and green paint to give some texture. I also splattered purple and white paint on the sky to give it a starry look! 

Sunny Studio Stamps: Garden Fairy Slimline Dies Birthday Card by Kavya

Later, I die cut various images from the Garden Fairies stamp set and colored them using alcohol markers and colored pencils. I tried to recreate Tinkerbell, Silvermist and Iridessa from the franchise :) I hope you could tell! Finally, I heat embossed a sentiment from the same stamp set to finish off the card.

I hope you liked this! Be sure to check back for more inspiration. 

Sunny Studio Supplies Used:

Fancy Frames- Rectangles
Shop at:
Sunny Studio
Slimline Nature Borders
Shop at:
Sunny Studio
Garden Fairy Stamps
Garden Fairy Stamps
Shop at:
Sunny Studio
Garden Fairy Dies
Garden Fairy Dies
Shop at:
Sunny Studio