Monday, April 16, 2018

Critter Campout Framed Appreciation Card with Eloise

Hi everyone, Eloise here and today I'll be using the Critter Campout Stamp Set along with the new Fancy Frames Rectangles Dies to create my appreciation card. This Critter Campout set from the release is probably one of my favourites. It's super adorable and has a ton of image stamps to help set the scene along with loads of sentiments for many different occasions.

Sunny Studio Stamps: Critter Campout Framed Appreciation Card by Eloise Blue

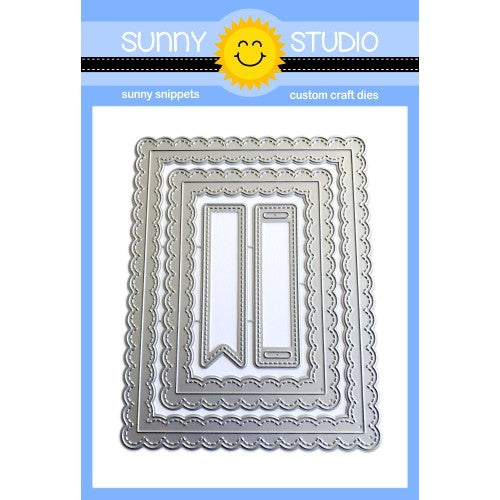
To begin my card today, I first started off with cutting out three frames from the Fancy Frames Rectangles Dies out of some white cardstock. Once my frames were cut, I measured them and then cut three additional rectangles from some watercolour paper for the backgrounds of each of them. Once those were cut, I used some Chipped Sapphire and Salty Ocean Distress Inks for the sky and Twisted Citron and Mowed Lawn Distress Inks for the ground. I ink blended on all three pieces and once they were done, I added foam tape on the backs of the frames and adhered them to the backgrounds. 

Sunny Studio Stamps: Critter Campout Framed Appreciation Card by Eloise Blue

Next up, was to colour up my images. I stamped them all out on some white cardstock with some black ink and coloured them up using Copic Markers. I used lots of different shades of browns so all my critters would look different, as that's something I do find hard with woodland critters. Once they were coloured, I cut them out using the coordinating dies. Now, I added foam tape all along the backs of the critters and adhered them down onto each of my rectangle pieces, creating a mini scene in each of them. To adhere all these pieces onto my cardbase, I took a piece of grey cardstock and layered up all my frames. I did this by tucking each of the pieces under each other and then cutting off the excess of the frame going under any of the other pieces. Now that everything was adhered, I white heat embossed the 'Life With You Is An Adventure' sentiment onto a thin black strip. I then popped that up on foam tape and adhered it down onto my card as well. 

Thanks so much for stopping by today, I hope you feel inspired and you enjoyed my project today. I'll catch you all next time!

Sunny Studio Products Used:

Critter Campout Stamps
Shop at:
Sunny Studio
Critter Campout Dies
Shop at:
Sunny Studio
Fancy Frames- Rectangles
Shop at:
Sunny Studio

Saturday, April 14, 2018

Guest Designer Spotlight: Party Pups Cards with Kay Miller

Hello! Kay Miller here, and I am thrilled to be guesting with Sunny Studio Stamps again this month! My two cards today are using the adorable new stamp set called Party Pups, which is one of my new favorites! I am a huge dog lover! I have five of my own :)

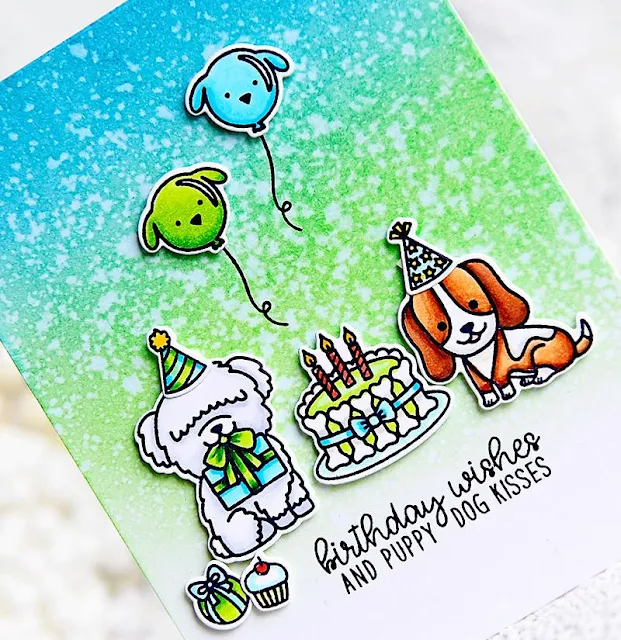
Sunny Studio Stamps: Party Pups Watercolored Background Cards by Kay Miller

So for the background I used Distress inks, Broken China and Cracked Pistachio. I blended onto Bristol Board and sprinkled with water. 

Sunny Studio Stamps: Party Pups Watercolored Background Cards by Kay Miller

The cute images were all colored with Copic markers, cut out with the coordinating dies, and adhered with foam tape. I stamped the sentiment and the balloon strings with black ink.

Sunny Studio Stamps: Party Pups Watercolored Background Cards by Kay Miller

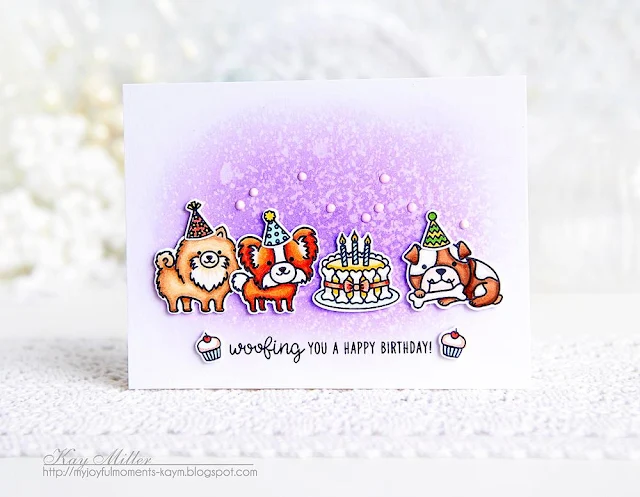
My second card was made exactly the same as the first, although I used Wilted Violet Distress ink on my background.  All of the cute little dogs were colored with Copic markers and cut out with the coordinating dies. 

Sunny Studio Stamps: Party Pups Watercolored Background Cards by Kay Miller

I also added some gloss white Nuvo Crystal drops to finish it up. I had a lot of fun coloring these cute little dogs!

I hope you have enjoyed my cards today! Be sure to check out all of the wonderful products at Sunny Studio Stamps! Thanks so much for stopping by!

Sunny Studio Supplies Used:

Party Pups Stamps
Party Pups Stamps
Shop at:
Sunny Studio
Party Pups Dies
Party Pups Dies
Shop at:
Sunny Studio

Friday, April 13, 2018

Critter Campout Starry Night Sky Card with Lexa

Hello everyone! How are you doing? It's Lexa here today with a happy card using the brand new Critter Campout Stamps and the coordinating dies together with another versatile frames from Sunny Studio called Fancy Frames Rectangle Dies. I must say that this stamp set is my absolute favorite from the release. How I can say no to these adorable critters?

Sunny Studio Stamps: Critter Campout Starry Night Sky Card by Lexa Levana

First of all, I stamped all of the images with Versafine black ink and watercolored them with Distress Markers. After I finished with the coloring, I die cut each of them with the coordinating dies (time saver!). I wanted to create a scene where all of these friends are gathering around the campfire under the starry night sky. Each of them are so darling! 

Sunny Studio Stamps: Critter Campout Starry Night Sky Card by Lexa Levana

I created the green hills portions bigger than the sky so there would be enough space for all of the critters to be together. I'm super happy with the result. It's even better than what I imagined. The scallop Fancy Frames Rectangle is a perfect touch to frame this little scene.

Thank you so much for stopping by today. I hope you like today's card as much as I do. Have a wonderful day everyone!

Sunny Studio Supplies Used:

Critter Campout Stamps
Shop at:
Sunny Studio
Critter Campout Dies
Shop at:
Sunny Studio
Fancy Frames- Rectangles
Shop at:
Sunny Studio

Thursday, April 12, 2018

Critter Campout Fireside Buddies Friendship Card with Vanessa

Hello everybody! Vanessa here today to invite you to s'mores sitting comfortably around a campfire with the cute critters from Critter Campout! Again, I had difficulties to decide which of the fantastic new sets to use first :) This is what I ended up with:

Sunny Studio Stamps: Critter Campout Fireside Buddies Friendship Card by Vanessa Menhorn

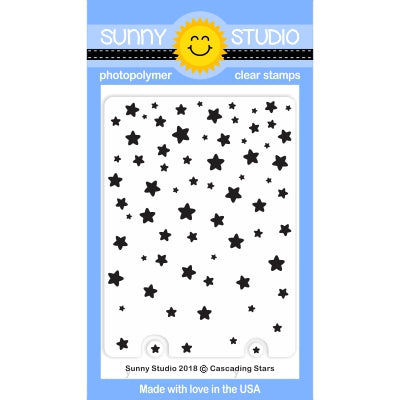
I masked off a rectangle on a Kraft cardstock panel and inked the outer portions with white pigment ink. Then I masked the inked part and stamped the Cascading Stars. Next, I stamped the sentiment, heat-embossed it with gold embossing powder and adhered the panel to the card. Now I stamped the images, colored everything with Copics, die-cut them with the matching dies and adhered them to the card with foam tape. Finally, I added wood veneer stars.

Sunny Studio Stamps: Critter Campout Fireside Buddies Friendship Card by Vanessa Menhorn

Looking at it now, I might have chosen a darker color for the sentiment, but I wanted to imitate the glow of that campfire!

I hope you enjoyed today's look at the new sets! Thank you for stopping by!

Sunny Studio Supplies Used:

Cascading Stars Stamps
Shop at:
Sunny Studio
Critter Campout Stamps
Shop at:
Sunny Studio
Critter Campout Dies
Shop at:
Sunny Studio

Wednesday, April 11, 2018

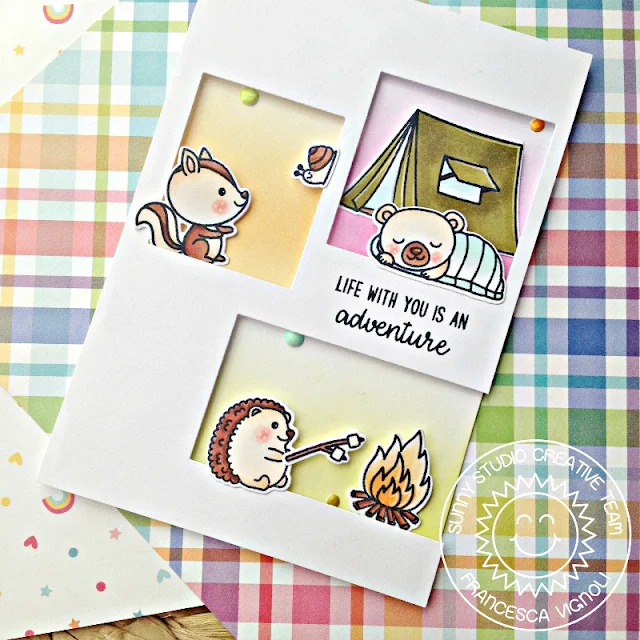
Critter Campout Window Cut Out Card with Franci

Hi there, Franci here with you today! First of all, did you already fall in love with the new release? The new goodies are amazing and every set is so special and full of details. I can't even pick just one favorite, as I love them all! For today I picked up the new Critter Campout stamp set to create this happy rainbow inspired card. Hope you enjoy it! 

Sunny Studio Stamps: Critter Campout Window Cut Out Card by Franci Vignoli

First, I created my white card base and cut a coordinated white panel. I used some rectangle dies to create the pattern on my panel and then colored the front of my card base with Distress inks to create this colorful window effect. I stamped all of my critters and all of their accessories with a Copic friendly ink onto some smooth white cardstock. I colored them and die cut them with their coordinating dies

Sunny Studio Stamps: Critter Campout Window Cut Out Card by Franci Vignoli

I stamped my sentiment with the same black ink used before and adhered my panel onto the front of my card with lot of foam adhesive to create dimension. Then I added all of the little campout critters and glued them down with a combo of liquid glue and foam adhesive. Finally, I added some embellishments to complete my card. I love these little critters so much, they are perfect for creating little scenes! 

Thank you so much for stopping by and have a happy creative day! 

Sunny Studio Supplies Used:

Critter Campout Stamps
Shop at:
Sunny Studio
Critter Campout Dies
Shop at:
Sunny Studio

Tuesday, April 10, 2018

Beach Babies Hello Sunshine Window Card with Juliana


Hello friends! It's Juliana Michaels here with you for my first post as a new design team member for Sunny Studio. I'm super excited to be here and I'm looking forward to sharing some inspiration with you. Today, I've used the brand new Beach Babies stamp set to create a "Hello" card with thoughts of warmer days and sunshine in mind.

Sunny Studio Stamps: Beach Babies Hello Sunshine Window Card by Juliana Michaels

To get started, I stamped several of the images from the Beach Babies stamp set with Memento Ink. I then colored them in using Chameleon Pens and die cut them using the coordinating dies.


Sunny Studio Stamps: Beach Babies Hello Sunshine Window Card by Juliana Michaels

Next, I took the Window Trio Circle die and used it to create a window scene for a trio of Beach Babies. I cut the image from a piece of white cardstock and then tucked the Beach Babies inside the openings. To give them a little dimension, I used double sided foam adhesive behind just their heads and to adhere the beach ball.


Sunny Studio Stamps: Beach Babies Hello Sunshine Window Card by Juliana Michaels

To create the sentiment, I took the Hello Word die and cut it 3 times from black cardstock. I glued these layers together with liquid adhesive before adhering it to the card front to give it a bit of dimension. I then stamped “sunshine” from the Beach Babies stamp set to complete the sentiment.

I know spring has just arrived, but I hope this "Hello Sunshine" card fills you with thoughts of warmer days to come!

Sunny Studio Supplies Used:

Beach Babies Stamps
Beach Babies Stamps
Shop at:
Sunny Studio
Beach Babies Dies
Beach Babies Dies
Shop at:
Sunny Studio
Window Trio- Circles Die
Shop at:
Sunny Studio
Hello Word Die
Hello Word Die
Shop at:
Sunny Studio

Monday, April 9, 2018

Beach Babies Hello Sunshine Window Card and Video with Eloise

Hi everyone, Eloise here and I’m so excited to be using the brand new products that were just released for summer! These new stamps and dies are so fun and I’m so excited to dive right in. For today’s card, I’ll be using the new Beach Babies stamp set as well as the Window Trio Circle Dies which are going to be a personal favourite of mine since I love cards with window openings in them, have done them a lot in the past and am so excited to have a die that does most of the lining up for me.

Sunny Studio Stamps: Beach Babies Hello Sunshine Window Card and Video by Eloise Blue

To begin my card today, I first went ahead and cut down a piece of white cardstock to 3 ¾” wide by 5 1/8” tall. I then used the Window Trio Circle Dies to cut out two lines in the white cardstock. Once my circles were die cut, I used a piece of watercolour paper, cut it down a little smaller than my panel and ink blended some yellow, aqua and blue strips to go behind my circle windows. I masked each row off to make sure each circle would be one colour. Once everything was blended I added some foam tape behind the panel and adhered it to my coloured background.

Sunny Studio Stamps: Beach Babies Hello Sunshine Window Card and Video by Eloise Blue

Next, it was time to colour my images. I stamped a ton of the images out from Beach Babies with black ink and coloured them with Copic Markers. I then used the coordinating dies to cut them out and added foam tape behind all the images. I then adhered them inside the little circle openings. Lastly, it's time to stamp the sentiment. I white heat embossed the sentiment 'Hello Sunshine' onto a thin black strip. Then, added more foam tape and adhered it in the bottom centre of my card. To finish up, I adhered the entire panel onto a yellow piece of patterned paper and then onto a card base. 

The video is linked down below for you all, also.


So thank you so much for stopping by today, I hope you enjoyed and are super excited to get started using this release as well! Make sure to head by the blog the rest of the week for more inspiration and I'll catch you all next week!

Sunny Studio Supplies Used:

Beach Babies Stamps
Beach Babies Stamps
Shop at:
Sunny Studio
Beach Babies Dies
Beach Babies Dies
Shop at:
Sunny Studio
Window Trio- Circles Die
Shop at:
Sunny Studio