Showing posts with label Tropical Scenes. Show all posts

Thursday, August 18, 2022

Designer's Choice Cards with Marine and Marieke

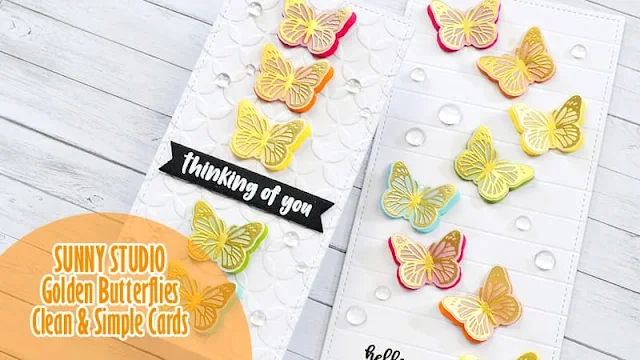
Hey crafty friends, Marine here with you today! I'm super happy to be back on the blog with this duo of cute and bright cards. They feature the butterfly stamp from the Watering Can stamp set, I didn't get a chance to use that stamp before, and I thought it would be nice to use with rainbow colors.

Sunny Studio Stamps: Watering Can Butterfly Cards by Marine Simon (featuring Moroccan Circle Embossing Folder)

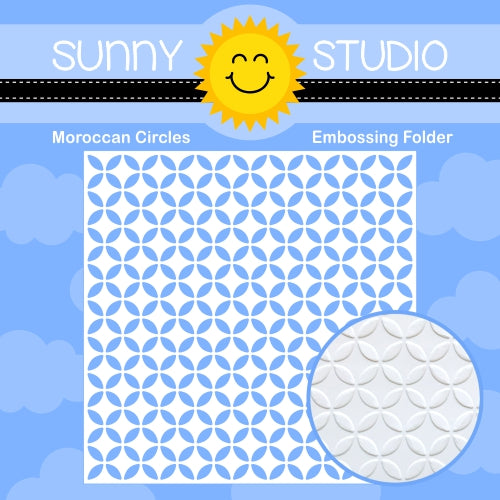
I started by cutting a 6 x 3" mini slimline white panel, and an 8,5 x 3,5" slimline white panel. On the mini slimline panel I printed texture using the Moroccan Circles embossing folder, and on the slimline panel I added texture by creating lines each quarter of an inch using a ball tool.

I gold heat embossed a bunch of butterflies on vellum, and I cut them using the coordinating die. I used that same coordinating die to cut colorful butterflies. And I white heat embossed a "Thinking of you" sentiment from Watering Can on a black banner. 

Sunny Studio Stamps: Watering Can Butterfly Cards by Marine Simon (featuring Moroccan Circle Embossing Folder)

Next I assembled the cards. On the mini slimline panel, I added a vertical row of butterflies. I first attached plain butterflies in a rainbow order using foam squares, tucked my "Thinking of you" sentiment between two butterflies, and then stuck a golden butterfly on each plain butterfly using liquid glue.

And on the slimline panel, I stamped a simple "Hello" sentiment from Lovely Lilacs, attached plain butterflies in zigzag using foam squares, and then added a golden butterfly on each plain butterfly. And I finished both cards by gluing clear droplets to bring more light.

Sunny Studio Stamps: Watering Can Butterfly Cards by Marine Simon (featuring Moroccan Circle Embossing Folder)

And that's it! They're both super pretty and they were very quick to make so it would definitely be easy to mass produce them. I hope that those cards will inspire you. As always I leave with the process video so feel welcome to check it out for more details (click on the image above)! Thank you so much for stopping by, and see you next time!

-------------------------------------------------

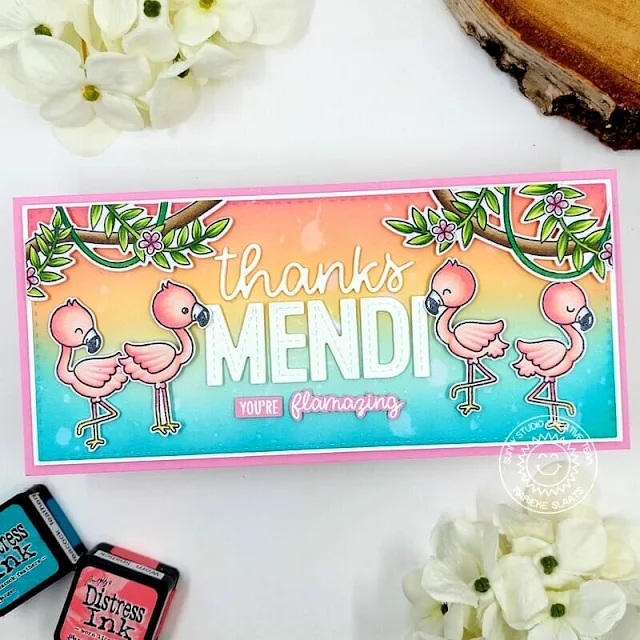
Hello Sunny Studio Friends, Marieke here. Today I hope to inspire you with a personalized card that I made especially for the amazing owner of Sunny Studio; Mendi! 

Sunny Studio Stamps: Fabulous Flamingos Card by Marieke Slaats (featuring Thank You Word Dies, Tropical Scenes)

ink blended Cracked Pistachio, Peacock Feathers, Dried Marigold, Worn Lipstick and Picked Raspberry on to a piece of cardstock and I die cut it. Splattered some water and adhered it onto a slightly larger rectangle.

Out of white cardstock I cut the word Thanks using the Thank You Word Dies four times and glued them together. Die cut the name Mendi and adhered both in the middle of the card. Heat set the other sentiments that are in the Fabulous Flamingo set on pink cardstock. Die cut the small sentiment and cut the other one using my scissors.

Used Copic Colors:
Flamingo - RV13, RV42, R01, R00 / C5,C3,C1,0 / Y13, Y11
Green - YG67, YG63, YG03, YG01
Brown - E47, E44, E43
Dark Green - G28, G09, G07
Pink - R85, R83, R81

Sunny Studio Stamps: Fabulous Flamingos Card by Marieke Slaats (featuring Thank You Word Dies, Tropical Scenes)

Stamped the images out of the Fabulous Flamingos and Tropical Scenes stamps. Colored them up using my Copic markers and cut them using the Fabulous Flamingos and Tropical Scenes Dies.

Adhered the background on to a pink top fold base card and added all the images using different heights of foam tape.

Sunny Studio Supplies Used:

Thank You Words Die
Thank You Words Die
Shop at:
Sunny Studio
Fabulous Flamingos Stamps
Shop at:
Sunny Studio
Fabulous Flamingos Dies
Shop at:
Sunny Studio
Moroccan Circles Embossing
Shop at:
Sunny Studio
Tropical Scenes Stamps
Shop at:
Sunny Studio
Tropical Scenes Dies
Shop at:
Sunny Studio
Lovely Lilacs Stamps
Shop at:
Sunny Studio
Watering Can Stamps
Watering Can Stamps
Shop at:
Sunny Studio
Watering Can Dies
Watering Can Dies
Shop at:
Sunny Studio

Thursday, August 11, 2022

Watering Can Cards with Marieke and Marine

Hello Sunny Studio friends, Marieke here. Today I hope to inspire you with an underwater card. 

Sunny Studio Stamps: Watering Can Card by Marieke Slaats (featuring Fintastic Friends, Tropical Scenes)

As always I made the background first. I ink blended the colors Cracked Pistachio, Peacock Feathers and Mermaid Lagoon and adhered the panel onto a white topfold base card. 

Die cut the watering can using the Watering Can dies and colored it up using my Copic markers. Then I stamped the inner second layering stamp out of the Watering Can stamp using a black ink. Heat set the sentiment that comes in the set using white embossing powder.

Sunny Studio Stamps: Watering Can Card by Marieke Slaats (featuring Fintastic Friends, Tropical Scenes)

Used Copic Colors:
Sand - E57, E55, E53, E51, E50
Green - YG67, YG63, YG03, YG01
Yellow - Y17, Y15, Y13, Y11
Pink - RV17, RV14, RV13, RV11
Stones - W6, W4, W2, W1
Blue - B04, B02, B00, B000
Purple - BV17, BV04, BV1
Teal - BG15, BG13, BG11, BG10
Pink / Red - R24, R22, R20
Watering Can - N10, N8, N6, N5, N3, N2 / YR27

Sunny Studio Stamps: Watering Can Card by Marieke Slaats (featuring Fintastic Friends, Tropical Scenes)

Stamped the images out of Fintastic Friends and Tropical Scenes stamps. Colored them up using my Copic markers and die cut them using the Tropical Scenes and Fintastic Friends dies.

Adhered all the images onto the card using foam tape or glue and finished the card by adding some clear drops.

----------------------------------------------

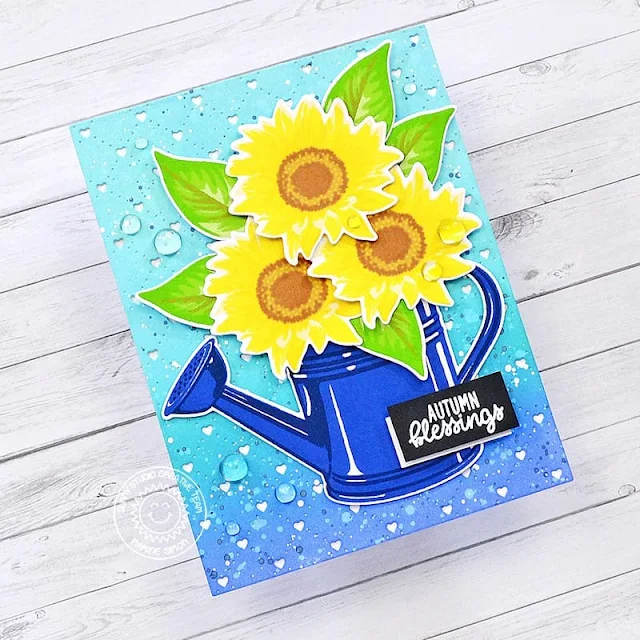
Hey crafty friends, happy Thursday! Marine here, super happy to be back this week with another stamp layering card! Today I'm showcasing the Watering Can stamp set again, but this time, I'm putting some beautiful sunflowers from the Sunflower Fields stamp set in it. A good way to officially start making fall cards!

Sunny Studio Stamps: Watering Can Card by Marine Simon (featuring Sunflower Fields, Quilted Hearts Dies)

I started by stamping the watering can. I wanted it to bring a bold contrast with the sunflowers, so I stamped it using dark blue inks. Next I stamped some sunflowers and leaves, and to make sure that I was layering the stamps correctly, I used the guide on the Sunflower Fields page to help me line up everything. 

And just like the Lovely Lilacs card I shared last week, I used Lawn Fawn dye inks to stamp all the images:
Watering can: blue jay + deep sea
Leaves: celery stick + freshly cut grass + jalapeno

Sunny Studio Stamps: Watering Can Card by Marine Simon (featuring Sunflower Fields, Quilted Hearts Dies)

Next step was to create the background. I cut a Quilted Heart Portrait panel out of bristol cardstock, and used salvaged patina, peacock feathers and blueprint sketch oxide inks to color it. I added lots of texture to that panel, and once it was dry, I attached it to a piece of white cardstock.

I stuck the watering can and the sunflowers using 1mm and 2mm foam squares, and next I added my sentiment. I white heat embossed the "Autumn blessings" sentiment from Happy Harvest on black cardstock, trimmed it into a small banner and added a piece of white cardstock to create an outline, and used clear foam squares to stick that banner on the panel.

Sunny Studio Stamps: Watering Can Card by Marine Simon (featuring Sunflower Fields, Quilted Hearts Dies)

I attached the panel to a white card base, and finally glued a few clear droplets here and there to bring a touch of shine to the card. And that's it, super pretty and bright, I hope that you like it. I have a process video for you, so feel welcome to watch it for more information (click on the image above). Thank you so much for stopping by, and see you next week!

Sunny Studio Supplies Used:

Happy Harvest Stamps
Shop at:
Sunny Studio
Sunflower Fields Stamps
Shop at:
Sunny Studio
Sunflower Fields Dies
Shop at:
Sunny Studio
Tropical Scenes Stamps
Shop at:
Sunny Studio
Tropical Scenes Dies
Shop at:
Sunny Studio
Quilted Hearts Portrait
Shop at:
Sunny Studio
Fintastic Friends Stamps
Shop at:
Sunny Studio
Fintastic Friends Dies
Shop at:
Sunny Studio
Watering Can Stamps
Watering Can Stamps
Shop at:
Sunny Studio
Watering Can Dies
Watering Can Dies
Shop at:
Sunny Studio

Thursday, July 28, 2022

Fintastic Friends Cards with Marieke and Marine

Hello Sunny Studio friends, Marieke here. Today I hope to inspire you with an shaker card using the Fintastic Friends

Sunny Studio Stamps: Fintastic Friends Ocean Themed Card by Marieke Slaats (featuring Snail Mail, Tropical Scenes)

As always I started with the background. I ink blended the colors Tumbled Glass, Broken China, Blue Sapphire and Villainous Potion. Splattered water and some Villainous Potion and die cut the heart out of it.

Sunny Studio Stamps: Fintastic Friends Ocean Themed Card by Marieke Slaats (featuring Snail Mail, Tropical Scenes)

Heat set the sentiment out of the Sending Sunshine and die cut the word love out of white cardstock and glued it onto the die cut heart. Adhered a sheet of acetate behind the border. Added a layer of foam tape on to the basecard and filled up the shaker. Closed it using the border.

Used Copic Colors:
Purple - V06, V04, V01, V00
Red - R24, R22, R20
Green - G05, G02, G00
Yellow - Y17, Y15, Y13, Y11
White - W6, W4, W2, W00
Blueish purple - BV17, BV04, BV13, BV02
Sand - E55, E53, E51, E50
Envelop - E43, E41, E40

Sunny Studio Stamps: Fintastic Friends Ocean Themed Card by Marieke Slaats (featuring Snail Mail, Tropical Scenes)

Stamped all the images out of Fintastic FriendsSnail Mail and Tropical Scenes stamps. Colored them up using my Copic markers and die cut them using the coordinating dies. I added some die cuts in the animals so I could fit in the envelopes.

Adhered all the images on the card using glue or foam tape and added some white gel pen details to the octopus to give him something extra to stand out.

--------------------------------------------------

Hello crafty friends, Marine here, super happy to be back with one last Christmas in July card. I had a lot of fun making this series, and I hope you appreciated it as well! Today we're going under the ocean to celebrate Christmas with some adorable Fintastic Friends critters.

Sunny Studio Stamps: Fintastic Friends Ocean Themed Card by Marine Simon (featuring Ocean View, Penguin Pals)

I started off with the underwater background. I cut a 5,5 x 4,25" bristol panel, and worked on the bottom part first. I created a sand border using a hill stencil, along with antique linen and vintage photo oxide inks. And once the inking was done, I added texture on that sand border: white ink + water splatters, and vintage photo oxide ink + water splatters.

Next I covered the sand border using the hill stencil, and I created the ocean on the upper part of the panel using oxide inks again. From the sand border towards the top of the panel I applied chipped sapphire, blueprint sketch, peacock feathers and salvaged patina. I also added texture: water splatters, chipped sapphire oxide ink + water splatters, and white ink + water splatters.

Sunny Studio Stamps: Fintastic Friends Ocean Themed Card by Marine Simon (featuring Ocean View, Penguin Pals)

I set the paper aside to dry, and worked on the images. I stamped them all using an alcohol marker friendly black ink, cut them using the coordinating dies and colored everything using my alcohol markers with greys, pinks, aquas, blues and purples.

Fintastic Friends: sea critters
Ocean View: crab +reef
Penguin Pals: small fishes + hat
Christmas Critters: small hat
North Pole: nice list

After the coloring, I stamped my sentiment at the very top of the panel using clear embossing ink and silver embossing powder. I picked the words "Wishing you a" + "Christmas" from Santa Claus Lane, and "Fintastic" from Fintastic Friends to make the phrase "Wishing you a fintastic Christmas", and then I attached all the images on the panel using 1mm foam squares.

Sunny Studio Stamps: Fintastic Friends Ocean Themed Card by Marine Simon (featuring Ocean View, Penguin Pals)

Finally I glued a few clear droplets here and there, and added highlights and details to the images using a white gel. And done! Super bright and so cute, I hope you like it. As always you will find more details in the process video so feel welcome to check it out (click on the image above)! Thanks so much for stopping by, and see you next week!

Sunny Studio Supplies Used:

Christmas Critters Stamps
Shop at:
Sunny Studio
Christmas Critters DIes
Shop at:
Sunny Studio
Sending Sunshine Stamps
Shop at:
Sunny Studio
Santa Claus Lane Stamps
Shop at:
Sunny Studio
Tropical Scenes Stamps
Shop at:
Sunny Studio
Tropical Scenes Dies
Shop at:
Sunny Studio
North Pole Stamps
North Pole Stamps
Shop at:
Sunny Studio
North Pole Dies
North Pole Dies
Shop at:
Sunny Studio
Penguin Pals Stamps
Penguin Pals Stamps
Shop at:
Sunny Studio
Penguin Pals Dies
Penguin Pals Dies
Shop at:
Sunny Studio
Snail Mail Stamps
Snail Mail Stamps
Shop at:
Sunny Studio
Snail Mail Dies
Snail Mail Dies
Shop at:
Sunny Studio
Fintastic Friends Stamps
Shop at:
Sunny Studio
Fintastic Friends Dies
Shop at:
Sunny Studio
Ocean View Stamps
Ocean View Stamps
Shop at:
Sunny Studio
Ocean View Dies
Ocean View Dies
Shop at:
Sunny Studio

Thursday, July 21, 2022

Designer's Choice Cards with Marine and Marieke

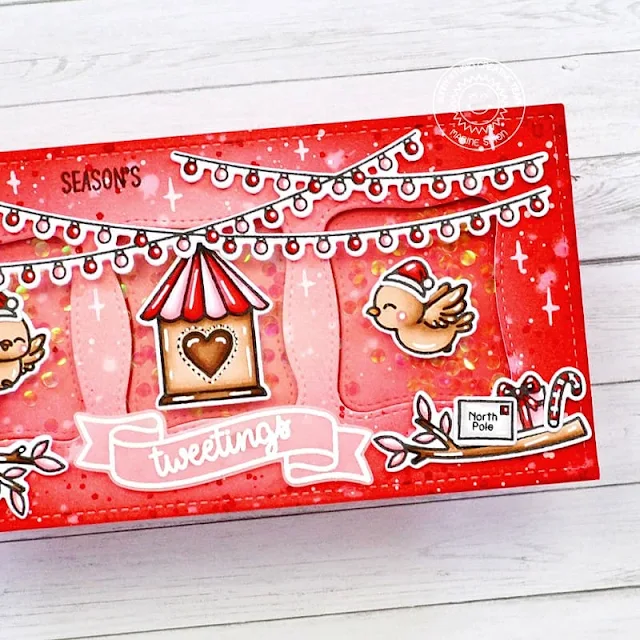
Hello crafty friends, Marine here with you today. I'm super happy to be back on the blog with this new Christmas in July card! Today I'm featuring the Wonky Windows die, I love this die, it's just so perfect to make shaker cards!

Sunny Studio Stamps Mini Slimline Bird Christmas in July Card by Marine (using Little Birdies, Scenic Route, Outback Cirtters, Christmas Critters, Holiday Express, Penguin Pals & Wonky Windows Dies)

I first started by cutting a 6 x 3" bristol panel, and created a vibrant red background using tattered rose, festive berries and aged mahogany distress inks. And I added lots of texture to give this panel more interest: water splatters, white ink splatters and aged mahogany distress ink + water splatters.

And while the panel was drying, I stamped, die cut and colored my images. I like to mix and match stamps from different sets, and this is what I did on this card:

Little Birdie: the birdhouse and two birds
Scenic Route: the strings of lights
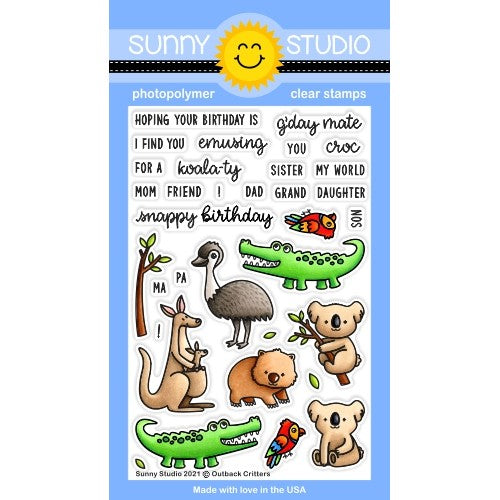
Outback Critters: the branch
Christmas Critters: the Christmas hat
Holiday Express: a present
Penguin Pals: the postcard and candy canes

Sunny Studio Stamps Mini Slimline Bird Christmas in July Card by Marine (using Little Birdies, Scenic Route, Outback Cirtters, Christmas Critters, Holiday Express, Penguin Pals & Wonky Windows Dies)

Next I worked on the shaker. I started by cutting three windows out of my red panel using the Wonky Windows die. I cut a 6 x 3" red card base, temporarily taped the red panel to it using washi tape, and put each window back to its original spot using liquid glue.

I removed the washi tape to lift the red panel, and then attached a piece of clear acetate at the back of it. Still at the back of the red panel, I added foam strips all around each window to create room for the shaker accessories.

Sunny Studio Stamps Mini Slimline Bird Christmas in July Card by Marine (using Little Birdies, Scenic Route, Outback Cirtters, Christmas Critters, Holiday Express, Penguin Pals & Wonky Windows Dies)

I rubbed the inside edges of the foam strips with my powder tool to make those edges non sticky so the confetti don't stick to the foam. I used a microfiber cloth to remove any excess of powder from the acetate, and then I added a bunch of shiny confetti inside each window. Peeled all the backing papers off the foam strips, and finally attached the card base to the foam to complete and close the shaker.  

I stuck the images on the panel using foam squares and liquid glue. And next I created my "Season's Tweetings" sentiment using elements from Little Birdie. I stamped "Season's" in the upper part of the panel using black ink, and I white heat embossed "Tweetings" on vellum, along with the banner, and I attached this banner below the birdhouse using clear foam squares.

Sunny Studio Stamps Mini Slimline Bird Christmas in July Card by Marine (using Little Birdies, Scenic Route, Outback Cirtters, Christmas Critters, Holiday Express, Penguin Pals & Wonky Windows Dies)

Finally I added highlights and details to the images and background using a white gel pen. And that's it, super bright and very cute with those birdies wearing Christmas hats. Thanks for stopping by, and as always feel welcome to watch the process video for more details (click on the image above). See you next week!

------------------------------------------

Hello Sunny Studio friends. Marieke here, and today I hope to inspire you with a Clean and Simple birthday card. 

Sunny Studio Kid Snorkling in Ocean Card by Marieke (using Tropical Scenes, Kiddie Pool & Fintastic Friends Stamps)

First off I cut a white topfold base card and ink blended the colors Tumbled Glass, Mermaid Lagoon and Blueprint Sketch. Splattered some water and let it dry.

Stamped the images out of the Tropical ScenesKiddie Pool and Fintastic Friends and colored them up using my Copic markers. Cut them using the matching dies and adhered them on to the card using foam tape.

Sunny Studio Kid Snorkling in Ocean Card by Marieke (using Tropical Scenes, Kiddie Pool & Fintastic Friends Stamps)

Used Copic Colors:
Sand - E44, E43, E42, E41, E40
Light Green - G07, G05, G03
Dark Green - YG67, YG63, YG03
Yellow - Y17, Y15, Y13, Y11
Pink - RV17, RV14, RV13, RV11
Orange - YR07, YR04, YR12
Stones / Black - N6, N5, N4, N3, N2 / White gel pen
Dark Blue - B26, B24, B21
Light Blue - B02, B00, B000
Purple - BV17, BV04, BV13, BV02
White - C5, C3, C1, 0
Teal - BG18, BG15, BG13, BG11, BG10
Hair - E37, E35, E33, E31
Skin - E000, E00, E04, E21, E11

Stamped the sentiments using a black ink directly on to the base. Finished the card off adding some glossy accent on to the goggles.

Sunny Studio Supplies Used:

Outback Critters Stamps
Shop at:
Sunny Studio
Outback Critters Dies
Shop at:
Sunny Studio
Christmas Critters Stamps
Shop at:
Sunny Studio
Christmas Critters DIes
Shop at:
Sunny Studio
Holiday Express Stamps
Shop at:
Sunny Studio
Holiday Express Dies
Shop at:
Sunny Studio
Tropical Scenes Stamps
Shop at:
Sunny Studio
Tropical Scenes Dies
Shop at:
Sunny Studio
Penguin Pals Stamps
Penguin Pals Stamps
Shop at:
Sunny Studio
Penguin Pals Dies
Penguin Pals Dies
Shop at:
Sunny Studio
Little Birdie Stamps
Shop at:
Sunny Studio
Little Birdie Dies
Little Birdie Dies
Shop at:
Sunny Studio
Fintastic Friends Stamps
Shop at:
Sunny Studio
Fintastic Friends Dies
Shop at:
Sunny Studio
Kiddie Pool Stamps
Kiddie Pool Stamps
Shop at:
Sunny Studio
Kiddie Pool Dies
Kiddie Pool Dies
Shop at:
Sunny Studio
Wonky Windows Die
Wonky Windows Die
Shop at:
Sunny Studio