Showing posts with label Fluffy Clouds Border. Show all posts

Wednesday, March 1, 2023

Hayley Alphabet Die Focused Cards with Catherine and Marie

Hello Crafty Friends! Catherine here, today I am sharing a rainbow card featuring Hayley Uppercase Alphabet Dies and Hayley Lowercase Alphabet Dies.

Sunny Studio Stamps: Hayley Alphabet Die Focused Rainbow Card by Catherine Cohen (featuring Panda Party, Stitched Circle Dies)

To start, I ink blended the cloudy background with a stencil made using Fluffy Cloudy Border Dies with Tumbled Glass Distress Oxide on to A2 size cardstock. I splattered some blue watercolor onto the card for added interest.

Next, I die cut four more cloudy borders for the top and bottom of the card. Two out of white cardstock and two out of pearlescent vellum. I lightly inked the edges of the two white cloudy borders with the same ink. I layered the cloudy borders onto the top and bottom of the card with foam tape.

To make the rainbow, I used the circle dies from Stitched Circle Large Dies and Stitched Circle Small Dies. I nested the smaller circles inside the larger circles and ran it through my die cut machine and cut the circles into an arch. I tucked the rainbow into the cloudy border and adhered it onto the background with glue. I used the bright and cheery paper from Spring Sunburst Paper. I added a sun using Sunny Sentiments Dies and a stitched circle from Stitched Circle Large Dies using paper from Classic Gingham 6x6 Paper.

Sunny Studio Stamps: Hayley Alphabet Die Focused Rainbow Card by Catherine Cohen (featuring Panda Party, Stitched Circle Dies)

For the sentiment “Bright,” I die cut the letters twice  with Hayley Uppercase Alphabet Dies and Hayley Lowercase Alphabet Dies out of white card stock and once out of scrap colored cardstock. I adhered the white letters together and then the colored letters on top and added highlights with a white gel pen.

I added a few more clouds from Balloon Rides Dies and I couldn’t resist but to add a panda from Panda Party StampsI finished off the card with a colorful sentiment Happy Thoughts Stamps using the following Altenew Inks: Fresh Lemon, Pinkalicious, Deep Iris, and Firefly.

Thank you so much for stopping buy! Have a wonderful day!

---------------------------------------

Hello Crafty Friends, Marie here! Today I am back sharing a very simple Easter card featuring Sunny Studio Stamps' Hayley Lowercase Alphabet Dies and Hayley Uppercase Alphabet Dies as well as some super cute images from their Chubby Bunny Stamps and Bunnyville Stamps. This adorable chubby bunny has been blessed with tons of Easter treats and it doesn't look like he's about to share anytime soon! 

Sunny Studio Stamps: Hayley Alphabet Die Focused Bunnyville Easter Card by Marie Marco (featuring Chubby Bunny)

To create this simple and sweet Easter card, I first start off by die cutting my A2 sized card base from 110 lb. heavyweight cardstock. I die cut another A2 sized panel of bright yellow pattern paper from the new Spring Fever Paper. I then attached my pattern paper to my card base using a double sided tape adhesive. To create my background, I die cut a smaller sized panel from bristol smooth cardstock because inks glides smoothly with this type of paper. I used distress ink in the color Salvaged Patina to ink blend my sky and Twisted Citron for my grass. I centered my background panel and attached it to my card front with Bearly Art Precision craft glue.

For my Easter Blessings sentiment, I combined the Hayley Uppercase Alphabet Dies with the Hayley Lowercase Alphabet Dies. I cut out all my alphas from  Neenah Solar White cardstock. I just love the typography of these dies! It's whimsical and elegant at the same time, and I absolutely love how you can create your own sentiments. 

Sunny Studio Stamps: Hayley Alphabet Die Focused Bunnyville Easter Card by Marie Marco (featuring Chubby Bunny)

For my images, I used both the Chubby Bunny Stamps and the Bunnyville Stamps. I stamped out all the images onto watercolor paper using Distress Ink in Antique Linen. I colored all my images using watercolor pencils. I cut all my images using the Chubby Bunny Dies and the Bunnyville Dies

Finally, I adhered my sentiment and all my images using a combination of craft glue, tape adhesive, and foam tape. There you have it friends, a very simple Easter card that could be mass produced! Thanks so much for joining me for this week's card inspiration! Until next time, have fun crafting and creating! 

Sunny Studio Supplies Used:

Sunny Sentiments Dies
Shop at:
Sunny Studio
Classic Gingham 6x6 Paper
Shop at:
Sunny Studio
Happy Thoughts Stamps
Shop at:
Sunny Studio
Spring Sunburst 6x6 Paper
Shop at:
Sunny Studio
Chubby Bunny Stamps
Chubby Bunny Stamps
Shop at:
Sunny Studio
Chubby Bunny Dies
Chubby Bunny Dies
Shop at:
Sunny Studio
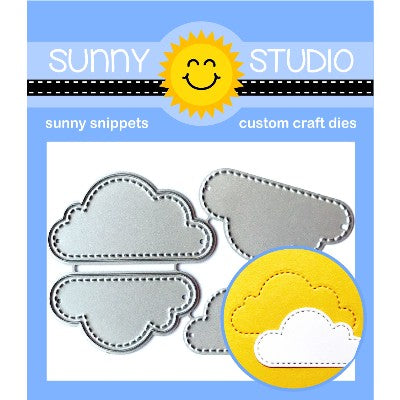
Fluffy Clouds Border Dies
Shop at:
Sunny Studio
Balloon Rides Stamps
Shop at:
Sunny Studio
Balloon Rides Dies
Balloon Rides Dies
Shop at:
Sunny Studio
Stitched Circle Small Dies
Shop at:
Sunny Studio
Stitched Circle Large Dies
Shop at:
Sunny Studio
Bunnyville Stamps
Bunnyville Stamps
Shop at:
Sunny Studio
Bunnyville Dies
Bunnyville Dies
Shop at:
Sunny Studio
Panda Party Stamps
Panda Party Stamps
Shop at:
Sunny Studio
Panda Party Dies
Panda Party Dies
Shop at:
Sunny Studio
Hayley Lowercase Alphabet Dies
Shop at:
Sunny Studio
Hayley Uppercase Alphabet Dies
Shop at:
Sunny Studio
Spring Fever Paper
Spring Fever Paper
Shop at:
Sunny Studio

Monday, February 27, 2023

Rainy Day Die Focused Cards with Cathy and Bobbi

Hey friends! Cathy here today and Spring has already sprung where I live with plenty of rain showers greening up that grass! I had great inspiration for my card today featuring the Rainy Days Dies.

Sunny Studio Stamps: Rainy Day Die Focused Card by Cathy Chapdelaine (featuring Fluffy Cloud Border Dies, Stitched Rectangle Dies, Haley Alphabet Dies)

I wanted to keep this card light and bright even though I’ve got some Spring showers going on, so I started with a cloud background lightly inked with Tumbled Glass Distress ink. First, I die-cut a piece of white cardstock with a Stitched Rectangles Die, inked the very top with Tumbled Glass and adhered it centered on an A2 card front. I then die-cut 2 more pieces of white cardstock using the same Stitched Rectangle Die and die-cut them 3 times using the Fluffy Clouds Border Dies. (the die-cut cloud pieces measure 1 1/4" high, 2 1/4” high and 3 1/4" high) I inked each piece near the cloud edge with Tumbled Glass and layered/adhered the pieces to the card front.

Next, I die-cut a piece of white cardstock with a Stitched Semi-Circle Die and inked the top half with Tumbled Glass and Broken China Distress ink. I die-cut a second piece of white cardstock with the same Stitched Semi-Circle Die and then die-cut across the bottom of the semi-circle with the grass border die from the Picket Fence Border Die. I inked the grass with Twisted Citron and Mowed Lawn Distress ink and adhered it to the bottom of the semi-circle. I adhered the semi-circle to the card front even with the bottom stitched line of the rectangle and centered.

Sunny Studio Stamps: Rainy Day Die Focused Card by Bobbi Lemanski (featuring Fluffy Cloud Border Dies, Stitched Rectangle Dies, Haley Alphabet Dies)

I die-cut the cute rain boots from the Rainy Days Dies from white cardstock. I colored the main boot portion with Copics and inked the base piece underneath and the top of the boot with Twisted Citron Distress ink. I inked the sole of the boot with Broken China Distress ink. I also inked the raindrops (die-cut using the Rainy Days Dies) with Broken China Distress ink and heat embossed them with clear embossing powder to give them a wet look.

To finish, I stamped the “wishing you” and “of happiness” sentiments from the Over the Rainbow Stamps in teal ink on blue cardstock and die-cut them using the ribbon die from the Ribbon & Lace Border Dies and a flag die from the Stitched Rectangles Dies to notch the ends. I die-cut the “showers” sentiment using the Hayley Lowercase Alphabet Dies from ivory cardstock and teal cardstock and layered them slightly overlapping to help it stand out a bit more.

I hope you enjoyed and thanks for stopping by today! For more inspiration, please visit my blog www.inkredibleadventures.com and you can also find me on Instagram as @cathy.chapdelaine.

-----------------------------------------

Hi friends! It’s Bobbi here with a card to celebrate just about anything. There’s something so fun about brightly colored umbrellas. I was inspired by a trip to the s where we visited Calle de las Sombrillas, a street of brightly hanging umbrellas. When I saw this Rainy Days Dies set, it reminded me of all those hanging umbrellas over the street.


Sunny Studio Stamps: Rainy Day Die Focused Card by Bobbi Lemanski (featuring Hayley Alphabet Dies)


I’m using three new sets from the latest release including Rainy Days Dies and the Hayley Alphabet dies – Uppercase dies and Lowercase dies.


This 5″ X 7″ card begins with a watercolor background in blues, greens and aquas on watercolor paper. Once my base layer was dry, I splattered blue watercolor paint over it to look like tiny raindrops. Next, I cut twelve colors of umbrellas in bold brights and combined two tones of each color to make the six umbrellas you see on the card. I glued all the pieces together and added a few highlight marks using a white Gelly Roll pen. I assembled all of my remaining die cut pieces and made six more umbrellas to use on a later project.


Sunny Studio Stamps: Rainy Day Die Focused Card by Bobbi Lemanski (featuring Hayley Alphabet Dies)


Using some white cording, I attached two strings diagonally across the card front. I attached the six umbrellas, positioning them so that they look like they are hanging from the strings. I attached them using Scrapbook Adhesives foam tabs to make them stand out, too. I cut the Hayley letters to spell out, “OH, happy day” and attached them to the card front. Lastly, I attached blue and white die cut teardrops to the front and added some clear drops using Pearl Pen transparent.


Thanks for stopping by today. If you want to see more ideas and inspiration from me, subscribe to my blog, BobbiHartDesign.com. I’ll send you updates on new posts! You can also find me on Instagram as @BobbiHartDesign and on Facebook as BobbiHartDesign.


Sunny Studio Supplies Used:

Picket Fence Border Dies
Shop at:
Sunny Studio
Stitched Rectangle Dies
Shop at:
Sunny Studio
Over The Rainbow Stamps
Shop at:
Sunny Studio
Fluffy Clouds Border Dies
Shop at:
Sunny Studio
Stitched Semi-Circle Dies
Shop at:
Sunny Studio
Hayley Lowercase Alphabet Dies
Shop at:
Sunny Studio
Hayley Uppercase Alphabet Dies
Shop at:
Sunny Studio
Rainy Days Dies
Rainy Days Dies
Shop at:
Sunny Studio
Ribbon & Lace Dies
Ribbon & Lace Dies
Shop at:
Sunny Studio

Monday, February 13, 2023

Build-a-Birdhouse Cards with Cathy and Bobbi

Hey friends! Cathy here sharing a tweat card today featuring the cute Build-A-Birdhouse Dies! I just love the different detailed pieces that you can use to make each birdhouse unique.

Sunny Studio Stamps: Build-A-Birdhouse Spring Themed Friendship Card by Cathy Chapdelaine (featuring Little Birdie, Picket Fence Border Dies, Fluffy Cloud Border Dies)

To begin this mini slimline card, I cut a piece of white cardstock 3” x 6” and lightly inked the very top with Spun Sugar Distress ink. I die-cut 3 panels with the Fluffy Clouds Border Dies and overlapped them on the 3” x 6” panel after inking each lightly with Tumbled Glass Distress ink. The top panel measures 1 1/2" x 3” and I adhered it approximately 1/2” down from the top edge. The middle cloud panel measures 1 1/2" x 3” and the bottom panel measures 3” x 4”. I stamped the “tweatheart” sentiment from the Little Birdie Stamps on the middle cloud panel in Memento London Fog ink and heat embossed it with clear embossing powder before adhering it to the 3” x 6” panel.

Next, I cut a white card base 6 1/4” x 6 1/2" (scored on the 6 1/2" side at 3 1/4" and folded in half) and adhered the 3” x 6” panel to the card front. I die-cut a fence from white cardstock using the Picket Fence Border Die, added some gray Copic details and adhered it 1” from the bottom edge of the 3” x 6” panel. I inked 2 pieces of white cardstock (1 1/4" x 3” and 3/4" x 3”) with Shabby Shutters Distress ink and die-cut the top edge of each with the grass border die from the Picket Fence Die. I adhered the 1 1/4” x 3” piece to the bottom edge of the 3” x 6” panel slightly overlapping the fence. Before I adhered the 3/4” x 3” grass piece, I needed to adhere a birdhouse and tulips. I die-cut the Build-a-Birdhouse elements from gray, yellow, pink and white cardstock and Copic colored the white house portions. I adhered a birdhouse to the left side of the card front. For the tulips, I stamped and Copic colored the tulip planter from the Garden Critters Stamps and die-cut it using the coordinating dies. I adhered it over the post of the birdhouse and then adhered the bottom grass piece so that only the tulips were peeking out. I then adhered the second birdhouse.

Sunny Studio Stamps: Build-A-Birdhouse Spring Themed Friendship Card by Cathy Chapdelaine (featuring Little Birdie, Picket Fence Border Dies, Fluffy Cloud Border Dies)

To finish, I stamped 2 adorable birds from the Little Birdie Stamps on Neenah Classic Crest 80lb solar white cardstock, colored them with Copics and die-cut them using the coordinating dies. I added 3 little die-cut hearts from the Build-A-Birdhouse Dies. Finally, I die-cut the “hello” sentiment from the Slimline Scalloped Frame Dies from a light and dark yellow cardstock and overlapped them slightly to help it stand out a bit more.

I hope you enjoyed and are looking forward to Spring as much as I am! Thanks for stopping by today! For more inspiration, please visit my blog www.inkredibleadventures.com and you can also find me on Instagram as @cathy.chapdelaine.

----------------------------------------------

Hi friends, Bobbi here. With spring just a few months away, It’s time to start thinking about singing birds and cute birdhouses. Sunny Studio Stamps has a cute new birdhouse die set, called Build-a-Birdhouse, that has a number of fun design elements to make one-of-a-kind houses for our feathered friends. There’s two darling birds in the set, too.

Sunny Studio Stamps: Build-A-Birdhouse Spring Themed Birthday Card by Bobbi Lemanski (featuring Big Bold Greetings, Fluffy Cloud Dies)

To make this 5″ X 7″ card, I splattered watercolor paints in vibrant colors on a white card base. I added a cloudy sky with a stitched cloud design. Sunny Studios offers a cute stitched cloud die set called Fluffy Clouds to make a fun stitched sky background. I applied Distress Oxide Ink in Tumbled Glass and Salvaged Patina for a varied sky color. I attached the blended background, bordered with 2- 1/8″ strips made from green pattern paper from the Spring Fever paper pad on the top and bottom, and attached it to the splattered front panel.

I made three birdhouses, mixing and matching the die cut pieces. Each one was colored using shades of pink, oranges and aquas. Additional details were added like scalloped roofs, hearts, flowers and more. Each birdhouse was adhered to a post and attached to the card. I added a number of blue birds to the houses, too.


Sunny Studio Stamps: Build-A-Birdhouse Spring Themed Birthday Card by Bobbi Lemanski (featuring Big Bold Greetings, Fluffy Cloud Dies)


Using the Big Bold Greetings stamp set and coordinating dies, I stamped the “Happy Birthday” in two tones of blue and cut it out. I attached it with foam tabs to make it stand out. I added additional flowers around the greeting and a few sparkly sequins, too.


Thanks for stopping by today. If you want to see more ideas and inspiration from me, subscribe to my blog, BobbiHartDesign.com. I’ll send you updates on new posts! You can also find me on Instagram as @BobbiHartDesign and on Facebook as BobbiHartDesign.


Sunny Studio Supplies Used:

Picket Fence Border Dies
Shop at:
Sunny Studio
Fluffy Clouds Dies
Fluffy Clouds Dies
Shop at:
Sunny Studio
Fluffy Clouds Border Dies
Shop at:
Sunny Studio
Slimline Scalloped Frame
Shop at:
Sunny Studio
Little Birdie Stamps
Shop at:
Sunny Studio
Little Birdie Dies
Little Birdie Dies
Shop at:
Sunny Studio
Big Bold Greetings Stamps
Shop at:
Sunny Studio
Big Bold Greetings Dies
Shop at:
Sunny Studio
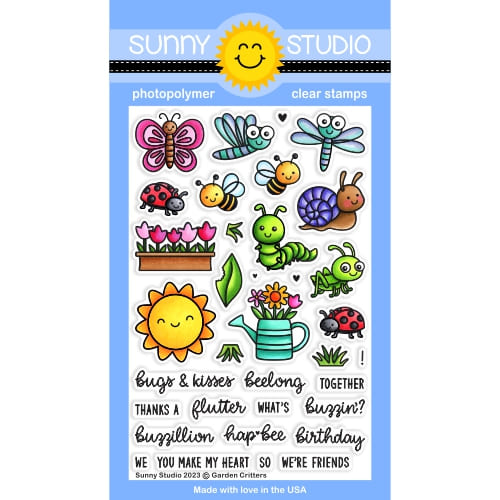
Garden Critters Stamps
Shop at:
Sunny Studio
Garden Critters Dies
Shop at:
Sunny Studio
Build-A-Birdhouse Dies
Shop at:
Sunny Studio
Spring Fever Paper
Spring Fever Paper
Shop at:
Sunny Studio

Wednesday, November 16, 2022

Cozy Christmas Cards with Marie and Alma

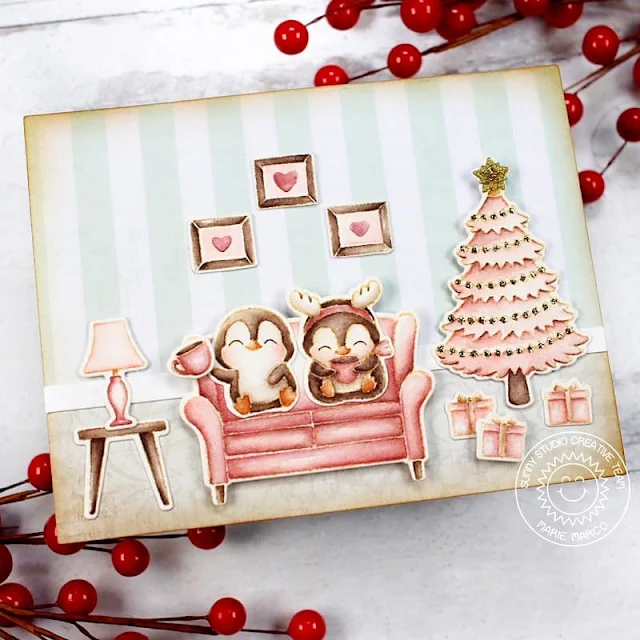
Hello Crafty Friends, Marie here. So happy to be back on the blog! Today I am sharing a simple Holiday card featuring the super cute Cozy Christmas stamps. Together with the super adorable Penguin Party stamps, with its super adorable penguins, I created a vintage inspired cozy Christmas scene. 

Sunny Studio Stamps: Cozy Christmas Holiday Card by Marie Marco (featuring Penguin Party)

To create this card, I started by stamping out all my images using  Antique Linen Distress Ink onto watercolor paper. I color all my images using Faber-Castell Watercolor Pencils. I then cut out all my images using the Cozy Christmas dies as well as the Penguin Party dies. After cutting all my images, I set it aside to create my super easy background using only pattern paper. First, I die cut my A2 Size Base panel from 110 lb heavy weight cardstock. I always use Neenah Solar White for all my card bases. Using the same A2 size rectangle die, I cut 2 different sheets of vintage paper. 

Sunny Studio Stamps: Cozy Christmas Holiday Card by Marie Marco (featuring Penguin Party)

To create the look of a living room wall, I took the paper with minty vertical stripes and adhered the whole A2 sheet to my base. I then took the paper that would become the floor, and cut it and then adhered that to the bottom portion. To create the base board, I just cut a strip of white cardstock the length of my panel and glued it on top of the floor paper where it meets the minty stripped wall. 

Once I was finished playing around with the placement of my images, I glued everything down using a combination of double sided tape adhesive, Bearly Art Precision Craft Glue, and foam tape which I added to the sofa for dimension. I then placed my sentiment from Cozy Christmas on the inside of my card. For my last finishing touch, I used some gold Stickles Glitter Glue to embellish my pink Christmas tree. I love pink and gold together! 

I absolutely love how this card came together! So simple and cute! I hope we are all on top of our card crafting game as the holidays are really fast approaching now! Thanks so much for joining me today and for allowing me to share with you my passion for cardmaking! Until next week! Happy Crafting! 

-----------------------------------------------

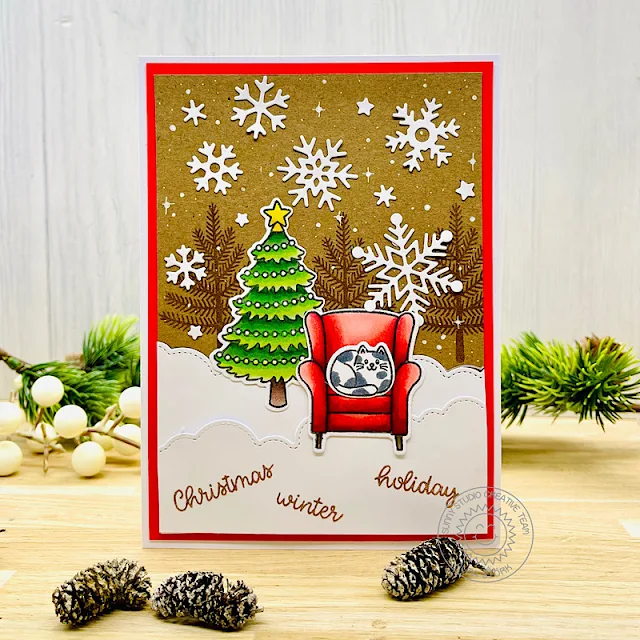
Hi my friends. Alma here, and today I want to show you a super sweet Christmas card with the Cozy Christmas Stamps. I cut a rectangle card and die-cut a lot of snowflakes  from the Snowflake Circle Frame Dies. I stamped the trees from the Santa Clause Lane Stamps with brown ink.

Sunny Studio Stamps: Cozy Christmas Holiday Card by Alma Störk (featuring Snowflake Circle Frame Dies, Santa Claus Lane, Fluffy Cloud Border Dies)

Then I glued the Snowflakes on the background and added a lot of snowflake highlights with a white gel pen. Now I die-cut the Fluffy Clouds Border Dies and I used the "clouds" as snow.

Sunny Studio Stamps: Cozy Christmas Holiday Card by Alma Störk (featuring Snowflake Circle Frame Dies, Santa Claus Lane, Fluffy Cloud Border Dies)

 
After that I colored the images from the sweet Cozy Christmas Stamps with Copics and die-cut the images with the Cozy Christmas Dies and I glued all together. Finally I stamped the three sentiments from the Cozy Christmas Stamps. Happy Winter!

Sunny Studio Supplies Used:

Fluffy Clouds Border Dies
Shop at:
Sunny Studio
Santa Claus Lane Stamps
Shop at:
Sunny Studio
Santa Claus Lane Dies
Shop at:
Sunny Studio
Snowflake Circle Frame
Shop at:
Sunny Studio
Cozy Christmas Stamps
Shop at:
Sunny Studio
Cozy Christmas Dies
Cozy Christmas Dies
Shop at:
Sunny Studio
Penguin Party Stamps
Shop at:
Sunny Studio
Penguin Party Dies
Penguin Party Dies
Shop at:
Sunny Studio