Showing posts with label Christmas Home. Show all posts

Friday, November 6, 2020

Victorian Christmas Cards with Rachel and Candice

Hello friends! It's Rachel here with a single-layer card featuring the new Victorian Christmas Stamp Set. I combined this set with the Christmas Home Stamp Set to create a fun winter scene.

Sunny Studio Stamps: Victorian Christmas Christmas Home Christmas Card by Rachel Alvarado

To start, I first stamped my images using a masking technique onto a 4.5" X 5.75" piece of Neenah Solar White 110lb Card Stock. I used some Gina K. Designs Magic Masking Sheets to mask my images as I worked so that I could ink blend my background.

For my background, I blended some Tattered Rose, Spun Sugar, Milled Lavender, and Mermaid Lagoon Distress Oxide Inks. I used a #4 round brush to splatter some water on this piece and then quickly blotted it dry with a clean paper towel. I then splattered it again with some diluted opaque white and purple paint for a snowy effect.

Sunny Studio Stamps: Victorian Christmas Christmas Home Christmas Card by Rachel Alvarado

Copic Color Combos Used: Window Trim and Door : BG72, BG75; Reds: R14, R46, R89; Greens: YG01, YG06, YG17; Warm Grays: W00, W0, W2, W4; Roof: W5, W7; Browns: E41, E42, E43; Snow: B0000, B000, B00, B02; Cool Grays: C00, C1

Once finished with that step, I then removed my masking sheets and set my panel aside to dry. Once dry, I trimmed my panel down to 4.25" x 5.5" and then colored my images with Copic Markers.

I hope you enjoyed my card today! Wishing you all a lovely day and happy weekend!

------------------------------------------------------

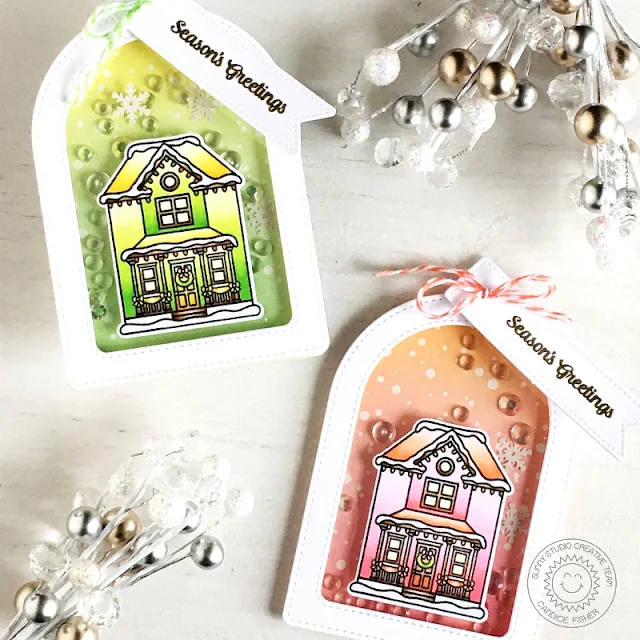
Hello! Candice here with you today! I love this Victorian Christmas house for making beautiful Christmas tags!

Sunny Studio Stamps: Victorian Christmas Frosty Flurries Stitched Arch Dies Christmas Tags Candice Fisher

I used these Sunny Studio products for my shaker tags:

For the tag base, I first die cut the two medium stitched arch dies taped together to create my frames. I then took the larger of the two and die cut the back from Bristol Smooth cardstock.

I heat embossed the snowfall in white and then inked one with Worn Lipstick and Dried Marigold and the other with Cracked Pistachio and Squeezed Lemonade. To create the shaker, I first put the acetate behind the window and then added double layer of foam tape on the back of the frame. I placed my sequins in the center and attached the frame to the background.

Sunny Studio Stamps: Victorian Christmas Frosty Flurries Stitched Arch Dies Christmas Tags Candice Fisher

Next, I stamped the the Victorian houses, colored them with Copic markers and then used the coordinating dies to cut them out and adhered them to the acetate with strong adhesive. To finish the tags, I cut 2 stitched banners, heat embossed the sentiment with gold and used colored twine to tie them to the tag tops!

I hope you are inspired to make fun Holiday tags for your gifts this year! Thank you for visiting today!

Sunny Studio Supplies Used:

Christmas Home Stamps
Shop at:
Sunny Studio
Christmas Home Dies
Christmas Home Dies
Shop at:
Sunny Studio
Frosty Flurries Stamps
Shop at:
Sunny Studio
Fancy Frames- Rectangles
Shop at:
Sunny Studio
Stitched Arch Dies
Stitched Arch Dies
Shop at:
Sunny Studio
Victorian Christmas Stamps
Shop at:
Sunny Studio
Victorian Christmas Dies
Shop at:
Sunny Studio

Thursday, August 20, 2020

Sneak Peek: Holy Night, Inside Greetings & Victorian Christmas

Hello and welcome to day 5 of our Fall & Winter Peek Week!  All this week I am showcasing cards using our newest collection which will be available to purchase tomorrow morning. 

Today's sneak peeks include a new 4x6 Nativity stamp set, two 4x6 Sentiment Stamp sets for the inside greetings on your holiday cards, a second new 6x6 paper pack and a mini 2x3 holiday house stamp to compliment our previoulsy released Christmas Home Stamps.  Are you ready? Let's get started!

Card No. 1:  My first card uses our new Holy Night Stamps. This is a set I have wanted to create for the previous two Christmas seasons, but I was always too nervous I wouldn't be able to bring it to life the way I envisioned. I wanted to have a set that included some cute animals welcoming the birth of Jesus just like my favorite children's Christmas book The Crippled Lamb by Max Lucado. I'm happy I was finally able to overcome my fear though because I had so much fun using it to create today's Christmas cards.

I started by inking up a white cardstock panel with Salty Ocean, Blueprint Sketch, Chipped Sapphire and Black Soot distress inks, working darker towards the outer edges. This set comes with a number of different sized shining stars so I started by heat embossing the largest one near the center just over where I planned to position the baby Jesus and added the smaller ones throughout my sky, adding small white dots between them with my white sharpie extra fine point paint pen.

For my ground I die-cut a piece of brown cardstock with a sloped die from the Slimline Nature Border dies and inked up the bottom half with some vintage photo distress ink. After it had dried I heat embossed a sentiment from the set using clear VersaMark ink with white embossing powder. I decided to fussy cut my images which I had colored with Copic markers, but I saved myself some trouble with cutting out the rafters on the stable and just cut the outside edge. For the inside portion I colored it with a coordinating Copic marker and no one would ever be the wiser.  ;)

Sunny Studio Blog: Oh Come Let Us Adore Him Starry Night Nativity Slimline Handmade Holiday Card (using Holy Night 4x6 Clear Stamps)

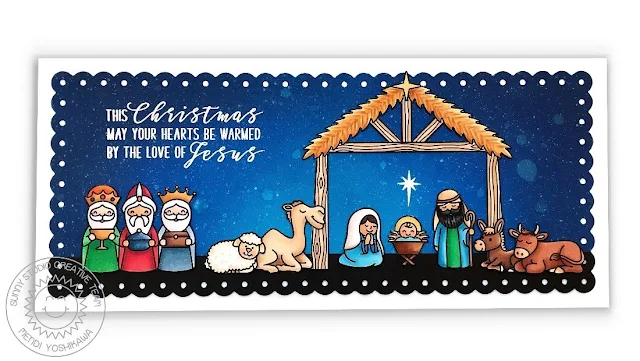
Card No. 2:  Up next is a slimline card that gave me the extra room I needed to include the three wise men from the Holy Night Stamps. I inked up my paper with the same colors that I used on my first card, but this time I spritzed it with water and flicked on some watered down white paint. I then die-cut the panel when it was dry with our new Slimline Scalloped Frame dies and cut a second portion out using black cardstock to form my ground. This time I only used the simple large star from the set and heat embossed my sentiment using our new Inside Greetings Christmas Stamps.
Sunny Studio Blog: This Christmas May Your Hearts Be Warmed By The Love Of Jesus Nativity Slimline Handmade Holiday Card (using Holy Night Stamps, Inside Greetings Christmas Stamps and Slimline Scalloped Frame Dies)

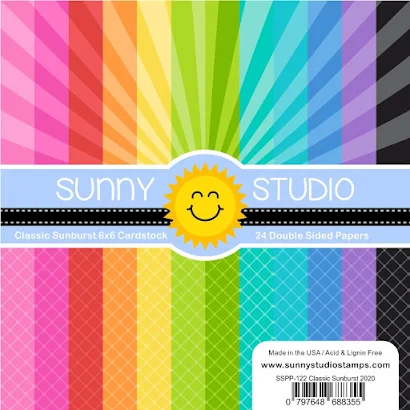
Card No. 3: This card makes use of our new Classic Sunburst paper which features the sunray print in all your favorite bright colors (previously we only had this style available in our pastel version) and it includes a nice diagonal grid print on the reverse side that is identical to the versatile grid print found in our Very Merry Paper pack. I elected to come out with two basic paper packs that can be used all year long over a traditional Christmas paper set this year since our small business is starting to outgrow our limited storage space and I need to be more selective about which new papers I add. I'm so happy to have these 4 basic new prints though that can be enjoy throughout the year!

I kept the rest of my card really simple, heat embossing my "O Holy Night" Sentiment from the Holy Night set near the center in white embossing powder and using the Slimline Basic Border dies to add stitching to my cardstock strip and a simple white scalloped edge.
Sunny Studio Blog: Baby Jesus in the Stable with Animals Sunburst Nativity Scene Handmade Holiday Christmas Card (using Holy Night Stamps, Slimline Basic Border Dies & Classic Sunburst Paper Pack)
Card No. 4: For my last Holy Night card I pulled out our Window Trio Square dies to create the three stitched windows in the center of my white cardstock panel and then added stitching along the edges of that same panel with ric-rac trim using our Slimline Basic Border dies.  I used our Gingham Jewel Tones Paper peeking out from behind the windows and then embossed a piece of navy cardstock using our Dapper Diamond Embossing folder.  

Sunny Studio Blog: Wise Men Still Seek Him Nativity Scene Handmade Holiday Christmas Card (using Holy Night Stamps, Window Trio Square Dies, Slimline Basic Border Dies & Dapper Diamonds Embossing Folder)

Card No. 5: Switching gears I have some cards featuring our new Victorian Christmas 2x3 Stamps. My first card lets the house in this set take center stage, using our Stitched Semi-Circle Dies to create a snowglobe and base. For my base, I cut it out using our Amazing Argyle Paper pack and trimmed off part of my circle with my paper trimmer, adding a stitched edge to match the other stitching with out Slimline Basic Border dies. For my label, I stamped the Season's Greetings phrase from the stamp set onto a cutout using our Stitched Oval Dies.  I mounted my completed snow globe onto a piece of red Classic Sunburst Paper.

Sunny Studio Blog: Season's Greetings House & Snowman in Snowglobe Handmade Holiday Christmas Card (using Victorian Christmas Stamps, Stitched Semi-Circle Dies, Stitched Oval Dies, Classic Sunburst Paper & Amazing Argyle Paper)

Card No. 6:  For this card I wanted to recreate the look of San Francisco's Alamo Square (inspired by this photo here) at Christmas time. Then of course my husband had to point out to me that it doesn't snow in San Francisco and while I thought that it probably didn't do it often, "never" seemed pretty unlikely. Well, it seems we were both right. According to google snow has fallen and stuck on the ground 11 times since the gold rush so let's just pretend it was one of those years or as my daughters threw me a bone and told me maybe it could pass for a few other cities across America.  LOL!

I started by inking up my background with spun sugar, faded lilac, salty ocean and blueprint sketch distress inks.  For my scene I paired the Victorian Christmas house with the house and bare trees from our Christmas Home stamps and then die-cut my city backdrop using our Cityscape Border dies.
Sunny Studio Blog: Season's Greetings San Francisco Alamo Square Park At Christmas Handmade Holiday Card (using Victorian Christmas, Christmas Home Stamps & Cityscape Border Die)

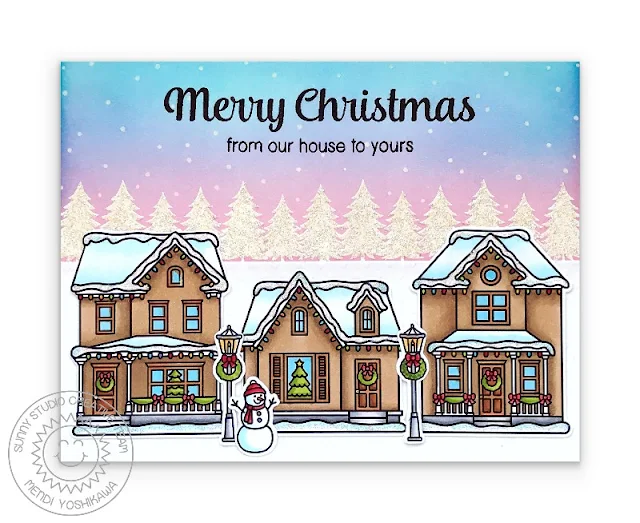
Card No. 7: My next card uses all three houses from the Victorian Christmas and Christmas Home Stamps for a beautiful snowy scene. To set my scene, I inked up my background with spun sugar, faded lilac & tumbled glass distress ink and then heat embossed two sets of the fir tree borders from our Here Comes Santa stamps using Versamark ink and white embossing powder. My embossing powder was looking a bit cream in color next to my white snowy ground though so I decided to add some Stardust stickles over the top of the embossing to help it blend better and it turned out to be a happy solution. I really love the sparkle it adds to my card. I then added some snowflakes to my sky using a white Sharpie extra fine paint pen.

For my sentiment I used the "Merry Christmas" greeting from our Merry Sentiments stamps and then the "from our house to yours" from the Christmas Home set. The little snowman and lamp posts from the same Christmas Home set completed my scene. I love having a third house to go with this set so I can create a full neighborhood with three unique homes!

Sunny Studio Blog: Merry Christmas From Our House To Yours Neighborhood Homes with Glittery Snow, Snowman, Pink Sunset and Snowflakes Handmade Holiday Card (using Victorian Christmas, Christmas Home, Here Comes Santa & Merry Sentiments Stamps)

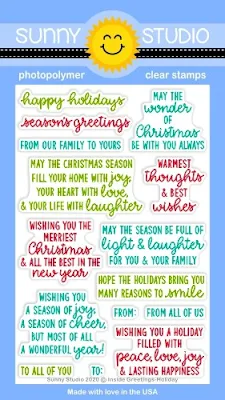
Card No.8: For my last card of the day, I have a card featuring our new Inside Greetings Christmas stamps. I had created this small scene a couple years ago with our Christmas Chapel Stamps, Christmas Home Stamps and Sunny Semi-Circle Dies, but then just set it aside because life got busy and I wasn't quit sure how to fill the space above the church where I felt there was a bit of a gap.

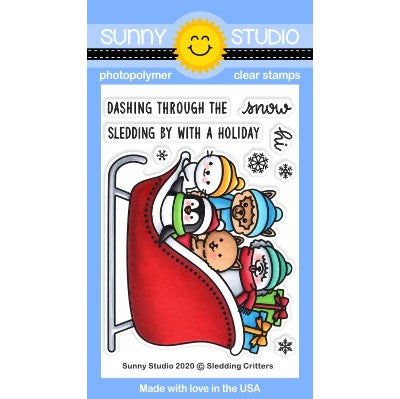
Well this beautiful greeting came to my rescue, as did the tiny snowflakes from our Sledding Critters Stamps (being shared tomorrow) and the tiny circle flakes from our Winter Scenes Stamps.  I then mounted my little scene onto a piece of our brand new Classic Sunburst Paper in green to pick up the colors of the trees and wreaths.

Sunny Studio Blog: May The Miracle of Christmas Fill You With Joy Handmade Card (using Christmas Chapel, Christmas Home, Inside Greetings Christmas Stamps, Sunny Semi-Circle Dies & Classic Sunburst Paper)

That wraps up today's sneak peeks. I'm so happy to have you hang out with me today. I read all your comments and they mean so much!  I'd love to give a $25 gift code to one lucky winner using the rafflecopter below.  Make sure to keep checking back all this week for more peeks & prizes. The contests run through Wednesday, August 26th at Midnight PST with winners announced here on Sunday, August 30th. :)

a Rafflecopter giveaway

Sunny Studio Stamps Holy Night Nativity Faith Based Christmas Holiday 4x6 Clear Photopolymer Stamp Set  Sunny Studio Stamps Holy Night Metal Cutting Dies

Sunny Studio Stamps Inside Greetings Christmas Card Sentiments 4x6 Clear Photopolymer Stamp Set Sunny Studio Stamps Inside Greetings Holiday Card Sentiments 4x6 Clear Photopolymer Stamp Set

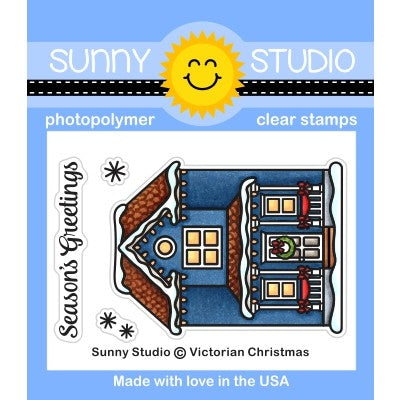
Sunny Studio Stamps Victorian Christmas Winter Holiday House 2x3 Clear Photopolymer Stamp Set  Sunny Studio Stamps Victorian Christmas House Metal Cutting Dies

Sunny Studio Stamps Classic Sunburst Sunray Sun Ray & Diagonal Grid 24 sheet Double Sided 6x6 Patterned Paper Pad

Sunny Studio Supplies Used:

Merry Sentiments Stamps
Shop at:
Sunny Studio
Sunny Semi Circles Dies
Shop at:
Sunny Studio
Memento Tuxedo Black Ink Pad
Shop at:
Sunny Studio
Tsukineko Jumbo Dauber
Shop at:
Sunny Studio

Christmas Chapel Stamps
Shop at:
Sunny Studio
Christmas Chapel Dies
Shop at:
Sunny Studio
Christmas Home Stamps
Shop at:
Sunny Studio
Christmas Home Dies
Christmas Home Dies
Shop at:
Sunny Studio
Window Trio- Square Die
Shop at:
Sunny Studio
Gingham Jewel Tones 6x6 Paper
Shop at:
Sunny Studio
Amazing Argyle 6x6 Paper
Shop at:
Sunny Studio
Dapper Diamonds Embossing
Shop at:
Sunny Studio
Here Comes Santa Stamps
Shop at:
Sunny Studio
Stitched Oval Dies
Stitched Oval Dies
Shop at:
Sunny Studio
Cityscape Border Dies
Shop at:
Sunny Studio
Stitched Semi-Circle Dies
Shop at:
Sunny Studio
Slimline Basic Borders
Shop at:
Sunny Studio
Slimline Nature Borders
Shop at:
Sunny Studio
Slimline Scalloped Frame
Shop at:
Sunny Studio
Scaredy Cat Dies
Scaredy Cat Dies
Shop at:
Sunny Studio

Versafine Onyx Black Ink
Shop at:
Sunny Studio
Classic Sunburst Paper
Shop at:
Sunny Studio
VersaMark Watermark Ink
Shop at:
Sunny Studio

Thursday, December 12, 2019

Feeling Frosty Cards with Vanessa and Anja

Hello to you! Vanessa here with a card using the adorable Feeling Frosty set. I used almost every snowman from the set to create this gathering of frosty friends.

Sunny Studio Stamps: Feeling Frosty Christmas Home Winter Themed Card by Vanessa Menhorn

First, I inked the front of a white card base with Distress Oxide Inks. Now I hand-cut snow hills from white cardstock, inked the edges with blue ink and adhered them. I stamped all the images onto white cardstock, colored them with Copic markers, die-cut the elements with the matching dies and adhered them to the card, raising some with foam tape.

Stamps and dies used: Feeling Frosty StampsFeeling Frosty Dies, Christmas Home StampsChristmas Home Dies, Gleeful Reindeer StampsGleeful Reindeer Dies

Sunny Studio Stamps: Feeling Frosty Christmas Home Winter Themed Card by Vanessa Menhorn

After I had added "snow" with a white gel pen, I stamped and heat-embossed the sentiment onto a strip of black cardstock with white embossing powder, trimmed it and adhered it.

I love these snowmen so much, they are the coolest gang :) Thank you for stopping by today!

-------------------------------------------------------

Hello everyone, Anja here to share a card made with the Feeling Frosty set which is one of my favorites. I already used it a couple of times and wanted to come up with something different. So I tried my hand on no-line coloring which I find quite intimidating to be honest.

Sunny Studio Stamps: Feeling Frosty Fancy Frame Dies Scenic Route Winter Themed Card by Anja Bytyqi

With the help of some masking, I created a one layer scene. I combined the Feeling Frosty snowmen and cups with the hillside border from the Scenic Route set. For a very light stamped color, I used the Inkon3 Fadeout No Line Coloring Detail Ink. I colored the images with Copic Markers and Prismacolor Pencils.

The sky was done by blending Distress Oxide Inks (Milled Lavender and Spun Sugar) and splattering white paint with a brush. I cut one of the Fancy Frames Square Dies from white cardstock to frame my little winter scene.

I think the sentiment is the perfect match for these snowman friends who share a cup of hot cocoa together. It's stamped in VersaMark Ink and heat embossed with Ranger Liquid Platinum Embossing Powder. I die cut a stitched banner and adhered it with foam tape. To finish off my card, I added White Clay Snowflakes and a Pink Clay Heart.

Thank you so much for stopping by! Wishing you a beautiful day!

Sunny Studio Supplies Used:

Gleeful Reindeer Dies
Shop at:
Sunny Studio
Gleeful Reindeer Stamps
Shop at:
Sunny Studio
Christmas Home Stamps
Shop at:
Sunny Studio
Christmas Home Dies
Christmas Home Dies
Shop at:
Sunny Studio
Fancy Frames-Square Dies
Shop at:
Sunny Studio
Feeling Frosty Stamps
Shop at:
Sunny Studio
Feeling Frosty Dies
Feeling Frosty Dies
Shop at:
Sunny Studio
Scenic Route Stamps
Scenic Route Stamps
Shop at:
Sunny Studio