Saturday, May 30, 2020

Guest Designer Spotlight: Savanna Safari Cards with Nicky Meek

Hey everyone, it's Nicky Meek here with you. Safari anybody? Today I'm happily guest designing for Sunny Studio Stamps again and I'm featuring the fun new stamp set Savanna Safari for my two cards I'm sharing here.

Sunny Studio Stamps: Savanna Safari Birthday Cards by Nicky Meek

My first card is a slimline card with finished dimensions of 8 1/2 x 3 1/2 inches. I prepared the base and set it to one side and then took a panel and stamped and ink blended it using several colours in the yellow and orange family for a sunset scene.

Sunny Studio Stamps: Savanna Safari Birthday Cards by Nicky Meek

On Copic friendly cardstock the cute critters from the stamp set were stamped and Copic coloured, die cut with the coordinating dies, and applied to the scene with foam tape. Points were highlighted with a white gel pen.

The sentiment was stamped and applied with foam tape and I finished the card by using a black gel pen to dot in some ground texture and add the birds to the sky.

Sunny Studio Stamps: Savanna Safari Birthday Cards by Nicky Meek

I wanted to create something quite a bit different for my second card which is a standard A2 finished size.

Again I ink blended a panel using Distress Oxides and distressed it just a little. I took the 'watering hole' die and die cut the opening in the panel. I took the cut out piece and ink blended it and then die cut a little 'wave' opening so that the hippo's head could poke through. The panel was backed with foam tape and applied to the card base and then I recessed the 'water' in the gap created and adhered it.

Sunny Studio Stamps: Savanna Safari Birthday Cards by Nicky Meek

I stamped the greenery around the pond directly and also stamped and die cut some of the images for some dimension, backing them with foam tape and applying them. All other images were stamped on Copic friendly cardstock and applied with more of the foam tape and as planned the hippo was placed in the watering hole to cool off!

To finish out the card I dotted in some ground texture, stamped and applied the sentiment and added some tiny sparkling clear sequins in the water for a little interest.

Many thanks for stopping by today.

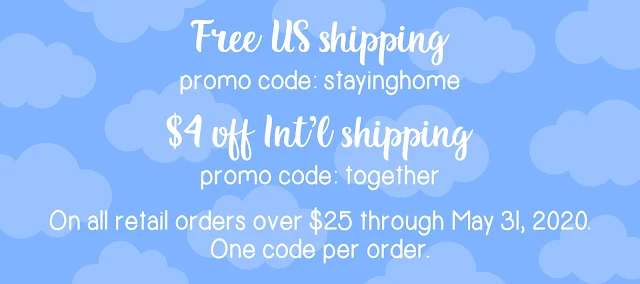
Just a reminder that tomorrow is the last day of our shipping promotion. Shop HERE using the code "stayinghome" (for US customers) or "together" (for international customers) on orders of $25 or more.  Limit one promo code per order.


Sunny Studio Supplies Used:

Savanna Safari Stamps
Shop at:
Sunny Studio
Savanna Safari Dies
Savanna Safari Dies
Shop at:
Sunny Studio

Friday, May 29, 2020

Grad Cat Cards with Rachel and Candice

Hello friends! Hope you are all doing well! It's Rachel here and I have a slimline card to share with you today featuring the new Grad Cat Stamp Set

Sunny Studio Stamps: Grad Cat Woo Hoo Purrfect Birthday Graduation Card by Rachel Alvarado

To start, I first stamped all of my images with Memento Tuxedo Black Ink onto a sheet of Neenah Solar White 110 lb Card Stock. I added some graduation caps from the Woo Hoo Stamp Set as well as some other feline friends from the Purrfect Birthday Stamp Set. I colored all of my images with Copic Markers and used the coordinating dies to cut them out.

Sunny Studio Stamps: Grad Cat Woo Hoo Purrfect Birthday Graduation Card by Rachel Alvarado

I then trimmed some smooth white card stock to 3.25" x 8.25 and lightly blended the center of it with some Peacock Feathers Distress Ink. I then splattered this blending with both some water as well as diluted teal watercolor paint. Once this piece was dry, I then stamped my sentiment with black ink as well as some stars using the small Round Acrylic Block. Lastly, I added my images with some 3D Foam Adhesive Tape for some added dimension.

Thanks so much for taking the time to stop by! Hope you have a wonderful weekend!

------------------------------------------------------

Hello my crafty friends! Candice here with you today! I have some fast and last minute mail friendly graduation cards using the Grad Cat stamp set for those graduates this year who are stuck with virtual graduations. 

Sunny Studio Stamps: Grad Cat Frilly Frame Dies Graduation Card by Candice Fisher

For the background, I first die cut some slimline scalloped frames using the partial die cut method with the Frilly Frames Hexagon dies. I then taped the edges and inked with Barn Door, which happens to be the high school colors for the graduates I am giving these to. You could easily change it to the colors of the high school your graduate is from!

I then stamped the "con-cat-ulations" in Versafine black in the top left corner. For the table, I trimmed black cardstock and heat embossed the "mew did it!" in white on the right side.

Sunny Studio Stamps: Grad Cat Frilly Frame Dies Graduation Card by Candice Fisher

Next, I stamped all my images from the Grad Cat stamp set, colored them with copic markers and used the coordinating dies to cut them out. I adhered them to the card front with glue and foam tape for dimension. To finish the card, I added some stars and white Nuvo drops. I used a gold pen to fill in some stars and the stripes on the books.
Thank you for stopping by and I hope this can help for some last minute grad cards!

Don't forget, there's still time to take advantage of our special offer on shipping through May 31st when you shop at our store HERE.


Sunny Studio Supplies Used:

Woo Hoo Dies
Woo Hoo Dies
Shop at:
Sunny Studio
Woo Hoo Stamps
Woo Hoo Stamps
Shop at:
Sunny Studio
Purrfect Birthday Stamps
Shop at:
Sunny Studio
Purrfect Birthday Dies
Shop at:
Sunny Studio
Frilly Frames Hexagon Dies
Shop at:
Sunny Studio
Grad Cat Stamps
Grad Cat Stamps
Shop at:
Sunny Studio
Grad Cat Dies
Grad Cat Dies
Shop at:
Sunny Studio

Thursday, May 28, 2020

Potted Rose Cards with Vanessa and Anja

Hello to you! Vanessa here with a slim line card using the wonderful Potted Rose setMy gardening-loving heart jumped when I saw that Mendi released a planting pot and I wanted to immediately "plant" all the different flower stamps! For today's card, I used the beautiful Sunflower Fields Stamps:

Sunny Studio Stamps: Potted Rose Sunflower Fields Friendship Card by Vanessa Menhorn

I first inked a panel of white cardstock with brown and yellow Distress Oxide Inks and added ink droplets. Then I stamped the sentiment with dark brown ink and adhered the panel to the white card base. Now I stamped my images onto white cardstock, die-cut all the pieces with the matching dies and adhered them to the card with foam-tape.

Sunny Studio Stamps: Potted Rose Sunflower Fields Friendship Card by Vanessa Menhorn

I used various inks from different manufacturers. Here comes a list if you are interested:

Flowers: Hero Arts Shadow Inks Pumpkin Pie, Butter Bar, Soft Yellow. MFT Sunshine, Milk Chocolate. Ranger Distress Ink Tea Dye, Vintage Photo.

Leaves: Hero Arts Shadow Ink Green Hills, MFT Banana Split, Memento Bamboo Leaves, FSJ Kiwi Slice.

Pot: Distress Oxide Ink Carved Pumpkin, Rusty Hinge. Ranger Distress Ink Tea Dye.


Happy gardening! Have a beautiful week :)

--------------------------------------------------

Hi everyone, Anja here and today's floral card features another gorgeous layering stamp set. The new Potted Rose Stamps can be combined with the Everything's Rosy Stamps and I really like the terracotta pot.

Sunny Studio Stamps: Potted Rose Everything's Rosy Frilly Frame Dies Stitched Arch Dies Friendship Card by Anja Bytyqi

I started off with a white card base which is slightly smaller than the standard A2 size. I created a frame from light grey cardstock by combining the largest of the Stitched Arch Dies with the stitched rectangle die from the Frilly Frames Retro Petals set.

Next, I stamped the roses, leaves and the flower pot with dye inks (find the ink colors below) and the help of a stamp positioning tool. I used the coordinating Potted Rose Dies and Everything's Rosy Dies to cut everything out. For some dimension, I layered the die cuts and used several heights of foam squares to adhere them. The frame was popped up with foam tape as well. Finally, I white heat embossed the sentiment from the Love Monkey set onto a black cardstock strip.

Sunny Studio Stamps: Potted Rose Everything's Rosy Frilly Frame Dies Stitched Arch Dies Friendship Card by Anja Bytyqi

Altenew Dye Inks used: Roses: Cotton Candy, Coral Berry, Ruby Red, Grapevine; Leaves: Frayed Leaf, Forest Glades, Evergreen; Terracotta Pot: Sunkissed, Simon Says Stamp Melon, Caramel Toffee

Thank you so much for stopping by! Hope your day is awesome!

Don't forget, there's still time to take advantage of our special offer on shipping through May 31st when you shop at our store HERE.


Sunny Studio Supplies Used:

Love Monkey Stamps
Love Monkey Stamps
Shop at:
Sunny Studio
Everything's Rosy Stamps
Shop at:
Sunny Studio
Everything's Rosy Dies
Shop at:
Sunny Studio
Sunflower Fields Stamps
Shop at:
Sunny Studio
Sunflower Fields Dies
Shop at:
Sunny Studio
Frilly Frames Retro Petals Dies
Shop at:
Sunny Studio
Potted Rose Stamps
Potted Rose Stamps
Shop at:
Sunny Studio
Potted Rose Dies
Potted Rose Dies
Shop at:
Sunny Studio
Stitched Arch Dies
Stitched Arch Dies
Shop at:
Sunny Studio

Wednesday, May 27, 2020

Frilly Frame Herringbone Frame Focused Cards with Tammy and Ana

Hi crafty friends! Tammy here with a fun card featuring the Frilly Frames Herringbone from the brand new release. I also used the new Savanna Safari Stampsone of my favorites, to create a sweet little jungle scene.

Sunny Studio Stamps: Frilly Frame Dies Savanna Safari Tropical Scenes Everyday Card by Tammy Stark

To begin, I cut a piece of Bristol smooth cardstock, A2 sized, and ink blended it with Abandoned Coral and Scattered Straw Distress Oxide inks. I splattered some water and some thinned Abandoned Coral ink onto my background with a paintbrush for some interest, and set aside to dry.

Next, I stamped, colored my images from the Savanna Safari and Tropical Scenes (palm trees) stamp sets. I added highlights to my colored images with a white gel pen, and die cut with the Savanna Safari Dies and Tropical Scenes Dies.

Next, I die cut an A2 sized piece of kraft paper using the Frilly Frames Herringbone Die. I poked out all of the herringbone pieces, and it left me with this beautifully intricate frame that I layered on top of my inked panel.

Sunny Studio Stamps: Frilly Frame Dies Savanna Safari Tropical Scenes Everyday Card by Tammy Stark

Next, I die cut a white frame three times using the Fancy Frames Circle Dies. I inked a circle to put behind the circle frame with Broken China, Tumbled Glass, and Scattered Straw Distress Oxide inks. I arranged my little scene, and the critters were then all attached with foam tape for dimension. I tucked the trees from Tropical Scenes behind the critters to create a fuller scene and fill in any sparse areas. 

To complete my card, I stamped the sentiment onto a black cardstock strip, heat embossed it with white embossing powder, and attached to my card front. The completed panel was then attached to an A2 white card base.

Thanks so much for stopping by today ... see you next time!

---------------------------------------------------------

Hi friends! Ana here today with a feminine congrats card showcasing Frilly Frames Herringbone dies from the new summer release! I needed a congrats card for our friend’s daughter who just graduated from college. She is a big lover of pink and also loves flowers, especially roses, so I combined those into my design for today’s card.

Sunny Studio Stamps: Frilly Frame Dies Everything's Rosy Banner Basics Everyday Card by Ana Anderson

I started by die cutting a piece of pink cardstock with Frilly Frames Lattice dies (which gave my frame the scallops) then inserted Frilly Frames Herringbone die and die cut the center. I love that all Frilly Frames and Fancy Frames dies work so well together and you can mix and match creating many different designs.

After die cutting the frame, I inked the edges with Pink Raspberry distress ink then added white pigment ink with a sponge to create some texture and interest, then added foam tape to the back to create dimension. I backed my die cut Herringbone frame with a piece of the same pink cardstock and a layer of striped vellum.

Sunny Studio Stamps: Frilly Frame Dies Everything's Rosy Banner Basics Everyday Card by Ana Anderson

I stamped the roses and leaves from Everything’s Rosy stamp set in pink and red colors and die cut them with coordinating dies. Next, I stamped the word congrats (from Everything’s Rosy set) on Banner Basics die cut and adhered the roses and the sentiment to the background. Finally, I embellished with White pearls and my card was finished!

I love how girly this card turned out! The Herringbone frame really stands out and looks so gorgeous and classy! Thank you for spending some time with us today, I will see you next week!

Don't forget, there's still time to take advantage of our special offer on shipping through May 31st when you shop at our store HERE.


Sunny Studio Supplies Used:

Fancy Frames-Circle Dies
Shop at:
Sunny Studio
Everything's Rosy Stamps
Shop at:
Sunny Studio
Everything's Rosy Dies
Shop at:
Sunny Studio
Frilly Frames Lattice Dies
Shop at:
Sunny Studio
Banner Basics Stamps
Shop at:
Sunny Studio
Banner Basics Dies
Banner Basics Dies
Shop at:
Sunny Studio
Savanna Safari Stamps
Shop at:
Sunny Studio
Savanna Safari Dies
Savanna Safari Dies
Shop at:
Sunny Studio
Tropical Scenes Stamps
Shop at:
Sunny Studio
Tropical Scenes Dies
Shop at:
Sunny Studio
Frilly Frames Herringbone
Shop at:
Sunny Studio

Tuesday, May 26, 2020

Sea You Soon Cards with Leanne and Mindy

Hello everyone! Leanne here and I'm taking you under the sea today. My card features images from a new mini stamp set called Sea You Soon. It coordinates so well with all the other ocean themed sets Sunny Studio has release previously. For this fun under water scene I chose to include some images from Magical Mermaids.

Sunny Studio Stamps: Sea You Soon Magical Mermaids Fancy Frame Dies Summer Themed Card by Leanne West

This card is A2 size. I started by creating an ink blended and paint splattered background. I used Cracked Pistachio and Peacock Feathers to achieve the pretty mint green and teal tones. I wanted to give the illusion of tiny fish swimming in the distance, so I stamped them in light grey ink. I Copic colored all the images (colors used listed below). 

Copic Markers used for coloring: Shark & rocks - C00, C1, C3, C5; Coral & large fish - V01, V12, V15; Tiny fish & octopus - B60, B63, B66; Seahorse - V22, V28; Seaweed - G000, G00, G02; Starfish & shell - R0000, R00, R20

Sunny Studio Stamps: Sea You Soon Magical Mermaids Fancy Frame Dies Summer Themed Card by Leanne West

I used a white gel pen to add lots of little dots and highlight details to the colored images. I knew I wanted to stamp the greeting in the top left area of the scene so I just arranged all the images with that in mind. I used the largest die from the Fancy Frames Rectangles dies to create a frame to give this card design a nice finished look.  

------------------------------------------------------

Hello! It’s Mindy from My Creative Scoop.Today I’m sharing a fun Summer card using the new Sea You Soon Stamp Set. The sentiment is from the Radiant Plumeria Stamp Set and I’m using the new Stitched Semi-Circle Dies.

Sunny Studio Stamps: Video by Sunny Studio Stamps on youtube · · · Sunny Studio Stamps: Sea You Soon, Tropical Scenes & Stitched Semi-Circle Dies Summer Slimline Card with Video Tutorial by Mindy Baxter

I used the Tim Holtz Alcohol Inks to create the ocean background. I used the colors Aquamarine and Pearl. I stamped my images in Memento Ink and stamped onto my Copic xpress it blending card.

Sunny Studio Stamps: Video by Sunny Studio Stamps on youtube · · · Sunny Studio Stamps: Sea You Soon, Tropical Scenes & Stitched Semi-Circle Dies Summer Slimline Card with Video Tutorial by Mindy Baxter

I used the following Copic Markers to color my images: Shark and Rocks – N5, N3, N1, N0; Pink Octopus and Coral – RV19, RV17, RV14, N3; Blue Octopus and Coral – BG07, BG05, BG02, N3; Orange Fish and Coral – YR07, YR04, Y17, N3; Yellow Coral – Y02, Y17, N3; Seaweed – YG13, YG17, N3; Sand – E30

Check out the video below, on how I put my card together + some Copic Coloring!


I really enjoyed making this card. I just love coloring cute little creatures! 

Don't forget, there's still time to take advantage of our special offer on shipping through May 31st when you shop at our store HERE.


Sunny Studio Supplies Used:

Magical Mermaid Dies
Shop at:
Sunny Studio
Magical Mermaid Stamps
Shop at:
Sunny Studio
Fancy Frames- Rectangles
Shop at:
Sunny Studio
Radiant Plumeria Stamps
Shop at:
Sunny Studio
Sea You Soon Stamps
Sea You Soon Stamps
Shop at:
Sunny Studio
Sea You Soon Dies
Sea You Soon Dies
Shop at:
Sunny Studio
Stitched Semi-Circle Dies
Shop at:
Sunny Studio