Friday, April 24, 2020

Sneak Peek: Introducing Grad Cat, Tea-riffic & Tool Time Mini Stamps

Hello and welcome to 5th and final day of our Summer Sneak Peek Week!  All this week I have been showcasing cards using our newest collection which is now shipping!!!

I've created a video showcasing not only today's sneak peeks, but all the new products from our Summer 2020 release and a closer look at the 48 cards I made with them (which you can view below or at our YouTube channel HERE).


Today's final peeks include three new 2x3 mini stamp sets and their coordinating dies celebrating Graduation, Mother's Day, Father's Day and so much more. 

Card No.1:  Up first is our new Grad Cat Stamps that comes with a little kitty wearing a graduation cap, a small bow tie, a book and three punny sentiments. When adding the book to the set I immediately knew I wanted to create a rainbow stack of books for the cat (or any critter really) to sit on.  And can I just say I adore the puns in this set!  To carry out my rainbow theme, I used a rainbow chevron pattern from our Surprise Party Paper pack.  Often my graduation cards follow a red, black & white theme for our local high school colors so it was really fun to break free of that and embrace the rainbow!
Sunny Studio Blog: Con-cat-ulations! Graduation Cat Rainbow Card by Mendi Yoshikawa (using Grad Cat 2x3 Stamp Set)


Card No. 2:  For my next card I couldn't resist the opportunity to stamp a whole litter of kitties in different colors. I inked behind them with some salty ocean distress ink and added a tiny red heart using our Basic Mini Shape Dies II to separate my two phrases. For their diplomas I used the smallest sized diploma from our Woo Hoo Stamps and completed my card with a small strip of red cardstock to tie with all the other red accents.
Sunny Studio Blog: Con-cat-ulations! Mew Did it! Punny Graduation Kitty Card by Mendi Yoshikawa (using Grad Cat & Woo Hoo Stamp Sets)

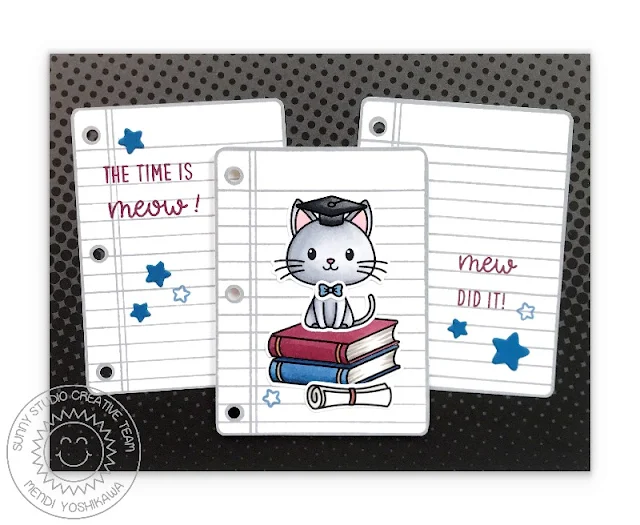
Card No. 3:  My last card with the new Grad Cat Stamps pairs the kitty with the notebook paper from our School Time Stamps and the diploma from our Woo Hoo Stamps. The lines of the notebook paper were just the right size to stamp my two punny sentiments on either side and I added a little extra realism by using a 1/8" circle punch to punch out the holes for each paper.  For my card background, I used a gradient from our Heroic Halftones Paper pack and stamped a couple stars from the Grad Cat stamps, together with some mini star die-cuts with our Basic Mini Shape Dies II.
Sunny Studio Blog: The Time is Meow! Mew Did it! Punny Graduation Kitty Card by Mendi Yoshikawa (using Grad Cat, School Time & Woo Hoo Stamp Sets)

Card No. 4:  Our second new mini set of the day is our new Tea-riffic Stamps. The set comes with a teapot, teacup and a punny sentiment that can be personalized for a friend, mother or sister like I did here. To decorate my teapot & teacup I added some flowers from our Chubby Bunny & Chickie Baby Stamps. I fussy cut mine, but you could also use the coordinating dies or mask them off and stamp them directly onto the tea images themselves.

I added the pair onto a Stitched Arch using our new dies, stamping the punny sentiment from the set. For my background I alternated yellow prints & patterned scraps from our Classic Gingham, Striped Silly and Polka-dot Parade Paper packs. A grosgrain ribbon tied with a bow completed my card, which was inspired by THIS card by Heather Pulvirenti.

Sunny Studio Blog: Tea-riffic Teapot & Teacup Yellow & Blue Floral Sister Card, using Stitched Arch Dies

Card No. 5:  Up next is a polka-dot take on the teapot & teacup. The Tea-riffic Stamps come with a full dot and a half dot making it possible to stamp a polka-dot pattern like the one shown here before you color your images. Everything is just cuter with polka-dots, right?  

I mounted my images onto one of our new Stitched Semi Circle dies and then offset a red and white layer of our Eyelet Lace Border Dies to add along the bottom. To tie in my pink heart print paper from our Flirty Flowers Paper pack, I inked on some worn lipstick distress ink behind my images. A few scattered White Pearls completed my card.
Sunny Studio Blog: You're A Tea-riffic Mom Red Polka-dot Teapot & Teacup Mother's Day Card (using Tea-riffic Stamps, Eyelet Lace Border Dies, Stitched Semi-Circle Dies & Flirty Flowers Paper)

Card No. 6:  For my last card using the Tea-riffic Stamps, I used the little happy face from the set to add personalities to  my Teapot & Teacup (which always make me think of Beauty & The Beast). To create my custom patterned paper, I started by inking up a piece of white cardstock with shaded lilac distress ink and then used a ruler to draw faint pencil lines to help me keep my stamped teacups straight. I then went back through and quickly stamped all the little faces and erased my pencil lines.

I finished my card with a couple scalloped layers using our Eyelet Lace Border Dies and another punny sentiment that works perfectly with this set from our new Summer Sweets Stamps.
Sunny Studio Blog: For My Bes-tea Punny Teapot & Teacup Handmade Card (using Tea-riffic Stamps & Eyelet Lace Border Dies)

Card No. 7: Our last new little stamp set of the day is called Tool Time which features a hammer, nail & hand saw with two different punny sentiments.  I once again decided to create my own patterned paper, this time drawing my light pencil lines on the diagonal.  A clear grid style ruler is perfect for this sort of technique because it makes it super easy to draw evenly spaced lines without a ton of measuring and honestly after I drew my lines I just eyeballed the rest, trying my best to keep each row somewhat evenly spaced and centering the nails with the row above and below.

When I was done with my pattern, I cut part of a circle out of the side using our new Stitched Semi Circle dies. I then cut another circle in the same size from white cardstock inked up with mustard seed and a little spiced marmalade distress ink along the bottom. I inlaid the circle into my opening and taped the two pieces together with some tape along the back. Lastly I die-cut a mat from both pieces using our Frilly Frames Retro Petals dies.

I then mounted them onto a blue A2 sized cardstock panel and tucked in a tape measure border from our School Time Stamps and a sentiment which was stamped onto a little banner piece from our Fancy Frames Rectangle Dies.
Sunny Studio Blog: Tool Time Congrats!  You Nailed It!  Punny Congratulations Card (using Tool Time & School Time Stamps, Stitched Semi-Circle Die, Fancy Frames Rectangle Dies & Frilly Frames Retro Petals Dies)

Card No. 8:  For my very last card of the week I used the little hand saw image to create a cute punny Father's Day card. I created my own faux wood frame by coloring some white strips of cardstock with my copic markers, adding some faint little squiggly lines to mimic the look of woodgrain.  I then created a little slice in each corner with my craft knife to insert the nails into, before adding foam tape to the back of my entire frame.  A piece of red cardstock which I embossed with our Woodgrain Embossing Folder seemed like the perfect way to complete this simple card.

I ended up using faces on both my Tool Time cards because I just love the personality it gives the hammer & saw, but I know it's not for everyone so I just wanted to make sure to point out that the happy face is a separate stamp that you can chose to use or omit. :)
Sunny Studio Blog: For the Best Dad I Ever Saw Punny Father's Day Card (using Tool Time Stamps & Woodgrain Embossing Folder)

That wraps up our Summer sneak peeks. I know I've unloaded a ton of information, but it means so much to have you hang out with me today. I'd love to give a $40 gift code to one lucky winner using the rafflecopter below.  If you missed our previous giveaways it's not too late to enter.  You can still go back through the past week and enter each contest. The contests run through Saturday at Midnight PST with winners announced here on Sunday, April 26th. :)

a Rafflecopter giveaway We know what a struggle it is to be confined to our homes as we continue to fight the Coronavirus. As many of us turn to paper crafts to help keep ourselves entertained, we'd like to help you save a little extra cash with these two shipping offers through May 31st.

Sunny Studio Stamps: Free Shipping Offer on Orders of $25+ through May 31, 2020

Also receive our newest free mini splash die that automatically comes with every order (while supplies last).

Sunny Studio Stamps: Summer 2020 Free Mini Splash Die with Every Order!

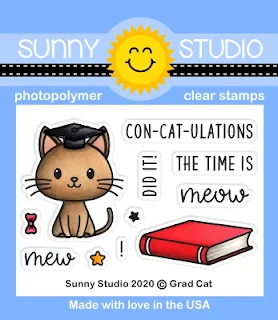
Here's a closer look at the new Grad Cat stamps & coordinating dies
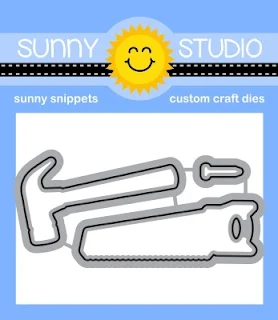
Tea-riffic stamps & coordinating dies and Tool Time stamps & coordinating dies used today (available for purchase on Friday, April 24th).

Sunny Studio Blog: Grad Cat Graduation Kitty 2x3 Clear Photopolymer Stamp Set     Sunny Studio Blog: Grad Cat Coordinating Metal Cutting Dies Set

Sunny Studio Blog: Tea-riffic Mother's Day 2x3 Clear Photopolymer Stamp Set     Sunny Studio Blog: Tea-riffic Coordinating Metal Cutting Dies Set

Sunny Studio Blog: Tool Time Nail, Hammer & Saw Father's Day 2x3 Clear Photopolymer Stamp Set     Sunny Studio Blog: Tool Time Coordinating Metal Cutting Dies Set

Other Supplies Used:
School Time Dies
School Time Dies
Shop at:
Sunny Studio
School Time Stamps
School Time Stamps
Shop at:
Sunny Studio
Woo Hoo Dies
Woo Hoo Dies
Shop at:
Sunny Studio
Woo Hoo Stamps
Woo Hoo Stamps
Shop at:
Sunny Studio

Classic Gingham 6x6 Paper
Shop at:
Sunny Studio
Striped Silly 6x6 Paper
Shop at:
Sunny Studio
Polka-dot Parade 6x6 Paper
Shop at:
Sunny Studio
Flirty Flowers 6x6 Paper
Shop at:
Sunny Studio
Surprise Party 6x6 Paper
Shop at:
Sunny Studio
Heroic Halftones 6x6 Paper
Shop at:
Sunny Studio
Woodgrain Embossing
Woodgrain Embossing
Shop at:
Sunny Studio
Eyelet Lace Borders
Eyelet Lace Borders
Shop at:
Sunny Studio
Fancy Frames- Rectangles
Shop at:
Sunny Studio
Stitched Arch Dies
Stitched Arch Dies
Shop at:
Sunny Studio
Stitched Semi-Circle Dies
Shop at:
Sunny Studio

Thursday, April 23, 2020

Sneak Peek: Cruisin' Cuisine, Summer Sweets & Stitched Arch Dies

Hello and welcome to day 4 of our Summer Sneak Peek Week!  All this week I'm showcasing cards using our newest collection which will be available to purchase tomorrow, April 24th

Today's sneak peeks include two new 4x6 food themed stamp sets for Summer (and even throughout the entire year), along with their matching dies and a new standalone die set. Let's jump right in!

Card No.1: Up first is a card using our new Cruisin' Cuisine Stamps which come with a food truck and various foods to add to the top, along with a bunch of tiny cute names to name your food trucks and several punny greetings too. The food and sentiments of this set mix and match perfectly with our previously released Fast Food Fun Stamps which I love! For this card I decided to borrow the Pizza and Taco image from that set to pair with the new cheeseburger & fries with the new Cruisin' Cuisine set.  

I was ecstatic to discover the little stitched rectangle die that comes with our Wrap Around Box dies is the perfect size to add three little scenes to a slimline style card!  I sponged on a bit of broken china distress ink the center of each one with my Jumbo Dauber and then layered them with my individual trucks.  As you will see as you scroll through my cards with this set there are three good spots where you can add the name of your food truck.  There are also some mini condiment bottles, ice cream, popsicles & donuts to decorate your truck with or add to the counter.

To add a little interest to my background I created my own patterned paper by cutting the three mini clouds from our Comic Strip Everyday dies from masking material. I cut approximately 3 of each and then worked section by section, inking up my surface with the broken china distress ink until the entire panel was covered. I then added another lighter layer of that same ink over the entire surface to give a cool tone-on-tone effect that is a bit less distracting than if the clouds were left pure white.
Sunny Studio Blog: You've Stolen A Pizza My Heart & You're the Burger To My Fries Punny Taco Food Truck Card (using Cruisin' Cuisine & Fast Food Fun Stamps, Sliding Window & Comic Strip Everyday Dies)

Card No. 2:
 Up next is a card where I turned the food truck into an ice cream truck using the Cruisin' Cuisine Stamps.  For my neighborhood scene I used a border from our Scenic Route stamps.  I thought I would be clever and curve the border on my Misti tool to match the curve of my stitched cardstock (which I die-cut using our Woodland Border Dies), but in hindsight I wish I would have left it straight because it's driving me nuts that the houses are looking crooked now. Have I ever mentioned I have a mild case of OCD?  


To help my ice cream on the top of the truck stand out against the backdrop of busy houses directly behind it, I chose to add a layer of vellum over the scene to keep the focus on my truck. Several designers on our team have been experimenting with this technique lately and I love how it makes objects in the foreground really pop!
Sunny Studio Blog: Have A Sweet Day Ice Cream Truck Neighborhood Card (using Cruisin' Cuisine & Scenic Route Stamps and Woodland Border Dies)

Card No. 3:  For my third card with the set, I went with an Asian theme and added some sushi with chopsticks to the top of my Cruisin' Cuisine Truck. To create my circular backdrop, I started by cutting a 4.25" wide circle from a heavy yellow cardstock. I then inked up one side of my Sunburst Embossing Folder with an ink brayer and some pigment ink, carefully laying my cardstock on the uninked side and closing the inked side down on it.  I held it tight to make sure it didn't shift and then ran it through my die-cutting machine. By adding ink only to the raised surface on the one side, I was able to get the two different tones for my sunrays. Pigment ink works best for this technique because it will stick to the slick plastic surface without beading up. I just make sure to quickly scrubbed my embossing folder with a little dish soap and a scrub brush and it's as good as new.  :)

For my city scene, I die-cut our Cityscape Border die from Grey Cardstock, added some strips white cardstock behind it to fill in the windows (which I had colored with my B000 copic marker) and then die cut the border again with that same circle die I used in my first step.  A cute punny sentiment from the set stamped onto our Banner Basics Stamps completed my scene. You can also switch around the phrases in the set to say "You're Soy Awesome". Lastly I mounted my scene onto a 5" x 5" square card base.
Sunny Studio Blog: Soy Happy We're Friends Punny Sushi Food Truck in the City Card (using Cruisin' Cuisine & Sunny Borders Stamps, Cityscape Border Die & Sunburst Embossing Folder)

Card No. 4:
  I love the idea of using several different food trucks all on one card. However they are large enough that it's no easy feat when it comes to an A2 sized card. I was able to get around this by stamping a truck and cutting it in half before coloring it and having half of it bleed off on one side and half on the other side.  It turned out to be a great way to show them off and I think they look cute all parked bumper to bumper like they are lined up on a street for lunch time.  For my background I used our stitched Fluffy Cloudy Dies. This die set comes with two options on how to die-cut clouds and I used the stitching only option for my card here.
Sunny Studio Blog: Hope You Have A Sweet Day Food Truck Card by Mendi Yoshikawa (using Cruisin' Cuisine Stamps & Fluffy Cloud Dies)

Card No. 5:  For my last card featuring the Cruisin' Cuisine Stamps I thought I would go clean and simple and show that the food images don't always have to be used with the truck.  

To create my card I cut three rectangles that are 4" wide by 1-5/8" high from our Classic Gingham Paper. I rounded the corners for each of them and lightly inked up the edges with Picked Raspberry, Broken China & Twisted Citron distress inks. To my eye at this point my card still looked a bit too plain so I decided to use a paper piercer to poke some small holes around the edges. It took a bit of extra time, but I did it while watching tv so it wasn't too bad and I was happy with how it added a little something extra to my simple card. Another alternative would be to stitch around them with your sewing machine (with or without the thread), but sadly my machine is out of commission right now so I had to do it by hand. 
Sunny Studio Blog: Treat Yourself Cheeseburger, Fries, Hotdog, Ice Cream & Donut Clean & Simple Handmade Card (using Cruisin' Cuisine Stamps & Classic Gingham Paper)

Card No. 6: 
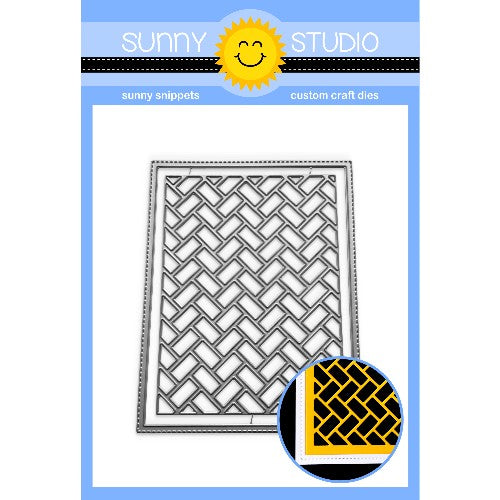
 Switching to our other new food themed stamp set, I have a card using our new Summer Sweets stamps. I started by cutting a frame using the new Frilly Frames Herringbone Dies. Rather than cutting a mat like most of our Frilly Frames dies, the outer portion of these dies cut a thin stitched frame or opening when used on an A2 sized card panel (or a wider frame when used on a larger A6 or A7 sized card). I cut a piece of acetate that was 4.25 x 5.5 inches and used some thin sticky tape to adhere it to the back of my frame before adding a layer of foam tape around the entire perimeter to form a large shaker that spans my entire background.

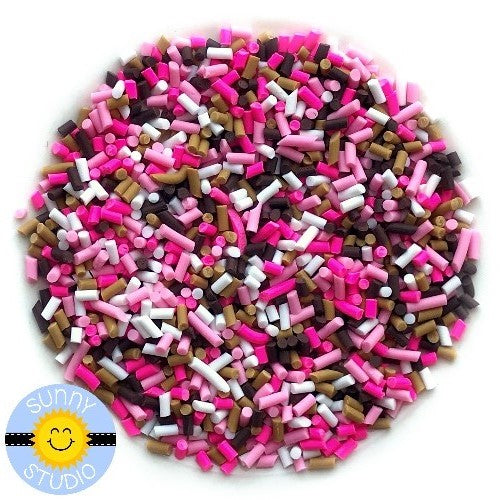
I then used our new Stitched Arch Dies to cut three little arched mats from our Classic Gingham, Rainbow Bright and Striped Silly Paper packs. I adhered them to my acetate and then added more foam tape behind them to give my card more stability and make it so I didn't need to use as many Neapolitan Sprinkles for my shaker.


I colored my ice cream images with Copic markers to match the sprinkles and added glossy accents to the portions of each image that I thought would be shiny. I finished off my card with a sentiment from the set, pairing it with our older Sweet Word Die.
Sunny Studio Blog: Sweet Birthday Ice Cream Cone, Sundae & Popsicle Shaker Card by Mendi Yoshikawa (using Summer Sweets Stamps, Sweet Word Die & Stitched Arch Dies)

Card No. 7:
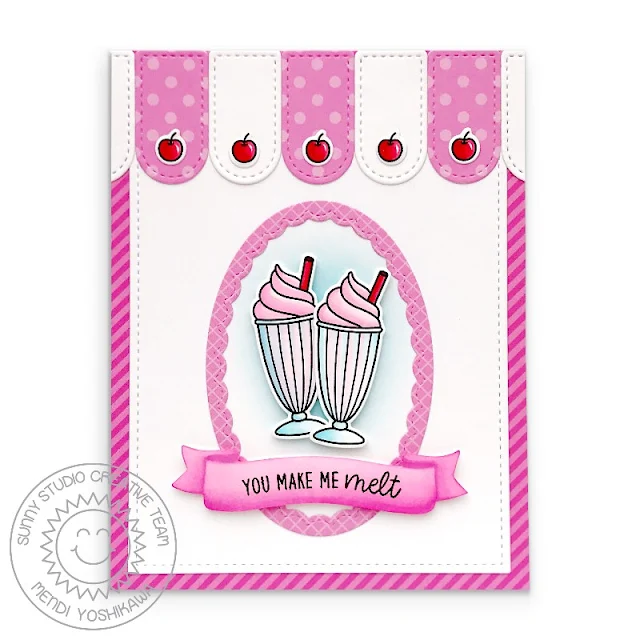
  For my next Summer Sweets Card I used the cute little milkshake images from the set. I wanted to recreate the look of a malt shoppe awning so I used the smallest Stitched Arch Die, alternating white cardstock with a pink print from our Polka-dot Parade Paper pack. The only problem is the smallest die comes with a little hole in it so you can use it as a mini tag so to solve that problem I hid the hole with a row of cherries from the set.  

For my card base, I mounted a stitched mat from our Frilly Frames Retro Petal dies onto a piece of hot pink striped paper from our Striped Silly Paper pack. I then cut a scalloped Fancy Frames Oval from some pink patterned paper from our Classic Gingham Paper pack, inking up just lightly in the center with some tumbled glass distress ink to help my ice cream sodas stand out.  A little banner for my sentiment that I colored with Copic markers using a no-line coloring technique completed my card.
Sunny Studio Blog: You Make Me Melt Milkshake Ice Cream Soda Card by Mendi Yoshikawa (using Summer Sweets & Banner Basics Stamps, Stitched Arch & Stitched Oval Dies, Polka-dot Parade, Striped Silly & Classic Gingham Paper)

Card No. 8: I don't know what it is about the little popsicles in the Summer Sweets set, but I found them so much fun to color!  I colored them all the colors of the rainbow to match our Surprise Party Paper, radiating them around our new Stitched Semi-circle Dies. A little punny sentiment from the stamp set completed this fun, asymmetrical design.

Sunny Studio Blog: Rainbow Polka-dot & Stripes Popsicle Card by Mendi Yoshikawa (using Summer Sweet Stamps, Stitched Semi-Circle Dies & Surprise Party Paper)

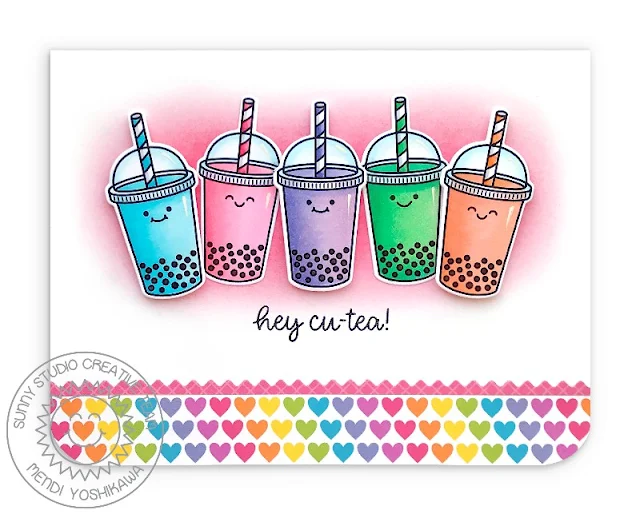
Card No. 9: Boba tea anyone? The cute little drink cup from 
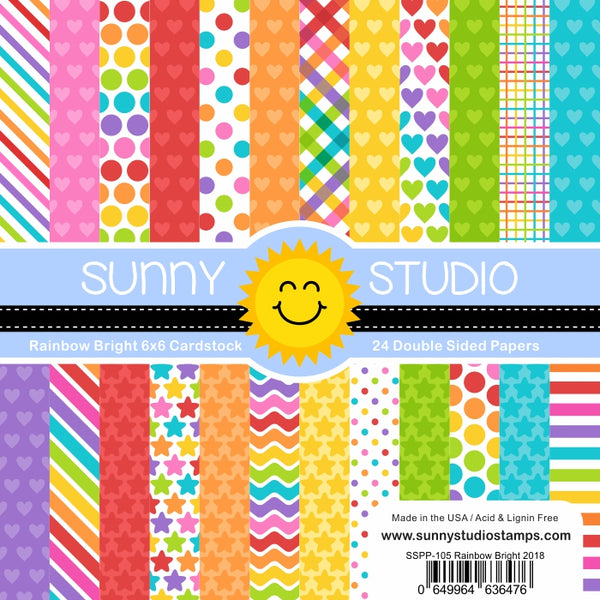
Summer Sweets set has the option to be stamped and colored in a variety of ways whether you want boba tea or a smoothie. The little boba pieces & happy faces are separate images that you can chose to add or omit. I colored mine in happy pastel colors to match the heart print from our Spring Sunburst Paper pack and inked a glow behind them with some worn lipstick distress ink to match the small Ric Rac Border cut from Gingham Pastel Paper.
Sunny Studio Blog: Hey Cu-tea Punny Boba Tea Rainbow Heart Card by Mendi Yoshikawa (using Summer Sweet Stamps, Ric-Rac Border Dies & Spring Sunburst Paper)

Card No. 10: For my last card of the day I took the soda pop bottle and turned them into orange soda by first coloring them with Copic markers and then heat embossing the little orange slice from the set with white embossing powder.  I then went over them with my copic marker again which allowed me to give the look of orange embossing powder without having to go buy the perfect shade.

For my background I created my own patterned paper by inking up my background with some carved pumpkin distress ink and then stamped the citrus slice from our Slice of Summer Stamps and added a cute border using our Ric Rac Border diesTo create the look of a vintage crate for my bottles, I cut a small strip of kraft cardstock which I colored with a woodgrain print using my Copics. I don't do monochromic cards very often and orange doesn't usually top my list of favorite colors, but I actually had a ton of fun with this one and am happy with how it turned out.
Sunny Studio Stamps: You're Soda-lightful Punny Orange Slice Soda Pop Card (using Summer Sweets & Slice of Summer Stamps and Ric Rac Border dies)

Birthday Tag Set:
I couldn't resist creating some birthday tags with our new Stitched Arch Dies. Love that these dies are so versatile! There are times when I just want to tie a quick tag to a kid's birthday gift and these will totally fit the bill. I cut the tags from our Surprise Party Paper and layered them with a circle cut from a coordinating tone-on-tone print to stamp a punny birthday greeting mixing in some words from our Savanna Safari Stamps.  For the little heart reinforcement I used a mini die from our Crescent Tag Dies.
Sunny Studio Blog: Rainbow Birthday Gift Tags Set (using Stitched Arch Dies, Surprise Party Paper, Cruisin' Cuisine & Summer Sweet Stamps)

That wraps up today's sneak peeks.  I know that's quite a bit of information and it means so much to have you hang out with me today. I'd love to give a $40 gift code to one lucky winner using the rafflecopter below.  Make sure to keep checking back all this week for more peeks & prizes for up to five chances to win. The contests run through Saturday at Midnight PST with winners announced here on Sunday, April 26th. :)

a Rafflecopter giveaway Here's a closer look at the new Cruisin' Cuisine stamps & coordinating dies, Summer Sweets stamps & coordinating dies and the new Stitched Arch Dies used today (available for purchase on Friday, April 24th).

Sunny Studio Blog: Cruisin' Cuisine Food Truck 4x6 Clear Photopolymer Stamp Set    Sunny Studio Blog: Cruisin' Cuisine Coordinating Metal Cutting Dies Set

Sunny Studio Blog: Summer Sweets Ice Cream Cone, Sundae, Popsicle, Smoothie, Pop & Boba Tea 4x6 Clear Photopolymer Stamp Set    Sunny Studio Blog: Summer Sweets Coordinating Metal Cutting Dies Set

Sunny Studio Blog: Stitched Arch Nested Metal Cutting Dies

Other Supplies Used:

Sweet Word Die
Sweet Word Die
Shop at:
Sunny Studio
Tag Topper Dies-Crescent
Shop at:
Sunny Studio
Ric Rac Border Dies
Ric Rac Border Dies
Shop at:
Sunny Studio
Fancy Frames- Ovals
Fancy Frames- Ovals
Shop at:
Sunny Studio

Fast Food Fun Dies
Fast Food Fun Dies
Shop at:
Sunny Studio
Classic Gingham 6x6 Paper
Shop at:
Sunny Studio
Striped Silly 6x6 Paper
Shop at:
Sunny Studio
Polka-dot Parade 6x6 Paper
Shop at:
Sunny Studio
Rainbow Bright 6x6 Paper
Shop at:
Sunny Studio
Comic Strip Everyday Dies
Shop at:
Sunny Studio
Woodland Borders Dies
Shop at:
Sunny Studio
Gingham Pastels 6x6 Paper
Shop at:
Sunny Studio
Spring Sunburst 6x6 Paper
Shop at:
Sunny Studio
Dots & Stripes Pastels 6x6 Paper
Shop at:
Sunny Studio
Sunburst Embossing
Sunburst Embossing
Shop at:
Sunny Studio
Fluffy Clouds Dies
Fluffy Clouds Dies
Shop at:
Sunny Studio
Wrap Around Box Die
Wrap Around Box Die
Shop at:
Sunny Studio
Slice of Summer Stamps
Shop at:
Sunny Studio
Surprise Party 6x6 Paper
Shop at:
Sunny Studio
Cityscape Border Dies
Shop at:
Sunny Studio
Frilly Frames Retro Petals Dies
Shop at:
Sunny Studio
Scenic Route Stamps
Scenic Route Stamps
Shop at:
Sunny Studio
Scenic Route Dies
Scenic Route Dies
Shop at:
Sunny Studio
Banner Basics Stamps
Shop at:
Sunny Studio

Fast Food Fun Stamps
Shop at:
Sunny Studio
Banner Basics Dies
Banner Basics Dies
Shop at:
Sunny Studio
Frilly Frames Herringbone
Shop at:
Sunny Studio
Stitched Semi-Circle Dies
Shop at:
Sunny Studio
Neapolitan Sprinkles
Shop at:
Sunny Studio