Thursday, April 18, 2019

Coastal Cuties Cards with Anja and Vanessa

Hi everyone, Anja here and I'm delighted to share my first card using some of the new Summer Release products. Today I'm showcasing the Coastal Cuties Stamps. The two girls included in this set are having so much fun in the sun!

Sunny Studio Stamps: Coastal Cuties Fancy Frames Sending Sunshine Sunshine Word Die Summer Themed Cards by Anja Bytyqi and Vanessa Menhorn

I created a square card and die cut the yellow sunburst paper from the Spring Sunburst 6x6 paper pack for my cheering background. For the water, I pulled out some Alcohol Inks in aqua and blue tones and die cut the Yupo paper with a circle die. Next, I die cut one of the Fancy Frame Circle Dies from white cardstock and adhered it on top of my Alcohol Ink circle.

Sunny Studio Stamps: Coastal Cuties Fancy Frames Sending Sunshine Sunshine Word Die Summer Themed Cards by Anja Bytyqi and Vanessa Menhorn

I stamped the girls as well as the palm tree (from the new Sending Sunshine set), island image (Island Getaway Stamps) and crab (Oceans of Joy Stamps) in Memento Tuxedo Black Ink and colored them with Copic Markers. I covered the girl's floating ring with Glossy Accents for some extra shine.

For the sentiment, I combined the gold heat embossed word "Sending" and the Sunshine Word Die which I die cut from golden glitter cardstock. To finish off my summer card, I adhered three aqua jewels to the water.

Thank you so much for stopping by! Hope to see you again next Thursday!

------------------------------------------------------

Hello everybody! Vanessa here with a summer card using the new Coastal Cuties set. For today's project I wanted to create the look of a swimming pool, so I took out my watercolors.

Sunny Studio Stamps: Coastal Cuties Fancy Frames Sending Sunshine Sunshine Word Die Summer Themed Cards by Anja Bytyqi and Vanessa Menhorn

To achieve this, I first masked off a rectangle on a panel of watercolor paper. Then I drew the lines with a masking fluid pen. After the blue watercolors were dried, I removed the masking fluid and the tape and adhered the panel to the card base.

Sunny Studio Stamps: Coastal Cuties Fancy Frames Sending Sunshine Sunshine Word Die Summer Themed Cards by Anja Bytyqi and Vanessa Menhorn

Now I stamped the girl onto white cardstock, colored her with Copics, die-cut the image with the matching die and adhered it to the card. Finally, I stamped the sentiment and the water splashes and colored these with Copics.

This new release is amazing again, don't you agree? Love every single bit of it! Hope to see you next week for more inspiration using the new products!

Sunny Studio Supplies Used:

Island Getaway Dies
Island Getaway Dies
Shop at:
Sunny Studio
Island Getaway Stamps
Shop at:
Sunny Studio
Oceans of Joy Dies
Oceans of Joy Dies
Shop at:
Sunny Studio
Oceans of Joy Stamps
Shop at:
Sunny Studio
Sunshine Word Die
Sunshine Word Die
Shop at:
Sunny Studio
Fancy Frames-Circle Dies
Shop at:
Sunny Studio
Spring Sunburst 6x6 Paper
Shop at:
Sunny Studio
Coastal Cuties Stamps
Shop at:
Sunny Studio
Coastal Cuties Dies
Coastal Cuties Dies
Shop at:
Sunny Studio
Sending Sunshine Stamps
Shop at:
Sunny Studio
Sending Sunshine Dies
Shop at:
Sunny Studio

Wednesday, April 17, 2019

Slice Of Summer Cards with Mona and Franci

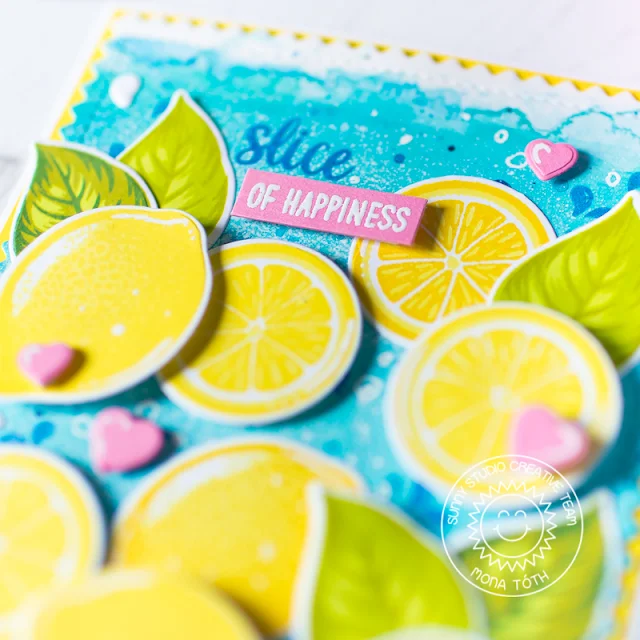
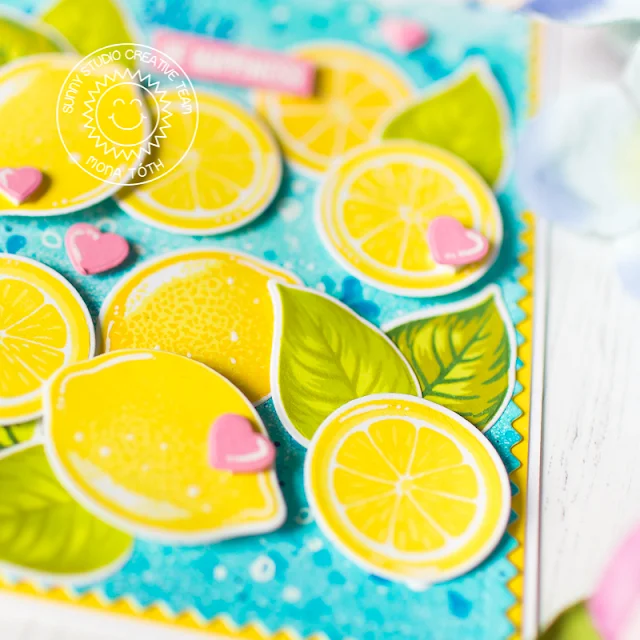
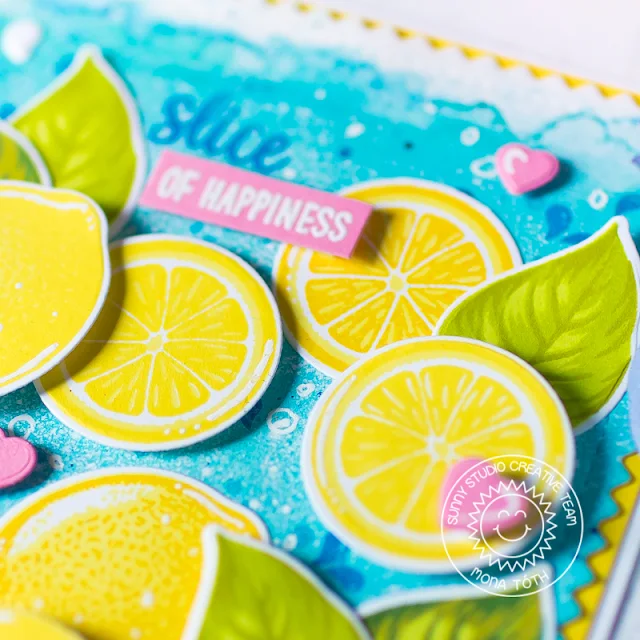
Hi crafty friends! It's Mona here, today I am showing you a yummy and fresh card featuring the Slice of Summer stamp set.

Sunny Studio Stamps: Slice Of Summer Hawaiian Hibiscus Frilly Frames Hello Word Everyday Cards by Mona Toth and Franci Vignoli

This time I started the card making with stamp layering. For the stamping I used Hybrid Inks from Scrapbook.com and green colored mini ink cubes from Altenew. As you can see I also stamped a few leaves from the Hawaiian Hibiscus stamp set. For the leaves I used the Bamboo, Parrot and Moss colors. For the lemon I used the Yellow Group. When it was done I die-cut the images with the coordinating dies.

Sunny Studio Stamps: Slice Of Summer Hawaiian Hibiscus Frilly Frames Hello Word Everyday Cards by Mona Toth and Franci Vignoli

The next step was the background which I made with teal and blue watercolors. While it dried I run it through my die-cut machine with the new Frilly Frames Chevron Dies.

Sunny Studio Stamps: Slice Of Summer Hawaiian Hibiscus Frilly Frames Hello Word Everyday Cards by Mona Toth and Franci Vignoli

Next I heat embossed the sentiment to a pink piece of cardstock and created pink hearts from the same pink cardstock as an embellishment.

Sunny Studio Stamps: Slice Of Summer Hawaiian Hibiscus Frilly Frames Hello Word Everyday Cards by Mona Toth and Franci Vignoli

In the end I styled my card and adhered the tasty images to my card base, embellished the card and yay, it was done. Thank you very much for reading through my post, I hope that you have enjoyed it and I have inspired you! If you like my creations let's be friends on Instagram. :)

------------------------------------------

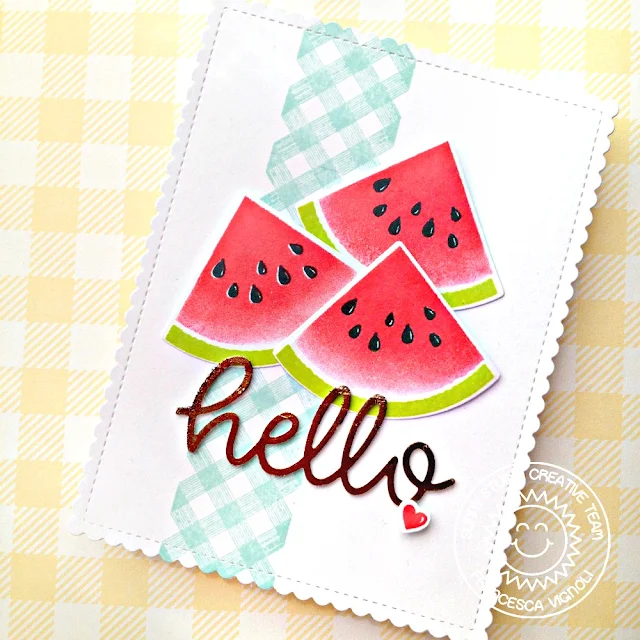
Hello there! Franci here with you today and I'm super happy to show you my first project with the new amazing summer release!! I'll showcase the Slice Of Summer set today with a cool watermelon card.

Sunny Studio Stamps: Slice Of Summer Hawaiian Hibiscus Frilly Frames Hello Word Everyday Cards by Mona Toth and Franci Vignoli

I love layering sets but what I love the most of them is having solid images that I can shade myself playing with inks. That's what I did here with my watermelon slices. I just used a red ink pad and I stamped the 3a layer multiple times, dabbing the ink away with a clean towel along the bottom of the slice. That created a natural shaded effect that I love!

I cut all my slices out with the coordinating dies and then I stamped the seeds and all the green parts with the same technique. I also die cut the card panel out of white cardstock using the new Frilly Frames Stripes die and stamped it with the Background Basic stamp set in a light teal ink.

Sunny Studio Stamps: Slice Of Summer Hawaiian Hibiscus Frilly Frames Hello Word Everyday Cards by Mona Toth and Franci Vignoli

Then I die cut the word Hello Word die from some double sided foam tape and I foiled it in gold rose. I glued everything down with a combo of liquid glue and foam tape and mounted my decorated panel onto a white card base.

Hope you like my card and thank you so much for stopping by today :) 

Sunny Studio Supplies Used:

Background Basics Stamps
Shop at:
Sunny Studio
Hello Word Die
Hello Word Die
Shop at:
Sunny Studio
Frilly Frames Chevron Die
Shop at:
Sunny Studio
Frilly Frames Stripes Die
Shop at:
Sunny Studio
Hawaiian Hibiscus Stamps
Shop at:
Sunny Studio
Hawaiian Hibiscus  Dies
Hawaiian Hibiscus Dies
Shop at:
Sunny Studio
Slice of Summer Stamps
Shop at:
Sunny Studio
Slice of Summer Dies
Shop at:
Sunny Studio

Tuesday, April 16, 2019

Fabulous Flamingos Cards with Angelica and Juliana

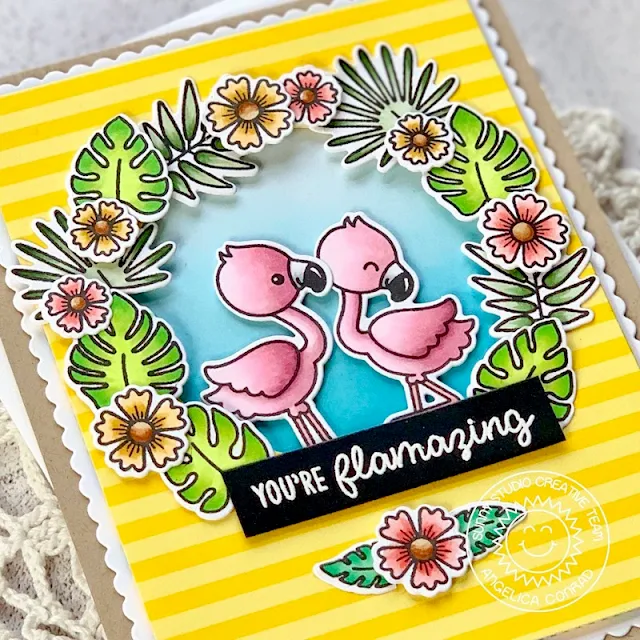
Hello crafty friends, it's Angelica here and I am super excited to share my first project from the fantastic new Summer 2019 Release! I used Fabulous Flamingos stamp set to make this bright and tropical card.

Sunny Studio Stamps: Fabulous Flamingos Fancy Frames Frilly Frames Stitched Ovals Flamingo Punny Cards by Angelica Conrad and Juliana Michaels

You're Flamazing ... How cute are these flamingos?? I stamped the images, then pulled out my Copic Markers and started coloring. The birds I colored: R83, RV11, RV10, RV000. I used 2 different green combos for the leaves: YG06, YG03, YG01 for the first, YG67, YG61 for the second. The flowers: Y23, Y26 yellow flowers, R22, R20 pink flowers. The middle of the flowers: E37, E35, E33. 

Sunny Studio Stamps: Fabulous Flamingos Fancy Frames Frilly Frames Stitched Ovals Flamingo Punny Cards by Angelica Conrad and Juliana Michaels

I used the coordinating dies to cut them out. For the card front, I used the the scallop die from the Frilly Frames Stripes Dies to die-cut white card stock. Next, I cut a circle out of the middle of a 3.75 x 5 panel of yellow striped paper from the Summer Splash 6x6 Paper Pack. I made a sky background for the circle window by ink-blending Mermaid Lagoon Distress Oxide ink onto the white card stock using a quick handmade stencil.

Sunny Studio Stamps: Fabulous Flamingos Fancy Frames Frilly Frames Stitched Ovals Flamingo Punny Cards by Angelica Conrad and Juliana Michaels

I used foam tape to add the pattern paper to the white card stock, then added the panel to an A2 size card base. I used thin foam adhesive squares to attach the flamingos inside the window, and also to add the stamped and heat-embossed sentiment. I made a wreath around the window, using foam squares for some of leaves and flowers for different heights. My last step was adding the flower and two leaves under the sentiment.

I hope I have helped give you some ideas on how to use this stamp set. That's all that I have for today. Thanks for stopping by!

----------------------------------------------------

Hello Friends and Happy Tuesday! Juliana here and I'm so excited to begin sharing some projects created using the brand new release from Sunny Studio Stamps. Today, I'm sharing a card that uses the adorable Fabulous Flamingos Stamp Set.

Sunny Studio Stamps: Fabulous Flamingos Fancy Frames Frilly Frames Stitched Ovals Flamingo Punny Cards by Angelica Conrad and Juliana Michaels

To get started, I stamped the images from the Fabulous Flamingos Stamp Set and colored them using Copic Markers. I then die cut them using the Fabulous Flamingos Dies.

Sunny Studio Stamps: Fabulous Flamingos Fancy Frames Frilly Frames Stitched Ovals Flamingo Punny Cards by Angelica Conrad and Juliana Michaels

For the background, I die cut a piece of the sky patterned paper from the Summer Splash 6x6 Paper Pad using the largest oval from the Stitched Oval Dies. I then layered a white cardstock frame die cut on top using the largest frame from the Fancy Frames Oval Dies.

Sunny Studio Stamps: Fabulous Flamingos Fancy Frames Frilly Frames Stitched Ovals Flamingo Punny Cards by Angelica Conrad and Juliana Michaels

Next, I went about creating the scene by adding in 3 of the flamingos and lots of the jungle leaves. I even added in the pineapple for a touch of interest and contrast to all of the pink and green. To give the die cuts some dimension, I adhered most of them using Therm O Web Foam Squares. Once the scene was completed, I adhered the entire frame to a piece of pink floral paper from the Summer Splash 6x6 Paper Pad.

Thanks so much for stopping by today. I hope you enjoyed this bit of inspiration using the Fabulous Flamingos Stamp Set. See you next time!

Sunny Studio Supplies Used:

Fancy Frames- Ovals
Fancy Frames- Ovals
Shop at:
Sunny Studio
Stitched Oval Dies
Stitched Oval Dies
Shop at:
Sunny Studio
Frilly Frames Stripes Die
Shop at:
Sunny Studio
Fabulous Flamingos Stamps
Shop at:
Sunny Studio
Fabulous Flamingos Dies
Shop at:
Sunny Studio
Summer Splash 6x6 Paper
Shop at:
Sunny Studio

Monday, April 15, 2019

Silly Sloths Cards with Leanne and Eloise

Hello there! Leanne here and I’m so excited to start sharing projects featuring stamps and dies from the new April release! I’ve used images from the new Silly Sloths stamp set along with some previously released dies for my card today.  

Sunny Studio Stamps: Silly Sloths Staggered Circles Ric Rac Borders Fancy Frames Sloth Themed Cards by Leanne West and Eloise Blue

This card is A6 size and I started with some ink blending on a panel of Bristol Smooth card stock. I used Mowed Lawn Distress Ink for the bottom and Worn Lipstick for the top. As I blended the ink towards the center, I kept going lighter to create a gradual fade to white. I then used the Staggered Circles die to cut out the circles which serve as grounding spots for the stamped images. I used a die from the Ric Rac Borders to create the decorative detail along the left side of the panel. I adhered the panel with dimensional foam tape but inlaid the circles flat to the card base.  

Sunny Studio Stamps: Silly Sloths Staggered Circles Ric Rac Borders Fancy Frames Sloth Themed Cards by Leanne West and Eloise Blue

I Copic colored the sloths. flowers, and leaves from Silly Sloths. I arranged the images on the card while leaving spaces to add the sentiment.  I stamped “have a” and “birthday” directly on two of the circles. I white heat embossed “slothsome” onto some dark gray card stock, trimmed into a skinny strip, and adhered right above “birthday”. Lastly, I added some sparkling clear sequins.  

I hope you liked this fun birthday card. I will be back next Monday with another card using stamps from the new release. See you then!

---------------------------------------------------------

Hello friends, Eloise here and today we are sharing cards using the Silly Sloths Stamp Set. I am loving this new release and I hope you are too. I recreated an old card design of mine since I loved the layout so much and thought it would work perfectly for all these small images.

Sunny Studio Stamps: Silly Sloths Staggered Circles Ric Rac Borders Fancy Frames Sloth Themed Cards by Leanne West and Eloise Blue

I started off by stamping out my images, colouring them with Copic Markers and then cutting them out with the coordinating dies. I made sure to stamp a ton of extra leaves since I wanted my scenes to feel full.

(Copic Markers Used: E41, E42, E43, E44, E47 / E000, E00, E02, E40 / E53, E55, E57, E59 / R00, R20 / YG01, YG03, YG07, YG09 / YG61, YG63, YG67, G28 / RV10, RV13, RV25, RV19 / Y13, YR14)

Sunny Studio Stamps: Silly Sloths Staggered Circles Ric Rac Borders Fancy Frames Sloth Themed Cards by Leanne West and Eloise Blue

I took the Surprise Party Patterned Paper Pad and chose the starry paper for the background. I took the Fancy Rectangle Frames Dies, took the smallest one and cut it three times from white cardstock. I added foam tape onto the backs of each of them and layered them around on top of my patterned paper. I then laid out all my sloths and leaves around to see how I wanted my scenes arranged.

Sunny Studio Stamps: Silly Sloths Staggered Circles Ric Rac Borders Fancy Frames Sloth Themed Cards by Leanne West and Eloise Blue

I added adhesive and foam adhesive onto the backs of my images and adhered them down into place. For my sentiment I white heat embossed the ‘You’re So Slothsome’ onto a black piece of cardstock and adhered it into the middle of my card. I adhered the entire panel onto a card base and that finished up my card for today.

Thanks so much for stopping by today and I’ll see you next week! 

Sunny Studio Supplies Used:

Ric Rac Border Dies
Ric Rac Border Dies
Shop at:
Sunny Studio
Fancy Frames- Rectangles
Shop at:
Sunny Studio
Staggered Circles Die
Shop at:
Sunny Studio
Silly Sloths Stamps
Silly Sloths Stamps
Shop at:
Sunny Studio
Silly Sloths Dies
Silly Sloths Dies
Shop at:
Sunny Studio
Surprise Party 6x6 Paper
Shop at:
Sunny Studio