Tuesday, January 1, 2019

Sneak Peek Week: Everything's Rosy, Everyday Greetings & Frilly Frames

Hello and welcome to our Spring Sneak Peek Week (for Season's Giving Blog Hop please click HERE)!  All this week I will be showcasing cards using our new collection for Spring coming out on Friday, January 4th.  

Today I will showing some fun ways to use our new Everything's Rosy stamps & diesEveryday Greetings stamps and two new mix and match Frilly Frames Dies.  :)

Card No. 1:  Up first is a card featuring all three products in a soft and pretty Sympathy card.  The sentiments in this new scripty set come with four phrases to compliment the beautiful roses in our newest layering set.  Our Everything's Rosy stamps creates two Roses, one trio of leaves and a small baby's breath type flower.

To frame my roses, I turned to our new Frilly Frames Polka Dot Dies.  These dies have two separate pieces so you can cut a scalloped mat, a polka-dot background or both at the same time.  For this background, I actually took my X-acto knife and cut a window around the stitching so that I could add my polka-dot background behind it as a separate piece for extra dimension. I then adhered them to a piece of pink gingham paper from our new Gingham Pastels 6x6 Paper Pack.
Sunny Studio Stamps: Everything's Rosy Rose Sympathy Card (Using Everyday Greetings Stamps & Frilly Frames Polka-Dot Dies)

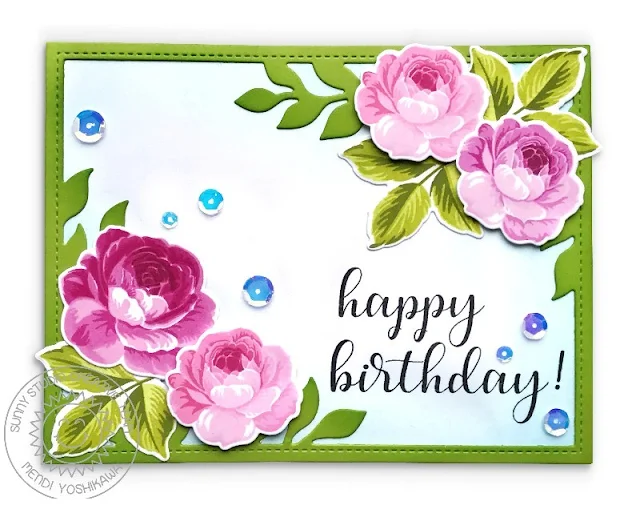
Card No. 2:  For my next card I paired the roses with a new leafy frame that will be featured more on Thursday.  ;)  I inked up my background with a little tumbled glass distress ink and sprinkled some Crystal Clear sequins by Studio Katia.  They are such a pretty iridescent color that pick up both the blues and pinks in person.  I finished off my card with the birthday sentiment from our new Everyday Greetings stamps.
Sunny Studio Stamps: Everything's Rosy Layered Rose Birthday Card (using Everyday Greetings Stamps & Botanical Backdrop Dies)

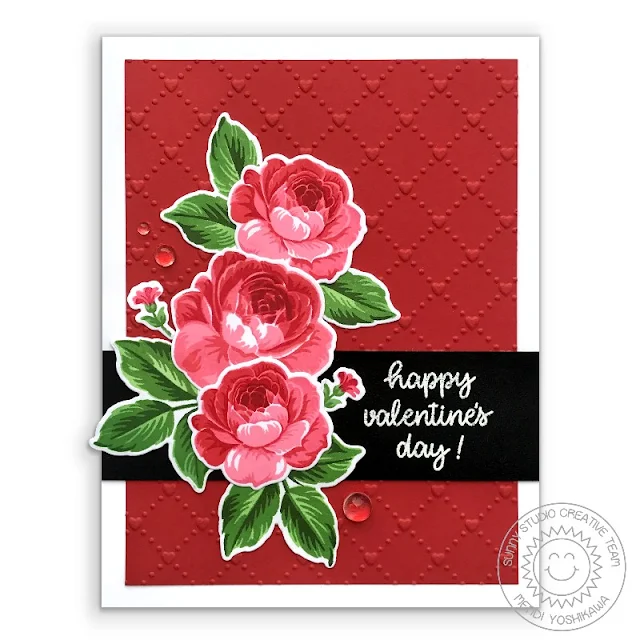
Card No. 3:  Up next I switched up my colors for the Roses and put a Valentine's Day spin on them, pairing them with the Quilted Hearts Embossing Folder shared yesterday.  For my sentiment I heat embossed it with opaque white powder using a sentiment from our Happy Thoughts stamps.  I completed my card with a couple of small drops from Studio Katia's Clear Drop Mix 2--I love how they look like beautiful dew drops which feels so perfect for roses!
Sunny Studio Stamps Everything's Rosy Layered Rose Valentine's Day Card (using Happy Thoughts Stamps & Quilted Hearts Embossing Folder)

Card No. 4: For this card I took the inner background from our new Frilly Frames Lattice Dies and positioned it vertically on my horizontal card panel, first running it through my die-cuttting machine aligned on the left side.  I then aligned it on the right side feeling the grooves of my first cut before running it through my machine a second time for a full coverage background.  I then framed the lattice using our Comic Strip Everyday dies (cutting out the inside frames to leave just the outside stitched border).  

I cut apart the words "thank you" from our new Everyday Greetings stamps so that I could stack them to fit in the space I had and then framed them with a stitched scalloped circle from our Fancy Frames Circle dies.  This card design looks fabulous with any rose color so I had a hard time deciding which one to use, but in the end I went with yellow roses which I think are a beautiful compliment.
Sunny Studio Stamps: Everything's Rosy Yellow, Black & White Layered Rose Thank You Card (using Everyday Greetings & Frilly Frames Lattice Dies)

Card No. 5:  Up next is another soft and sweet card mixing a couple different colored roses with the jar from our Vintage Jars Stamps and dies and the stems from our Daffodil Dreams stamps.  To create the look of water in my jar, I used the little oval ring that comes with the jar stamps and then created a mask from a post-it note to ink in the "water" with tumbled glass distress ink.

For my background, I used both dies from the Frilly Frames Lattice dies at the same time to create a single layer mat with both the scalloped edge and lattice cutouts.  I then tucked in a piece of white cardstock below which I had inked up with some more tumbled glass distress ink.  I completed my card by mounting them onto a piece of patterned paper from our new Flirty Flowers 6x6 Paper Pack and sprinkled on some of my favorite Studio Katia Crystal Clear Mini Sequins.  My sentiment from the Everything's Rose set was stamped onto a piece of coordinating striped paper from our new Dots & Stripes Pastels 6x6 Paper and popped up with a piece of foam tape.
Sunny Studio Stamps: Everything's Rosy Congrats Rose Card (using Vintage Jar Stamps, Frilly Frames Lattice Dies & Flirty Flowers Paper)

Card No. 6: For my last card of the day, I used a similar color scheme as I did for my Valentine's Day card, this time making a wedding card using another sentiment from the Everyday Greetings stamps.  This time I inked up the water in my jar using Colorbox Sky Ink and used our new Quilted Hearts Embossing Folder to add some extra texture to my background and continue the love theme.

For the black and white striped pattern I used our Background Basics stamps together with my favorite VersaMark Black Onyx ink.  To get really full coverage, I stamped it repeatedly using a stamp positioning tool and then made sure to zap it pretty good with my heat gun so my fingers wouldn't smudge it.
Sunny Studio Stamps: Everything's Rosy Red, Black & White Rose Wedding Card (using Background Basics, Everyday Greetings, Vintage Jar stamps & Quilted Hearts embossing folder

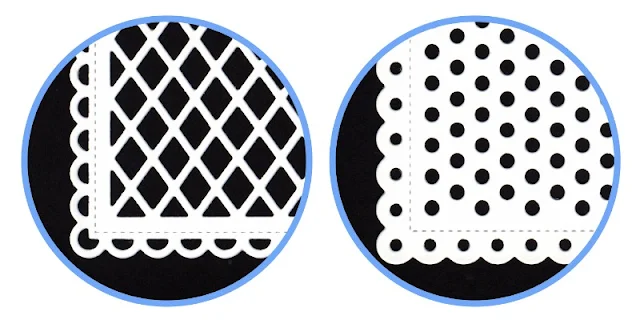
Here's a closer look at the two new Frilly Frames dies mix and match sets.  The inner patterns of each are separate making it possible to either use just the outer frame as a scalloped mat sized 4" x 5.25", use just the inner portion as a background or mix the two like shown here.  These look awesome when paired with our Fancy Frames Rectangle dies and have so many possibilities!  I found myself turning to them over and over for my cards this week.  ;)
Sunny Studio Stamps Frilly Frames Lattice & Polka-dot Mix and Match Stitched Scalloped Lacey Mat Die Examples

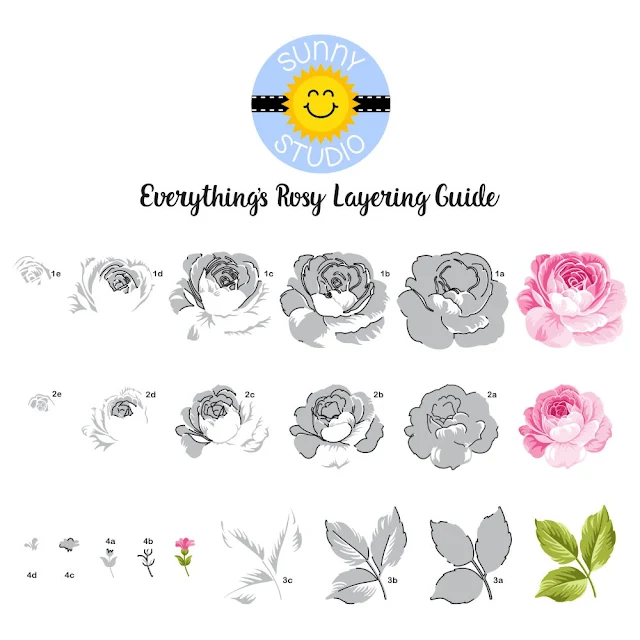
To help you line up our Everything's Rosy stamps like a pro I've created a special layering guide (you can click on the photo below to view it larger).  For all the Roses I started by stamping them with the darkest ink color, working towards the lightest.  The black outline indicates where that layer touches the previously stamped layer.  :)
Sunny Studio Stamps: Everything's Rosy Layered Rose Layering Guide

I will note that this particular set requires 4 to 5 ink colors for each rose and 3 inks for the leaves so the only downside is it requires a decent stash of inks for best results (in addition to a stamp positioning tool).  

I frequently am asked which ink colors I used for my layered images.  While I think there are so many great options out there, these are the colors I used today for my stamped images (in the ordered shared from darkest to lightest)...

Darkest Pink Roses
Colorbox Gooseberry
Colorbox Dark Cherry
Colorbox Very Berry
Versafine Charming Pink
Colorbox Candy


Medium Pink Roses
Colorbox Dark Cherry
Simon Says Stamps Doll Pink
Hero Arts Ultra Pink
MFT Cotton Candy
Hero Arts Soft Pink


Light Pink Roses
Papertrey Ink Raspberry Fizz
Papertrey Ink Hibiscus Flower
Ranger Pink Gumball
MFT Cotton Candy

Hero Arts Soft Pink

Red Roses
Colorbox Cranberry
Colorbox Candy Red
Stampin' Up Watermelon Wonder
Simon Says Stamps Hot Lips
Lawn Fawn Bubblegum


Yellow Roses
Stampin' Up Crushed Curry
Colorbox Dandelion
Colorbox Banana
Versafine Cheerful
Colorbox Lemonade

Light Green Leaves
Colorbox Artichoke
Colorbox Tree Frog
Colorbox Kiwi


Dark Green Leaves
Colorbox Golf Course
Colorbox Green Apple
Colorbox Grasshopper


Mason Jar 
Simon Says Stamp Sea Glass
Simon Says Stamp Maliblue

2021 UPDATE: While many of the colors used for this post have now retired after Colorbox went out of business, you can find my newest ink color recommendations for red flowers HERE, pink flowers HERE and for yellows I adore the set of PinkFresh Studio inks HERE.

I'm so happy you've joined me for today's sneak peek and I'd love to give a $25 gift code to one lucky winner.  Make sure to keep checking back all this week for more peeks & prizes for up to five chances to win.  The contests run through Saturday at Midnight PST with winners announced here on Sunday, January 6th. :)

a Rafflecopter giveaway
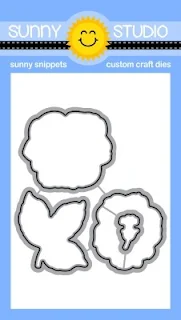
Here's a closer look at the new Everything's Rosy stamps & coordinating dies, Everyday Greetings 3x4 Stamps and the two new mix and match Frilly Frames used today (available for purchase on Friday, January 4th). 


Sunny Studio Stamps: Introducing New Everything's Rosy 4x6 Layering Rose Photopolymer Stamp Set   Sunny Studio Stamps: Everything's Rosy Coordinating Metal Cutting Dies   Sunny Studio Stamps: Everyday Greetings 3x4 Photopolymer Sentiment Stamps (including Sympathy, Birthday, Thank You & Best Wishes on Your Wedding Day)

Sunny Studio Stamps: Frilly Frames Lattice Stitched Scallop Mix & Match Background Mat Dies   Sunny Studio Stamps: Frilly Frames Polka-Dot Stitched Scallop Mix & Match Background Mat Dies

Other Sunny Studio Supplies Used:
Daffodil Dreams Stamps
Shop at:
Sunny Studio
Vintage Jar Dies
Vintage Jar Dies
Shop at:
Sunny Studio
Vintage Jar Stamps
Vintage Jar Stamps
Shop at:
Sunny Studio
Fancy Frames-Circle Dies
Shop at:
Sunny Studio
Background Basics Stamps
Shop at:
Sunny Studio
Happy Thoughts Stamps
Shop at:
Sunny Studio
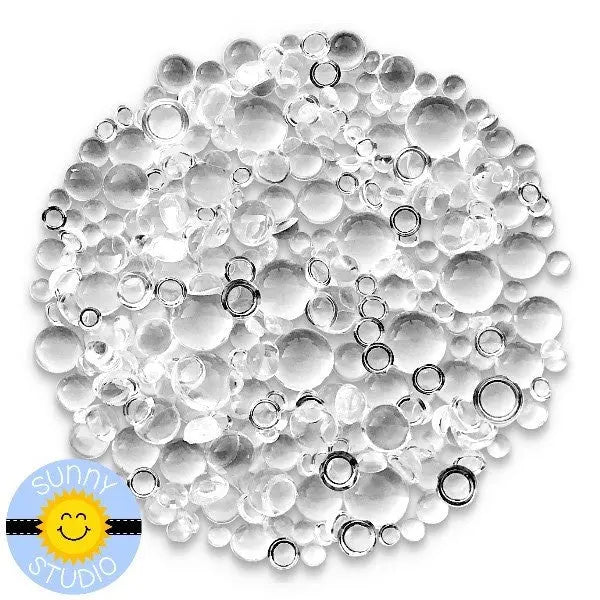
Clear Drops Mix 2
Clear Drops Mix 2
Shop at:
Sunny Studio
Crystal Clear Mini Sequins
Shop at:
Sunny Studio
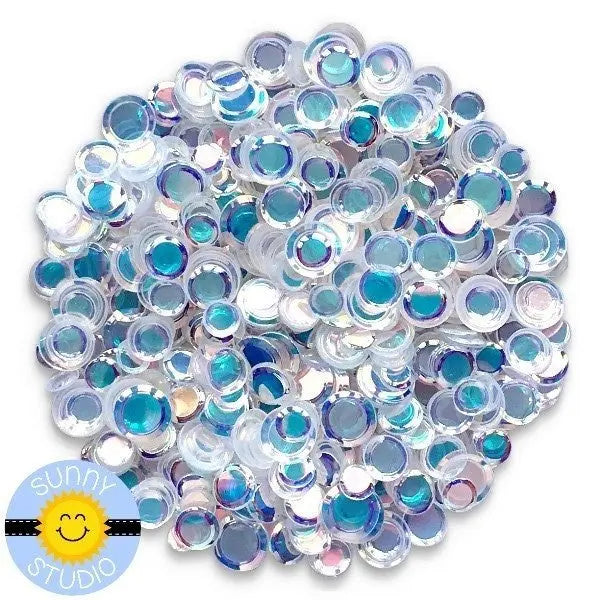
Iridescent Clear Confetti
Crystal Clear Confetti
Shop at:
Sunny Studio
VersaMark Watermark Ink
Shop at:
Sunny Studio
Flirty Flowers 6x6 Paper
Shop at:
Sunny Studio
Dots & Stripes Pastels 6x6 Paper
Shop at:
Sunny Studio
Quilted Hearts Embossing
Shop at:
Sunny Studio
Botanical Backdrop Die
Shop at:
Sunny Studio

Monday, December 31, 2018

Seasons Givings Blog Hop with Love Themed Cards & Giveaway


Hello!  We're so excited to be hopping today with the Seasons Givings blog hop!  We are so thankful for all of our loyal followers and this hop is all about showing our thanks with a fun gift package for one lucky winner (see details below).  You should be arriving here from Indigo Jade Art or if you are just joining in the fun, you can start at the beginning of the hop HERE.

In honor of the hop and with Valentine's Day quickly approaching, I thought I would share a handful of past love themed cards that are fun to revisit.


Froggy Friends
Valentine's Day Card by Amy Yang (see original post HERE)


Sunny Studio Stamps: Froggy Friends Valentine's Day Frog Card by Amy Yang

Breakfast Puns Heart Shaker Card by Franci Vignoli (see original post HERE)

Breakfast Puns I Donut Know What I Would Do Without You Heart Shaker Card by Franci Vignoli

Timeless Tulips & Vintage Jar Card by Mendi Yoshikawa (see original post HERE)
Sunny Studio Stamps: Timeless Tulips & Vintage Jar Red Love Themed Shaker Card by Mendi Yoshikawa


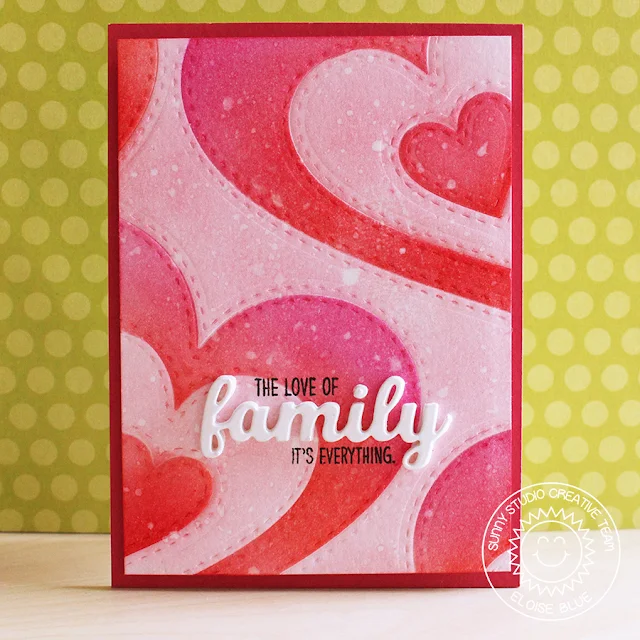
Stitched Heart Card by Eloise Blue (see original post HERE)

Sunny Studio Stamps: Stitched Hearts Red & Pink Love themed card by Eloise Blue

Thank you for visiting today.  It just so happens that this hop coincides with our Spring Sneak Week so I hope you will visit our other blog posts this week to see sneak peeks of our new products coming on Friday.  If you are new to our brand, we would love for you to join our mailing list HERE to be notified of future sales and promotions (or you can sign up for daily blog updates in the top left hand corner). 

For our giveaway today, we have a prize package which includes our Sweater Vest Dies, Happy Thoughts Stamps, Happy Word Die & Holiday Cheer paper. Please use the rafflecopter below to enter--You have up to five chances to win! 
Sunny Studio Stamps: Seasons Giving Blog Hop Giveaway
a Rafflecopter giveaway This giveaway will run through Saturday at Midnight PST with winners announced here on Sunday, January 6th. :)

Your next stop in the hop is 
Paper House Productions.  If you ever get lost along the way, here's a full list of everyone hopping today.  That's a whole lot of prizes up for grabs so I hope you will join in.  ;)

Lawn Fawn


Sneak Peek Week: Chubby Bunny, Spring Greetings + Paper & Embossing

Hello and welcome to our Spring Sneak Peek Week!  All this week I will be showcasing cards using our new collection for Spring debuting on Friday, January 4th

Today I am showcasing our new Chubby Bunny stamps and dies, Spring Greetings stamps and dies, 4 new Pastel Paper Packs and 2 new 6x6 embossing folders!  Yay!!!

Card No. 1: For my first card I used our new Chubby Bunny set to create a sweet Easter card.  This set comes with a darling Easter banner that is so much fun to color! I used a sheet of lilac striped paper from our new Dots & Stripes Pastels Paper Pack (along with a new stitched scallop Frilly Frames Polka-dot die that I will be showcasing more of tomorrow).
Sunny Studio Stamps: Chubby Bunny Easter Card (using Frilly Frames Polka-Dot dies and Dots & Stripes Pastels Paper)

Card No. 2: For my next card I had a number of strips of paper leftover from creating display cards for stores and I hate letting scraps go to waste so I adhered them to a piece a printer paper in a rainbow pattern. I then used our Ric Rac Border dies to add a little detail to my white panel going down the center. This time I colored my Easter banner in a rainbow pattern going the opposite direction and sponged on some tumbled glass distress ink behind each little bunny in my grid using a little foam dauber.
Sunny Studio Stamps: Chubby Bunny Easter Card (using Dots & Stripes Pastels Paper & Ric Rac Border Die)

Card No. 3:  Up next is a card using a fun striped rainbow print from our new Spring Sunburst 6x6 Paper Pack.  I paired it with a polka-dot background from our new Frilly Frames Polka-dot die which was layered together with our Fancy Frames Rectangle die. To fill my dotted background with color, I adhered thin strips of cardstock scraps on the back of my card panel to match the colors in my striped paper. I then framed my little chicks in a grid pattern using one of the circles from our new Staggered Circles die (which will be featured more on Wednesday) using our new Flirty Flowers 6x6 Paper.  There's a lot going on in this card, but I love how it all came together!
Sunny Studio Stamps: Chubby Bunny Easter Card (using Frilly Frames Polka-Dot Die & Spring Sunburst Papers)

Card No. 4: For this card I created rows of grass to tuck my bunnies and eggs into using our Sunny Sentiment dies together with our new Dots & Stripes Pastel 6x6 Paper, alternating the dots and stripes.  To frame my little scene, I punched out 1/4" circles with a hole punch and adhered them to the back of my Frilly Frames Polka-dot panel using a liquid glue pen. I adore how the colors mimic the colors of the little eggs in the grass.  I finished off my card by mounting it onto some lavender floral paper from our Flirty Flowers 6x6 Paper Pack and stamped it with an Easter sentiment from our Happy Thoughts stamps.  
Sunny Studio Stamps: Chubby Bunny Easter Card (using Frilly Frames Dies, Flirty Flowers, Dots & Stripes Pastel Paper and Happy Thoughts stamps)

Card No. 5: For my last Chubby Bunny project of the day I thought it would be fun to create some happy Easter tags perfect for tying to treat bags or the handle of an Easter basket.  For these tags I used our Build-A-Tag #2 die together with papers from three of our four new 6x6 paper packs.  I just adore how these papers mix and match together!  I finished my tags with that same sentiment borrowed from our Happy Thought stamps.
Sunny Studio Stamps: Chubby Bunny Easter Gift Tags (using Build-A-Tag 2 Dies, Happy Thoughts Stamps, Flirty Flowers, Dots & Stripes Pastels and Spring Sunburst 6x6 Paper)

Card No. 6:  For those who prefer less cutesy and a bit more realistic images, I have an Easter card featuring our sweet new mini stamp set called Spring Greetings.  For this card I paired the bunnies and tulip from the set with the cross & sentiment from our Easter Wishes stamps.  For my sunburst sky and grass I cut them from our new Spring Sunburst 6x6 Paper Pack using a circle die and our Woodland Border Die.  I finished my card by cutting a stitched scallop frame using our Fancy Frames Circle dies and mounted it onto a piece of heavyweight cardstock which was embossed using our new Sunburst 6x6 Embossing Folder.
Sunny Studio Stamps: Spring Greetings Easter Bunny with Tulips & Cross Card (also using Easter Wishes Stamps, Frilly Frames Circles & Sunburst Embossing Folder)

Card No. 7: For my last card of the day I have one more Spring Greetings card.  This time I paired the bunnies with an Easter basket from our A Good Egg stamps.  To create my background I embossed a piece of white cardstock using the same Sunburst 6x6 Embossing Folder and then blended on spun sugar, squeezed lemonade, twisted citron, tumbled glass and shade lilac distress inks using my favorite Jumbo Dauber.  By inking my panel after it was embossed, it emphasizes the sunburst pattern more than it would have if I had inked up my panel beforehand. 

To frame my sentiment, I cut two little stitched pennants from our Fancy Frames Rectangle dies and turned them both inward to hide the little tails under my bunnies and basket.  I then added a little decorative edge using our Ric Rac Border dies
Sunny Studio Stamps: Spring Greetings Sun Ray Easter Bunny Card (using Sunburst Embossing Folder & A Good Egg Stamps)

I'm so happy you've joined me for today's sneak peek!  I'd love to give a $25 gift code to one lucky winner.  Make sure to keep checking back all this week for more peeks & prizes for up to five chances to win.  The contests run through Saturday at Midnight PST with winners announced here on Sunday, January 6th. :)

a Rafflecopter giveaway Here's a closer look at the new stamps & coordinating dies, 6x6 paper packs and embossing folders used today (available for purchase on Friday, January 4th). 


Sunny Studio Stamps: Introducing Chubby Bunny 4x6 Photopolymer Clear Easter Stamps    Sunny Studio Stamps: Introducing Chubby Bunny Coordinating Metal Cutting Dies

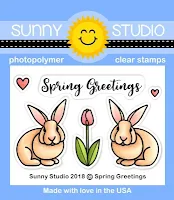
Sunny Studio Stamps: Introducing Spring Greetings 2x3 Photopolymer Clear Easter Bunny Stamps    Sunny Studio Stamps: Introducing Spring Greetings Coordinating Metal Cutting Dies

Sunny Studio Stamps: Introducing 4 New Spring 6x6 Paper Packs (Spring Sunburst, Dots & Stripes Pastels, Gingham Pastels & Flirty Flowers)
Sunny Studio Stamps: Introducing 2 New Spring 6x6 Embossing Folders ~ Sunburst & Quilted Hearts

Other Sunny Studio Supplies Used:
A Good Egg Dies
A Good Egg Dies
Shop at:
Sunny Studio
A Good Egg Stamps
A Good Egg Stamps
Shop at:
Sunny Studio
Easter Wishes Dies
Easter Wishes Dies
Shop at:
Sunny Studio
Easter Wishes Stamps
Shop at:
Sunny Studio
Sunny Sentiments Dies
Shop at:
Sunny Studio
Memento Tuxedo Black Marker
Shop at:
Sunny Studio
Tsukineko Jumbo Dauber
Shop at:
Sunny Studio
Versafine Onyx Black Ink
Shop at:
Sunny Studio
Ric Rac Border Dies
Ric Rac Border Dies
Shop at:
Sunny Studio
Fancy Frames-Circle Dies
Shop at:
Sunny Studio
Fancy Frames- Rectangles
Shop at:
Sunny Studio
Happy Thoughts Stamps
Shop at:
Sunny Studio
Build-A-Tag #2 Dies
Build-A-Tag #2 Dies
Shop at:
Sunny Studio

Sunday, December 30, 2018

A Birds Life Everyday Card with Eloise

Hello friends, Eloise here and today I have a card to share with you all using the A Birds Life stamp set, an oldie but a goodie. I love this set so much and thought it would be perfect to make an everyday card.

Sunny Studio Stamps: A Bird's Life Stitched Scallop Dies Everyday Card by Eloise Blue

I started off stamping out my images from the A Birds Life stamp set and colouring them in with Copic Markers. I then used the coordinating dies to cut them out.

(Copic Markers Used: Y21, YR12, YR15 / YG61, YG63, YG67 / E53, E55, E57 / R81, R83, R85 / RV13, RV25, RV19 / 0 / BG11, BG13, BG49 / Y11, Y15, Y19 / C1, C3, C5)

Next up I took a Cloud Border Die, I used one from another brand but you could cut your own or use the Stitched Scallop Dies at an angle to get a similar effect. I cut the die from white cardstock and stamped the 'from our nest to yours' sentiment on it with black ink.

Sunny Studio Stamps: A Bird's Life Stitched Scallop Dies Everyday Card by Eloise Blue

I then ink blended some blue Distress Inks onto a piece of watercolour cardstock and flicked it with some water. I dried it off with a heat tool and adhered all my pieces into place. I tied some white hemp cord around the branch to "attach" my bird house and my card was complete.

Thanks so much for stopping by today and I'll see you in the new year!

Sunny Studio Supplies Used:

A Bird's Life Stamps
Shop at:
Sunny Studio
A Bird's Life Dies
A Bird's Life Dies
Shop at:
Sunny Studio
Stitched Scallop Dies
Shop at:
Sunny Studio