Showing posts with label Garden Critters. Show all posts

Friday, February 17, 2023

Garden Critters Cards with Tina and Vanessa

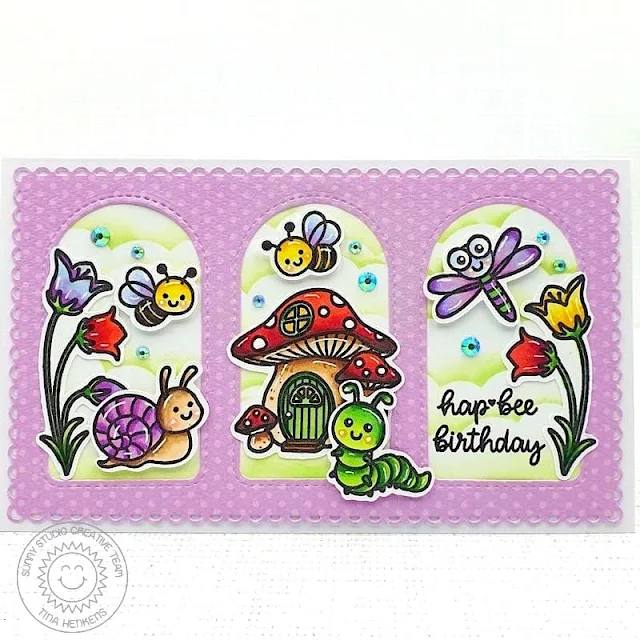
Hello crafty friends, Tina here with a card featuring the adorable Garden Critters stamp and die set. I just love all the cute images and they work really well with the Garden Fairy set. So, I decided to combine both sets to create a happy outdoor scene!

Sunny Studio Stamps: Garden Critters Card by Tina (featuring Garden Fairy, Stitched Arch Dies)

First, I stamped and die cut all my images and colored them with my Copic markers. For extra details I used my white gel pen. I wanted to create three mini scenes that together would become a complete setting.

After die cutting a purple panel with a slim line die and some pattern paper from my stash, I made the arch frames with the smallest of the Stitched Arch dies. To get these arches positioned evenly it’s best to start with the middle one and then cut the ones to the left and the right. That gives you more control regarding the spacing in between.

Sunny Studio Stamps: Garden Critters Card by Tina (featuring Garden Fairy, Stitched Arch Dies)

Next, I cut a white panel slightly smaller than the purple one. This would be my background and I inked up a green sky with a cloud stencil. I glued the background to the purple panel with liquid glue. You can never have enough birthday cards, so I went with a sentiment from the Garden Critters set, stamping it directly to the background with Versafine Onyx Black ink.

Then, I started building my three mini scenes, using foam tape were needed for dimension. Lastly, I adhered the entire scene to a white card base and added a few Iridescent Clear Jewels for that extra bling!

It’s been a cloudy, rainy day but creating this happy Spring card really made my smile! I hope you will have fun too with this darling set! Thank you for visiting the blog and happy crafting!

-----------------------------------------

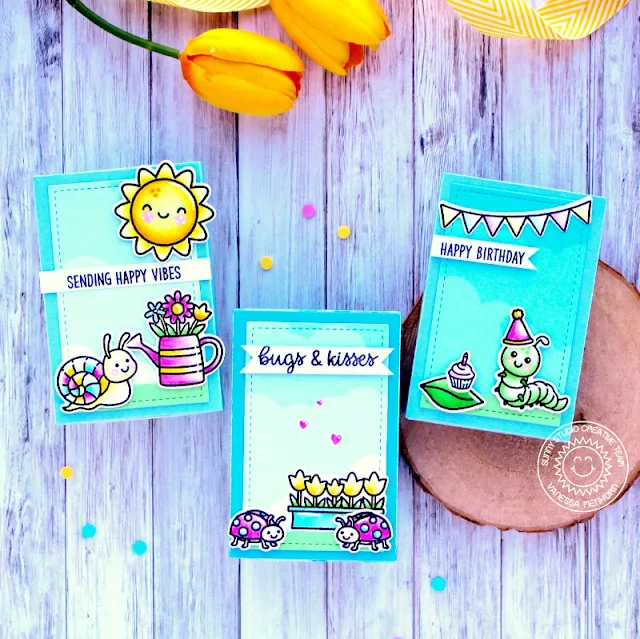
Hello to you! Vanessa here with a set of cute gift boxes using Garden Critters.

Sunny Studio Stamps: Garden Critters Card by Vanessa Menhorn (featuring Panda Party)

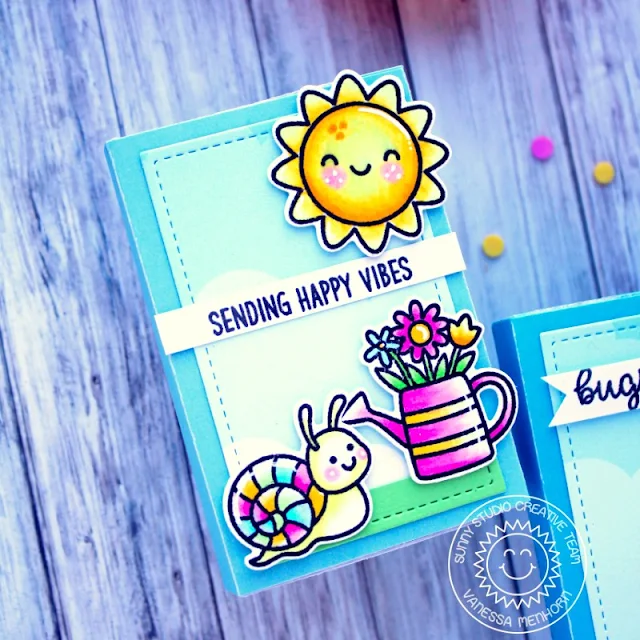
For the matchboxes, I used a die from Mama Elephant, die-cut them from blue cardstock and assembled them. Now I die-cut the backgrounds from the clouds patterned paper from Spring Fever paper and adhered the panels. To the bottom of each rectangle, I added a strip of green paper. Then I stamped the images, including a few images from Panda Party, colored them with Copics, die-cut everything with the matching dies and adhered the elements to the boxes with foam tape.

Sunny Studio Stamps: Garden Critters Card by Vanessa Menhorn (featuring Panda Party)

After I had stamped the sentiment strips, I trimmed them, adhered the strips and used a white gel pen to add highlights to the images.

I love having little boxes at hand to give small gifts. Have a wonderful weekend and thanks for stopping by!

Sunny Studio Supplies Used:

Stitched Arch Dies
Stitched Arch Dies
Shop at:
Sunny Studio
Garden Fairy Stamps
Garden Fairy Stamps
Shop at:
Sunny Studio
Garden Fairy Dies
Garden Fairy Dies
Shop at:
Sunny Studio
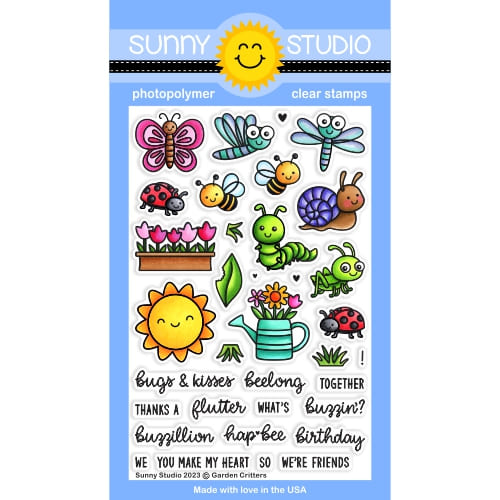
Garden Critters Stamps
Shop at:
Sunny Studio
Garden Critters Dies
Shop at:
Sunny Studio
Panda Party Stamps
Panda Party Stamps
Shop at:
Sunny Studio
Panda Party Dies
Panda Party Dies
Shop at:
Sunny Studio
Spring Fever Paper
Spring Fever Paper
Shop at:
Sunny Studio

Saturday, February 4, 2023

Guest Designer Spotlight: Garden Critters Cards with Tammy Stark

Hello friends! Tammy here! I'm so excited to be guest designing for Sunny Studio for the new, adorable Spring release! My projects feature the new set, Garden Critters. This set is so fun, happy, and Springy, it will be sure to bring smiles!

Sunny Studio Stamps: Garden Critters Spring Cards by Tammy Stark (featuring WooHoo, Slimline Dies)

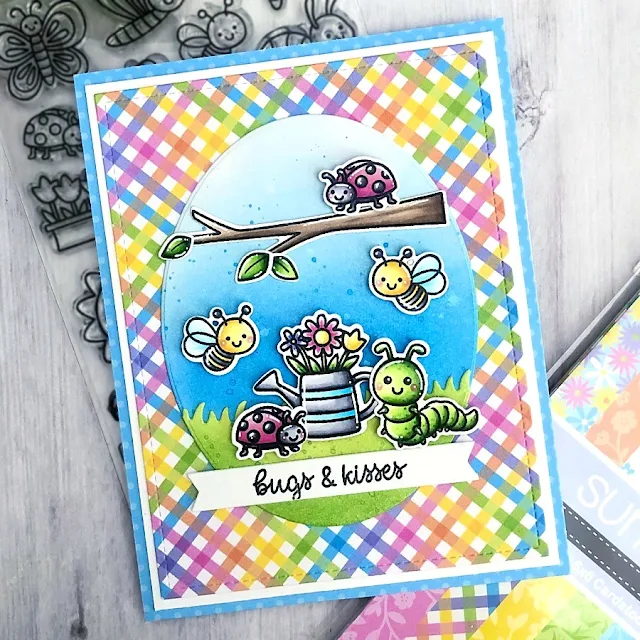
For my first project, I made an A2 card, creating a fun scene to showcase all the darling little critters. To begin, I stamped the images from Garden Friends, colored with Copic markers, and die cut with the Garden Critters Dies. The tree branch and leaves is from the Woo Hoo Stamp SetCoordinating Dies

Next, using the new Spring Fever Paper, I cut the blue dot patterned paper 4 1/4 X 5 1/2" and attached it to an A2 card base. I then cut a white mat, just slightly smaller, and then layered a smaller rectangle using the rainbow plaid patterned paper on top and attached them to the card base.

Sunny Studio Stamps: Garden Critters Spring Cards by Tammy Stark (featuring WooHoo, Slimline Dies)

Next, I die cut an oval from Bristol cardstock and ink blended it with Salty Ocean and Tumbled Glass Distress Oxide inks. I splattered the background with water, then added some Salty Ocean ink to the water and added some darker splatters to add some dimension. Using the Slimline Nature Borders Dies, I die cut a grassy border from green cardstock, inking the bottom with Mowed Lawn Distress Oxide ink, and attached it to the card.

I arranged the stamped images onto the card, attaching some with foam tape for dimension. Lastly, I stamped the punny sentiment onto a white cardstock banner using black ink to complete my card.

Sunny Studio Stamps: Garden Critters Spring Cards by Tammy Stark (featuring WooHoo, Slimline Dies)

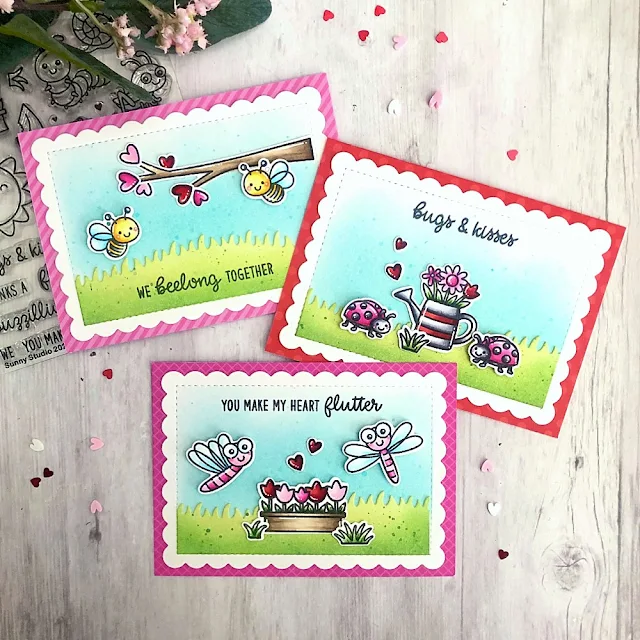
Next up is a fun set of mini cards, perfect for Valentine's Day, or just a little note for someone special.

To begin, I die cut Bristol smooth cardstock 3 times using the Mini Mat & Tag 1 Dies.  I taped off the edges with washi tape and ink blended the background with Salvaged Patina and Tumbled Glass Distress Oxide inks, splattering some watered down Salvaged Patina to create some interest. Next, using the Slimline Nature Borders Dies, I die cut a grassy border from green cardstock, inking the bottom with Mowed Lawn Distress Oxide ink, trimming to fit, and attached it to the card. 

Next, I stamped, colored with Copic markers, and die cut the images from the following sets:
Garden Critters / Coordinating Dies
Woo Hoo Coordinating Dies
Meow & Furever Coordinating Dies

Sunny Studio Stamps: Garden Critters Spring Cards by Tammy Stark (featuring WooHoo, Slimline Dies)

I stamped the sentiments onto the background using black ink, then attached the stamped images using foam tape on some for dimension. Lastly, I cut mats, approximately 3 1/4 X 4 1/2", using patterned paper (Classic GinghamStriped Silly, and Holiday Cheer) and attached them to a white card base. I then glued the scalloped mats to the patterned cards bases to complete my set of mini cards!

Thanks so much for stopping by! See you next time!

Sunny Studio Supplies Used: 

Woo Hoo Dies
Woo Hoo Dies
Shop at:
Sunny Studio
Woo Hoo Stamps
Woo Hoo Stamps
Shop at:
Sunny Studio
Classic Gingham 6x6 Paper
Shop at:
Sunny Studio
Striped Silly 6x6 Paper
Shop at:
Sunny Studio
Holiday Cheer 6x6 Paper
Shop at:
Sunny Studio
Slimline Nature Borders
Shop at:
Sunny Studio
Meow & Furever Stamps
Shop at:
Sunny Studio
Meow & Furever Dies
Meow & Furever Dies
Shop at:
Sunny Studio
Mini Mat & Tag 1 Dies
Shop at:
Sunny Studio
Garden Critters Stamps
Shop at:
Sunny Studio
Garden Critters Dies
Shop at:
Sunny Studio
Spring Fever Paper
Spring Fever Paper
Shop at:
Sunny Studio

Friday, February 3, 2023

Clucky Chickens Cards with Tina and Vanessa

Hello crafty friends, Tina here and yes, I made my first Easter card of 2023! When I saw the super adorable Clucky Chickens stamp and die set, I knew it would be perfect for the occasion.

Sunny Studio Stamps: Clucky Chickens Easter Card by Tina (featuring Little Birdie, Chickie Baby, Picket Fence Border Dies)

I started by stamping and die cutting almost every image from this set using a sheet of Neenah Solar White cardstock. I also selected a few Easter eggs from Chickie Baby. The nest comes from the Little Birdie set. Next, I die cut the Picket Fence Border from the same white paper. All the images were colored with Copic markers.

For my card panel, I used a rectangle die and a piece of Neenah Solar White paper. Next, I cut a diamond shape from the middle of this panel. I inked the outer portion of the rectangle with Distress Oxides Spun Sugar and Kitsch Flamingo using a grid stencil from my stash. The diamond shape was colored with the same Oxides. I stamped an Easter greeting (Clucky Chickens and Fall Friends) onto a small banner with my trusty Versafine Onyx Black ink.

Now let’s assemble the card, starting by adhering the outer portion of the rectangle to a card base. Next, I build my scene onto the diamond shape, working my way through the different layers of the design.

Sunny Studio Stamps: Clucky Chickens Easter Card by Tina (featuring Little Birdie, Chickie Baby, Picket Fence Border Dies)

Before I start a new card, I always place my stamps onto the panel to decide where each image will go. And then I take a picture of this design. This also helps me to choose the colors for each element of my scene.

I added the diamond shape to the base with foam tape for dimension. And lastly, the sentiment banner was mounted to the card. To embellish the card I sprinkled a few Chrystal Clear Jewels around the sentiment.

As always, I plan to send lots of Easter cards, so I am happy I got started working on my stash! I hope you will make some sweet cards with this adorable set too! Thank you for visiting the blog and happy crafting!

---------------------------------------------------

Hello to you! Vanessa here with a birthday card using the adorable Clucky Chickens set.

Sunny Studio Stamps: Clucky Chickens Birthday Card by Vanessa Menhorn (featuring Panda Party, Garden Critters, Big Bold Greetings)

I trimmed a panel of white cardstock slightly smaller than my card base and adhered it. Now I stamped the images onto a piece of cardstock, paper-pieced the hen house with patterned paper, colored everything with Copics, die-cut the elements with the matching dies and adhered them with foam tape.

I mixed these sets:
Clucky Chickens stamps + dies
Panda Party stamps + dies
Garden Critters stamps dies
Big Bold Greetings stamps + dies
Spring Fever Paper Pad

Sunny Studio Stamps: Clucky Chickens Birthday Card by Vanessa Menhorn (featuring Panda Party, Garden Critters, Big Bold Greetings)

Then I stamped the sentiment, die-cut it and adhered it. Finally, I added highlights with a white gel pen.

Such a fun party to join, don't you agree? Enjoy your weekend!

Sunny Studio Supplies Used:

Picket Fence Border Dies
Shop at:
Sunny Studio
Fall Friends Stamps
Fall Friends Stamps
Shop at:
Sunny Studio
Chickie Baby Stamps
Chickie Baby Stamps
Shop at:
Sunny Studio
Chickie Baby Dies
Chickie Baby Dies
Shop at:
Sunny Studio
Little Birdie Stamps
Shop at:
Sunny Studio
Little Birdie Dies
Little Birdie Dies
Shop at:
Sunny Studio
Big Bold Greetings Stamps
Shop at:
Sunny Studio
Big Bold Greetings Dies
Shop at:
Sunny Studio
Clucky Chickens Stamps
Shop at:
Sunny Studio
Clucky Chickens Dies
Shop at:
Sunny Studio
Garden Critters Stamps
Shop at:
Sunny Studio
Garden Critters Dies
Shop at:
Sunny Studio
Panda Party Stamps
Panda Party Stamps
Shop at:
Sunny Studio
Panda Party Dies
Panda Party Dies
Shop at:
Sunny Studio
Spring Fever Paper
Spring Fever Paper
Shop at:
Sunny Studio

Wednesday, February 1, 2023

Garden Critters Cards with Catherine and Marie

Hello Crafty Friends! Catherine here, it’s February 1st and Valentine’s Day is just two weeks away!  I created a Valentine’s Day card with some of the cute bees from Garden Critters Stamps which coordinated nicely with Just Bee-Cause Stamps.

Sunny Studio Stamps: Garden Critters Card by Catherine Cohen (featuring Bursting Heart Dies, Haley Alphabet Dies, Just Bee-cause)

To start, I ink blended a piece of A2 white cardstock with Spun Sugar, Picked Raspberry, and Festive Berries Distress Oxide.  Next I die cut the beautiful Bursting Heart Die out of white cardstock and adhered it onto the background. I ink blended some of the white hearts from the Bursting Heart Die with Festive Berries Distress Oxide and adhered the hearts onto the background.

I stamped and die cut the bees from Garden Critters Stamps and the bees and bee hive from Just Bee-Cause Stamps and die cut the images with coordinating dies. I added some “heart” branches from Love Monkey Stamps and I colored all the images with Copic Markers listed in my blog link below.

Sunny Studio Stamps: Garden Critters Card by Catherine Cohen (featuring Bursting Heart Dies, Haley Alphabet Dies, Just Bee-cause)

For the sentiment, I ink blended Festive Berries and Picked Raspberry Distress Oxide onto white cardstock and I trimmed the banner with my paper cutter. I white heat embossed the sentiment from Just Bee-Cause Stamps. I finished off the card with the word “Bee” using the new Hayley Uppercase Alphabet Dies and Hayley Lowercase Alphabet Dies ink blended with Festive Berries Distress Oxide.

Thanks so much for joining me today! For more Valentine’s inspiration, please feel free to visit me at Crafti-Cat.

--------------------------------------------

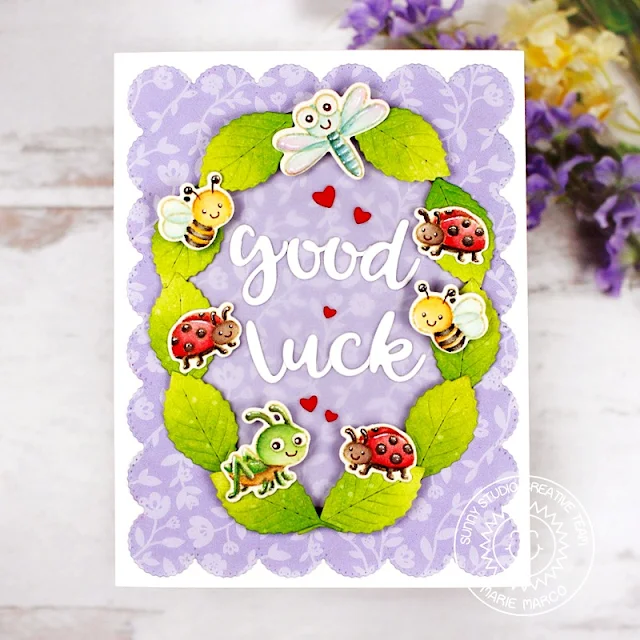
Hello Crafty Friends, Marie here! I am happy to be back on the blog sharing a new card! For many people across different cultures, ladybugs, grasshoppers, dragonflies, and even bees are a symbol of good luck, good fortune, and prosperity so I decided to create a Good Luck card featuring the Garden Critters Stamp. This card is perfect for anyone who needs some warm encouragement! 

Sunny Studio Stamps: Garden Critters Card by Marie Marco (featuring Frilly Frame Dies, Haley Alphabet Dies, Autumn Greenery)

To create this card, I first start by die cutting an A2 sized panel from Neenah Solar white 110 lb cardstock paper. I then used the Frilly Frames Eyelet Lace Die to cut a super cute scalloped panel from the new Spring Fever Paper. I then attached the pattern paper to the white panel using some double sided tape adhesive. 

To create the leafy wreath I used a single leaf die from the Autumn Greenery Dies. I ink blended all my leaves using Twisted Citron and Mowed Lawn Distress Inks. For my "good Luck" sentiment, I used the new Hayley Lowercase Alphabet Dies

Next, I stamped all the garden critters onto watercolor paper using Distress Ink in the color Antique Linen. I then watercolor all my images using Faber- Castell watercolor Pencils. Finally, I used the corresponding Garden Critters Dies to  cut out all the images. 

Sunny Studio Stamps: Garden Critters Card by Marie Marco (featuring Frilly Frame Dies, Haley Alphabet Dies, Autumn Greenery)

To complete my card, I die cut an oval from Translucent Vellum paper and adhered it to the center of my pattern paper. I layered all the leaves around the vellum  to create a wreath. I adhered the leaves using double sided tape adhesive and foam tape to add some dimension. Next, I added the garden critters using some Bearly Art Precision Craft glue and foam tape. Lastly, I adhered the sentiment and added some spare die cut hearts as a finishing touch. 

And that does it for this week's project inspiration! Thank you for joining me today! Until next week, Happy Crafty Cardmaking!!

Sunny Studio Supplies Used:

Love Monkey Stamps
Love Monkey Stamps
Shop at:
Sunny Studio
Love Monkey Dies
Love Monkey Dies
Shop at:
Sunny Studio
Just Bee-cause Stamps
Shop at:
Sunny Studio
Just Bee-cause Dies
Just Bee-cause Dies
Shop at:
Sunny Studio
Frilly Frames-Eyelet Lace
Shop at:
Sunny Studio
Bursting Heart Die
Bursting Heart Die
Shop at:
Sunny Studio
Autumn Greenery Dies
Shop at:
Sunny Studio
Garden Critters Stamps
Shop at:
Sunny Studio
Garden Critters Dies
Shop at:
Sunny Studio
Hayley Lowercase Alphabet Dies
Shop at:
Sunny Studio
Hayley Uppercase Alphabet Dies
Shop at:
Sunny Studio
Spring Fever Paper
Spring Fever Paper
Shop at:
Sunny Studio