Showing posts with label Everyday Greetings. Show all posts

Thursday, March 21, 2019

Puppy Dog Kisses Cards with Vanessa and Anja

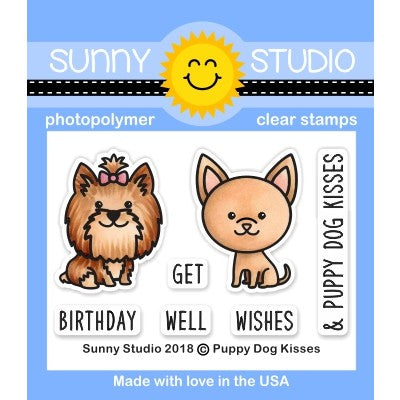
Hi everybody! Vanessa here with a card using the adorable Puppy Dog Kisses Stamps. I am still in the mood for spring, so my puppies are standing in a bed of flowers.

Sunny Studio Stamps: Puppy Dog Kisses Fancy Frames Dies Woodland Borders Dies Happy Birthday Card by Vanessa Menhorn

First, I inked the front of a white card base with a cloud stencil and Distress Oxide Inks. Then I die-cut the Woodland Borders Die from green cardstock and adhered it. Now I die-cut the Fancy Frames Rectangle Dies from pink patterned paper from the Flirty Flowers Paper and adhered the frames. 

Sunny Studio Stamps: Puppy Dog Kisses Fancy Frames Dies Woodland Borders Dies Happy Birthday Card by Vanessa Menhorn

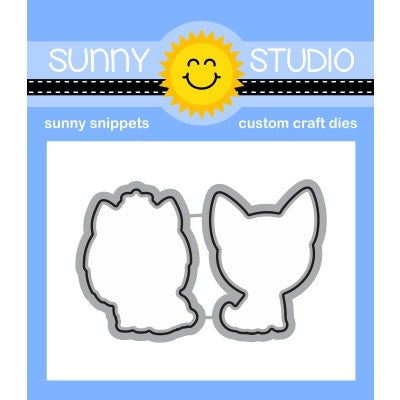
After I had stamped the sentiment from the Party Pups set, I stamped the flowers and dogs onto white cardstock. I colored the images with Copics, die-cut them with the matching dies and adhered everything, popping up some parts with foam tape.

These cuties are adorable, don't you agree? Love their faces :) Thank you for visiting, see you next week!

--------------------------------------------------

Hello everyone, Anja here today with an interactive card. I rarely create these kind of cards but the Sliding Window Die makes it soo easy!

Sunny Studio Stamps: Puppy Dog Kisses Fancy Frames Dies Sliding Window Dies Happy Birthday Card by Anja Bytyqi

First, I created an A2 card base from aqua cardstock. I die cut a stitched rectangle from the violet grid patterned paper (Gingham Pastels 6x6 Paper) which is slightly smaller. Next, I used the sliding window die to create the interactive part. It's a flap with three folds that can be popped up – but the card can be mailed flat into an envelope. Make sure to only put adhesive to the outside frame when adhering it to your card.

Sunny Studio Stamps: Puppy Dog Kisses Fancy Frames Dies Sliding Window Dies Happy Birthday Card by Anja Bytyqi

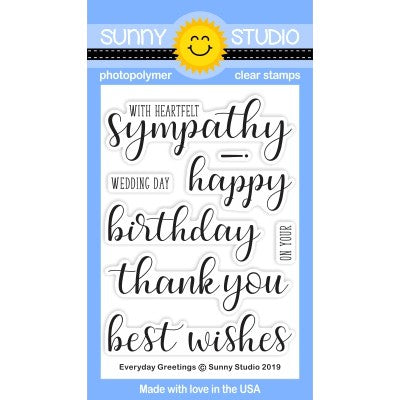
I kept the design of my card front pretty simple and decorated it with a white heat embossed birthday sentiment (Everyday Greetings Stamps), a cake (Make A Wish Stamps) and three die cut hearts (Basic Mini Shape Dies).

Sunny Studio Stamps: Puppy Dog Kisses Fancy Frames Dies Sliding Window Dies Happy Birthday Card by Anja Bytyqi

When you fold the flap up, the inside will be revealed. And here is my fun surprise – the two cute dogs from the Puppy Dog Kisses set are ready to celebrate and they brought a pile of gifts, too.

Sunny Studio Stamps: Puppy Dog Kisses Fancy Frames Dies Sliding Window Dies Happy Birthday Card by Anja Bytyqi

The gifts are from two other stamp sets (Alpaca Holiday Stamps and Foxy Christmas Stamps). I stamped all images in Memento Tuxedo Black Ink and colored them with Copic Markers. In the background, I blended together two Distress Oxide Inks (Shaded Lilac and Tumbled Glass) on a piece of Strathmore Bristol Smooth Cardstock.

I loved creating this interactive card – it looks really sweet on display :-) Thank you so much for stopping by! Have a wonderful day!

Sunny Studio Supplies Used:

Fancy Frames- Rectangles
Shop at:
Sunny Studio
Party Pups Stamps
Party Pups Stamps
Shop at:
Sunny Studio
Party Pups Dies
Party Pups Dies
Shop at:
Sunny Studio
Happy Harvest Stamps
Shop at:
Sunny Studio
Happy Harvest Dies
Happy Harvest Dies
Shop at:
Sunny Studio
Sliding Window Dies
Sliding Window Dies
Shop at:
Sunny Studio
Woodland Borders Dies
Shop at:
Sunny Studio
Mini Basic Shape Dies
Shop at:
Sunny Studio
Alpaca Holiday Stamps
Shop at:
Sunny Studio
Alpaca Holiday Dies
Alpaca Holiday Dies
Shop at:
Sunny Studio
Foxy Christmas Stamps
Shop at:
Sunny Studio
Foxy Christmas Dies
Foxy Christmas Dies
Shop at:
Sunny Studio
Gingham Pastels 6x6 Paper
Shop at:
Sunny Studio
Flirty Flowers 6x6 Paper
Shop at:
Sunny Studio
Make A Wish Stamps
Make A Wish Stamps
Shop at:
Sunny Studio
Make A Wish Dies
Make A Wish Dies
Shop at:
Sunny Studio
Puppy Dog Kisses Stamps
Shop at:
Sunny Studio
Puppy Dog Kisses Dies
Shop at:
Sunny Studio
Everyday Greetings Stamps
Shop at:
Sunny Studio

Thursday, March 7, 2019

Botanical Backdrop Cards with Vanessa and Anja

Hi there! Vanessa here today with a soft pastel card using the Botanical Backdrop Die. I am so ready for spring and have been enjoying a few warmer days! So I was in the perfect mood for creating this.

Sunny Studio Stamps: Botanical Backdrop Hello Word Die Hello Card by Vanessa Menhorn

I started with a card base made from watercolor paper and inked it with various watercolors. Then I added ink droplets and let it dry. Now I die-cut the leafy frame and colored the leaves. After I had adhered the frame to the card, I die-cut the flowers from purple cardstock, bend the petals upwards, added a white pearl to the center and adhered the flowers to the card.

Sunny Studio Stamps: Botanical Backdrop Hello Word Die Hello Card by Vanessa Menhorn

I die-cut the Hello Word Die from watercolor paper, inked it, layered it with a word die-cut from purple cardstock and adhered it to the card. Finally, I added clear droplets.

Have you been enjoying spring days in your part of the world? I hope you'll get plenty soon! Thanks for visiting today :)

-------------------------------------------------

Hi everyone, Anja here and today I'm back with a birthday card that uses the beautiful Botanical Backdrop Die.

Sunny Studio Stamps: Botanical Backdrop Everyday Greetings Birthday Card by Anja Bytyqi

I started with a white A2 card base and die cut this leafy frame from two shades of purple cardstock. I snipped the lighter frame apart to fill in the empty spaces behind the darker frame.

Next, I created a reversed mask of the die by cutting it from masking paper. I adhered it to a panel of Strathmore Bristol Smooth cardstock and sponged on the Distress Oxide Inks Milled Lavender and a little bit of Wilted Violet. I also added tiny ink splatters with a paint brush.

Sunny Studio Stamps: Botanical Backdrop Everyday Greetings Birthday Card by Anja Bytyqi

When everything was completely dry, I combined some sentiments from the Everyday Greetings set and stamped them in VersaMark Ink before heat embossing them with Ranger Liquid Platinum embossing powder. I adhered the layered frame to the panel and embellished the card with Sparkling Clear sequins. You can't really see it on the photo, but I also added some Nuvo Pale Periwinkle Jewel Drops.

Thank you so much for stopping by! See you next week!

Sunny Studio Supplies Used:

Hello Word Die
Hello Word Die
Shop at:
Sunny Studio
Botanical Backdrop Die
Shop at:
Sunny Studio
Everyday Greetings Stamps
Shop at:
Sunny Studio

Monday, February 25, 2019

Everything's Rosy Cards with Leanne and Eloise

Hello everyone! Leanne here today and I’m happy to be sharing a set of thank you cards I made using the Everything’s Rosy stamp set. I was so anxious to play with this beautiful layering set. I just started by stamping out the largest rose in a few different colors. I honestly couldn’t pick which color I like best to use on one card so I decided to make a set of cards.  

Sunny Studio Stamps: Everything's Rosy Everyday Greetings Floral Thank You Cards by Leanne West

These cards are 4 Bar size. The dimensions are 3 1/2 by 4 7/8 inches. This is such a cute size and perfect for thank you notes! To add a little interest to the background, I embossed panels of white card stock and trimmed slightly smaller than 4 Bar size. I used the Quilted Hearts embossing folder which I think pairs so well with the roses.  

Sunny Studio Stamps: Everything's Rosy Everyday Greetings Floral Thank You Cards by Leanne West

Altenew dye ink cube sets used: Pink rose - Cherry Blossom ink set, Yellow rose - Summer Afternoon ink set, Teal rose - Sea Shore ink set, Leaves - Tropical Forest ink set

Sunny Studio Stamps: Everything's Rosy Everyday Greetings Floral Thank You Cards by Leanne West

After stamping all the roses and leaves, I use the coordinating Everything’s Rosy dies to cut them out. I adhered the roses and leaves with glue dots. The glue dots seemed to stick well to the embossed surface. I white heat embossed “thank you” (from Everyday Greetings) on green card stock and trimmed into strips with a fish tail end. I tucked one end of the sentiment strip underneath a rose and secured with more glue dots.  

-------------------------------------------------------

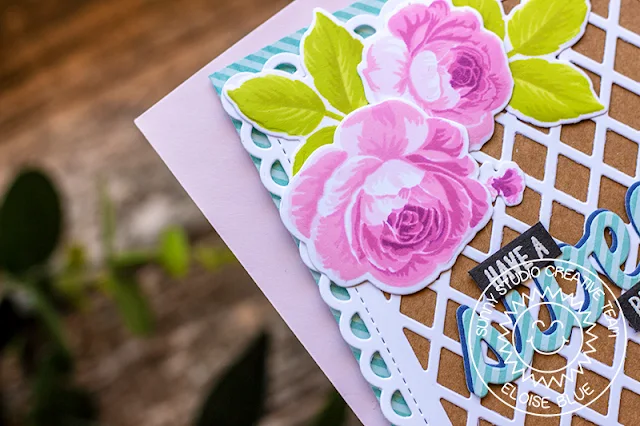
Hi friends, Eloise here and today I’m using the Everything’s Rosy stamp set. I also paired it with the Sweet Word die and Frilly Frames Lattice Dies.

Sunny Studio Stamps: Everything's Rosy Frilly Frames Floral Birthday Card by Eloise Blue

I started off with stamping out my roses and leaves using my MISTI. I used various Altenew Inks to stamp the layers. Once they were all stamped, I cut them out using the coordinating dies.

(Altenew Inks Used: Rose Quartz, Cotton Candy, Puffy Heart, Purple Wine, Cosmic Berry / Bamboo, Parrot, Olive)

Sunny Studio Stamps: Everything's Rosy Frilly Frames Floral Birthday Card by Eloise Blue

Next, I die cut out the Frilly Frames Lattice Dies from white cardstock. I added adhesive onto the back and adhered a piece of Kraft Cardstock. I added foam tape onto the back and adhered it onto a piece of blue striped pattern paper from the Striped Silly 6x6 Paper Pad. I added foam tape onto the roses and leaves and adhered them in each corner as well.

Sunny Studio Stamps: Everything's Rosy Frilly Frames Floral Birthday Card by Eloise Blue

For the sentiment, I die cut the Sweet Word Die from the same striped patterned paper and also from some dark blue. I adhered them together a little offset. I also used the Fruit Cocktail Stamp Set and white heat embossed ‘Have A’ and ‘Birthday’ onto some black cardstock. I cut them down into strips and adhered all the pieces into the centre of the design.

That finished up my card for today, I hope you enjoyed. See you next week! 

Sunny Studio Supplies Used:

Sweet Word Die
Sweet Word Die
Shop at:
Sunny Studio
Striped Silly 6x6 Paper
Shop at:
Sunny Studio
Fruit Cocktail Stamps
Shop at:
Sunny Studio
Quilted Hearts Embossing
Shop at:
Sunny Studio
Everything's Rosy Stamps
Shop at:
Sunny Studio
Everything's Rosy Dies
Shop at:
Sunny Studio
Frilly Frames Lattice Dies
Shop at:
Sunny Studio
Everyday Greetings Stamps
Shop at:
Sunny Studio

Friday, February 22, 2019

Spring Greetings Cards with Lexa and Rachel

Hi everyone! Lexa here to share a card I made that highlighting both Spring Greetings Stamps and the coordinating dies. It's a sweet 2x3 stamp set that has two little bunnies and a tulip. Even though it's a mini stamp set, the possibilities are endless and you can match this stamp with other sets. Either an Easter themed, spring themed or just everyday projects. Let's get started!

Sunny Studio Stamps: Spring Greetings Easter Wishes Frilly Frames Lattice Spring Themed Best Wishes Card by Lexa Levana

I use Frilly Frames Lattice Dies on Gingham Pastels Paper for the card base. For the inside panel, I make it with a 3.25"x4.5" white cardstock then create three grassy hills and a blue sky to create a scene. I blended some Distress Inks (Mowed Lawn, Crushed Olive, Twisted Citron and Tumbled Glass) on every pieces. The images are stamped with Versafine black ink and watercolor them with various brand of markers. 

Sunny Studio Stamps: Spring Greetings Easter Wishes Frilly Frames Lattice Spring Themed Best Wishes Card by Lexa Levana

To match the single tulip from the stamp set, I also use ones from Easter Wishes Stamps to create more variations. "Best wishes" sentiment is from one of the-must-have Everyday Greetings and "for you" come from the stamp set called Over The Rainbow. When two bunnies aren't enough, make them four instead. The more the merrier. Last touch, I use yellow gems from Pretty Pink Posh to create an accent to my card.

That's all for today, I hope you like today's card as much as I do. Have an amazing day to you and your loved ones!

-------------------------------------------------------------

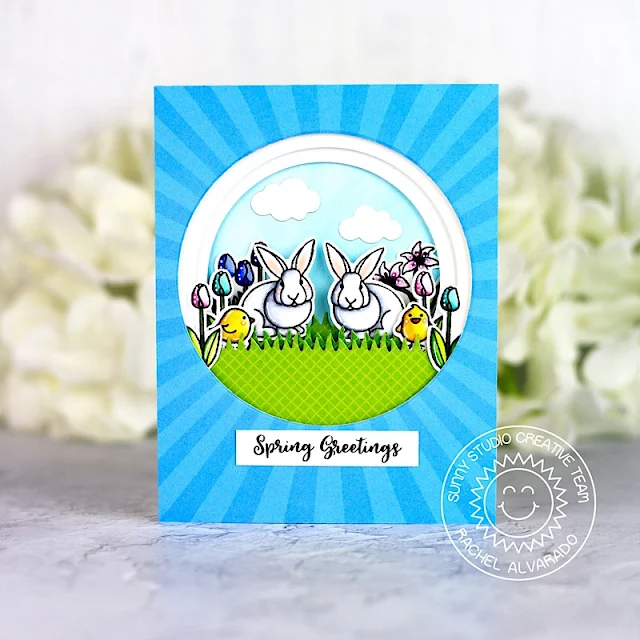
Happy Friday! It's Rachel here and today I am sharing a card featuring the adorable rabbits and tulips from the Spring Greetings Stamp Set.

Sunny Studio Stamps: Spring Greetings Easter Wishes Spring Themed Spring Greetings Card by Rachel Alvarado

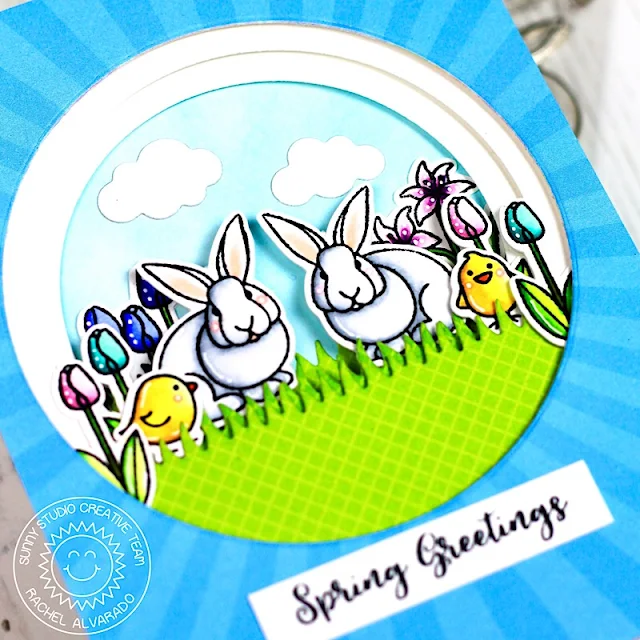
I combined this set with a few of the matching tulips from the Easter Wishes Stamp Set and created a tunnel card. To start, I first stamped my images with Copic friendly black ink, colored them with Copic Sketch Markers and used the coordinating dies to cut them out.

Sunny Studio Stamps: Spring Greetings Easter Wishes Spring Themed Spring Greetings Card by Rachel Alvarado

Copic Colors Used: Rabbits: 0, C00, C0, C2, C3; Ears: RV0000, R00, R01; Greens: YG0000, YG01, YG07, YG17, YG67; Teal: BG10, BG11, BG15, BG49; Pinks: RV0000, RV000, RV52, RV55; Purples: V000, V01, V06, V09; Dark Purplish Blue: B63, B66, B69

Sunny Studio Stamps: Spring Greetings Easter Wishes Spring Themed Spring Greetings Card by Rachel Alvarado

To get the tunneling effect, I trimmed 4 pieces of white card stock to 4.25" x 5.5". I then used 3 different circle dies to cut into the first 3 pieces going from the largest circle to the smallest. For the front panel, I added a sheet of beautiful blue patterned paper from the Spring Sunburst Paper Pad. I added some 3D Foam Tape behind each panel so that it was lifted off of the panel behind it, therefore giving it more depth.

Sunny Studio Stamps: Spring Greetings Easter Wishes Spring Themed Spring Greetings Card by Rachel Alvarado

I cut some grass from two different shades of green patterned paper from the Classic Gingham 6x6 Paper Pad using the grass die from the Sunny Sentiments Die Set. I blended some Tumbled Glass Distress Oxide Ink for the sky and added a couple of clouds cut from white card stock using the Comic Strip Every Day Dies. Lastly, I stamped my sentiment onto a strip of white card stock with black ink and adhered it to the front of my card.

Thanks so much for dropping by!  Wishing you all a lovely and relaxing weekend!

Sunny Studio Supplies Used: 

Easter Wishes Dies
Easter Wishes Dies
Shop at:
Sunny Studio
Easter Wishes Stamps
Shop at:
Sunny Studio
Sunny Sentiments Dies
Shop at:
Sunny Studio
Sunny Sentiments Stamps
Shop at:
Sunny Studio
Classic Gingham 6x6 Paper
Shop at:
Sunny Studio
Comic Strip Everyday Dies
Shop at:
Sunny Studio
Gingham Pastels 6x6 Paper
Shop at:
Sunny Studio
Spring Sunburst 6x6 Paper
Shop at:
Sunny Studio
Spring Greetings Stamps
Shop at:
Sunny Studio
Spring Greetings Dies
Shop at:
Sunny Studio
Over The Rainbow Stamps
Shop at:
Sunny Studio
Frilly Frames Lattice Dies
Shop at:
Sunny Studio
Everyday Greetings Stamps
Shop at:
Sunny Studio