Saturday, March 11, 2023

Sunny Saturday Share: Customer Cards


Hey everyone, how are you all doing this weekend? I'm so excited to be popping in today with a Sunny Saturday Share. There have been so many amazing cards popping up on Instagram that have made my jaw drop so I couldn't wait to share them with all of you! 

Spring Bouquet, Layered Basket, Scalloped Oval Mat 3, Stitched Oval 2 card by Kimmie Burmaster

Sunny Studio Stamps Spring Bouquet, Layered Basket, Scalloped Oval Mat 3, Stitched Oval 2 card by Kimmie Burmaster

Baby Elephants card by Linda Anderson

Sunny Studio Stamps Baby Elephants Slimline Baby Girl card by Linda Anderson

Baby Elephants card by Mrs Fox Delights

Sunny Studio Stamps Baby Elephants Baby Boy card by Mrs Fox Delights

Devoted Doggies card by Alexandra

Sunny Studio Stamps Devoted Doggies pastel rainbow birthday card by Alexandra

Happy Hamster, Stitched Heart 2, Scalloped Heart card by Roslyn Jin

Sunny Studio Stamps Happy Hamster, Stitched Heart 2, Scalloped Heart card by Roslyn Jin

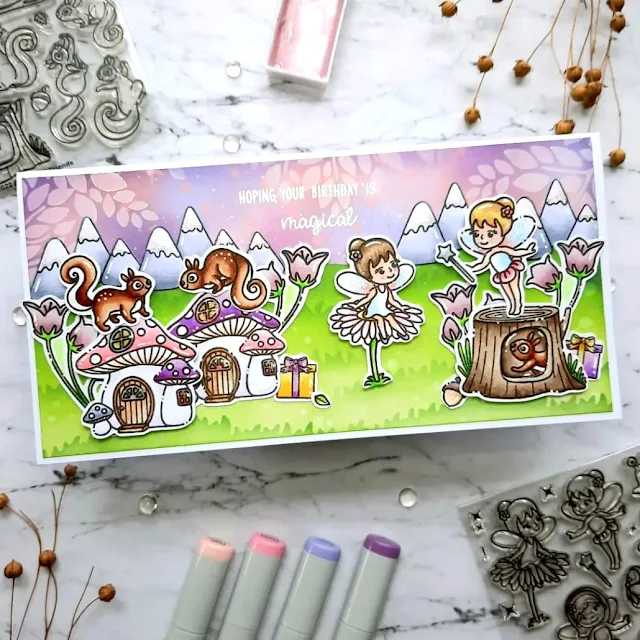
Garden Fairy, Alpaca Holiday, and Squirrel Friends card by Janneke

Sunny Studio Stamps Garden Fairy, Alpaca Holiday, and Squirrel Friends slimline birthday card by Janneke


Build-A-Birdhouse and Big Bold Greetings card by Kimmie BurmasterSunny Studio Stamps Build-A-Birdhouse and Big Bold Greetings thank you card by Kimmie Burmaster


Sunny Studio Stamps Bunnyville Easter Bunny Card by Peggy Emmerink


Sunny Studio Stamps Passionate Penguins and Sunny Sentiments slimline card by Shannon Lee Smith


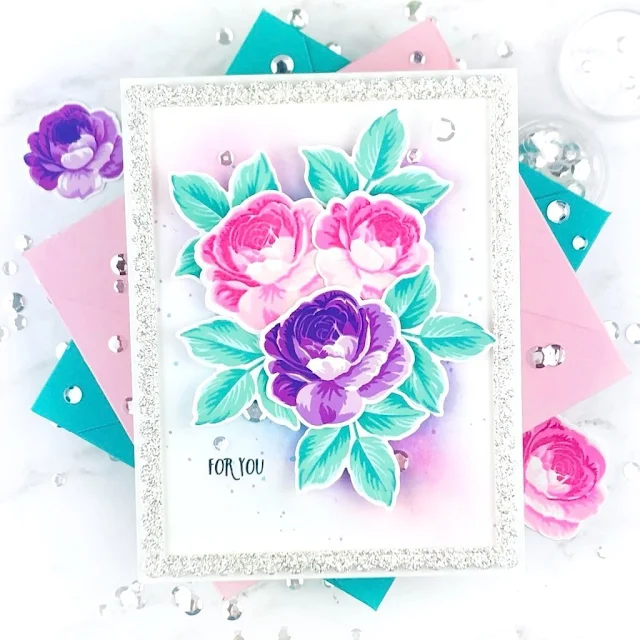
Sunny Studio Stamps Everything’s Rosy Layered Floral Roses card by Arsenia


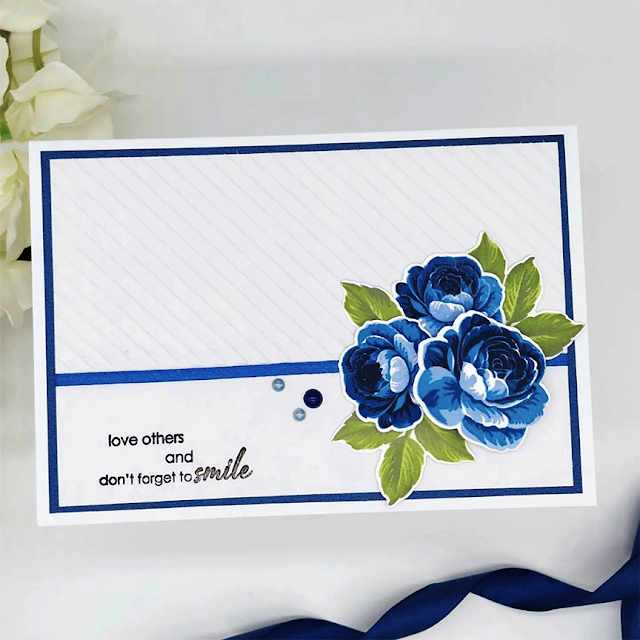
Sunny Studio Stamps Everything’s Rosy Layered Floral Roses card by Art Ani Design

Thank you for sharing all these fabulous ideas with us! I hope you will continue to share your gorgeous projects with us--It always makes my day to see them. You can tag us on instagram with the hashtag #sunnystudiostamps or share your projects with us in our flickr group or on our facebook page. ☺


Sunny Studio Supplies Used:

Sunny Sentiments Dies
Shop at:
Sunny Studio
Sunny Sentiments Stamps
Shop at:
Sunny Studio
Happy Hamsters Stamps
Shop at:
Sunny Studio
Happy Hamsters Dies
Happy Hamsters Dies
Shop at:
Sunny Studio
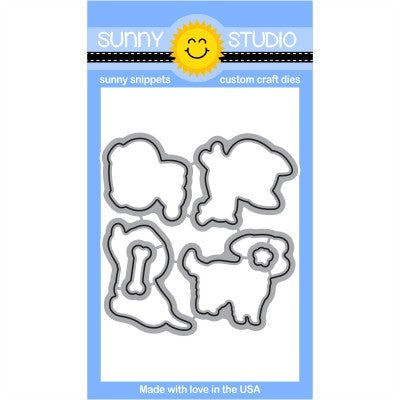
Devoted Doggies Stamps
Shop at:
Sunny Studio
Devoted Doggies Dies
Shop at:
Sunny Studio
Alpaca Holiday Stamps
Shop at:
Sunny Studio
Alpaca Holiday Dies
Alpaca Holiday Dies
Shop at:
Sunny Studio
Everything's Rosy Stamps
Shop at:
Sunny Studio
Everything's Rosy Dies
Shop at:
Sunny Studio
Garden Fairy Stamps
Garden Fairy Stamps
Shop at:
Sunny Studio
Garden Fairy Dies
Garden Fairy Dies
Shop at:
Sunny Studio
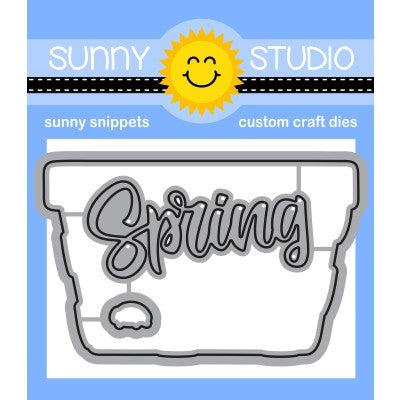
Layered Basket Stamps
Shop at:
Sunny Studio
Layered Basket Dies
Layered Basket Dies
Shop at:
Sunny Studio
Scalloped Oval Mat 3 Dies
Shop at:
Sunny Studio
Stitched Oval 2 Dies
Shop at:
Sunny Studio
Bunnyville Stamps
Bunnyville Stamps
Shop at:
Sunny Studio
Bunnyville Dies
Bunnyville Dies
Shop at:
Sunny Studio
Passionate Penguins Stamps
Shop at:
Sunny Studio
Passionate Penguins Dies
Shop at:
Sunny Studio
Scalloped Heart Dies
Shop at:
Sunny Studio
Stitched Heart 2 Dies
Shop at:
Sunny Studio
Baby Elephants Stamps
Shop at:
Sunny Studio
Baby Elephants Dies
Baby Elephants Dies
Shop at:
Sunny Studio
Squirrel Friends Stamps
Shop at:
Sunny Studio
Squirrel Friends Dies
Shop at:
Sunny Studio
Big Bold Greetings Stamps
Shop at:
Sunny Studio
Big Bold Greetings Dies
Shop at:
Sunny Studio
Spring Bouquet Stamps
Shop at:
Sunny Studio
Spring Bouquet Dies
Spring Bouquet Dies
Shop at:
Sunny Studio
Build-A-Birdhouse Dies
Shop at:
Sunny Studio

Friday, March 10, 2023

Slimline Ribbon & Lace Die Focused Cards with Vanessa and Tina

Hello to you! Vanessa here with a monochromatic birthday card using the Slimline Ribbon & Lace Borders.

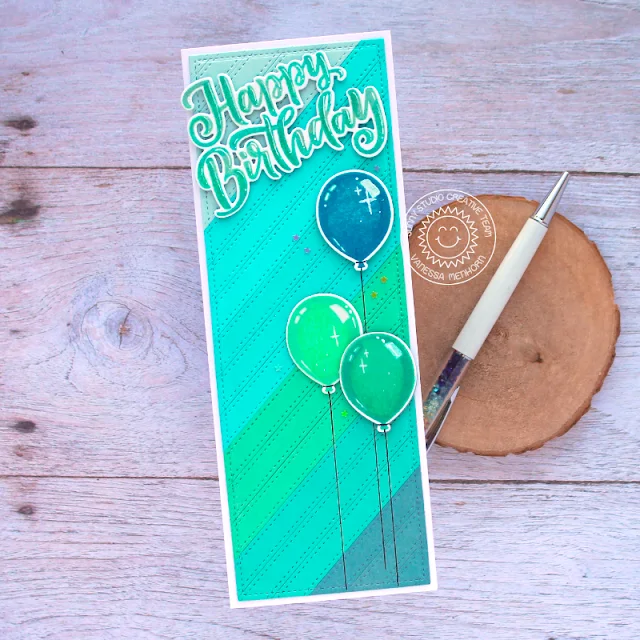
Sunny Studio Stamps: Slimline Ribbon & Lace Die Focused Birthday Card by Vanessa Menhorn (featuring Birthday Balloons, Big Bold Greetings, Slimline Dies)

Do you own a box full of cardstock scraps? I do and I love to be able to find a good use for them. For this card, I die-cut strips from various hues of aqua/turquoise/petrol paper and adhered them to a piece of paper. Now I die-cut the rectangle using the Slimline Scalloped Frame Dies and adhered it to the card base. I stamped the balloons from Birthday Balloon Stamps, die-cut them with the matching die, drew strings with a black marker and adhered the balloons to the card with foam tape.

Sunny Studio Stamps: Slimline Ribbon & Lace Die Focused Birthday Card by Vanessa Menhorn (featuring Birthday Balloons, Big Bold Greetings, Slimline Dies)

Then I stamped the sentiment using the Big Bold Greetings set, die-cut it with the matching dies and adhered it with foam tape. Finally, I added tiny star sequins and added highlights with a white gel pen.

I hope to have you inspired to use those scraps! Have a lovely weekend!

---------------------------------------

Hello crafty friends, it’s Tina and today I am using the Slimline Ribbon & Lace dies to create an Easter basket from scratch!

Sunny Studio Stamps: Slimline Ribbon & Lace Die Focused Easter Card by Tina (featuring Chickie Baby, Fancy Frame Dies)

These new dies make it super easy to assemble custom shapes. First, I drew a simple basket outline onto a piece of white cardstock and cut it with my scissors. I wanted to fit four straight stitched edge strips and one scalloped one. That was the height of the basket, for width I opted to almost completely fill an A2 size panel.

I die cut the slimline edges using two sheets from the Spring Fever paper pad. Next, I stacked them onto the paper shape, trimmed the sides and I got myself a sweet basket! Chickie Baby is one of my Easter favorites, so I stamped and die cut three of the cute chicks. I colored them with my Copic makers and added some white highlights.

The basket needed to be filled with Easter eggs and at first, I was planning the use the eggs from that same stamp set. But with the basket being so colorful already, it just didn’t work. I had to keep the eggs plainer but in the same colors as the basket. For this, I used two different egg dies from my stash and papers in yellow, green, pink, and purple shades.

Sunny Studio Stamps: Slimline Ribbon & Lace Die Focused Easter Card by Tina (featuring Chickie Baby, Fancy Frame Dies)

My card panel was a white rectangle, and I used a stencil from my stash to add a fine purple line. I also cut a grassy border that I colored with two green Copic markers. Lastly, I created a white frame with the Fancy Frames Rectangle dies.

I was only going to use the top part of this frame, so I decided to embellish some of the plain eggs with the leftovers. Gluing them on in opposite directions for some variation. And that really gave them an instant make-over!

The ‘Happy Easter’ sentiment from Chickie Baby was stamped directly onto the background panel. I glued the panel to a white card base, added the top part of the frame and continued building the scene with the basket, eggs, grass and chicks. A few Pastel Jewels were all the bling this happy card needed. I hope this idea inspires you to create your own custom shapes with these fun Slimline Ribbon & Lace dies!

Thank you for joining me and happy crafting!

Sunny Studio Supplies Used:

Fancy Frames- Rectangles
Shop at:
Sunny Studio
Chickie Baby Stamps
Chickie Baby Stamps
Shop at:
Sunny Studio
Chickie Baby Dies
Chickie Baby Dies
Shop at:
Sunny Studio
Slimline Scalloped Frame
Shop at:
Sunny Studio
Big Bold Greetings Stamps
Shop at:
Sunny Studio
Big Bold Greetings Dies
Shop at:
Sunny Studio
Ribbon & Lace Dies
Ribbon & Lace Dies
Shop at:
Sunny Studio
Spring Fever Paper
Spring Fever Paper
Shop at:
Sunny Studio

Thursday, March 9, 2023

Spring Bouquet Cards with Marine and Waleska

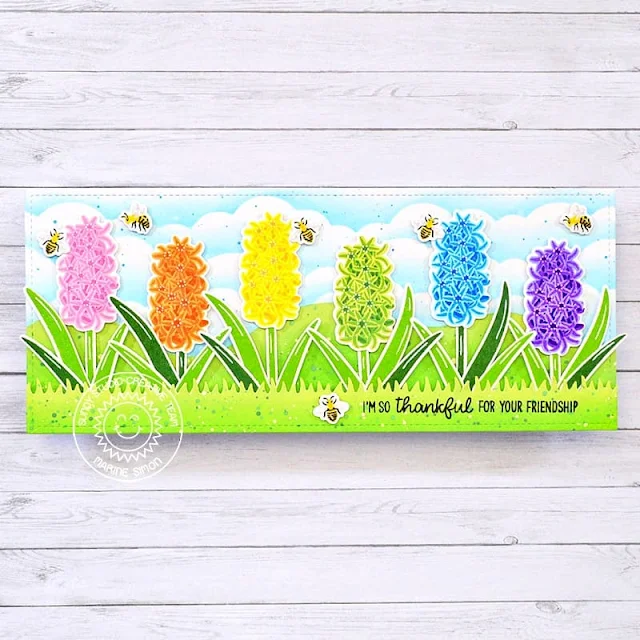
Hey crafty friends! Marine here, back with more flowers to brighten your day! Today's card features Spring Bouquet, a beautiful layering stamp set that includes three types of flowers: daffodil, hyacinth and iris. 

Sunny Studio Stamps: Spring Bouquet Friendship Card by Marine Simon (featuring Sunflower Fields, Words Of Gratitude, Picket Fence Border Dies)

I decided to go with hyacinths only in order to create like a field of flowers, and the first thing I did was to stamp six of them on Strathmore bristol smooth cardstock using distress oxide inks. Here are the color combinations I picked for each flower & greenery:

Pink: spun sugar + kitsch flamingo + picked raspberry
Orange: dried marigold + carved pumpkin + ripe persimmon
Yellow: squeezed lemonade + mustard see + fossilized amber
Green: shabby shutters + mowed lawn + rustic wilderness
Blue: tumbled glass + salty ocean + blueprint sketch
Purple: shaded lilac + wilted violet + villainous potion
Greenery: mowed lawn + rustic wilderness

Sunny Studio Stamps: Spring Bouquet Friendship Card by Marine Simon (featuring Sunflower Fields, Words Of Gratitude, Picket Fence Border Dies)

Because Spring is coming soon, I decided to add a few bees. These are from Sunflower Fields, and again, I used distress oxide inks to stamp the different parts: mustard seed for the body, black soot for the dark details, and lost shadow for the wings. Once the flowers, leaves and bees were done, I cut everything using the coordinating dies, and moved on to the background.

To be able to fit the six flowers on my card, I went for a slimline design. I cut an 8,5 x 3,5 inches Strathmore bristol smooth panel, and I did some stenciling using distress oxide inks. On the lower part, I created a hill border using shabby shutters + mowed lawn. And on the upper part, a cloudy sky using tumbled glass + salty ocean. Next I cut another 8,5 x 3,5 inches Strathmore bristol smooth panel, and cut a slim grass border out of it using a die from Picket Fence Border and I colored that grass border using shabby shutters + mowed lawn oxide inks.

Sunny Studio Stamps: Spring Bouquet Friendship Card by Marine Simon (featuring Sunflower Fields, Words Of Gratitude, Picket Fence Border Dies)

Next I stamped my "I'm so thankful for your friendship" greeting from Words Of Gratitude on the grass border using black ink, I attached the border at the bottom of my slimline panel using foam squares, and then the hyacinths, leaves and bees using foam squares again. And finally I added highlights and details on the images using a white gel pen.

And that's it! This card definitely calls for Spring, and I can't wait to see cute bees buzzing and flying from one flower to another in a few weeks! Thanks so much for stopping by, and see you next time!

-------------------------------------------

Hello there, Waleska here! Today's card is very colorful and brings you spring feel using Iris flowers from the Spring Bouquet Stamp from the latest release.

Sunny Studio Stamps: Spring Bouquet Miss You Card by Waleska Galindo (featuring Big Bold Greetings)

To start this card I stamped all the Iris flowers with the following inks: Lawn Fawn Fresh Lavender, Lawn Fawn Juice Box and Lawn Fawn Blue Joy and for the center of the flower I used a yellow copic marker,  I search for real Iris colors and this turned out exactly like the ones I like. I then stamped the leaves with Lawn Fawn Jalapeno Ink. I wanted a very contrasting background so I decided to use Oxide Inks in Colors Picked Raspberry and Wild Honey I added water splashes and some sparkle watercolor for more interest too.

Sunny Studio Stamps: Spring Bouquet Miss You Card by Waleska Galindo (featuring Big Bold Greetings)

I wanted my card to look like a field with Irises so I arrange them in a harmonic way and adhere them to the inked panel.  Finally I added the sentiment from the Big Bold Greetings.  This beautiful flowers look so realistic with all the layers and can be stamped with all kinds of different colors!

Thank you so much for stopping by today! Have a wonderful rest of your day!

Sunny Studio Supplies Used:

Picket Fence Border Dies
Shop at:
Sunny Studio
Words of Gratitude Stamps
Shop at:
Sunny Studio
Sunflower Fields Stamps
Shop at:
Sunny Studio
Sunflower Fields Dies
Shop at:
Sunny Studio
Big Bold Greetings Stamps
Shop at:
Sunny Studio
Big Bold Greetings Dies
Shop at:
Sunny Studio
Spring Bouquet Stamps
Shop at:
Sunny Studio
Spring Bouquet Dies
Spring Bouquet Dies
Shop at:
Sunny Studio

Wednesday, March 8, 2023

Build-A-Birdhouse Cards with Marie and Catherine

Hey there crafty friends, Marie here! Today I am sharing a very spring inspired birthday card featuring Sunny Studio Stamps' Build-A-Birdhouse Dies. These dies create the cutest little birdhouses that pair so perfectly with their Out On a Limb Dies

Sunny Studio Stamps: Build-A-Birdhouse Die Focused Card by Marie Marco (featuring Big Bold Greetings, Out On A Limb Dies)

To begin, I used an A7 size die to cut out my card base from 110 lb heavyweight cardstock paper. I used bristol smooth cardstock for my background panel which I ink blended using Salvaged Patina Distress Oxide Ink. Then I adhered my inked panel to my cardbase using double sided tape adhesive. 

Next, I die cut all the pieces from the Build-A-Birdhouse Dies, the Out On a Limb Dies, as well as the adorable tiny flowers from the Wonderful Windows Dies. I cut out my birdhouses from watercolor paper, and used watercolor pencils from Faber-Castell to color each one in a shabby chic style. To give the houses dimension I die-cut the roof about 5 times and stacked them up. For my flowers I cut them from pink shades of cardstock paper. All the tree limbs and leaves were cut from bristol smooth cardstock and inked using Vintage Photo and Mowed Lawn Distress inks. After inking, I went over some of the die cuts with color pencil for some extra shading.

Sunny Studio Stamps: Build-A-Birdhouse Die Focused Card by Marie Marco (featuring Big Bold Greetings, Out On A Limb Dies)

I positioned all my tree limbs to create a frame. From there, I built up my scene by adding all the leaves and flowers using Bearly Art Precision Craft Glue. The last thing I added were the birdhouses. I used some foam tape on the back of each house to create a floating dimensional look and I added some gold twine to the back of the houses and glued it to the top of the tree branch. I then created some super tiny bows and attached them to the top for the cutest hanging birdhouses! 

Sunny Studio Stamps: Build-A-Birdhouse Die Focused Card by Marie Marco (featuring Big Bold Greetings, Out On A Limb Dies)

Moving on to the inside of my card, I stamped out a big Happy Birthday Sentiment using the Big Bold Greetings Stamp and cut it out using the Big Bold Greetings Dies. I used some extra leaves and flowers to create some cute floral accents and called this card done! 

Thanks so much for joining me on this week's card inspiration! Until next time, Happy Crafting! 

--------------------------------------------

Hello Crafty Friends! Catherine here, and today I am so excited to share another card created with Build-A-Birdhouse Dies. I thought it would be fun this time to use a circle slider die so that the birds can fly around their homes. 

Sunny Studio Stamps: Build-A-Birdhouse Die Focused Card by Catherine Cohen (featuring Little Birdie, Fluffy Cloud Border Dies, Out On A Limb Dies)

There are many fabulous circle slider dies out in the market. The one that I used is a generic one listed in my blog link below. There are essentially three pieces that is required for the circle: circle slider track (A), circle used as a slide backer (B), slider disc (C). 

Sunny Studio Stamps: Build-A-Birdhouse Die Focused Card by Catherine Cohen (featuring Little Birdie, Fluffy Cloud Border Dies, Out On A Limb Dies)

To start, I ink blended two (one will be the front panel and the other will be the back) A2 white card stock with Tumbled Glass Distress Oxide using a cloud stencil that I created with Fluffy Clouds Border Dies. I splattered both with blue watercolor paint. Once dried, I die cut the front panel with the circle slider track (A). I die cut the slide backer out of white cardstock (B). I attached the slider disc (C) onto the slide backer (B) using a glue gun.  I put the slider disc inside front panel with the circle track. (A).  I attached the front panel onto the back panel with foam tape.

Next, I die cut the birdhouses from Build-A-Birdhouse Dies and branches from Out On A Limb Dies. I ink blended the birdhouses with Scattered Straw, Wilted Violet, and Shaded Lilac Distress Oxides. I ink blended the branches with Antique Linen and Tea Dye Distress Oxides and the coordinating leaves with Shabby Shutters and Bundled Sage Distress Oxides. I thought it would be pretty to add some flowers so I used the flower die from Window Quad Square Dies and ink blended the flowers with the same inks.

Sunny Studio Stamps: Build-A-Birdhouse Die Focused Card by Catherine Cohen (featuring Little Birdie, Fluffy Cloud Border Dies, Out On A Limb Dies)

I stamped and die cut the cute birds from Little Birdie Stamps and colored the birds with Copic Markers listed in my blog link below. I die cut an extra die cut for each of the two birds that I wanted to attach onto the slider discs for extra support. I glued the birds onto the slider discs with a hot glue gun. I attached the birdhouses onto the branches with some yellow bakers twine. I finished off the card with a reverse scalloped frame and a sentiment from A Bird's Life Stamps.

Thank you so much for joining me today. Please feel free to visit me at Crafti-Cat. Have a wonderful day!

Sunny Studio Supplies Used:

A Bird's Life Stamps
Shop at:
Sunny Studio
Fluffy Clouds Border Dies
Shop at:
Sunny Studio
Window Quad Square Die
Shop at:
Sunny Studio
Little Birdie Stamps
Shop at:
Sunny Studio
Little Birdie Dies
Little Birdie Dies
Shop at:
Sunny Studio
Out on A Limb Dies
Out on A Limb Dies
Shop at:
Sunny Studio
Big Bold Greetings Stamps
Shop at:
Sunny Studio
Big Bold Greetings Dies
Shop at:
Sunny Studio
Build-A-Birdhouse Dies
Shop at:
Sunny Studio
Wonderful Windows Dies
Shop at:
Sunny Studio

Tuesday, March 7, 2023

Big Bold Greetings Cards with Isha and Lien

Hello everyone, Isha here with you! Today I have a CAS floral card featuring the Big Bold Greetings stamp and coordinating dies. These sentiments are really lovely with beautiful fonts and size.

Sunny Studio Stamps: Big Bold Greetings Birthday Card by Isha Gupta (featuring Tranquil Tulips, Fancy Frame Dies)

I started by sponging squeezed lemonade distress ink to a white panel. Flick some water and white paint. I then stamped the tulips and leaves from the Tranquil Tulips stamp set, it has got layering stamps for beautiful results. Die-cut using the coordinating dies

Adhere the inside of the Fancy Frame Rectangle to the white panel. Adhere this panel to a pink card base.

Sunny Studio Stamps: Big Bold Greetings Birthday Card by Isha Gupta (featuring Tranquil Tulips, Fancy Frame Dies)

Adhere the images. Stamp the word "Happy Birthday" from the Big Bold Greetings stamp set using Versamark ink, sprinkle WOW! oiled slate embossing powder. Heat set and die-cut using the coordinating dies. Die-cut the word using dark pink card, stack this behind the embossed sentiment slightly offset.

Adhere to the card. Thank you for stopping by and have a nice day!

------------------------------------------

Hi crafty friends! It's Lien here, back with a very clean and simple card that makes your sentiments the star of the show. 

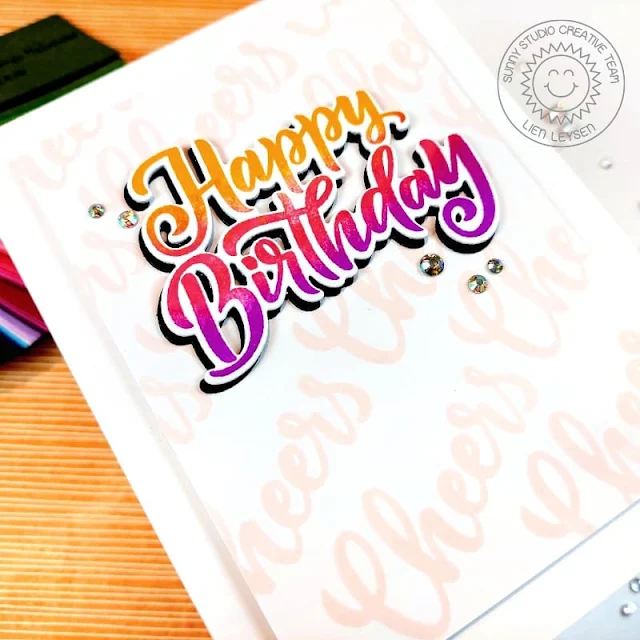
Sunny Studio Stamps: Big Bold Greetings Birthday Card by Lien Leysen

I'm using the 
Big Bold Greetings stamp set today and I started out by stamping my main Happy Birthday sentiment. I wanted to make it bright so I thought I'd do some ombre stamping with it. This is a very easy way to step up your large sentiment stamps if you have a Misti or another stamping tool. 

It's important to start inking with your lightest shade because you want to avoid cleaning your stamp as much as possible for the best result. I started with orange, inking up the top third of my stamp and dabbing away the harsh edge with a cloth before stamping it down onto my white cardstock. I then added some pink ink in the center and repeated the process a third time with purple. 

Sunny Studio Stamps: Big Bold Greetings Birthday Card by Lien Leysen

I cut it out with the Coordinating dies, also cutting out additional white layers and one layer of black cardstock. I'll stack the white layers behind the stamped sentiment and add those slightly offset on top of the black to add an additional shadow. 

For my background I used the Cheers stamp from the same Big Bold Greetings stamp set and stamped it repeatedly, diagonally across my background. I trimmed it down to leave a nice white border and propped it up on a piece of cardboard for sturdy dimension. I added the die cut sentiment on top and finished it up with a handful of Iridescent Jewels.

Sunny Studio Supplies Used:

Fancy Frames- Rectangles
Shop at:
Sunny Studio
Big Bold Greetings Stamps
Shop at:
Sunny Studio
Big Bold Greetings Dies
Shop at:
Sunny Studio
Tranquil Tulips Stamps
Shop at:
Sunny Studio
Tranquil Tulips Dies
Shop at:
Sunny Studio