Tuesday, February 21, 2023

Easter Cards with Isha and Lien

Hello everyone! Isha here with a fun Easter card today. I used the adorable bunnies from the Bunnyville stamps and combined them with a few other stamp sets to create the scene.

Sunny Studio Stamps Bunny Rabbit Easter Card by Isha Gupta (using Bunnyville, Little Birdie & Clucky Chicken Stamps)

I started by sponging the background using kitsch flamingo and squeezed lemonade distress oxide ink. I then die-cut the grass from the Picket Fence die. Sponge mowed lawn ink to it. 

Stamp the images, color and die-cut using the coordinating dies:

Bunnies, butterflies, carrot - Bunnyville stamp and dies
Tree stump - Squirrel Friends stamp and dies
Egg basket, Easter word - Clucky Chickens stamp and dies
Bird, Happy word - Little Birdie stamp and dies

Sunny Studio Stamps Bunny Rabbit Easter Card by Isha Gupta (using Bunnyville, Little Birdie & Clucky Chicken Stamps)

Adhere all the images to the card. To finish, I added some white gel pen details. Thank you for dropping by! Have a nice day.

-----------------------------------------------

Hi crafty friends! It's Lien here, back with a colorful Easter card!

I used the fun Eggs to Dye for stamp set to create a few dozen colorful easter eggs. I didn't need that many for this card, but I can always add them to other projects later or even add one to the outside of my envelope as a fun detail. To mass produce layered images like this, I start by die cutting

Sunny Studio Stamps Colorful Graphic Easter Card by Lien Leysen (using Eggs to Dye For Clear Stamps)

I cut a bunch of blanks with
 the coordinating dies and save one piece of cardstock with the negative space cut out. I put a piece of purple tape on the back of that little window so I can use it to keep my blanks in place while stamping. I stamped the base layer first for every blank using different colors. I then lined up a pattern layer and did the same thing, alternating the patterns every once in a while. 

I used the Bunnyville stamp set for the gorgeous bold sentiment that I stamped in Versafine Onyx Black ink and embossed with Clear Gloss Super Fine embossing powder. Around that sentiment, I adhered the easter eggs on some foam tape. The panel is slightly smaller than A2 size so as a matting layer I'm using one of the pretty papers from the Spring Fever paper pack.

A fun finishing detail for this colorful Easter card!

Sunny Studio Stamps Colorful Graphic Easter Card by Lien Leysen (using Eggs to Dye For Clear Stamps)

Sunny Studio Supplies Used:

Picket Fence Border Dies
Shop at:
Sunny Studio
Eggs To Dye For Stamps
Shop at:
Sunny Studio
Eggs To Dye For Dies
Shop at:
Sunny Studio
Bunnyville Stamps
Bunnyville Stamps
Shop at:
Sunny Studio

Little Birdie Stamps
Shop at:
Sunny Studio
Little Birdie Dies
Little Birdie Dies
Shop at:
Sunny Studio
Squirrel Friends Stamps
Shop at:
Sunny Studio
Squirrel Friends Dies
Shop at:
Sunny Studio
Bunnyville Dies
Bunnyville Dies
Shop at:
Sunny Studio
Clucky Chickens Stamps
Shop at:
Sunny Studio
Clucky Chickens Dies
Shop at:
Sunny Studio
Spring Fever Paper
Spring Fever Paper
Shop at:
Sunny Studio

Monday, February 20, 2023

Easter Cards with Bobbi and Cathy

Hello friends, Bobbi here! Today, I’m sharing a card for the Easter holiday. I’m using the Chickie Baby stamps (coordinating dies here) and a few carrot images from the Bunnyville stamps set (coordinating dies here). I’m also using the Slimline Nature Borders Dies for the grassy hills and the Spring Fever paper pad for the grass.

Sunny Studio Stamps: Chickie Baby Easter Card by Bobbi Lemanski

This card measures 6″ wide  X 5″ tall and fits inside a 5″ X 7″ envelope. I used this shorter width so that my 6″ square Spring Fever paper covered the full width at the bottom. This card could also be made into the popular, A2-size card with no seams, too. I just happen to like a bigger card to give.

I started by splattering my card front panel with watercolors. Using the grassy border from the Slimline Nature Borders dies and the grass pattern paper from the Spring Fever paper pad, I cut a couple rolling hills. I used two layers to make a foreground and background in the scene. I blended on some green Mowed Lawn Distress Oxide ink at the bottom for interest.

Sunny Studio Stamps: Chickie Baby Easter Card by Bobbi Lemanski

Next I stamped, colored (see colors below) and cut out my chicks, basket and the carrot images. I turned the large carrot on its side, punched out half of a 5/8″ circle and added two 3/8″ black wheels to make the carrot into a car. Now my chick fits inside perfectly and is ready to travel home for the holidays! Do you see his home?!

Copic Sketch Marker Colors used to color the images:
Carrots: YR07, YR68, YR65, YG67, YG17, YG03, YG01
Chicks: YR19, YR15, YR13, YR08, YR68, Y38, white Gelly Roll Pen for cheek highlights
Eggs: RV55, RV02, RV00, G00, G000, Y13, Y08, BG02, BB00, B000
Basket and bow: B04, B02, B00, RV17, RV55, RV02
Bunny Ears/Door: Bg01, B00, RV55, RV02
Shading: W4, W2, W1

Sunny Studio Stamps: Chickie Baby Easter Card by Bobbi Lemanski


All the cute images were set and glued in place. I added a black string to the carrot balloon. I stamped the “Happy Easter” phrase in the upper left corner to finish the card.

Thanks for stopping by today. If you want to see more ideas and inspiration from me, subscribe to my blog, BobbiHartDesign.com. I’ll send you updates on new posts! You can also find me on Instagram as @BobbiHartDesign and on Facebook as BobbiHartDesign.

-----------------------------------------------

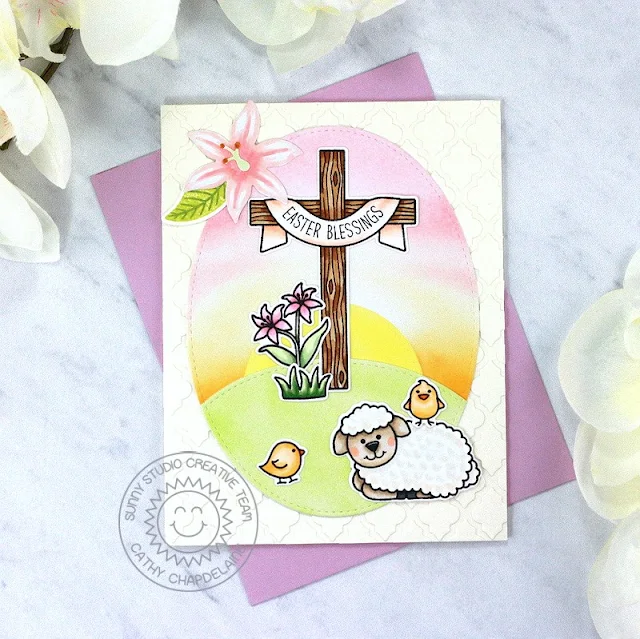
Hey friends! Cathy here today and I’ve got a sweet Easter card to share with you using the beautiful Easter Wishes Stamps.

Sunny Studio Stamps: Easter Wishes Easter Card by Cathy Chapdelaine

I started this card with a soft embossed look to the card front using the Frilly Frames Quatrefoil Dies. This technique takes a little bit of time, but I think the results are worth it. First, I cut an A2 sized piece of ivory cardstock and die-cut a second piece of ivory cardstock twice using the quatrefoil portion of the dies. I placed a die-cut quatrefoil frame over the A2 cardstock piece as a guide and began adhering the inner quatrefoil pieces to the cardstock. I moved the frame as needed until I had completely covered the A2 piece. Where pieces overlapped the edges, I carefully trimmed them along the edges of the A2 piece with scissors. I then adhered the cardstock to an A2 card base.

Next, I worked on a sunrise sky. I die-cut a piece of white cardstock using a Stitched Oval Die and then I die-cut a Stitched Circle Small Die from Eclipse masking tape. I placed the circle towards the bottom of the oval die-cut as a mask for the sun and inked from the bottom working up to the top of the oval with Spiced Marmalade, Fossilized Amber, Scattered Straw, Tattered Rose and Saltwater Taffy Distress inks. I then removed the circle, placed the negative portion of the circle die-cut masking tape over the sky and inked the sun with Squeezed Lemonade Distress ink.

Sunny Studio Stamps: Easter Wishes Easter Card by Cathy Chapdelaine

For the bottom grass portion, I die-cut a second piece of white cardstock with the same Stitched Oval Die and inked the bottom half of the oval with Twisted Citron Distress ink. I placed a smaller Stitched Oval Die across the bottom third of the oval and die-cut the piece. I then adhered it to the bottom of the oval sky piece.


Next, I stamped the images from the Easter Wishes Stamps on Neenah Classic Crest 80lb solar white cardstock, colored them with Copics and die-cut them using the coordinating diesTo finish, I die-cut a flower from the Botanical Backdrop Die from white cardstock, colored it with Copics and added a stamped/die-cut leaf from the Cherry Blossoms Stamps and Dies.


I hope you enjoyed and thanks for stopping by today! For more inspiration, please visit my blog www.inkredibleadventures.com and you can also find me on Instagram as @cathy.chapdelaine.


Sunny Studio Supplies Used:


Easter Wishes Dies
Easter Wishes Dies
Shop at:
Sunny Studio
Easter Wishes Stamps
Shop at:
Sunny Studio
Stitched Oval Dies
Stitched Oval Dies
Shop at:
Sunny Studio
Botanical Backdrop Die
Shop at:
Sunny Studio
Chickie Baby Stamps
Chickie Baby Stamps
Shop at:
Sunny Studio
Chickie Baby Dies
Chickie Baby Dies
Shop at:
Sunny Studio
Frilly Frames Quatrefoil
Shop at:
Sunny Studio
Slimline Nature Borders
Shop at:
Sunny Studio
Stitched Circle Small Dies
Shop at:
Sunny Studio
Bunnyville Stamps
Bunnyville Stamps
Shop at:
Sunny Studio
Bunnyville Dies
Bunnyville Dies
Shop at:
Sunny Studio
Cherry Blossoms Stamps
Shop at:
Sunny Studio
Cherry Blossoms Dies
Shop at:
Sunny Studio
Spring Fever Paper
Spring Fever Paper
Shop at:
Sunny Studio

Saturday, February 18, 2023

Guest Designer Spotlight: Cards with Gladys Marcelino

Hello friends!! Gladys here and I'm so excited to be back on the blog today to share some fun and fresh new projects using products from the latest release. Let's get started!

Sunny Studio Stamps: Panda Party Cards by Gladys Marcelino (Make A Wish)

For my first card I created a cute birthday card featuring the adorable pandas from the Panda Party stamp set. To start I used a watercolor stencil and ink blended a pastel rainbow with various distress oxide inks. I added interest by splattering diluted shaded lilac and white paint using a small paint brush. I stamped the pandas and birthday accessories from the stamp set with alcohol friendly ink. I colored the images with copic markers and used their coordinating dies to cut them out. Since this is a birthday card we can't have a birthday without cake so I stamped and colored the cake from a smaller stamp set called Make A Wish.

Sunny Studio Stamps: Panda Party Cards by Gladys Marcelino (Make A Wish)

Next I cut down the stenciled background panel using a stitched rectangle die slightly smaller than A2 size. Then it was time to assemble the scene. Once I was happy with the placement of the images I used double sided foam tape to attached them. I stamped the punny sentiment on the center of the card and finally I mounted the panel onto a rainbow pattern paper from the latest release called Spring Fever.  

Sunny Studio Stamps: Panda Party Cards by Gladys Marcelino (featuring Wonderful Windows)

For my second project I made a slimline card, again using the Panda Party stamp set with the Wonderful Windows dies.

I began by ink blending the background using a brick stencil and distress oxide inks. Then I started die cutting elements from the window dies. I used various colored card stock and pattern paper to complement the scene. The flowers did take the longest from cutting the different colors of paper and gluing them together. I wanted to create a cluster of flowers for the windowsills so it was a labor of love and I enjoyed the process. Also, I think it's because I'm longing for Spring to come. LOL!

Sunny Studio Stamps: Panda Party Cards by Gladys Marcelino (featuring Wonderful Windows)

I was able to fit almost 2 windows on top of each other and stuck the pandas in each of them. I cut a grass border and a couple of pandas holding flowers which I thought was so sweet. Next I heat embossed the sentiment in white on vellum. The sentiment "Have a pandastic day!" was my inspiration for this scene. I had imagined the pandas are greeting their neighbors, friends or family members to have a fantastic day. I  had so fun creating this scene and I love how it turned out.

That is all for me today. Thank you so much for stopping by and have a wonderful day!!

Sunny Studio Supplies Used:

Make A Wish Stamps
Make A Wish Stamps
Shop at:
Sunny Studio
Make A Wish Dies
Make A Wish Dies
Shop at:
Sunny Studio
Panda Party Stamps
Panda Party Stamps
Shop at:
Sunny Studio
Panda Party Dies
Panda Party Dies
Shop at:
Sunny Studio
Wonderful Windows Dies
Shop at:
Sunny Studio
Spring Fever Paper
Spring Fever Paper
Shop at:
Sunny Studio

Friday, February 17, 2023

Garden Critters Cards with Tina and Vanessa

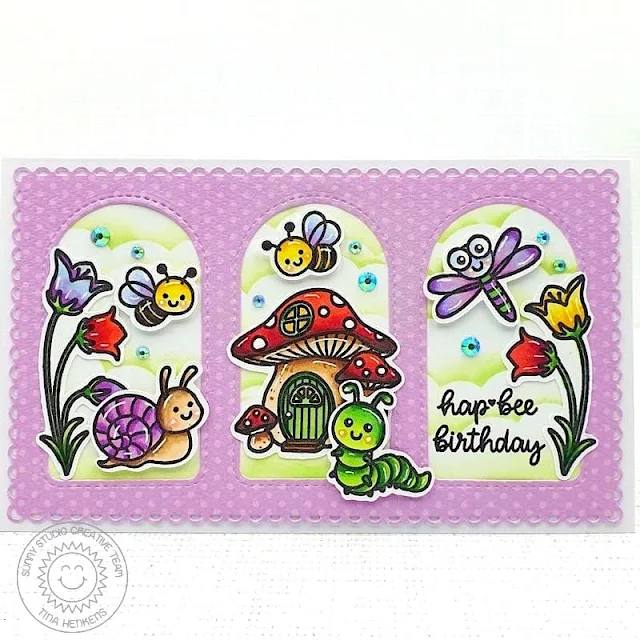
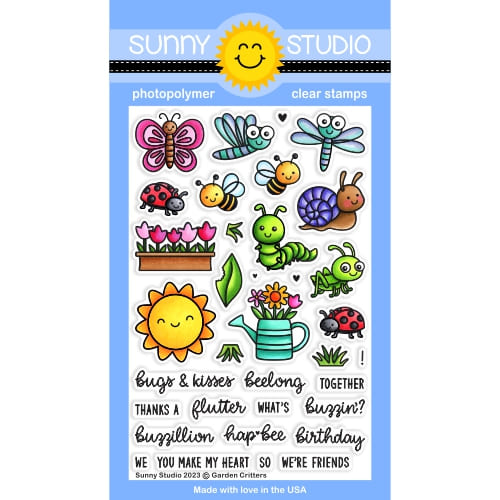
Hello crafty friends, Tina here with a card featuring the adorable Garden Critters stamp and die set. I just love all the cute images and they work really well with the Garden Fairy set. So, I decided to combine both sets to create a happy outdoor scene!

Sunny Studio Stamps: Garden Critters Card by Tina (featuring Garden Fairy, Stitched Arch Dies)

First, I stamped and die cut all my images and colored them with my Copic markers. For extra details I used my white gel pen. I wanted to create three mini scenes that together would become a complete setting.

After die cutting a purple panel with a slim line die and some pattern paper from my stash, I made the arch frames with the smallest of the Stitched Arch dies. To get these arches positioned evenly it’s best to start with the middle one and then cut the ones to the left and the right. That gives you more control regarding the spacing in between.

Sunny Studio Stamps: Garden Critters Card by Tina (featuring Garden Fairy, Stitched Arch Dies)

Next, I cut a white panel slightly smaller than the purple one. This would be my background and I inked up a green sky with a cloud stencil. I glued the background to the purple panel with liquid glue. You can never have enough birthday cards, so I went with a sentiment from the Garden Critters set, stamping it directly to the background with Versafine Onyx Black ink.

Then, I started building my three mini scenes, using foam tape were needed for dimension. Lastly, I adhered the entire scene to a white card base and added a few Iridescent Clear Jewels for that extra bling!

It’s been a cloudy, rainy day but creating this happy Spring card really made my smile! I hope you will have fun too with this darling set! Thank you for visiting the blog and happy crafting!

-----------------------------------------

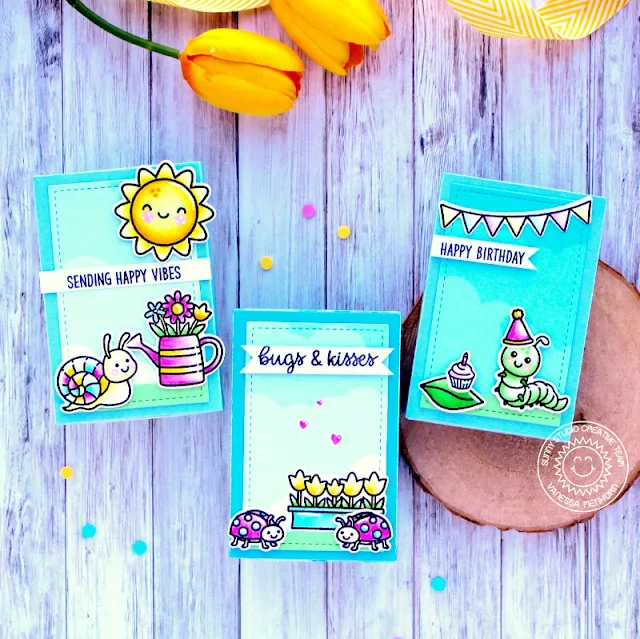
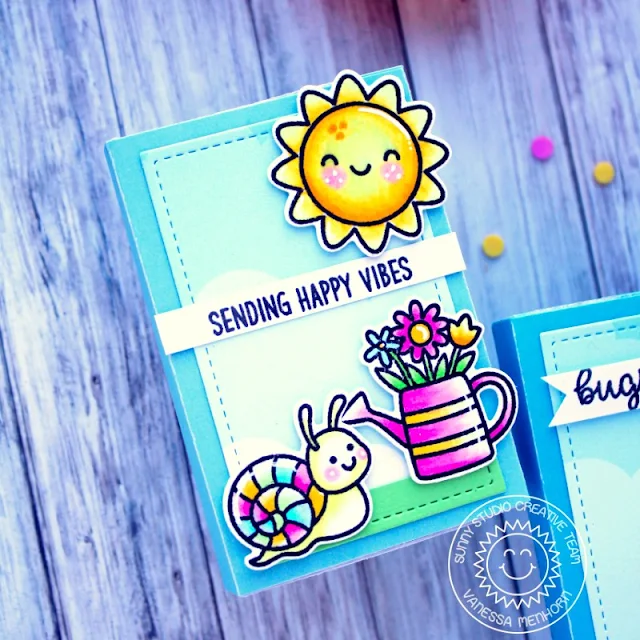
Hello to you! Vanessa here with a set of cute gift boxes using Garden Critters.

Sunny Studio Stamps: Garden Critters Card by Vanessa Menhorn (featuring Panda Party)

For the matchboxes, I used a die from Mama Elephant, die-cut them from blue cardstock and assembled them. Now I die-cut the backgrounds from the clouds patterned paper from Spring Fever paper and adhered the panels. To the bottom of each rectangle, I added a strip of green paper. Then I stamped the images, including a few images from Panda Party, colored them with Copics, die-cut everything with the matching dies and adhered the elements to the boxes with foam tape.

Sunny Studio Stamps: Garden Critters Card by Vanessa Menhorn (featuring Panda Party)

After I had stamped the sentiment strips, I trimmed them, adhered the strips and used a white gel pen to add highlights to the images.

I love having little boxes at hand to give small gifts. Have a wonderful weekend and thanks for stopping by!

Sunny Studio Supplies Used:

Stitched Arch Dies
Stitched Arch Dies
Shop at:
Sunny Studio
Garden Fairy Stamps
Garden Fairy Stamps
Shop at:
Sunny Studio
Garden Fairy Dies
Garden Fairy Dies
Shop at:
Sunny Studio
Garden Critters Stamps
Shop at:
Sunny Studio
Garden Critters Dies
Shop at:
Sunny Studio
Panda Party Stamps
Panda Party Stamps
Shop at:
Sunny Studio
Panda Party Dies
Panda Party Dies
Shop at:
Sunny Studio
Spring Fever Paper
Spring Fever Paper
Shop at:
Sunny Studio