Wednesday, June 23, 2021

Gift Card Pocket Focused Cards with Julia and Franci

Hey crafty friends! It’s Julia here with super fun mini birthday card!

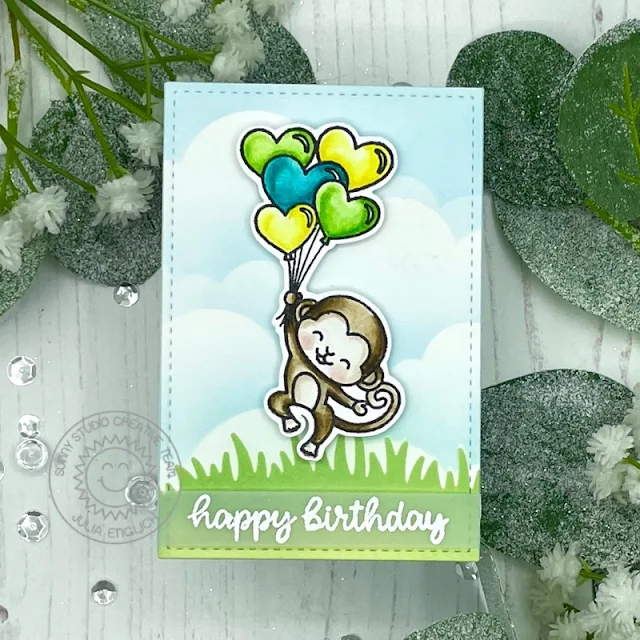
Sunny Studio Stamps: Gift Card Pocket Dies Love Monkey Inside Greetings Birthday Card by Julia Englich

I wanted to create a tiny card that would perfectly fit a gift card, so this is what I came up with! I stamped out the image from Love Monkey onto Strathmore Bristol smooth paper and colored it in using Zig Clean Color Real Brush Markers. Then, I die cut the smallest of the Stitched Rectangle dies and I ink blended the background using a grass and cloud stencil and Distress Oxide Inks. I heat embossed the sentiment from Inside Greetings Birthday in white onto vellum and layered it over the grass.

Inks used: Tumbled Glass, Bundles Sage, Shabby Shutters, Mowed Lawn. Zig Markers used:  999, 74, 68, 64, 66; 28; 45, 41; 33, 42; 50, 51, 55.

Sunny Studio Stamps: Gift Card Pocket Dies Love Monkey Inside Greetings Birthday Card by Julia Englich


To create the card base for my mini card, I cut a strip of light blue cardstock to 2 1/2 x 7 1/2" and I scored it at 3 3/4". I added the background to my little card base and then attached the 
Gift Card Pocket to the inside. 

Sunny Studio Stamps: Gift Card Pocket Dies Love Monkey Inside Greetings Birthday Card by Julia Englich


I also die cut the word dies that come with the Gift Card Pocket die set out of teal cardstock and added the words "for you" to the front of the pocket. To finish off my mini card, I added some sparkly Aquamarine Jewels to the gift card pocket!

Thank you so much for stopping by today! Have a wonderful week!

---------------------------------------------

Happy Wednesday crafty friends! It's Franci here with you today, with a cute new yummy project.

Sunny Studio Stamps: Gift Card Pocket Dies, Cupcake Shape & Slice Of Summer Birthday Card by Franci Vignoli

First of all I die cut all the cupcake elements out of colored cardstocks and patterned papers from these sets: Classic GinghamSummer Splash and Dots & Stripes. I also cut out the lemon using the Slice of Summer coordinated dies and glued my cupcake together with liquid glue.

Sunny Studio Stamps: Gift Card Pocket Dies, Cupcake Shape & Slice Of Summer Birthday Card by Franci Vignoli

Then I die cut all the elements from the new Gift Card Pocket die set, glued the sentiment on the front and the little pocket on the back - turning this cute cupcake into a little gift tag! 

Thanks a lot for stopping by today and have a lovely day! 

Sunny Studio Supplies Used:

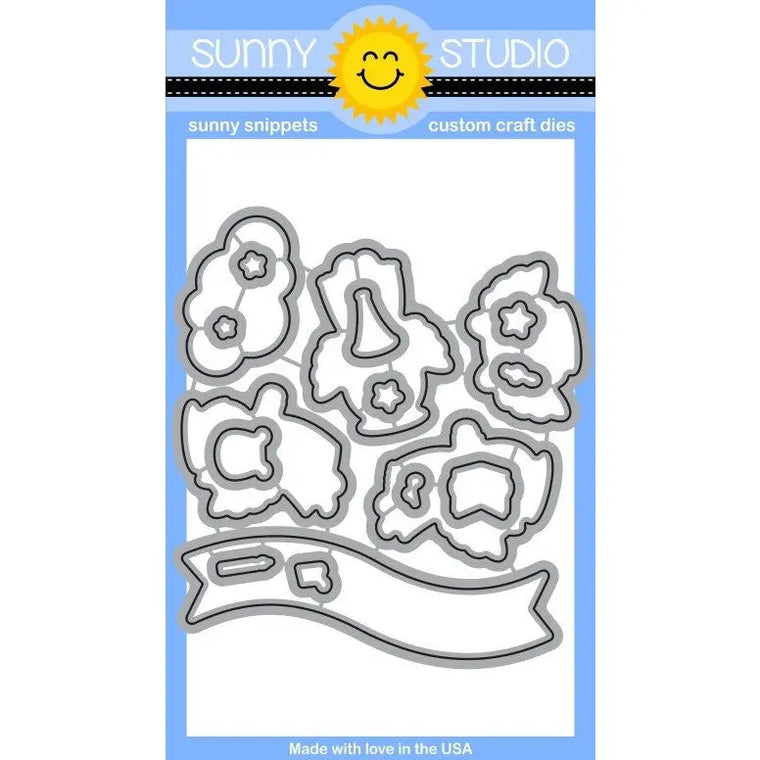
Gift Card Pocket
Gift Card Pocket
Shop at:
Sunny Studio
Stitched Rectangle Dies
Shop at:
Sunny Studio
Classic Gingham 6x6 Paper
Shop at:
Sunny Studio
Dots & Stripes Jewel Tones 6x6 Paper
Shop at:
Sunny Studio
Love Monkey Stamps
Love Monkey Stamps
Shop at:
Sunny Studio
Love Monkey Dies
Love Monkey Dies
Shop at:
Sunny Studio
Slice of Summer Dies
Shop at:
Sunny Studio
Summer Splash 6x6 Paper
Shop at:
Sunny Studio
Inside Greetings Birthday
Shop at:
Sunny Studio

Tuesday, June 22, 2021

Stitched Rectangles Cards with Kavya and Isha

Hi folks, Kavya here. I am back on the blog with another fun way to stretch your supplies! The new Stitched Rectangles have so many possibilities. I have already used them in a previous card to make some frames. Here is another way to combine them with other dies to create new and interesting layouts.

Sunny Studio Stamps: Stitched Rectangle Dies Window Quad Dies Little Angels Everyday Card by Kavya

For my background, I ink blended the top half of purple cardstock with blue dye ink. For the layout, I first started off by die cutting the largest rectangle in the set and then used the Window Quad Circle die to die cut the top half the stitched rectangle. I then cut the bottom half of the stitched rectangle and placed it the bottom of the background using foam tape. 

Sunny Studio Stamps: Stitched Rectangle Dies Window Quad Dies Little Angels Everyday Card by Kavya

Later, I stamped and colored a bunch of images from Little Angels stamp set and added a sentiment using Loopy Letters dies. Finally, I stamped ‘You’re my’ using sentiment stamps from Enchanted.

That’s it! Isn’t this layout just adorable? Hope this inspires you to find new ways to the rectangle dies!

--------------------------------------------

Hello everyone, Isha here featuring the Stitched Rectangle dies with an inside tunnel card. This card went through a lot of changes and is very special to me because as soon as I started creating it, my daughter called and told me she got her first job as an assistant doctor as soon as she finishes her medicine next year. I feel so proud, thus this card is for her and Sunny Studio has perfect sentiments to express.

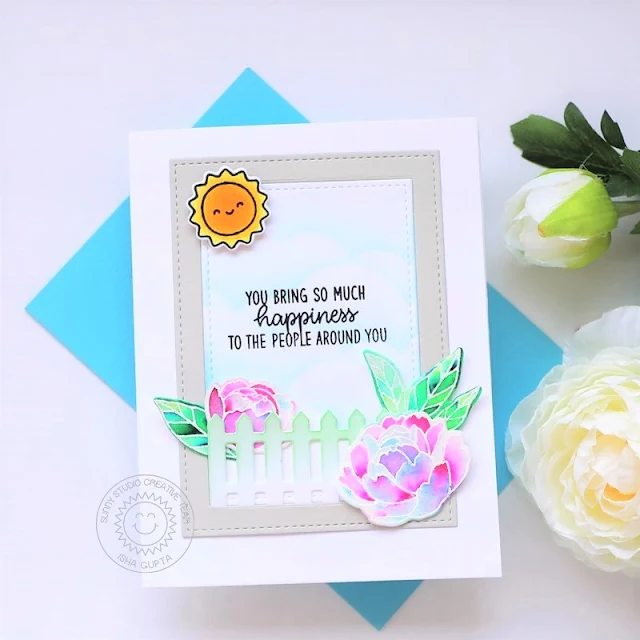
Sunny Studio Stamps: Stitched Rectangle Dies Pink Peonies Floating By Everyday Card by Isha Gupta

I started by stamping and embossing the florals onto watercolor paper from the Pink Peonies stamps. I colored them by sprinkling the nuvo shimmer powder shaded lilac. Die-cut using the coordinating dies. Next, I die-cut the grey frame using two of the rectangle dies from the Stitched Rectangle dies.

Sunny Studio Stamps: Stitched Rectangle Dies Pink Peonies Floating By Everyday Card by Isha Gupta

Die-cut a cloud stencil by using the cloud from the Slimline Nature Border dies. Sponge onto the white layer for the card front and also on the inside panel. Die-cut the fence from the Picket Fence dies. Sponge a little mowed lawn distress oxide ink.

Stamp the sun from Balloon Rides stamp, color and die-cut using the coordinating dies. Stamp the sentiment onto the front panel from the Inside Greetings - Birthday. Assemble everything together.

Sunny Studio Stamps: Stitched Rectangle Dies Pink Peonies Floating By Everyday Card by Isha Gupta

For the inside card base I used the tutorial by Jennifer McGuire HERE. I stamped the word CONGRATS from the Everything's Rosy stamp and stamped it onto the banner from the Stitched Rectangle dies.

Stamp the balloon from the Floating By stamp, color and die-cut using the coordinating dies. Assemble everything together.

Thank you for dropping by! Have a nice day :)

Sunny Studio Supplies Used:

Little Angels Dies
Little Angels Dies
Shop at:
Sunny Studio
Little Angels Stamps
Shop at:
Sunny Studio
Picket Fence Border Dies
Shop at:
Sunny Studio
Stitched Rectangle Dies
Shop at:
Sunny Studio
Loopy Letters Dies
Loopy Letters Dies
Shop at:
Sunny Studio
Everything's Rosy Stamps
Shop at:
Sunny Studio
Enchanted Stamps
Enchanted Stamps
Shop at:
Sunny Studio
Floating By Stamps
Floating By Stamps
Shop at:
Sunny Studio
Floating By Dies
Floating By Dies
Shop at:
Sunny Studio
Pink Peonies Stamps
Pink Peonies Stamps
Shop at:
Sunny Studio
Pink Peonies Dies
Pink Peonies Dies
Shop at:
Sunny Studio
Slimline Nature Borders
Shop at:
Sunny Studio
Window Quad Circle Die
Shop at:
Sunny Studio
Balloon Rides Stamps
Shop at:
Sunny Studio
Balloon Rides Dies
Balloon Rides Dies
Shop at:
Sunny Studio
Inside Greetings Birthday
Shop at:
Sunny Studio

Monday, June 21, 2021

Outback Critters Cards with Mayra and Ashley

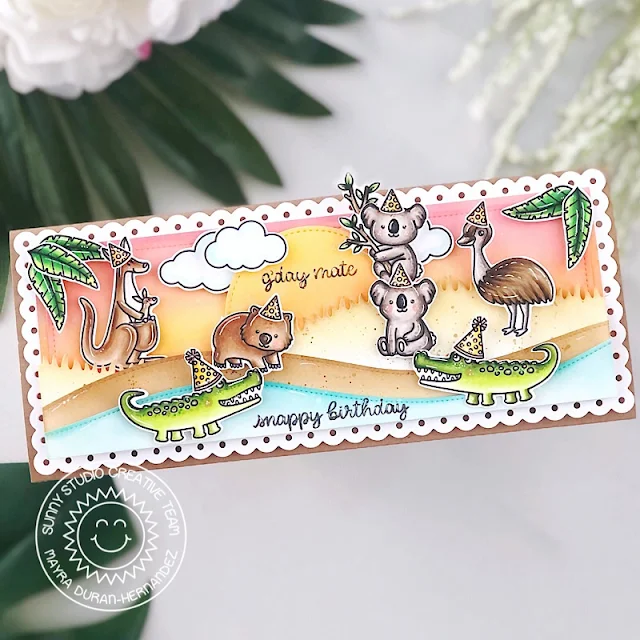
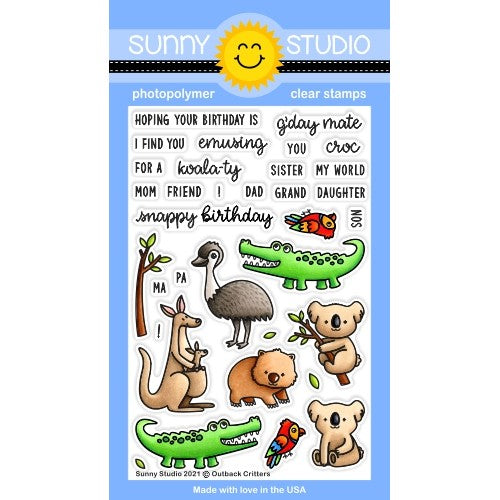
Hello and happy Monday everyone. Mayra here with you today. I am sharing this fun Australian-themed birthday card. I used the super fun Outback Critters stamp set.

Sunny Studio Stamps: Outback Critters Slimline Dies Stitched Circle Dies Critter Themed Birthday Card by Mayra Duran-Hernandez

I began by coloring all of the images using Copic markers. Along with the Outback Critters set, I also used the birthday hat from the Balloon Rides set, the leaves from the Tiki Time set, and the birthday hat from the Looking Sharp set.

Next, I die cut the base of the card using the Slimline Scalloped Frame die set, the grass and water layers using the Slimline Nature Borders die set, and the sun using the Stitched Circles Small dies set.

Sunny Studio Stamps: Outback Critters Slimline Dies Stitched Circle Dies Critter Themed Birthday Card by Mayra Duran-Hernandez

I added color to the background using Distress Oxide Inks. I used Fossilized Amber, Spiced Marmalade, Abandoned Coral, Kitsch Flamingo, and Picked Raspberry. For the ground, I used Scattered Straw, Gathered Twigs, and Brushed Corduroy. For the water area, I used Cracked Pistachio.

I hope you enjoy the card I created to share with you today. Thank you so much for taking the time to stop by. I hope you each have a wonderful and blessed day.

----------------------------------------------

Hello friends! It's Ashley with a cute scene from Down Under featuring the Outback Critters! I actually made this card while I was traveling. Only one stamp set and a few supplies can still make a cute card!

Sunny Studio Stamps: Outback Critters Slimline Dies Critter Themed Friendship Card by Ashley Ebben

I started by blending a bit of Tumbled Glass Distress Oxide ink on the edges of a piece of A2 cardstock. I used the Slimline Nature Borders on more white cardstock to create two grassy pieces. I blended some Scattered Straw Distress Oxide ink to color the grass, then added the two pieces to my card.

Sunny Studio Stamps: Outback Critters Slimline Dies Critter Themed Friendship Card by Ashley Ebben

I stamped my Outback Critters on Bristol smooth cardstock with Pinkfresh Studio Detail Black ink. I colored them with my Zig Clean Color Real Brush markers and added a few gel pen highlights. I really prefer my Zigs for travel - they take up a lot less space than Copics! I cut the critters out with the matching dies and added them to the card. I finished with a cute double friendship sentiment from the Outback Critters set.

Thank you so much for stopping by! Have a wonderful day!

Sunny Studio Supplies Used:

Looking Sharp Stamps
Shop at:
Sunny Studio
Looking Sharp Dies
Looking Sharp Dies
Shop at:
Sunny Studio
Outback Critters Stamps
Shop at:
Sunny Studio
Outback Critters Dies
Shop at:
Sunny Studio
Tiki Time Stamps
Tiki Time Stamps
Shop at:
Sunny Studio
Tiki Time Dies
Tiki Time Dies
Shop at:
Sunny Studio
Slimline Nature Borders
Shop at:
Sunny Studio
Slimline Scalloped Frame
Shop at:
Sunny Studio
Stitched Circle Small Dies
Shop at:
Sunny Studio

Saturday, June 19, 2021

Color My World & Looking Sharp Cards with Mona

Hi crafty friends! It's Mona here and I am super excited to be a guest on the Sunny Studio Stamp blog. Today I have 2 cute projects for you with the Color my World and Looking Sharp sets.

Sunny Studio Stamps: Color My World Build-A-Tag Dies Bookmarks by Mona Toth

First, I have created 3 lovely bookmarks with adorable and colorful crayons. I made a bulk stamp layering for these cuties, and it was so much fun! I just mix and matched my inkpad colors and enjoyed the creating process.

Sunny Studio Stamps: Color My World Build-A-Tag Dies Bookmarks by Mona Toth

For the stamping I have used the Color my World stamp set with their coordinating dies. For some of them I didn’t stamp the crayon text, instead of that I stamped the cute faces from the Looking Sharp Set.

Sunny Studio Stamps: Color My World Build-A-Tag Dies Bookmarks by Mona Toth

The next step was the base of the bookmark which I have created with the Build-A-Tag 2 dies. These are shorter, so I cut the tag die-cut in a half, and adhered on it (to the front and the back) a patterned paper from the Dots and Stripes Pastels Paper Pack in size 2” by 4.25”.

In the end I embellished the bookmarks with white tag die-cuts. Put inside colorful eyelets and a handmade tassel as well. 

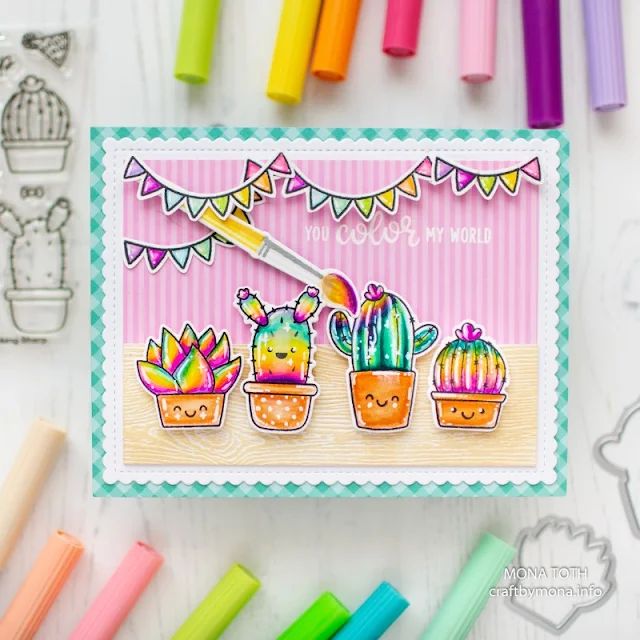
Sunny Studio Stamps: Looking Sharp Frilly Frame Dies Card by Mona Toth

For my second project I have create a lovely and colorful card, which will brighten up someone’s day.  I have created a white scalloped frame from the Frilly Frames Chevron Dies which I adhered to a 5.5” by 4.25” card base created from Gingham Pastels Cardstock.

Next, I have created the card front with pink patterned paper from the Dots and Stripes Pastels Paper Pack. I stamped on it the sentiment with watermark ink, then I heat embossed it with white embossing powder. I also added a beige wooden card panel on the top of it as a table.

Sunny Studio Stamps: Looking Sharp Frilly Frame Dies Card by Mona Toth

The following step was the stamping and coloring. I stamped the images with black pigment ink from the Looking Sharp and the banner from the Balloon Rides Stamp Set. I have also made a stamp layered brush with the Color my World stamp set.

I colored the stamped images with Tombow Markers and I decided to turn them into rainbow cacti. Aren’t they cute?

Sunny Studio Stamps: Looking Sharp Frilly Frame Dies Card by Mona Toth

In the end I just put my card together with 3D foam adhesives, to add more dimension to my card. Thank you very much for reading through my post, I hope that you have enjoyed it and I have inspired you! If you want to see more colorful happy cards visit my Instagram

Sunny Studio Supplies Used:

Color My World Stamps
Shop at:
Sunny Studio
Color My World Dies
Color My World Dies
Shop at:
Sunny Studio
Looking Sharp Stamps
Shop at:
Sunny Studio
Looking Sharp Dies
Looking Sharp Dies
Shop at:
Sunny Studio
Build-A-Tag #2 Dies
Build-A-Tag #2 Dies
Shop at:
Sunny Studio
Gingham Pastels 6x6 Paper
Shop at:
Sunny Studio
Dots & Stripes Pastels 6x6 Paper
Shop at:
Sunny Studio
Frilly Frames Chevron Die
Shop at:
Sunny Studio
Balloon Rides Stamps
Shop at:
Sunny Studio
Balloon Rides Dies
Balloon Rides Dies
Shop at:
Sunny Studio