Thursday, June 17, 2021

Embossing Folder Focused Cards with Vanessa and Anja

Hello to you! Vanessa here with a sweet birthday card using the beautiful Cable Knit Embossing Folder. You maybe wouldn't think of choosing this one with summer images, but it creates such a wonderful texture, so I did use it for this:

Sunny Studio Stamps: Embossing Folders Candy Shoppe Summer Sweets Card by Vanessa Menhorn

I first trimmed stripes from scraps of colored cardstock and adhered these to a cardstock panel. After I had run this panel through my machine with the embossing folder, I adhered it to the card base.

Here comes a list of the products I used today:
Cable Knit Embossing Folder
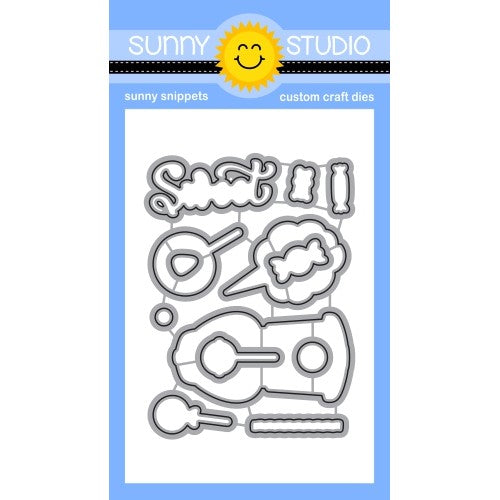
Candy Shoppe stamps dies (sweet + sentiment)
Summer Sweets stamps dies (popsicle, purple cone)
Cruisin' Cuisine stamps + dies (orange cone)
Jewels


Sunny Studio Stamps: Embossing Folders Candy Shoppe Summer Sweets Card by Vanessa Menhorn

Now I stamped the images onto white cardstock, colored them with Copic markers, die-cut the pieces with the matching dies and adhered the elements to the card with foam tape. I stamped the "sweet" onto aqua cardstock, die-cut it with the matching die, added highlights with a white gel pen and adhered it with foam tape. Then I stamped and heat-embossed the sentiment onto a strip of black cardstock, trimmed the edges and adhered it. Finally, I added matching jewels.

Thank you for visiting today! Have a wonderful day :)

-----------------------------------------------

Hi everyone, Anja here with you today sharing a floral card. I love to add texture using embossing folders. This time, I stepped it up by dry embossing a Gel Plate printed background.

Sunny Studio Stamps: Embossing Folders Pink Peonies Card by Anja Bytyqi

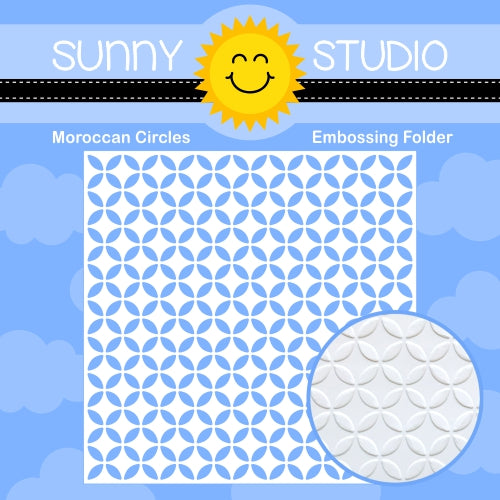
I started off with a white A2 card base. For my background, I applied Salvaged Patina and Wilted Violet Distress Oxide Ink with a brayer to my Gelly Arts gel printing plate and put a piece of white heavyweight cardstock on top slightly rubbing across with my fingers. I really like the soft blending of these gorgeous colors. I ran it through my die-cutting machine with the Moroccan Circles embossing folder and added small white paint splatters.

Sunny Studio Stamps: Embossing Folders Pink Peonies Card by Anja Bytyqi

Next, I stamped a couple of images from the Pink Peonies set in matching colors and cut them out with the coordinating dies. I adhered them with liquid glue as well as foam tape for a bit of dimension. The 'hello' sentiment (Beach Buddies) was stamped in VersaMark Ink onto a white cardstock strip and heat embossed in silver. Finally, I embellished my card with three Snow White Crystals around the floral cluster.

Thank you so much for stopping by! Have a beautiful day!

Sunny Studio Supplies Used:

Beach Buddies Stamps
Shop at:
Sunny Studio
Candy Shoppe Stamps
Candy Shoppe Stamps
Shop at:
Sunny Studio
Candy Shoppe Dies
Candy Shoppe Dies
Shop at:
Sunny Studio
Cable Knit Embossing
Shop at:
Sunny Studio
Moroccan Circles Embossing
Shop at:
Sunny Studio
Pink Peonies Stamps
Pink Peonies Stamps
Shop at:
Sunny Studio
Pink Peonies Dies
Pink Peonies Dies
Shop at:
Sunny Studio
Cruisin' Cuisine Stamps
Shop at:
Sunny Studio
Cruisin' Cuisine Dies
Shop at:
Sunny Studio
Summer Sweets Stamps
Shop at:
Sunny Studio
Summer Sweets Dies
Summer Sweets Dies
Shop at:
Sunny Studio

Wednesday, June 16, 2021

Embossing Folder Focused Cards with Franci and Julia

Hello there! Franci here with you today, showcasing an oldie but goodie - the Woodgrain Embossing folder!Awww I love all these little cuties so much, this card makes me so happy!

Sunny Studio Stamps: Embossing Folders Outback Critters Stitched Rectangles Card by Franci Vignoli

First of all I created my card base out of white cardstock and I die cut 2 Stitched Rectangles out of more white and brown cardstock. I added the wood texture to the brown rectangle and glued it down to the card base.

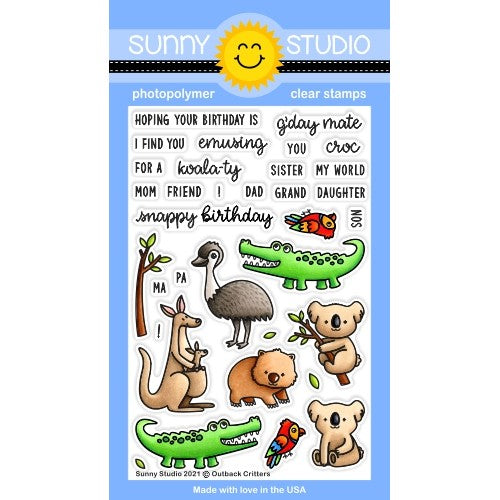
I stamped, colored with Copics and die cut all the images from the Outback Critters set and added some details with a white gel pen. I masked the bottom of my white rectangle and inked the top with some light blue Distress ink, then removed the mask and stamped my sentiment at the bottom.

Sunny Studio Stamps: Embossing Folders Outback Critters Stitched Rectangles Card by Franci Vignoli

I glued everything down into this cute little scene with foam adhesive and adhered my decorated panel to the front of my card too. Finally I added some Iridescent Jewels embellishments to finish my design.

I hope you like this card as much as I do and thanks a lot for stopping by today!

-----------------------------------------

Hey crafty friends! It’s Julia here with sealiously fun birthday card!

Sunny Studio Stamps: Embossing Folders Stitched Rectangles Sealiously Sweet Seasonal Trees Card by Julia Englich


I stamped out the images from 
Sealiously SweetSeasonal TreeSending SunshineBeach Buddies and Beach Babies onto Strathmore Bristol smooth paper and colored them in using Zig Clean Color Real Brush Markers. Then, I die cut the smaller of the Fancy Frames Rectangle dies three times out of white cardstock and layered the die cuts for more dimension. Then, I used the Sunburst Embossing Folder and after running it through my die cut machine, I ink blended it with yellow and orange Distress Oxides for a nice bright sunshiney look! Then I used the Slimline Nature Borders to create my ocean and sandy beach and I ink blended those panels as well. After that, I cut them down to fit behind the scalloped frame and layered all the pieces with liquid glue.

Inks used: Squeezed Lemonade, Dried Marigold, Peacock Feathers, Antique Linen, Tea Dye, Gathered Twigs Distress Oxide Zig Markers used: 999; 50, 51; 26, 24, 26; 41, 42, 400; 61, 72, 65, 68, 902; 904, 97, 90.

Sunny Studio Stamps: Embossing Folders Stitched Rectangles Sealiously Sweet Seasonal Trees Card by Julia Englich


For the background of my card I used the 
Quilted Hearts Embossing Folder with white cardstock. I added the background to an A2 sized card base and then layered my scalloped frame panel over top with foam tape. I added all my cute images with liquid glue and foam squares. Finally, I stamped my sentiment from the Sealiously Sweet stamp set onto a light grey cardstock and die cut it with the smallest of the Slimline Pennant dies. To add the fishtail to both sides, I ran it through my die cut machine once to cut the first side, then turned the strip of cardstock to the other side, lined up the die and ran it through again.


Once I was done with the front of the card, I realized I had some images left over, so I just added another cute little seal munching on his watermelon to the inside of the card for a fun little surprise! 

Thank you so much for stopping by today! Have an amazing week!

Sunny Studio Supplies Used:

Beach Buddies Stamps
Shop at:
Sunny Studio
Beach Buddies Dies
Beach Buddies Dies
Shop at:
Sunny Studio
Outback Critters Stamps
Shop at:
Sunny Studio
Outback Critters Dies
Shop at:
Sunny Studio
Stitched Rectangle Dies
Shop at:
Sunny Studio
Beach Babies Stamps
Beach Babies Stamps
Shop at:
Sunny Studio
Beach Babies Dies
Beach Babies Dies
Shop at:
Sunny Studio
Fancy Frames- Rectangles
Shop at:
Sunny Studio
Quilted Hearts Embossing
Shop at:
Sunny Studio
Sunburst Embossing
Sunburst Embossing
Shop at:
Sunny Studio
Seasonal Trees Stamps
Shop at:
Sunny Studio
Seaonal Trees Dies
Seaonal Trees Dies
Shop at:
Sunny Studio
Sending Sunshine Stamps
Shop at:
Sunny Studio
Sending Sunshine Dies
Shop at:
Sunny Studio
Woodgrain Embossing
Woodgrain Embossing
Shop at:
Sunny Studio
Sealiously Sweet Stamps
Shop at:
Sunny Studio
Sealiously Sweet Dies
Shop at:
Sunny Studio
Slimline Nature Borders
Shop at:
Sunny Studio
Slimline Pennant Dies
Shop at:
Sunny Studio

Tuesday, June 15, 2021

Embossing Folder Focused Cards with Isha and Kavya

Hello everyone! Isha here today sharing a CAS card with a lot of texture using our Woodgrain embossing folder. What I really like about Sunny Studio embossing folders is that they are 6 by 6 inches so perfect for making square/circular cards as well.

Sunny Studio Stamps: Woodgrain Embossing Folder Poppy Fields Stitched Circle Dies Hello Card by Isha Gupta

I started by creating the background by adding alcohol pearl inks onto the yupo paper and blended them using the ranger blending solution. Once dry, I applied some WOW! gold foil to this. The foil will stick to some of the sticky parts of the ink. Now, I used the Woodgrain embossing folder to dry emboss this piece. 

I made a circular frame using the Stitched Circle Large and Stitched Circle Small dies. Adhere to the mat layer. Adhere the mat layer to a white card base. Stamp the Poppy Fields flowers and leaves using the Poppy Fields stamps. I used the inks from Altenew. Die-cut using the coordinating dies.

Sunny Studio Stamps: Woodgrain Embossing Folder Poppy Fields Stitched Circle Dies Hello Card by Isha Gupta

Die-cut the word "HELLO" from the Slimline Scalloped Frame dies. I die-cut it two times in white and once in gold. Adhere the gold hello slightly offset behind the white. Assemble everything to the card. To finish, I added some Crystal Clear Jewels.

Thank you for stopping by!

------------------------------------------

Hi folks, Kavya here. I am back on the blog with a fun card. If you like stretching your supplies, you might like this card! I created this fun breakfast table using a bunch of old favorites that you might have in your stash already.

Sunny Studio Stamps: Woodgrain Embossing Folder Breakfast Puns Stitched Semi-Circle Dies Everyday Card by Kavya

I first created my wooden table background by first ink blending the edges of a brown cardstock using brown ink and then embossing it using Woodgrain embossing folder. I then splattered some brown, white and black paint to make it a bit more realistic. For the table cloth, I took another piece of white cardstock (lighter the better! I used 60 lb) and created a plaid background by using the broad tip of a red alcohol marker and a ruler. Then, crumble it up a bit, to make it more realistic! For the plate, I used the Stitched Semi Circle Die and added an inner shadow using colored pencil. I then traced an image of a spoon and fussy cut it to complete the cutlery!

Sunny Studio Stamps: Woodgrain Embossing Folder Breakfast Puns Stitched Semi-Circle Dies Everyday Card by Kavya

I then stamped a bunch of images from Breakfast Puns stamp set and colored them using colored pencils and alcohol markers. To make it a bit more realistic, I used different thicknesses of foam tape so that it doesn’t appear flat. Finally, I stamped a sentiment from Breakfast Puns stamp set on Kraft cardstock and tucked it underneath the table cloth to finish off the card :)

I hope you liked this fun little card! Be sure to check back tomorrow for more crafty ideas.

Sunny Studio Supplies Used:


Poppy Fields Stamps
Poppy Fields Stamps
Shop at:
Sunny Studio
Poppy Fields Dies
Poppy Fields Dies
Shop at:
Sunny Studio
Breakfast Puns Stamps
Shop at:
Sunny Studio
Breakfast Puns Dies
Breakfast Puns Dies
Shop at:
Sunny Studio
Woodgrain Embossing
Woodgrain Embossing
Shop at:
Sunny Studio
Stitched Semi-Circle Dies
Shop at:
Sunny Studio
Slimline Scalloped Frame
Shop at:
Sunny Studio
Stitched Circle Small Dies
Shop at:
Sunny Studio
Stitched Circle Large Dies
Shop at:
Sunny Studio