Monday, November 16, 2020

North Pole Cards with Mayra and Tammy

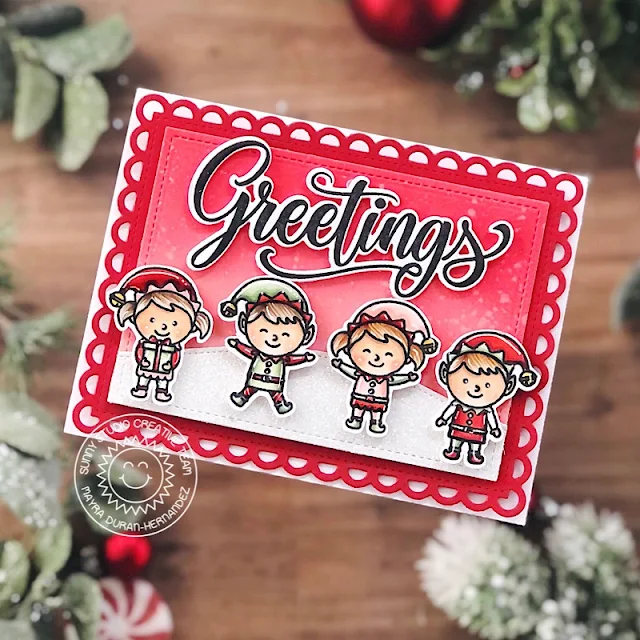
Hello and happy Monday everyone. Mayra here with you today. I am sharing a fun card with you. I used the adorable North Pole stamp set. This is such a cute set. I adore the little elves!!!

Sunny Studio Stamps: North Pole Frilly Frame Dies Slimline Dies Winter Themed Holiday Card by Mayra Duran-Hernandez

I began by coloring these little cuties using Copic markers. I used R26, R17, R05, and R59 for the red areas. For the soft pink, I used R00, R01, and R21. For the soft green, I used G20, G12, G43, G24, and G46. For the skin areas, I used E50, E51, E21, and E23. 

Next, I used the lovely Frilly Frames Lattice die to die cut a red scalloped frame for the card. I then die cut a rectangle to fit within the frame. I added color to this die-cut panel using Distress Oxide inks. I used Tattered Rose and Festive Berries. I then stamped the word 'greetings' from what is becoming one of my absolute favorite stamp sets Season's Greetings

Sunny Studio Stamps: North Pole Frilly Frame Dies Slimline Dies Winter Themed Holiday Card by Mayra Duran-Hernandez

I then used the stitched hill from the Slimline Nature Borders die set to create a snowy hill for the little elves to be on. This was a fun card to create. I hope you feel inspired. Thank you very much for taking the time to stop by. I pray you each have a wonderful and blessed day. 

---------------------------------------------

Hi friends! Tammy here! I'm so excited to share this festive holiday card and coordinating tag set, featuring the adorable set, North Pole. I just love traditional Christmas sets, and this set has it all...from Santa Claus to his adorable working elves! 

Sunny Studio Stamps: North Pole Frilly Frame Dies Slimline Dies Santa Claus Lane Winter Themed Holiday Card Tags by Tammy Stark

To begin, I stamped, colored with Copic markers, and die cut images from the following sets:

North PoleCoordinating Dies
Gleeful Reindeer
 (trees)/ Coordinating Dies
Santa Claus Lane/ Coordinating Dies

Sunny Studio Stamps: North Pole Frilly Frame Dies Slimline Dies Santa Claus Lane Winter Themed Holiday Card Tags by Tammy Stark

To create this slimline card, I first cut a white scalloped border using the Slimline Scalloped Frame Dies. Next, I cut a piece of Bristol smooth cardstock to fit inside the scallop and ink blended it with Tumbled Glass, Peacock Feathers, Chipped Sapphire, and Black Soot Distress Oxide inks. I added some white embossed snowflakes from Gleeful Reindeer, and die cut a snowy border using the Slimline Nature Borders Dies.

I then attached the panel to a red slimline card base. Next, I attached the images to my card, using foam tape on some for dimension, and white heat embossed the sentiment from North Pole to complete my card. Next, I created a fun trio of Christmas tags I can't wait to use on the kiddos gifts this year!

Sunny Studio Stamps: North Pole Frilly Frame Dies Slimline Dies Santa Claus Lane Winter Themed Holiday Card Tags by Tammy Stark

First, I cut my tag bases from the Very Merry and Holiday Cheer  6X6 paper, using the Scalloped Tag Square Dies. Next, I cut a background to fit inside the square tags, and ink blended it just as I did the slimline card. The snowy hills were created with the Woodland Borders Die and attached to the background. 

I then attached a white frame around the background using the Fancy Frames Square Dies, and added the stamped images, using foam tape on some for dimension. To complete my tags, I white heat embossed the sentiments from North Pole and Santa Claus Lane onto black cardstock strips, and added red and white bakers twine.

Thanks so much for stopping by...have a great day!!

Sunny Studio Supplies Used:

Gleeful Reindeer Dies
Shop at:
Sunny Studio
Gleeful Reindeer Stamps
Shop at:
Sunny Studio
Fancy Frames-Square Dies
Shop at:
Sunny Studio
Woodland Borders Dies
Shop at:
Sunny Studio
Holiday Cheer 6x6 Paper
Shop at:
Sunny Studio
Frilly Frames Lattice Dies
Shop at:
Sunny Studio
Very Merry 6x6 Paper
Shop at:
Sunny Studio
Season's Greetings Stamps
Shop at:
Sunny Studio
Santa Claus Lane Stamps
Shop at:
Sunny Studio
Santa Claus Lane Dies
Shop at:
Sunny Studio
Scalloped Tags-Square
Shop at:
Sunny Studio
Slimline Nature Borders
Shop at:
Sunny Studio
Slimline Scalloped Frame
Shop at:
Sunny Studio
North Pole Stamps
North Pole Stamps
Shop at:
Sunny Studio
North Pole Dies
North Pole Dies
Shop at:
Sunny Studio

Saturday, November 14, 2020

Holy Night Card with Juliana

Hello Sunny Studio friends! It's Juliana and happy to be here with you today as a guest on the Sunny Studio Blog. Today I'm sharing a Christmas card I created using the Holy Night Stamp Set.

Sunny Studio Stamps: Holy Night Stitched Semi-Circle Dies Woodland Borders Christmas Card by Juliana Michaels

To get started, I stamped and colored all of the images I wanted to use from the Holy Night Stamp Set using Copic Markers. I then die cut them using the coordinating die set.

For the background behind the nativity scene, I ink blended a piece of white cardstock using Distress Ink in Blueprint Sketch going darker toward the edges and lighter toward the center. Next, I die cut another piece of white cardstock using the largest of the Stitched Semi-Circle Dies. I layered this on top of the ink blended background and then began laying out the images to create the scene.

Sunny Studio Stamps: Holy Night Stitched Semi-Circle Dies Woodland Borders Christmas Card by Juliana Michaels

At this point, I felt like the design needed a little more interest, so I die cut some trees from black cardstock using the Woodland Border Dies. Then I die cut a piece of white cardstock using the grass die from the Comic Strip Everyday Dies and colored it with Copic Markers to look like straw. I adhered this behind the creche and then began layering the stamped images to complete the Nativity scene.

For the final step I stamped the sentiment onto a strip of white cardstock and tucked it behind the animals.

Thanks so much for stopping by today and I hope you enjoyed this bit of inspiration using the  Holy Night Stamp Set.

Sunny Studio Supplies Used: 

Comic Strip Everyday Dies
Shop at:
Sunny Studio
Woodland Borders Dies
Shop at:
Sunny Studio
Stitched Semi-Circle Dies
Shop at:
Sunny Studio
Holy Night Stamps
Holy Night Stamps
Shop at:
Sunny Studio
Holy Night Dies
Holy Night Dies
Shop at:
Sunny Studio

Friday, November 13, 2020

Retro Ornaments Cards and Video Tutorial with Franci and Candice

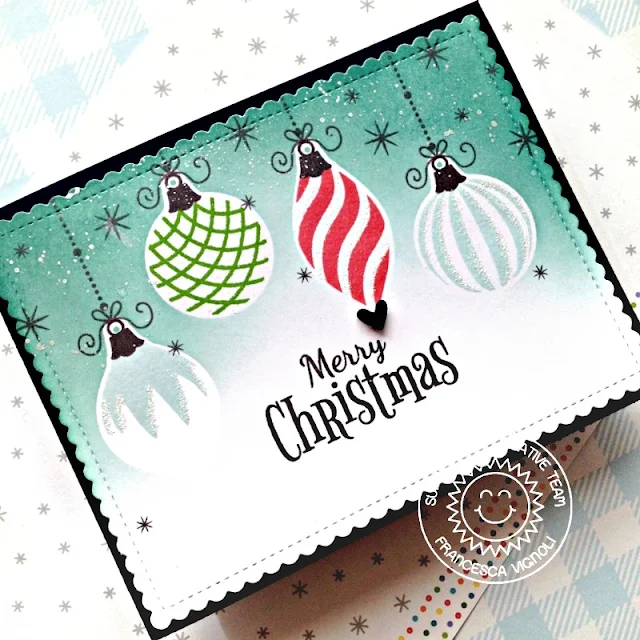
Hi there and happy Friday! It's Franci here with you today, with a new festive card featuring the Retro Ornaments set.

Sunny Studio Stamps: Retro Ornaments, Frilly Frames Stripes Dies Christmas Card by Franci Vignoli

This new Retro Ornaments set is so classic and elegant! It's a layering set but I just used an image per ornaments here and embellish them later on with some glittery embossing powder.

I stamped my ornaments using my stamping platform and all the ornament strings, bows and the little background elements with the Sunny Studio Round Acrylic Block, both the smallest and the largest ones ( I love these blocks so much!).

Sunny Studio Stamps: Retro Ornaments Frilly Frame Dies Christmas Card by Franci Vignoli

I also used the Retro Ornaments coordinated dies to create some masks and I inked on top with some Distress inks. For my panel I used the Frilly Frame Stripes Dies set and I created my card base out of some dark blue cardstock.

Please enjoy my card video tutorial below:

Hope you like this card and you are now inspired to create some Christmas cards! Have a lovely day! 

--------------------------------------------------

Hello! Candice back with you this Friday! Have you seen this new stamp set, Retro Ornaments, yet?! It is full of many different fun style of ornaments with layering options! I couldn't just pick one color so I went with some bright rainbow colors!

Sunny Studio Stamps: Retro Ornaments Season's Greetings Slimline Dies Christmas Card by Candice Fisher

I used these Sunny Studio products to create my card:

I began my slimline with an 8 1/2 x 3 1/2 card base. For the background I first die cut the stitched panel and inked it with Altenew inks in desert night, dusk, teal cove & aqualicious. I then heat embossed the sentiment in white, covered it with a scrap piece of paper and lastly splattered with white paint using a damp paint brush.

Sunny Studio Stamps: Retro Ornaments Season's Greetings Slimline Dies Christmas Card by Candice Fisher

Next, I stamped the ornaments in the rainbow colors listed above, stamped the tops with silver ink and used the coordinating dies to cut them out. The amazing thing about the coordinating dies is that they cut out the ornament with the top stamped! Brilliant! I finished the card by heat embossing the pine leaves in white on vellum, cutting them out with the coordinating dies and then adhering with a small glue dot to allow them to raise up a bit. I still have a bucket full of twine so I went with matching rainbow bows to complete the look and I am loving the results!

Thank you for visiting with me today!

Sunny Studio Supplies Used:

Frilly Frames Stripes Die
Shop at:
Sunny Studio
Season's Greetings Stamps
Shop at:
Sunny Studio
Season's Greetings Dies
Shop at:
Sunny Studio
Slimline Scalloped Frame
Shop at:
Sunny Studio
Retro Ornaments Stamps
Shop at:
Sunny Studio
Retro Ornaments Dies
Shop at:
Sunny Studio

Thursday, November 12, 2020

Sledding Critter Cards with Vanessa and Anja

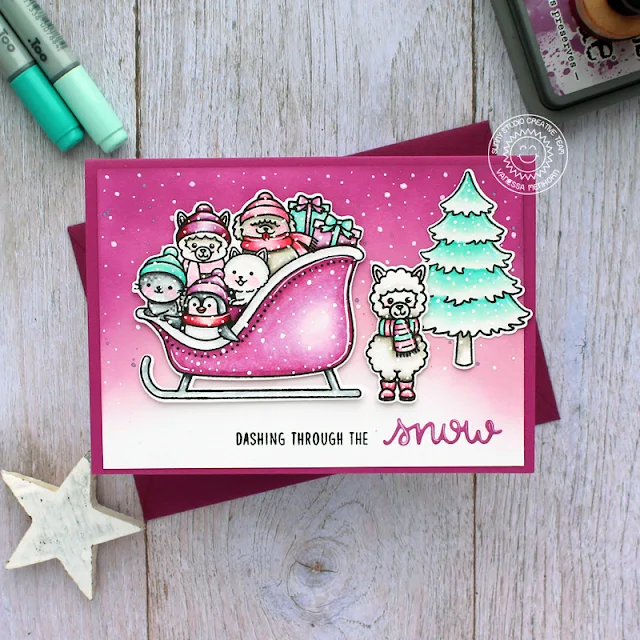
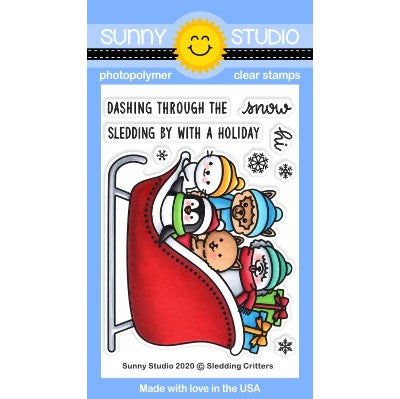
Hello to you! Vanessa here with a pink winter card using the lovely Sledding Critters Stamps set. This cute party is such fun!

Sunny Studio Stamps: Sledding Critters Alpaca Holiday Seasonal Trees Winter Card by Vanessa Menhorn

I started with a panel of white cardstock and inked it with Spun Sugar and Seedless Preserves Distress Oxide Inks. Then I added tiny ink droplets and stamped the sentiment before adhering the panel to the card. Now I stamped all the images onto white cardstock, colored them with Copics, die-cut the elements with the matching dies and adhered the pieces to the card with foam tape.

Sets used for this card:
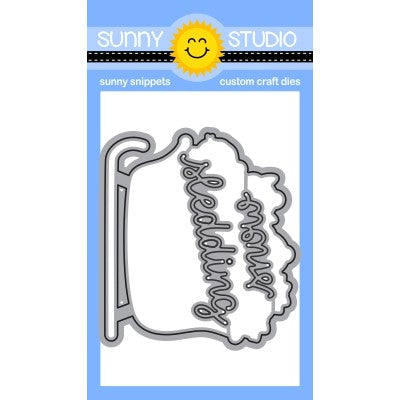
Sledding Critters Stamps Dies (Sleigh, sentiment, snow word)
Alpaca Holiday Stamps + Dies (Alpaca)
Seasonal Trees Stamps + Dies (tree)

Sunny Studio Stamps: Sledding Critters Alpaca Holiday Seasonal Trees Winter Card by Vanessa Menhorn

I inked a scrap of cardstock with Distress Oxide ink, die-cut the "snow" and adhered it to the card. Finally, I added snow with a white gel pen all over the card.

Love these adorable critters! Just imagine sledding with them! Thanks for visiting today, have a wonderful day!

-----------------------------------------------------

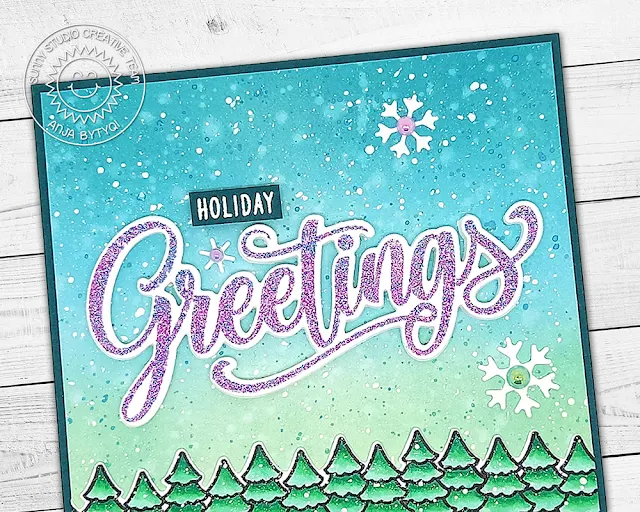
Hello everyone, Anja here and today I'm back with another holiday card featuring the Sledding Critters – love how they are piled up with some gifts, taking a sleigh ride through the snow. I created a card which is taller in size but not quite in the usual slimline format – it measures 4 5/16" x 7".

Sunny Studio Stamps: Sledding Critters Season's Greetings Winter Scenes Winter Card by Anja Bytyqi

For the background, I blended together the Distress Oxide Inks Broken China, Tumbled Glass and Cracked Pistachio. To add some texture, I splattered on ink and white paint with a brush.
I stamped the 
Sledding Critters and the fir tree border from the Winter Scenes set in Memento Tuxedo Black Ink and colored them with Copic Markers. I used the coordinating dies to cut out the images.

Sunny Studio Stamps: Sledding Critters Season's Greetings Winter Scenes Winter Card by Anja Bytyqi

Next, I stamped one of the large sentiments from the Season's Greetings set in VersaMark Ink onto a piece of white cardstock and heat embossed it with WOW! Royal Crush Embossing Glitter. The sparkle is absolutely gorgeous! I cut it out with the matching Season's Greetings Word Die and also added an additional layer cut from white fun foam to the back to make it dimensional.

Sunny Studio Stamps: Sledding Critters Season's Greetings Winter Scenes Winter Card by Anja Bytyqi

To complete the sentiment, I white heat embossed the word 'Holiday' onto a small cardstock strip which I popped up with foam tape. I embellished the card with white snowflakes (Snowflake Circle Frame Die) and adhered Iridescent Pearls to their centers.

Thank you so much for stopping by! Have a beautiful day!

Sunny Studio Supplies Used:

Alpaca Holiday Stamps
Shop at:
Sunny Studio
Alpaca Holiday Dies
Alpaca Holiday Dies
Shop at:
Sunny Studio
Seasonal Trees Stamps
Shop at:
Sunny Studio
Seaonal Trees Dies
Seaonal Trees Dies
Shop at:
Sunny Studio
Season's Greetings Stamps
Shop at:
Sunny Studio
Season's Greetings Dies
Shop at:
Sunny Studio
Snowflake Circle Frame
Shop at:
Sunny Studio
Scaredy Cat Dies
Scaredy Cat Dies
Shop at:
Sunny Studio
Sledding Critters Dies
Shop at:
Sunny Studio
Winter Scenes Stamps
Shop at:
Sunny Studio
Winter Scenes Dies
Winter Scenes Dies
Shop at:
Sunny Studio