Thursday, January 9, 2020

Sneak Peek: Pink Peonies, Blooming Frame, Heartstring Borders & Round Blocks

Hello and welcome to day 4 of our Spring Sneak Peek Week!  All this week I am showcasing cards using our newest collection which will be available for purchase on Friday, January 10th.

So I simply can't wait a second longer and have to share these cool new acrylic blocks right from the beginning!  

Our new circular blocks come in two fun sizes that fit very well in your hand and are made of a premium 9/16" thickness that has a really nice weight to them  They each come with a polished easy grip edge and have a 1/4" etched gridlines to help with lining things up.  

Don't get me wrong.  I adore my stamp positioning tools, but sometimes it's just really nice to grab a block and stamp things out quickly without the fuss and these are super fun to use!  They are also really handy for use with our new alphabet stamps which I'll be sharing more of in a video tomorrow.


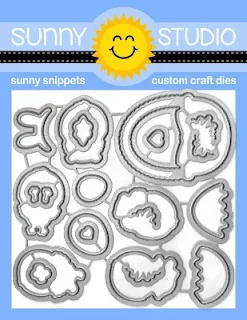
In addition to these cool blocks, today's sneak peeks also include another new floral 4x6 Stamp set, along with their coordinating dies and two new standalone die sets.  These have been a blast to create with and I'm thrilled to finally share them!

Card No. 1: My first card combines both our new Pink Peonies Stamps together with our new A2 sized Blooming Frame dies, used with a twist.  I backed my navy frame with some white cardstock I had inked up with Picked Raspberry distress ink and then I cut the frame in half so that I could create the look of a gatefold card on front.

For my flowers, I stamped them in VersaFine Clair Charming Pink ink with the leaves in VersaFine Clair Verdant Ink and then heat embossed them with clear embossing powder.  For my color medium I turned to my Daniel Smith watercolors.  At this point I was running out of space for a sentiment so I stamped "for you" using our Happy Thoughts Stamps onto a small tag from our Sweet Treats Bag Dies.
Sunny Studio Blog: Navy & Pink Watercolor Peony Flower Just For You Handmade Card (using Pink Peonies Stamps, Blooming Frame Dies & Sweet Treats Tag Die)

Card No. 2: Our new Blooming Frame Dies are cool in that they leave the center of the frame solid, however we have fully maximized the open space with an awesome new "happy birthday" script style word dies and a little daisy flower.  For this card I repeatedly adhered the happy birthday words from the die set onto my white cardstock panel with a glue pen for a cool tone-on-tone embossed texture look.

My Pink Peonies were stamped in VersaMark ink onto watercolor paper, heat embossed with white embossing powder and watercolored using some Spun Sugar & Twisted Citron distress ink reinkers.  For my black and white striped paper, I stamped the stripes from our Background Basics Stamps using VersaFine Onyx Black ink.  A few pieces of iridescent pastel confetti adhered with liquid adhesive completed my card.

Sunny Studio Blog: Watercolor Peonies Black & White Striped Birthday Card (using Pink Peonies Stamps, Background Basics Stamps & Blooming Frame Die)

Card No. 3:  Up next is a card using the Blooming Frame dies in a more traditional sense.  It just so happens that the Fancy Frames Rectangle dies perfectly fit over the opening which is pretty cool.  I could have simply added another piece of cardstock there behind my scalloped frame, but to conserve on paper and bulk I just masked off the outer portion of my blooming frame and inked up the center with some Spun Sugar distress ink. 

My flowers were once again 
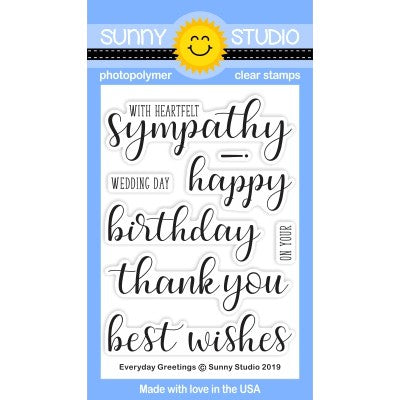
stamped in VersaMark ink onto watercolor paper and heat embossed with white embossing powder, but this time I used a different way to color them.  I wet each petal one at time with my paintbrush and then added a little color near the darkest spots with a brushmarker PRO pen (in Cerise 375) and allowed the water to just move the color outward. My sentiment was then stamped with VersaFine Onyx black ink using our Everyday Greetings stamps.
Sunny Studio Blog: With Heartfelt Sympathy Watercolor Peony Floral Card (using Pink Peonies Stamps, Everyday Greetings Stamps & Blooming Frame Die)

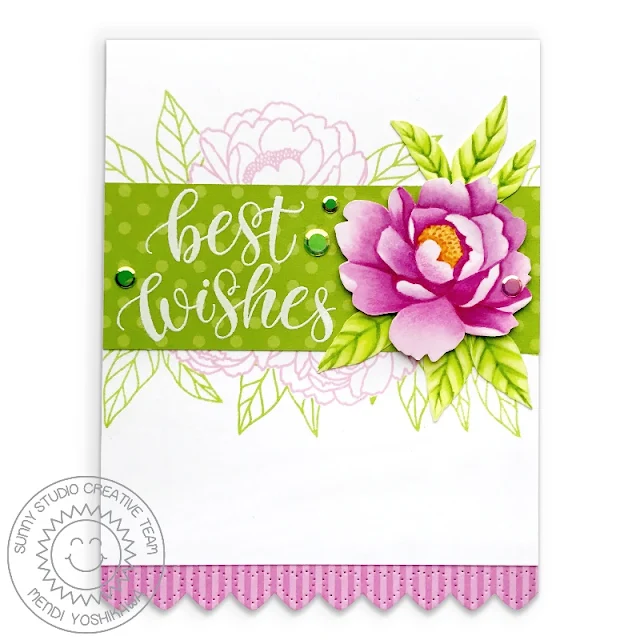
Card No. 4: I knew I wanted to attempt to color these peonies using a no-line coloring technique with my Copic Markers, but I wasn't fully prepared for how long it would take for me to color a single flower so I decided to to make my one flower count with a card that truly highlights it. To have my stamp outlines disappear with my coloring, I used a small mini pack of Memento dew drop inks in Angel Pink & New Sprout and then used those same ink colors to stamp the flower outlines for my background.  I heat embossed my sentiment onto a piece of polka-dot paper from our Dots & Stripes Pastels Paper pack using a phrase from the Pink Peonies set. A scalloped heart edge along the bottom cut using our Heartstrings Border Dies from some of that same paper pack completed my card and tied in some more pink.
Sunny Studio Blog: Best Wishes Floral No-line coloring Wedding Card (using Pink Peonies Stamps, Dots & Stripes Pastels Paper & Heartstrings Border Dies)

Card No. 5: For this card I was really inspired by THIS gorgeous card I came across on pinterest. I started my stamping my first flower in VersaFine Onyx Black Ink and then masking it off, flower by flower until I had my entire floral border stamped out. I then left all my masks in place inking a blended ombre background using Peacock Feathers and Blueprint Sketch distress inks before spritzing my background with water to create the speckled look. When I removed my masks I colored my flowers in a black and white color palette using N0, N1 & N3 Copic markers. For my sentiment, I used that same scripty birthday word from our Blooming Frame dies together with the "wishes" word from our Alpaca Holiday Stamps. Then for a little extra sparkle, I sprinkled some mirror droplets as a final finishing touch.
Sunny Studio Blog: Teal, Blue, Black & White Floral Birthday Wishes Card (using Pink Peonies Stamps, Blooming Frame Dies & Mirror Droplets)

Card No. 6: For my last peony card of the day I wanted to combine them with this cool banner from our new Banner Basics Stamps. It's hard to truly appreciate the banner when it's all by itself in the set, but it was designed to stamp two of so that you can flip one each way to appear like it's wrapping around an object.  For this set of peonies, I stamped the peonies using VersaFine Onyx Black ink onto watercolor paper which I then heat embossed with clear embossing powder to prevent them from smearing.  I then colored my flowers and leaves using Caran D'Ache watercolor pencils and blended with water on a paint brush, working from the lightest to darkest spots.

For my scalloped mat I turned to our Frilly Frames Eyelet Lace Dies, placing it over a piece of tone-on-tone floral print from our Spring Fling Paper pack.  I inked up both the banners and background behind my stamped flowers using Peacock Feathers distress ink and then f
or my sentiment, I stamped the words "Happy Mother's Day" using our Happy Thoughts Stamps 
Sunny Studio Blog: Sunny Studio Stamps Floral Peony Mother's Day Card (using Pink Peonies & Banner Basics Stamps, Frilly Frames Eyelet Lace Dies and Spring Fling Paper)

Card No. 7: I couldn't wrap up the day without sharing one last card using only the new Blooming Frame dies. I know sometimes it's nice to see ideas that use only a single product and for the most part I was able to achieve that goal with this bright and happy card. I started by inking up an A2 sized card panel with Picked Raspberry, Carved Pumpkin, Mustard Seed, Twisted Citron, Salty Ocean and Wilted Violet distress ink and backed them with a piece a navy blue cardstock.  

I then cut the birthday phrase and daisies from white cardstock adhering them in a loose scattered pattern.  For the center of each flower, I inked up little scraps of cardstock in those same ink colors and die-cut the centers using the little circle die that also comes with the die set. As a final touch to make the flowers pop a bit, I covered each flower center with a clear droplet from the Studio Katia Clear Drops Mix.
Sunny Studio Blog: Rainbow Daisy Handmade Birthday Card (using Blooming Frame Background Die)

Well that wraps up today's sneak peeks. I don't know if you can tell, but I was more than a little giddy to finally have some floral images to play with all my color mediums I've been collecting.  LOL!  I'd love to give a $25 gift code to one lucky winner using the rafflecopter below. Make sure to keep checking back all this week for more peeks & prizes for up to five chances to win. The contests run through Saturday at Midnight PST with winners announced here on Sunday, January 12th. :)

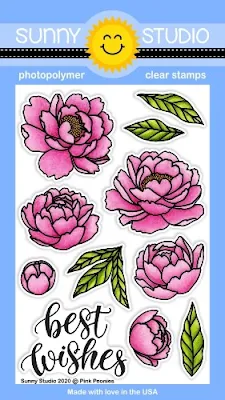
a Rafflecopter giveaway Here's a closer look at the new Pink Peonies Stamps & Dies, along with the new Blooming Frame Dies and Heartstrings Border Dies (available for purchase on Friday, January 10th).

Sunny Studio Stamps: Pink Peonies Peony Flower Outline 4x6 Clear Photopolymer Stamp Set    Sunny Studio Stamps: Pink Peonies Peony Flower Matching Metal Cutting Dies

Sunny Studio Stamps: Blooming Frame Petals with Happy Birthday Phrase Word Standalone Metal Cutting Dies    Sunny Studio Stamps: Heartstrings Valentine's Day Heart Border Metal Cutting Dies

Other Supplies Used:
Versafine Onyx Black Ink
Shop at:
Sunny Studio
Fancy Frames- Rectangles
Shop at:
Sunny Studio
Background Basics Stamps
Shop at:
Sunny Studio
Happy Thoughts Stamps
Shop at:
Sunny Studio

Dots & Stripes Pastels 6x6 Paper
Shop at:
Sunny Studio
Everyday Greetings Stamps
Shop at:
Sunny Studio
Sweet Treats Gift Bag
Shop at:
Sunny Studio
Heartstrings Border Dies
Shop at:
Sunny Studio

Banner Basics Stamps
Shop at:
Sunny Studio
Banner Basics Dies
Banner Basics Dies
Shop at:
Sunny Studio
Frilly Frames-Eyelet Lace
Shop at:
Sunny Studio
Spring Fling Paper
Spring Fling Paper
Shop at:
Sunny Studio
Alpaca Holiday Stamps
Shop at:
Sunny Studio
Iridescent Pastel Confetti
Shop at:
Sunny Studio
Mirror Droplets
Mirror Droplets
Shop at:
Sunny Studio
VersaMark Watermark Ink
Shop at:
Sunny Studio

Wednesday, January 8, 2020

Sneak Peek Week: Chickie Baby, Banner Basics & Spring Fling Paper

Hello and welcome to day 3 of our Spring Sneak Peek Week!  All this week I am showcasing cards using our newest collection which will be available for purchase on Friday, January 10th

Today's sneak peeks include two new 4x6 stamp sets with their coordinating dies and a 6x6 Spring Paper Pack.  So excited to finally share!!!

Card No. 1:  My first card of the day showcases one of my favorite patterned papers from our new Spring Fling Paper pack together with three of the chicks from our Chickie Baby Stamps. The set comes with two unique backdrops that make scenic cards effortless. For my card here, I trimmed down the paper to allow room for a scalloped edge from our Eyelet Lace Border dies and then added a strip of pink daisy tone-on-tone paper from the pack to the inside portion of my card to peek out behind the eyelet lace edge. I heat embossed my sentiment using a phrase from the stamp set using white embossing powder and my card was done.  This card came together really quick and I just love how happy it feels!
Sunny Studio Blog: Easter Chick with Cherry Blossom Tree Handmade Card (using Spring Fling Paper, Chickie Baby Stamps & Eyelet Lace Border Dies)

Card No. 2:  For my next card, I paired the new Chickie Baby stamps with our popular Chubby Bunny Stamps from last year. Don't they look cute together?!  For my background I thought it would be fun to do an everyday take on our Scenic Route Stamps showing that they aren't limited to just the holidays or snowy hills. I finished off my card with a custom punny sentiment using our new Phoebe Alphabet Stamps (which will be fully unveiled on Friday).
Sunny Studio Blog: Hoppy Easter Chicks & Easter Bunnies with Eggs Handmade Card (using Chickie Baby, Chubby Bunny & Scenic Route Stamps)

Card No. 3:  I wanted to go clean and simple for my next card, using a rainbow striped print from our Spring Fling Paper pack for my card background. I then topped it with the outer scalloped mat from our new Frilly Frames Eyelet Lace Dies. My basket, eggs and chicks were colored in bright happy colors to match the patterned paper and then arranged in a row along the bottom.  I then added a loose shadow with my Copic C1 and C0 markers to ground my pieces a bit. My "Happy Easter" greeting was stamped with pink ink and I then embellished around it with a couple small heart images from the stamp set and a few pink hearts from our Heart Droplets Mix.
Sunny Studio Blog: Rainbow Striped Scalloped Easter Basket with Eggs & Chicks Handmade Card (using Frilly Frames Eyelet Lace Die, Chickie Baby Stamps & Spring Fling 6x6 Paper)

Card No. 4:  Up next is a card using the second scene backdrop available in our Spring Fling Paper pack. I cut a stitched mat using our Frilly Frames Retro Petal Dies and then used a piece of craft foam to pop it up and fit it right back into the negative space leftover for my background.  I love that I was able to create this look with single sheet of patterned paper and it gives my card a little something extra. Also by having that portion that pops out, it gave me a place to "hang" an Easter banner from our Chubby Bunny Stamps.
Sunny Studio Blog: Happy Easter Chick with Basket, Banner and Sunburst Background Card (using Spring Fling Paper, Chickie Baby Stamps & Chubby Bunny Stamps)

Card No. 5: Continuing with the idea of an Easter banner, I turned to our new Banner Basics stamps and Phoebe Alphabet Stamps for my next card.  Happily the curve of my banner perfectly mimics the curve of the fence in our new Spring Scenes stamps which I think is the perfect backdrop for a cute little Easter egg hunt scene. To use the grass patterned paper from our Spring Fling Paper pack, I stamped the fence border along the top of my patterned paper and then fussy cut it the grass border out to layer over the top of another piece that had been colored with Copic Markers. If you look closely, you will see that I colored the diecut area around my fence with my Copic markers to help it blend with my Tumbled Glass Distress Ink background.  I love how that little trick helps the die-cut lines just disappear into the background.

The dies that coordinate with the little grass tuft stamps in the Chickie Baby set only cut out the top portions of the grass, making it possible to tuck things behind them like Easter eggs. It's so much fun!  A little bunny and basket from our Chubby Bunny Stamps completed my scene.
Sunny Studio Blog: Bunny & Chick with Basket and Egg Hunt Happy Easter Banner Card (using Chubby Bunny, Chickie Baby, Banner Basics & Spring Scenes Stamps)

Card No. 6:  For this card I trimmed two borders of tulips for the top and bottom of my card front using a pattern from our Spring Fling Paper pack, together with a grassy print which I die-cut along the top using the grass border from our Sunny Sentiments Dies. The Chickie Baby Stamps come with separate little legs so that you can extend the chick's legs when he is placed inside the cracked egg. It's sort of a fun & silly look, but I love having extra options like that. I stamped a couple extra tulips from the set to tie in with my tulip paper and then used the large script Easter greeting stamped with Versafine Onyx Black Ink to complete my scene.
Sunny Studio Stamps: Happy Easter Chicks with Tulips and Cracked Eggs Card (using Chickie Baby Stamps & Spring Fling 6x6 Paper)

Card No. 7:  This is just another take on many of the same supplies used in card no. 5.  This time for my grass though I used various shades of green Copic markers to flick on color to resemble blades of grass. When I was done I then came in with a little distress ink to darken up the bottom corners.  For this card I used another banner from our new Banner Basics Stamps which I stamped with a sentiment from our Chickie Baby stamps.  To create some separation between my grass and Rainbow Bright paper, I cut a heart border from white cardstock using our new Heartstrings Border dies.
Sunny Studio Blog: Easter Eggs with Basket & Chicks Handmade Card (using Chickie Baby, Spring Scenes & Banner Basics Stamps with Rainbow Bright 6x6 Paper)

Tag No. 1:  For my last project of the day I created a bright and happy tag perfect for tying to an Easter basket. I started by cutting our Scalloped Circle Tag dies from a polka-dot print found in the new Spring Fling paper pack. I then layered my tag with some basic nesting circles using some more cute tone-on-tone prints from the paper pack. For my sentiment I turned to a greeting from our Happy Thoughts Stamps which I paired with the fun circular banner from our new Banner Basics set. This banner has been perfectly sized to fit not only our circle tags like this, but also our fancy frames circle dies. A bunny from Chubby Bunny, a chick from Chickie Baby and a kite from our Spring Showers set complete my little vignette. 
Sunny Studio Blog: Rainbow Polka-dot Easter Bunny & Chick with Kite Gift Tag (using Chubby Bunny, Chickie Baby, Spring Showers & Banner Basics Stamps, Spring Fling Paper & Scalloped Circle Tag)

That wraps up today's sneak peeks.  That was a whole lot of information and I really appreciate you hanging out with me today. I'd love to give a $25 gift code to one lucky winner using the rafflecopter below.  Make sure to keep checking back all this week for more peeks & prizes for up to five chances to win. The contests run through Saturday at Midnight PST with winners announced here on Sunday, January 12th. :)

a Rafflecopter giveaway Here's a closer look at the new Spring Showers, Spring Scenes and Floating By stamps & dies used today (available for purchase on Friday, January 10th).

Sunny Studio Stamps: Chickie Baby Easter Chick, Eggs & Basket Happy Easter 4x6 Clear Photopolymer Stamp Set     Sunny Sunny Studio Stamps: Chickie Baby Easter Chick, Eggs & Basket Happy Easter Matching Metal Cutting Dies Set

Sunny Studio Stamps Banner Basics 4x6 Pennant Photopolymer Clear Stamp Set     Sunny Studio Stamps Banner Basics 4x6 Pennant Matching Metal Cutting Dies

Sunny Studio Stamps: Spring Fling 6x6 Double Sided Patterned Paper 24-Sheet Pack

Sunny Studio Stamps: Spring Fling 6x6 Double Sided Patterned Paper 24-Sheet Pack

Other Supplies Used:
Sunny Sentiments Dies
Shop at:
Sunny Studio
Rainbow Bright 6x6 Paper
Shop at:
Sunny Studio
Happy Thoughts Stamps
Shop at:
Sunny Studio
Chubby Bunny Stamps
Chubby Bunny Stamps
Shop at:
Sunny Studio
Chubby Bunny Dies
Chubby Bunny Dies
Shop at:
Sunny Studio
Frilly Frames Retro Petals Dies
Shop at:
Sunny Studio
Scenic Route Stamps
Scenic Route Stamps
Shop at:
Sunny Studio
Scenic Route Dies
Scenic Route Dies
Shop at:
Sunny Studio
Phoebe Alphabet Stamps
Shop at:
Sunny Studio
Spring Scenes Stamps
Shop at:
Sunny Studio
Spring Scenes Dies
Spring Scenes Dies
Shop at:
Sunny Studio
Spring Showers Stamps
Shop at:
Sunny Studio
Spring Showers Dies
Spring Showers Dies
Shop at:
Sunny Studio
Eyelet Lace Borders
Eyelet Lace Borders
Shop at:
Sunny Studio
Frilly Frames-Eyelet Lace
Shop at:
Sunny Studio
Heartstrings Border Dies
Shop at:
Sunny Studio
Heart Droplets Mix
Heart Droplets Mix
Shop at:
Sunny Studio

*Please Note: Some items shown will not be available until January 10th release date.

Tuesday, January 7, 2020

Sneak Peek Week: Cheerful Daisies, Frilly Frames & Eyelet Lace Borders

Hello and welcome to day 2 of our Spring Sneak Peek Week!  All this week I am showcasing cards using our newest collection which will begin shipping on Friday, January 10th

Today's sneak peeks include a new 4x6 layering stamp set for Spring, matching dies and two new standalone die sets. Let's jump right in!

Card No. 1:  Our newest layering set is a gerber daisy called Cheerful Daisies.  Everytime I see them I can't help but think of the Meg Ryan line in You've Got Mail where she says, "Don't you think daisies are the friendliest flower?"  

For all my cards today I stamped them assembly line style using the two corners of my MISTI stamping tool and going through all the layers color by color at the same time to save time with lining things up.  The good news though is that this daisy only has two layers for the petal portion so it's fairly easy to line up and easy to find two colors that compliment each other. I have still made sure to include my ink colors used for this card and all the cards at the bottom of my post just in case though.  :)

To create this particular card, I inked up my background with distress inks and then spritzed on water to create the speckled look. I then set to work randomly arranging my flowers and leaves making sure to run some off the edge that I then clipped off with my scissors.  For my sentiment, I heat embossed my "happy spring" greeting onto vellum using white embossing powder and then framed it with our Fancy Frames Circle Dies.  This is one of my favorite ways to adhere vellum because I can hide my adhesive on the outer ring and there's no messy glue showing behind my sentiment.  As a final little touch, I used one of the scalloped borders from our new Eyelet Lace Border dies.
Sunny Studio Blog: Colorful Daisy Flower Hello Spring Card with Flower Background (using Cheerful Daisies Stamps, Fancy Frames Circle & Eyelet Lace Border Dies)

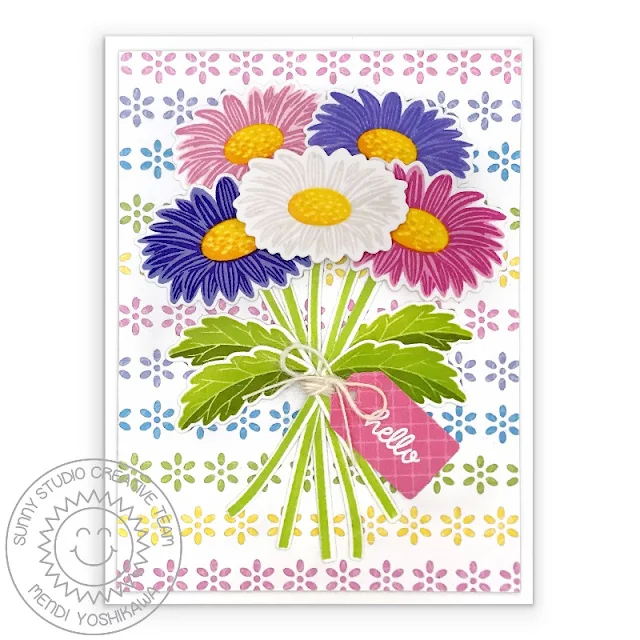
Card No. 2:  For my next card, I used another die from that same Eyelet Lace Border dies set to create my background pattern. I drew some light pencil lines using my clear grid ruler and then repeatedly ran the daisy cutout die through my machine to create an overall pattern. I then erased my pencil lines and added some strips of tone-on-tone paper to the back from our new Spring Fling Paper pack. I actually had a bunch of 1/2" strips leftover from making other cards so I was really happy to find a way to use them all and I adore the sweet romantic look that it created.

For my daisy bouquet, I stamped some stems using our Timeless Tulips Stamps and then tied some twine around them before adhering them to my card front.  As a final touch I heat embossed the word "hello" from our Chubby Bunny Stamps onto a tag from our Sweet Treats Bag Die using a scrap from our Very Merry Paper pack.
Sunny Studio Blog: Gerber Daisy Bouquet Hello Card with Flower Background (using Cheerful Daisies Stamps, Eyelet Lace Border Dies & Spring Fling 6x6 Paper)

Card No. 3:  Up next is another bouquet, this time using our Vintage Jar stamps and those same stems from our Timeless Tulip stamps. To frame my scene I created a lacy scalloped mat using the outer portion of our newest Frilly Frames Eyelet Lace dies.  I then stamped a sentiment from our new Pink Peonies Stamps (which will be shared more on Thursday) and mounted my entire panel onto a piece of rainbow heart patterned paper from our new Spring Fling Paper pack.
Sunny Studio Blog: Best Wishes Rainbow Ombre Gerber Daisy Bouquet Wedding Card (using Cheerful Daisies & Vintage Jar Stamps, Frilly Frames Eyelet Lace Dies & Spring Fling 6x6 Paper)

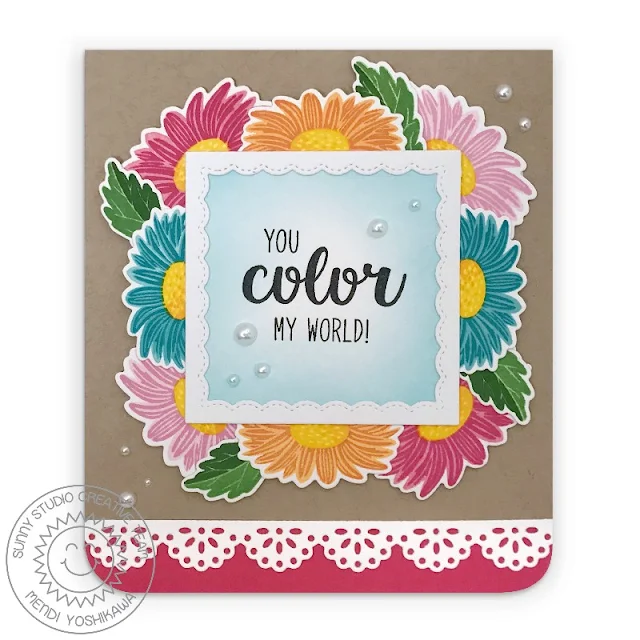
Card No. 4:  For this card, I arranged my colorful daisies around one of the scalloped frames from our Fancy Frames Square dies which I then stamped with a greeting from our Color Me Happy Stamps.  I scattered some simple White Pearls for some added interest and then added a lacy scalloped edge from our Eyelet Lace Border dies.  I love the way the bright daisies pop against the kraft background!
Sunny Studio Blog: You Color My World Rainbow Gerber Daisy Card (using Cheerful Days Stamps, Fancy Frames Square & Eyelet Lace Border Dies)

Card No. 5:  Up next is a card that uses the interior portion of the Frilly Frames Eyelet Lace dies in a unique way. I turned the background die on it's side and ran it through my machine twice, overlapping it by one row the second time to help line things up and create a continuous background pattern.  It's yet another fun way to stretch your supplies!  I then added a small strip of polka-dot print by heat embossing the pattern onto a piece of black cardstock using our Background Basics Stamps

For my daisy stems I was feeling too lazy to stamp them so I simply used the coordinating Timeless Tulips dies to cut them from some green cardstock instead which I think worked well and saved me a little time. My greeting from the set was stamped onto a piece of striped teal paper from our Dots & Stripes Pastels Paper pack and then cut into a pennant shape using our Fishtail Banner dies.
Sunny Studio Blog: Layered Daisy Hello Spring Handmade Card (using Cheerful Daisy & Background Basics Stamps, Frilly Frames Eyelet Lace & Fishtail Banner Die and Dots & Stripes Pastel Paper)

Card No. 6: For my last card of the day, I stamped some white daisies.  To do this I skipped the bottom layer and just stamped the top layer directly onto the coordinating die-cuts.  I love bold complimentary color schemes so I turned to red cardstock to go with my green leaves and the green grid print from our Gingham Jewel Tones Paper pack.  To leave room for my sentiment, I cut the scalloped panel from our Frilly Frames Eyelet Lace dies in half, before running in through my die-cutting machine again with the inside portion of the eyelet lace die.  I then heat embossed my sentiment in white using our Everyday Greetings stamps and taped the two sides back together, hiding the seam beneath my daisies.
Sunny Studio Blog: Layered Daisy Red, White & Green Scalloped Thank You Card (using Cheerful Daisy & Everyday Greetings Stamps, Frilly Frames Eyelet Lace Dies & Gingham Jewel Tones Paper)

To help you line up our Cheerful Daisies stamps like a pro I've created a special layering guide (you can click on the photo below to view it larger).  The guide shows the stamps starting with the lightest ink color, working towards the darkest, but sometimes I find it easier to start backwards. They both work depending on what your preference is.  The black outline indicates where that layer touches the previously stamped layer.  :)
Sunny Studio Blog: Cheerful Daisies Layered Daisy Step-by-step Layering Guide

I frequently am asked which ink colors I used for my layered images.  While I think there are so many great options out there, these are the colors I used today for my stamped images (in the ordered shared from lightest to darkest)...

Lavender Daisy
Simon Says Stamp Hydrangea
Colorbox Grape (Card No. 1 & 2)
or Catherine Pooler Grape Crush (Card No. 2 & 3)

Dark Violet Daisy (Card No. 5)
Colorbox Grape Slushy
Colorbox Imperial


Light Pink Daisy (Card No. 2 & 4)
Colorbox Bubblegum

Colorbox Candy

Medium Pink Daisy (Card No. 1, 2 & 3)
Colorbox Candy

Versafine Charming Pink

Hot Pink Daisy (Card No. 1)
Versafine Charming Pink

Colorbox Raspberry

Pinkish Red Daisy (Card  No. 4)
Colorbox Cherry

Colorbox Blossom

Orange Daisy (Card No. 3, 4 & 5)
Papertrey Ink Summer Sunrise
Colorbox Pumpkin Pie


Aqua Daisy (Card No. 4 & 5)
Colorbox Seaglass
Colorbox Ocean
or
Lawn Fawn Peacock


White Daisy (Card No. 2 & 6)
Simon Says Stamp Barely Beige


Centers for each Daisy
Versafine Cheerful
Colorbox Banana

Papertrey Ink Summer Sunrise

Green Leaves (Card  No. 4)
Colorbox Grasshopper
Colorbox Green Apple
Colorbox Golf Course

Olive Green Leaves (all other cards)
Colorbox Kiwi
Colorbox Tree Frog
Colorbox Artichoke

That wraps up today's sneak peeks.  I know that's quite a bit of information and it means so much to have you hang out with me today. I'd love to give a $25 gift code to one lucky winner using the rafflecopter below.  Make sure to keep checking back all this week for more peeks & prizes for up to five chances to win. The contests run through Saturday at Midnight PST with winners announced here on Sunday, January 12th. :)

a Rafflecopter giveaway Here's a closer look at the new Cheerful Daisies stamps & coordinating dies, as well as the new Frilly Frames Eyelet Laces Dies and Eyelet Lace Border Dies used today (available for purchase on Friday, January 10th).
Sunny Studio Stamps: Cheerful Daisies Layered Layering Daisy Flower 4x6 Clear Photopolymer Stamp Set     Sunny Studio Stamps: Cheerful Daisies Layered Layering Daisy Flower Coordinating Metal Cutting Dies

Sunny Studio Stamps: Frilly Frames Eyelet Lace Scalloped Mat with Interchangeable Mix & Match Background Standalone Metal Cutting Dies     Sunny Studio Stamps: Eyelet Lace Daisy Flower Scalloped Border Standalone Metal Cutting Dies

Other Supplies Used:
Color Me Happy Stamps
Shop at:
Sunny Studio
Fishtail Banner Dies
Shop at:
Sunny Studio
Timeless Tulips Dies
Shop at:
Sunny Studio
Timeless Tulips Stamps
Shop at:
Sunny Studio

Vintage Jar Stamps
Vintage Jar Stamps
Shop at:
Sunny Studio
Fancy Frames-Circle Dies
Shop at:
Sunny Studio
Fancy Frames-Square Dies
Shop at:
Sunny Studio
Background Basics Stamps
Shop at:
Sunny Studio
Gingham Jewel Tones 6x6 Paper
Shop at:
Sunny Studio
Dots & Stripes Pastels 6x6 Paper
Shop at:
Sunny Studio
Everyday Greetings Stamps
Shop at:
Sunny Studio
Sweet Treats Gift Bag
Shop at:
Sunny Studio
Spring Fling Paper
Spring Fling Paper
Shop at:
Sunny Studio
White Pearls
White Pearls
Shop at:
Sunny Studio