Thursday, March 2, 2017

Timeless Tulips and Vintage Jar Thank You Card with Vanessa

Hi everybody! Vanessa here with a card idea using Timeless Tulips and Vintage Jar. I so love the layered stamps, as it makes it very easy to create beautiful flower bouquets. And that jar is genius, it looks like real glass! 

Sunny Studio Stamps: Timeless Tulips And Vintage Jar Thank You Card by Vanessa Menhorn

I stamped the tulips and the jar onto white cardstock and die-cut them with the coordinating Timeless Tulips dies and Vintage Jar dies. For the tulips I used only two ink colors (MFT Dye Ink Coral Crush and Peach Bellini) plus white pigment ink. Since I didn't have a third ink color to pair with them I stamped one layer with the darker color and then white above to tone down the color...

Now I stamped the stems into the jar and onto a panel of white cardstock that I had trimmed a bit smaller than my card base. Then I covered my card base with checked patterned paper and adhered the cardstock panel. 

Sunny Studio Stamps: Timeless Tulips And Vintage Jar Thank You Card by Vanessa Menhorn

After I had adhered the jar and the tulips with foam tape, I stamped and heat-embossed the sentiment from Daffodil Dreams onto a strip of patterned paper and adhered this to the jar. Finally, I added sequins. 

I hope you like today's idea! Thank you for stopping by!

Sunny Studio Supplies Used:
        

Wednesday, March 1, 2017

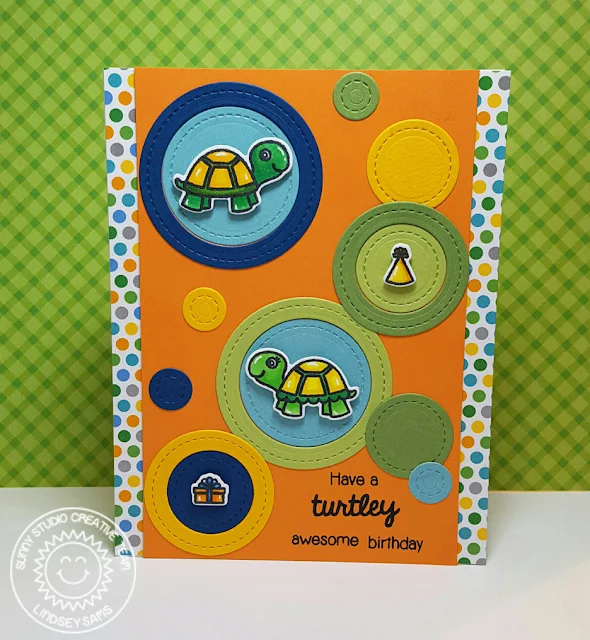
Turtley Awesome Turtle Birthday Card with Lindsey

Hi, Lindsey here today sharing my last post before I have my sweet little boy. I'll be taking a break from the design team for a while, but hopefully will be back to share more cards with you soon. I really appreciate all the love, support, and sweet comments you guys have given me during my time with Sunny Studio Stamps! Now let's get started on this fun birthday card using the Turtley Awesome stamps.

Sunny Studio Stamps: Turtley Awesome Turtle Birthday Card by Lindsey Sams

To begin, I cut a patterned piece of paper to an A2 size for my card base. Next, I cut a slightly narrower piece of orange card stock to go on top of the polka dot paper. I decided to do a circle design on the orange panel. I cut different sizes of coordinating stitched circles to make a cool design. Then, I stamped my sentiment on the bottom right corner of the orange panel and stamped the rest of the images on some white card stock. 

Sunny Studio Stamps: Turtley Awesome Turtle Birthday Card by Lindsey Sams

I colored the turtle and birthday images using Copic markers and cut them out using the coordinating Turtley Awesome dies. Once I had my design layed out, I adhered all the circles down using some adhesive. I then popped up the stamped images using some foam tape, so they would really stand out on the card. To finish off the card, I added a few highlights using my white gel pen.

That's it for me today. I think this card turned out super cute and this set is great for boy birthday cards. With such a great price point, you should definitely give this set a try. Thanks so much for reading and have a great day! 

Sunny Studio Supplies Used: