Showing posts with label Stitched Hearts. Show all posts

Tuesday, October 31, 2023

Baking Spirits Bright Card with Isha

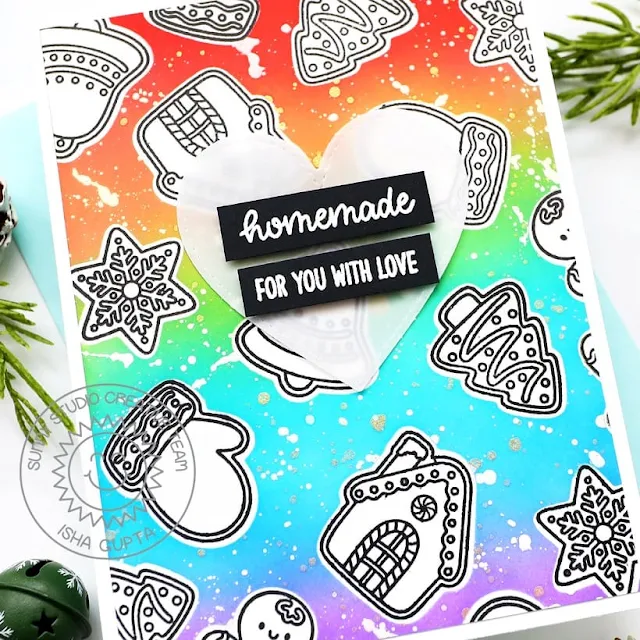
Hello everyone! Isha here today with a CAS card featuring the Baking Spirits Bright stamps and coordinating dies. The details of this artistic stamp immediately gave this idea and I am happy it came out exactly as I had imagined. 

Sunny Studio Stamps: Baking Spirits Bright Holiday Card by Isha Gupta (featuring Stitched Heart Dies)

To start I die-cut the images from masking paper using the coordinating dies. Adhere to a white card panel. Sponge distress inks (wilted violet, salty ocean, peacock feathers, mowed lawn, spiced marmalade and abandoned coral) to achieve rainbow effect. Flick gold and white splatters.

Sunny Studio Stamps: Baking Spirits Bright Holiday Card by Isha Gupta (featuring Stitched Heart Dies)

Remove the masks. Stamp the images using black ink. Die-cut the heart from vellum twice using the Stitched Heart 2 dies. Adhere the hearts together and adhere to the layer. Stamp the sentiment onto black cardstock using versamark ink. Sprinkle WOW! white embossing powder, heat set. Cut the stripes and adhere to the card using 3d foam tape. 

Thank you for dropping by! Have a nice day.

Sunny Studio Supplies Used:

Stitched Heart 2 Dies
Shop at:
Sunny Studio
Baking Spirits Bright Stamps
Shop at:
Sunny Studio
Baking Spirits Bright Dies
Shop at:
Sunny Studio

Sunday, October 15, 2023

Woolen Mitten Die Focused Gift Card Holders with Tammy

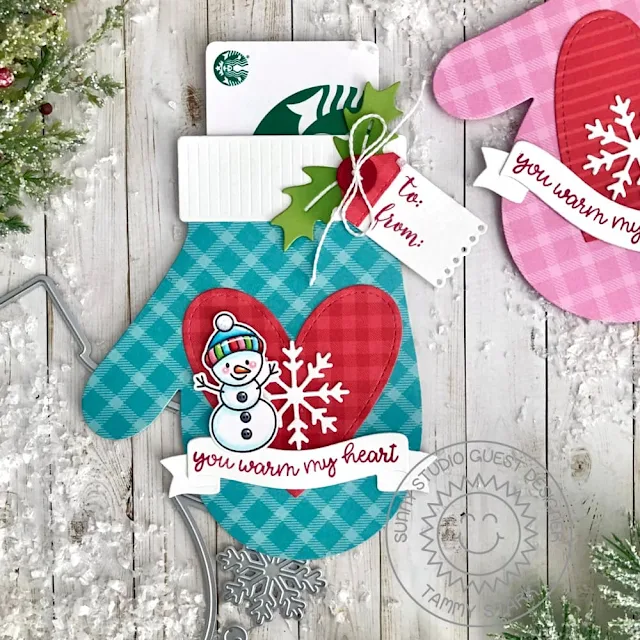
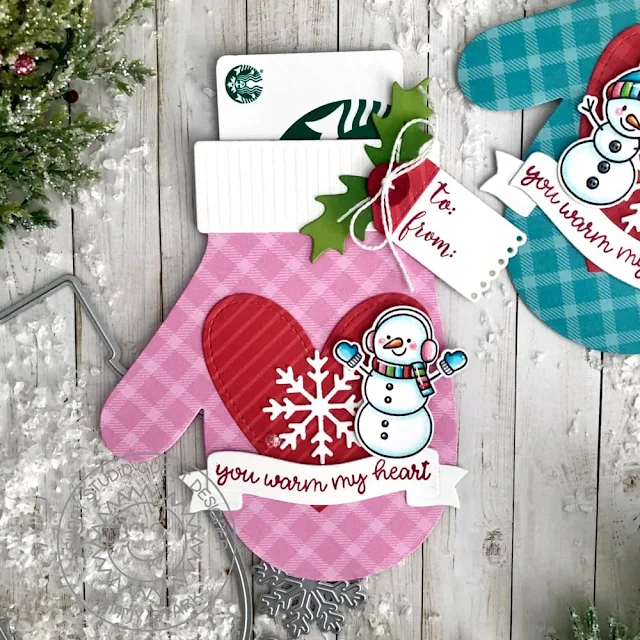
Hello friends! Tammy here with a fun project featuring the adorable Woolen Mitten Dies. Since the holidays are quickly approaching, I made a couple of gift card holders with a homespun feel!

Sunny Studio Stamps: Woolen Mitten Holiday Gift Card Holders by Tammy Stark (featuring Season's Greetings, Feeling Frosty, Brilliant Banners Dies)

To begin, I stamped the cute snowman images from Feeling Frostycolored with Copic markers, and die cut with the Feeling Frosty Dies. Next, I die cut the mittens from the All Is Bright 6X6 Paper Pad using the Woolen Mitten Die. I also cut 2 mittens from heavy white cardstock, attaching them together to create a pocket. I lined the edges of the mitten with thin sticky tape, making sure to leave the opening at the top to insert a gift card.

Sunny Studio Stamps: Woolen Mitten Holiday Gift Card Holders by Tammy Stark (featuring Season's Greetings, Feeling Frosty, Brilliant Banners Dies)

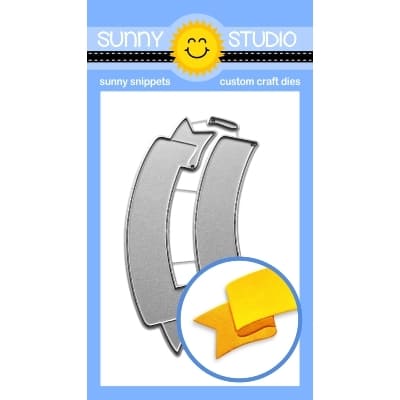
Next, I die cut the hearts from red patterned paper (Joyful Holiday Paper and Very Merry 6X6 Paper) using the Stitched Heart 2 DiesI die cut the cuff and snowflake from white cardstock using the Woolen Mitten Dies, then attached them to the front of each mitten, using foam tape to adhere the snowmen. I cut white banners using the Brilliant Banner 1 Die and stamped the sentiment from Feeling Frosty in red ink and attached them to the mitten, tucking underneath the snowmen.

Sunny Studio Stamps: Woolen Mitten Holiday Gift Card Holders by Tammy Stark (featuring Season's Greetings, Feeling Frosty, Brilliant Banners Dies)

Next, using the Woolen Mitten Dies, I cut the holly leaves from green cardstock and the cute button from red cardstock. I cut mini white tags from the Window Quad Square Diesadding red patterned paper (leftover from hearts) on the top of the tags. I stamped the 'to' and 'from' in red ink from the Season's Greeting Stampthen threaded the buttons with white string, adding the tags and tying them up. I attached the holly leaves to the cuff of the mitten, then adhered the tags, using foam tape for dimension to complete my mitten gift card holders!

Thanks so much for stopping by! See you soon!

Sunny Studio Supplies Used:

Very Merry 6x6 Paper
Shop at:
Sunny Studio
Season's Greetings Stamps
Shop at:
Sunny Studio
Feeling Frosty Stamps
Shop at:
Sunny Studio
Feeling Frosty Dies
Feeling Frosty Dies
Shop at:
Sunny Studio
Window Quad Square Die
Shop at:
Sunny Studio
All Is Bright Paper
All Is Bright Paper
Shop at:
Sunny Studio
Stitched Heart 2 Dies
Shop at:
Sunny Studio
Joyful Holiday Paper
Shop at:
Sunny Studio
Brilliant Banner 2 Dies
Shop at:
Sunny Studio
Woolen Mitten Dies
Woolen Mitten Dies
Shop at:
Sunny Studio

Wednesday, August 23, 2023

Sneak Peek: Introducing Holiday Hugs Stamps & Woolen Mitten Dies

Hello and welcome to day 4 of our Holiday Sneak Peek Week!  Each morning this week I am showcasing projects using our newest fall & winter collections which will be available to purchase on August 25th.

I'm so excited to share today's projects with you sharing a fun new oversized Bear called Holiday Hugs from our Black Friday graphics last year. A few of you had asked where to buy him so I'm super happy to have him available this year. As a follow-up to our popular Santa's Stocking Dies, I am also proud to introduce a similar concept with our fun new Woolen Mitten Dies! Let's dive right in! 

Card No. 1: For my first card of the day, I used our new Holiday Hugs Stamps to create a slimline card (measuring 9" wide x 4" high). I added a candy cane-striped patterned paper strip to the bottom of my card piecing together two strips from our Joyful Holiday Paper pack. I was able to completely make my seam invisible by cutting my paper on the diagonal to hug one of the red stripes. I then colored three of the bears to look like polar bears with matching candy-striped scarves and holding three of the holiday-themed objects with the cocoa mug, gift box, and stocking. For my background, I inked it using Tumbled Glass Distress Ink and then randomly stamped some of the snowflakes from the set in the background and filled the space between them with the large script greeting from the set, cut out using the Holiday Hugs Dies.

Sunny Studio Polar Bear Slimline Christmas Card (using Holiday Hugs Stamps & Joyful Holiday 6x6 Paper Pad)

Card No. 2:
Up next is a colorful holiday card using Holiday Hugs, together with our Frilly Frames Chevron Dies which I cut out a couple times from white cardstock and then inked the pieces in a rainbow of Distress Ink colors to stack up and bleed off the edges of my card. To do this I applied them to a thin piece of printer paper which I had coated in sticky adhesive and then was able to make quick work of lining them up. Afterward, I added a simple white ricrac edge using our Ric Rac Border Dies on either side. I colored my bear's scarf to match the Distress inks, this time coloring my bear a warm brown color to look like a traditional teddy bear. I stamped my "Winter Hugs" greeting onto a white thought bubble using our Comic Strip Speece Bubble Dies and then added three small snowflakes as an embellishment. One of these will be our new free die with purchase this holiday season (the top two) and the other style come from our online store-exclusive Basic Mini Shape 2 Dies

Sunny Studio Rainbow Striped Bear with Hot Cocoa Christmas Card (using Holiday Hugs Stamps, Frilly Frames Chevron, Comic Strip Speech Bubble & Ric Rac Border Dies)

Card No. 3: The Holiday Hugs Stamps aren't limited to just the Christmas holiday season. For this love-themed card, I took inspiration from the scalloped heart in the set that the bear can hold by repeating the motif, layering our Stitched Heart 2 Dies and Scalloped Heart Dies in a similar fashion for my background. I love that I was able to ink my stitched hearts with various inks in my stash to closely match the heart I had colored with my Copic Markers. I then mounted them onto a piece of hot pink grid paper from our Classic Gingham Paper pack and added the "sending hugs" sentiment to the largest heart in the center of my card.

Sunny Studio Red & Pink Sending Hugs Large Bear Valentine's Day Card (using Holiday Hugs Stamps, Scalloped Heart & Stitched Heart 2 Dies, and Classic Gingham 6x6 Paper Pad)

Card No. 4:
Continuing with non-holiday cards, I created a birthday card using the wrapped gifts and cupcake from the Holiday Hugs Stamps which I paired with the cherry from our Birthday Cat Stamps. I framed my sentiment and polar bear by layering an aqua blue polka-dot patterned paper from Polka-dot Parade Paper pack and a white scalloped mat from our Mini Mat & Tag 1 Dies. I stamped the happy birthday greeting from our Scrumptious Cupcakes Stamps with Versafine Onyx Black Ink and added rainbow streamers overhead using the Crepe Paper Streamers Dies.

Card No. 5: My next Holiday Hugs card spotlights the adorable iconic holiday images from this set without the bear. I think they are cute enough to stand out all on their own so I created a 4.25" x 4.25" square grid-style card by pairing our Window Quad Square Dies with patterned paper from our Classic Gingham Paper and Gingham Pastel Paper packs. To add a little pizazz, I added white polka-dots to my stocking and the bow on my gift using a white Sharpie paint pen. Lastly, I heat embossed my sentiment with White Detail Embossing Powder in the top, right square using our Inside Greetings Holiday Stamps.
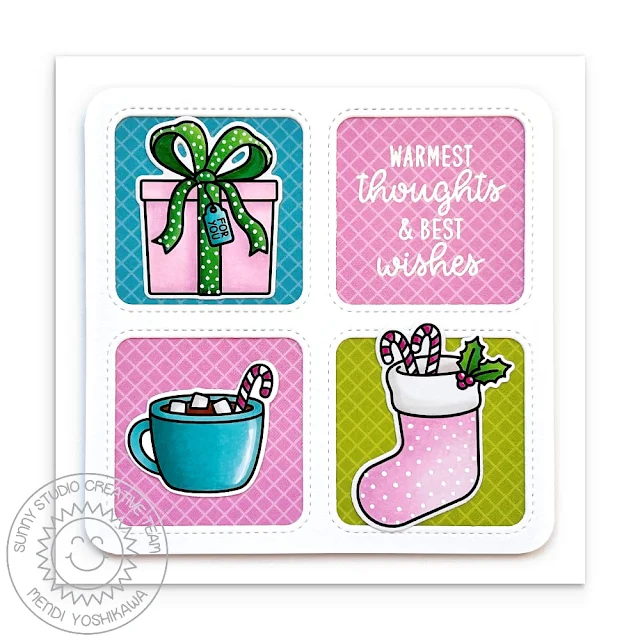
Sunny Studio Pastel Stocking, Gift Box, & Hot Cocoa Mug Square Grid Style Christmas Card (using Holiday Hugs & Inside Greetings Holiday Stamps, Window Quad Square Dies & Classic Gingham Paper)

Card No. 6:
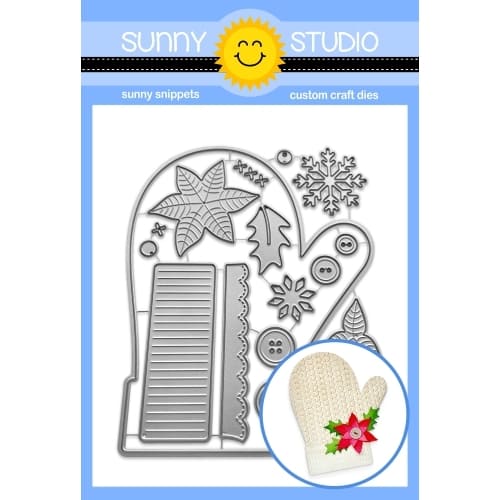
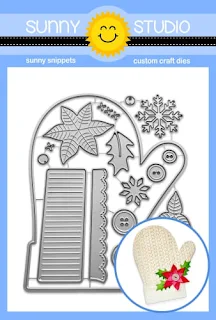
Switching gears, I have a shaped holiday gift card holder using our new Woolen Mitten Dies with a fun red and white Nordic pattern. These dies come with a number of elements to embellish these cute mittens including rows of stitches, snowflakes, holly leaves, poinsettia layers, and faux buttons. They have also been sized to fit in an A2 envelope with a little room to spare on top to fit your gift card.

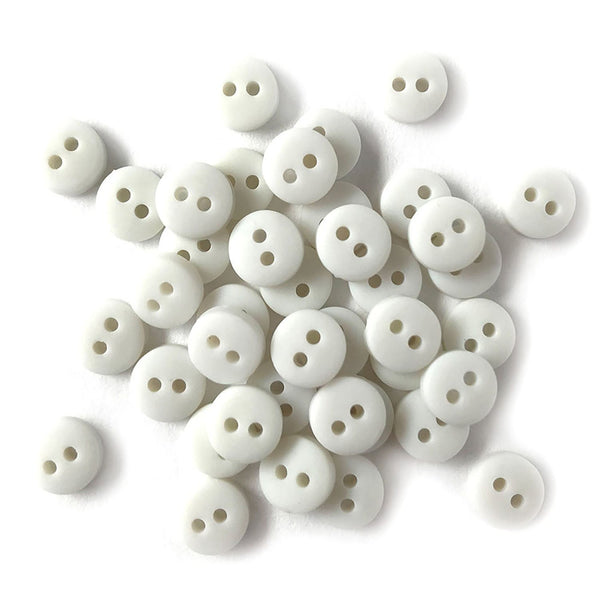
For this card, I repeatedly cut out the stylized snowflake print from the center of my mitten in a straight line, filled the negative space with a strip of white cardstock below, and then added the rows of stitches on either side before sewing on some Tiny White Buttons with red thread. I then took a paper piercer and added some little holes on the outside edge of my mitten by piercing through a piece of scratch foam before hand stitching around the outside edge. I did this merely for decoration though before using a strong line of liquid adhesive to actually adhere my front piece to my back piece. Lastly, I added a white cuff from the set which I had layered with a red snowflake (also from the set).
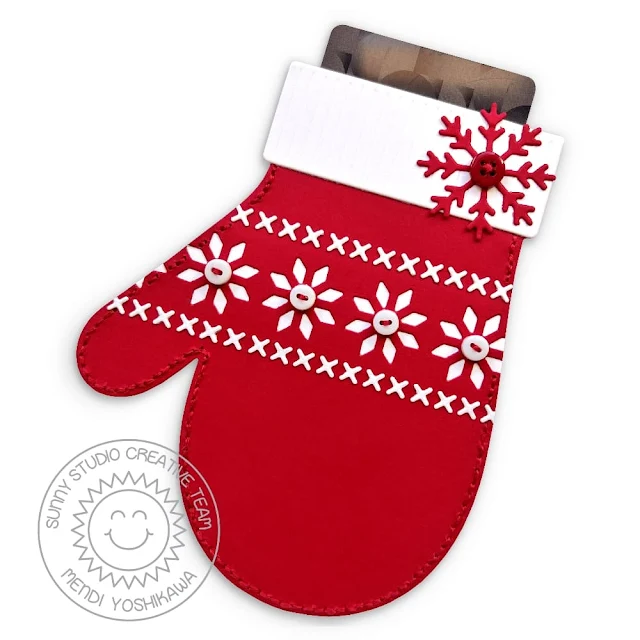
Sunny Studio Stamps Blog: Red Fair Isle Snowflake Mitten Shaped Gift Card Holder (using Woolen Mitten Dies)

Card No. 7:
Up next is a bright and happy Woolen Mitten card. They might be a little busy, but I really wish I had a pair of mittens like these! I started by cutting two mittens from Navy cardstock, scoring the back one about an inch from the top, parallel to the flat bottom of my cuff, and adding adhesive above my score line to adhere to the back of my other mitten piece. I then cut a number of colorful snowflakes from cardstock using the snowflake die from the set. I made sure to not throw away my scraps though because I was able to trim approximately 1/8" wide strips of rainbow cardstock to stack on printer paper and die-cut with the coordinating cuff die. I then stamped the "warm wishes" greeting from our Heartfelt Wishes Stamps using a shortened pennant from our Notebook Photo Corner Dies. Lastly, I added Pure White Jewels to the center of each of my snowflakes to pick up the white of my sentiment strip.

Sunny Studio Colorful Rainbow Snowflake Mitten Holiday Christmas Card (using Woolen Mitten Dies, Heartfelt Wishes Stamps & Snow White Jewels)

Card No. 8: For this Woolen Mitten card I couldn't resist creating a classic ivory cable knit design using our Cable Knit Embossing Folder, lightly inking the raised surface with some Antique Linen Distress Ink. This set comes with a small scalloped lace edge to tuck between the cuff and mitten. I then layered my mitten with the poinsettia pieces, holly, and faux wood button using the two individual dies from the set to layer together. Loving the ability to create a realistic-looking button that is flat enough to mail.

Sunny Studio Stamps Blog: Ivory Cable Knit Mitten Shaped Christmas Card with Holly & Poinsettia (using Woolen Mitten Dies & Cable Knit Embossing Folder)

Card No. 9: For my last card of the day I couldn't resist using some of the individual poinsettia and holly decorative elements from the Woolen Mitten Dies for a non-mitten card. I started by cutting all the pieces from white cardstock. I then inked up all the flowers with Spun Sugar Distress ink and all the holly leaves with Gina K. Key Lime Ink. I then took my heat gun to the poinsettias to make sure they were good and dry before tracing the veins using my R83 Copic Marker. I then softened them a bit by going over them with my RV10 and R81 colors. To add a little dimension to my flowers I popped up the center section using foam tape. Since this already added enough bulk, I didn't want to add jewels or peals to the center that would make this card difficult to mail so I used some Stickles Lime Green Glitter Glue with three dots in the center of each flower and filled any empty spaces I had on my black background. I love how they catch the light!

Lastly, I stamped my "happy holidays" sentiment using our Holiday Greetings Stamps and Dies which I first stamped in dye ink and then stamped a second time in my MISTI tool with Versamark ink so I could sprinkle on some pearlized embossing powder. I actually had prepared this sentiment for a card last year, but at the last minute chose to go with a different color so sadly I no longer remember the exact color combo I used here. 

Sunny Studio Pink & Black Poinsettia & Holly Christmas Card (using Holiday Greetings Stamps & Woolen Mitten Dies)

That wraps up today's sneak peeks. I'm so happy you spent part of your day with me today. I read all your comments and they mean so much!  I'd love to give a $25 gift code to one lucky winner using the Rafflecopter below. 

a Rafflecopter giveaway
Our daily contests will run through Monday, August 28th at Midnight PST with winners announced here on Friday, September 1st. :)

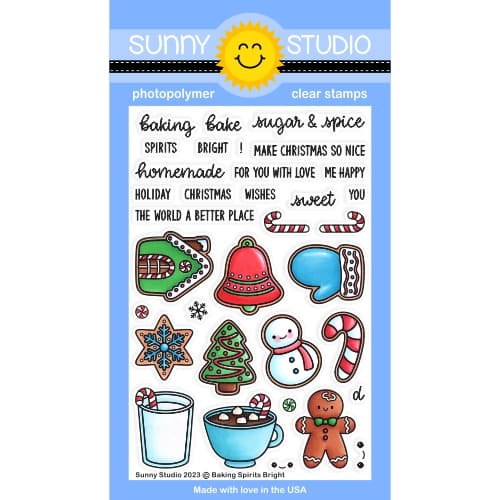
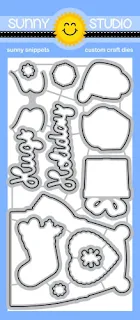
Here's a closer look at our new Holiday Hugs Stamps & Dies, and Woolen Mitten Dies 
used today (which will be available to purchase starting on August 25th):

Sunny Studio Stamps: Introducing Holiday Hugs Christmas Bear 4x6 Clear Photopolymer Stamp Set Sunny Studio Stamps Holiday Hugs Metal Cutting DiesSunny Studio Stamps Woolen Mitten A2 Large Oversized Metal Cutting Die with Poinsettia, Holly & Buttons

Other Supplies Used:
Heartfelt Wishes Stamps
Shop at:
Sunny Studio
Memento Tuxedo Black Ink Pad
Shop at:
Sunny Studio
Tsukineko Jumbo Dauber
Shop at:
Sunny Studio
Versafine Onyx Black Ink
Shop at:
Sunny Studio


Classic Gingham 6x6 Paper
Shop at:
Sunny Studio
Polka-dot Parade 6x6 Paper
Shop at:
Sunny Studio
Cable Knit Embossing
Shop at:
Sunny Studio
Gingham Pastels 6x6 Paper
Shop at:
Sunny Studio
Basic Mini Shape Dies 2
Shop at:
Sunny Studio
Frilly Frames Chevron Die
Shop at:
Sunny Studio
Comic Strip Speech Bubble Dies
Shop at:
Sunny Studio
Window Quad Square Die
Shop at:
Sunny Studio
Inside Greetings-Holidays
Shop at:
Sunny Studio
Scalloped Heart Dies
Shop at:
Sunny Studio
Stitched Heart 2 Dies
Shop at:
Sunny Studio
Holiday Greetings Stamps
Shop at:
Sunny Studio
Holiday Greetings Dies
Shop at:
Sunny Studio
Mini Mat & Tag 1 Dies
Shop at:
Sunny Studio
Joyful Holiday Paper
Shop at:
Sunny Studio
Notebook Photo Corners Dies
Shop at:
Sunny Studio
Birthday Cat Stamps
Birthday Cat Stamps
Shop at:
Sunny Studio
Birthday Cat Dies
Birthday Cat Dies
Shop at:
Sunny Studio
Scrumptious Cupcakes Stamps
Shop at:
Sunny Studio
Crepe Paper Streamers Dies
Shop at:
Sunny Studio
Tiny White Buttons
Tiny White Buttons
Shop at:
Sunny Studio
Hero Arts White Detail
Shop at:
Sunny Studio
Pure White Jewels
Pure White Jewels
Shop at:
Sunny Studio
VersaMark Watermark Ink
Shop at:
Sunny Studio
Ric Rac Border Dies
Ric Rac Border Dies
Shop at:
Sunny Studio

Wednesday, August 2, 2023

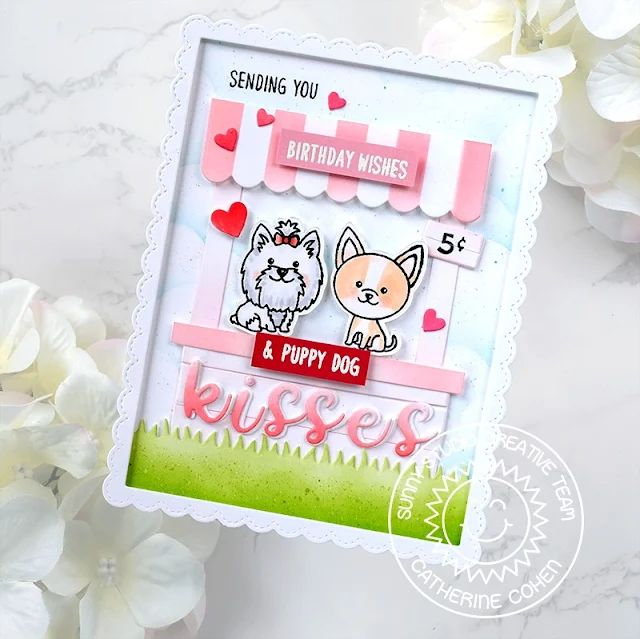
Puppy Dog Kisses Card with Catherine

Hello Crafty Friends! Catherine here! Today, I am sharing a birthday card created with the adorable Puppy Dog Kisses.

Sunny Studio Stamps: Puppy Dog Kisses Birthday Card by Catherine Cohen (featuring Picket Fence Border Dies, Fancy Frame Dies, Slimline Dies, Stitched Heart Dies)

To start, I ink blended white cardstock 4”W x 5 ¼”H using Tumbled Glass Distress Oxide with a cloudy stencil made with Slimline Nature Border Dies. I stamped the top left corner of the panel with “Sending You” from Sending Sunshine Stamps.

I then die cut the grass border using Picket Fence Border Die. I ink blended the border with Mowed Lawn Distress Oxide and sprayed the border with some water for added detail. I stamped and die cut the cute dogs from Puppy Dog Kisses Stamps and colored with Copic Markers listed in my blog link below.

To make the kissing booth, I die cut the awning from Sweet Treat House Add-On, I trimmed off one panel of the awning. I trimmed white cardstock to the following dimensions for the rest of the kissing booth:

Base: 3” W x 1 ¼”H - x 2 pieces. I trimmed one piece into 3 strips and adhered the strips onto the second piece for a wood effect.

Top: 3 ¼” W x ¼” H - x 1

Side Poles: 3/8” W x 3”H – x 2 pieces

Sunny Studio Stamps: Puppy Dog Kisses Birthday Card by Catherine Cohen (featuring Picket Fence Border Dies, Fancy Frame Dies, Slimline Dies, Stitched Heart Dies)

I inked blended the pieces with Spun Sugar Distress Oxide. I glued the booth together and adhered it onto the background and then I glued the grass border. I die cut two sets of “kisses” out of white cardstock. I ink blended one set with Festive Berries Distress Oxide and adhered it onto the white set for added dimension.

I added White Heat Embossed sentiments from the set, some hearts from Stitched Heart 2 Dies. I finished off the card by adding a border from Fancy Frames Rectangle Dies.

Thanks so much for joining me today! For a list of Copic Markers used, please visit me at Crafti-Cat. Have a wonderful week!

Sunny Studio Supplies Used:

Picket Fence Border Dies
Shop at:
Sunny Studio
Fancy Frames- Rectangles
Shop at:
Sunny Studio
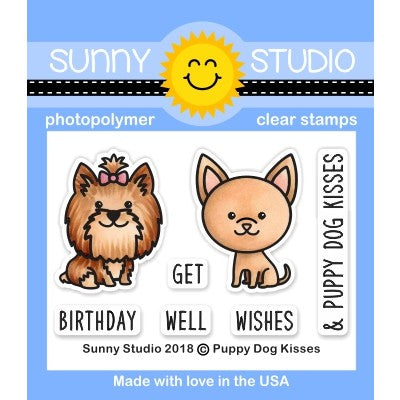
Puppy Dog Kisses Stamps
Shop at:
Sunny Studio
Puppy Dog Kisses Dies
Shop at:
Sunny Studio
Sending Sunshine Stamps
Shop at:
Sunny Studio
Sweet Treats House Add-on
Shop at:
Sunny Studio
Slimline Nature Borders
Shop at:
Sunny Studio
Stitched Heart 2 Dies
Shop at:
Sunny Studio