Showing posts with label Staggered Circles. Show all posts

Thursday, June 25, 2020

Sealiously Sweet Cards with Vanessa and Anja

Hello to you! Vanessa here with an interactive summer card using the adorable Sealiously Sweet set. These cute seals are enjoying a relaxing day at the pool: 

Sunny Studio Stamps: Sealiously Sweet Stitched Semi-Circle Dies Happy Word Die Summer Themed Card by Vanessa Menhorn

I created a square card base from white cardstock and colored the edges with Copic Markers. Then I trimmed a panel of white cardstock slightly smaller than the card base. Using the Stitched Semi-circle Dies, I made a mask for my pool. First, I created the water. For this, I applied lines of masking fluid and inked the semi-circle with blue Distress Oxide Ink. I applied small water droplets and removed the masking fluid when everything was dried. Now I adhered a mask over the pool and inked the rest of my panel with grey Distress Oxide ink. 

Sunny Studio Stamps: Sealiously Sweet Stitched Semi-Circle Dies Happy Word Die Summer Themed Card by Vanessa Menhorn

After I had applied tiny ink droplets, I drew the stones with a colored pencil. I removed the mask and die-cut a small circle from the position where the floating seal was going to sit. Then I stamped my images onto white cardstock, colored everything with Copic Markers and die-cut the elements with the matching dies. To make the seal float and turn around, I adhered a small coin to the back of the image, then a piece of foam tape onto the coin and behind the panel, underneath the circle, another small coin. Now I was ready to put the square panel onto my card base with foam tape.

I added the other images and die-cut the Happy Word Die from white cardstock. After I had colored it with the matching Copics, I adhered it to the card. Finally, I stamped the word "summer" onto a strip of black cardstock, heat-embossed it with white embossing powder and adhered it to the card with foam tape.

Sunny Studio Stamps: Sealiously Sweet Stitched Semi-Circle Dies Happy Word Die Summer Themed Card by Vanessa Menhorn

Now, let's see this card in action!

I'd love to join these cuties, how about you? Wishing you a happy day! Thanks for stopping by!

----------------------------------------------------------

Hi everyone, Anja here and today I have something cute for you! I made a slimline card with the Sealiously Sweet Stamps. Aren't these seals way too adorable?! They are going to have some fun at the pool for sure!

Sunny Studio Stamps: Sealiously Sweet Staggered Circle Dies Summer Themed Card by Anja Bytyqi

My white card base is different in size than a regular slimline card – it measures 7 5/8" × 3 11/16". I cut out a slightly smaller panel from aqua cardstock and used the Staggered Circle Die to create some windows. I trimmed a piece of teal cardstock to go behind the window openings.

I stamped the sentiment in VersaMark Ink and white heat embossed it. For a bit of dimension, I popped up the aqua panel with foam tape.

Sunny Studio Stamps: Sealiously Sweet Staggered Circle Dies Summer Themed Card by Anja Bytyqi

Next, I stamped the seals as well as the accessory stamps in Memento Tuxedo Black Ink and colored them with Copic Markers. I used the coordinating dies to cut everything out. I tucked the seals inside the windows and scattered the other images all over the card to complete my fun summer scene.

Thank you so much for stopping by! Have a sunny day!

Sunny Studio Supplies Used:

Happy Word Die
Happy Word Die
Shop at:
Sunny Studio
Staggered Circles Die
Shop at:
Sunny Studio
Sealiously Sweet Stamps
Shop at:
Sunny Studio
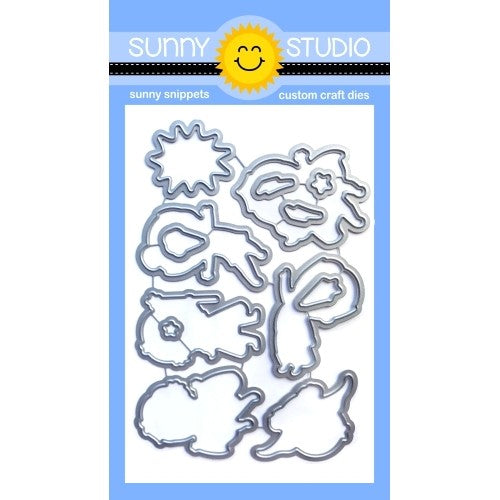
Sealiously Sweet Dies
Shop at:
Sunny Studio
Stitched Semi-Circle Dies
Shop at:
Sunny Studio

Friday, March 20, 2020

Spring Showers Cards with Juliana and Candice

Hello Sunny Studio friends! It's Juliana here and today I have a spring themed card to share with you featuring the Spring Showers Stamp Set.

Sunny Studio Stamps: Spring Showers Staggered Circle Dies Fancy Frame Dies Friendship Card by Juliana Michaels

I began by stamping the images from the Spring Showers Stamp Set. I then colored them with Copic Markers and die cut them using the coordinating Spring Shower Dies. I used colored pencils to add more detail to the hair and a white gel pen for highlights on the kite and umbrella.

For the background, I die cut a 3.75 x 5” piece of white cardstock using the Staggered Circle Die. I then backed it with a piece of yellow paper from the Spring Fling Paper Pad. I then layered the entire piece onto another piece of white cardstock die cut using the Fancy Frames Rectangle Die.

Sunny Studio Stamps: Spring Showers Staggered Circle Dies Fancy Frame Dies Friendship Card by Juliana Michaels

I then went about adhering each of the Spring Shower images using double sided foam adhesive, making sure to leave a space to stamp the sentiment. For a fun touch, I added a bit of black thread to the kite to act like a string.

I hope you enjoyed the bit of inspiration featuring the Spring Showers Stamp Set. Thanks so much for stopping by today!

-----------------------------------------------

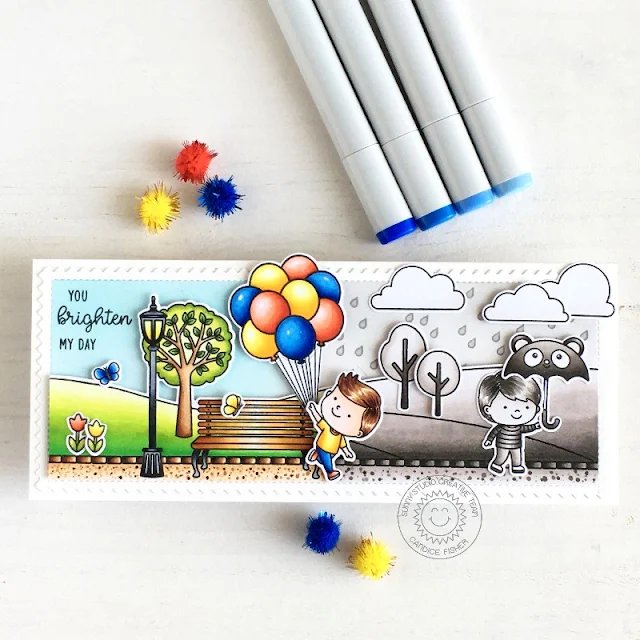
Hello crafty friends! Candice with you again and I have an unique card for you today highlighting the Spring Showers stamp set! I love the contrast as he runs and changes the grey to color!

Sunny Studio Stamps: Spring Showers Floating By Spring Scenes Friendship Card by Candice Fisher

I used a few Sunny Studio Stamps products for my card:
I began my card with an 8 1/2 3 1/2 card base that fits perfectly into a standard size envelope. For the background, I first created the pointed edge frame using the partial die cut method and then taped off the edges and inked the left side with tumbled glass and the right side with hickory smoke. On the grey side, I stamped some raindrops using the hickory smoke and stamped the sentiment in the top left corner.

Sunny Studio Stamps: Spring Showers Floating By Spring Scenes Friendship Card by Candice Fisher

Next, I stamped the the long hill scene, repeating the bricks on either side and extended the hills using a Copic friendly marker and cut out using the coordinating dies. I then stamped the treesballoonsboys, umbrella, clouds, flowers & butterflies, colored them with Copic markers and used the coordinating dies listed above.  

To put the card together, I used foam tape on the hill scene along with all the other accessories. Thank you so much for visiting today!

Sunny Studio Supplies Used:

Fancy Frames- Rectangles
Shop at:
Sunny Studio
Staggered Circles Die
Shop at:
Sunny Studio
Frilly Frames Chevron Die
Shop at:
Sunny Studio
Floating By Stamps
Floating By Stamps
Shop at:
Sunny Studio
Floating By Dies
Floating By Dies
Shop at:
Sunny Studio
Spring Scenes Stamps
Shop at:
Sunny Studio
Spring Scenes Dies
Spring Scenes Dies
Shop at:
Sunny Studio
Spring Showers Stamps
Shop at:
Sunny Studio
Spring Showers Dies
Spring Showers Dies
Shop at:
Sunny Studio
Spring Fling Paper
Spring Fling Paper
Shop at:
Sunny Studio

Friday, January 17, 2020

Chickie Baby Cards with Rachel and Candice

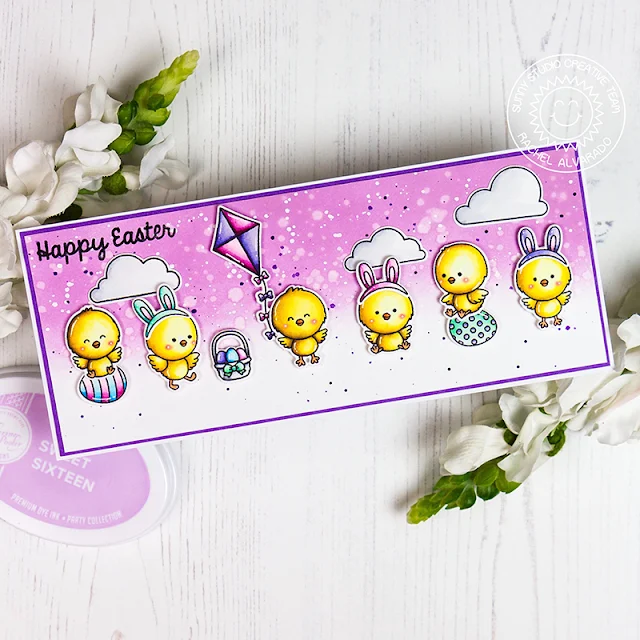
Hello friends! It's Rachel here and I have a Slimline Card to share with you that showcases the new and adorable Chickie Baby Stamp Set. I just love these sweet little peeps and their accessories! To start my card, I first stamped all of my images onto a sheet of Neenah Solar White 110lb Card Stock with Memento Tuxedo Black Ink. I then used Copic Markers to color everything and the coordinating dies to cut them out.

Sunny Studio Stamps: Chickie Baby Spring Showers Chubby Bunny Easter Card by Rachel Alvarado

I also added a few other images from separate stamp sets. I stamped a few clouds and a kite from the new Spring Showers Set and a cute little Easter basket from the Chubby Bunny Stamp Set.

Sunny Studio Stamps: Chickie Baby Spring Showers Chubby Bunny Easter Card by Rachel Alvarado

For my background, I cut a piece of Smooth White Card Stock to 3.25" x 8.25" and blended the top portion with some Sweet Sixteen Catherine Pooler Ink. I then splattered this piece with both water and diluted purple and white inks for some added interest. I then stamped my sentiment from the A Good Egg Stamp Set onto the top left corner and added all of my images with some 3D Foam Adhesive Squares. Lastly, I layered my card with both purple and white card stock for a final card size of 3.5" x 8.5".

Thanks so much for dropping by! Wishing you all a wonderful day!

----------------------------------------------------

Welcome crafty friends!  It's Candice here today and I am sooo excited to share with you this fabulous new Spring release from Sunny Studio Stamps! Today I am sharing a fun card using the adorable Chickie Baby stamp set!

Sunny Studio Stamps: Chickie Baby Frilly Frame Dies Staggered Circle Dies Girlfriend Card by Candice Fisher

I used these fantastic Sunny Studio Stamps products:
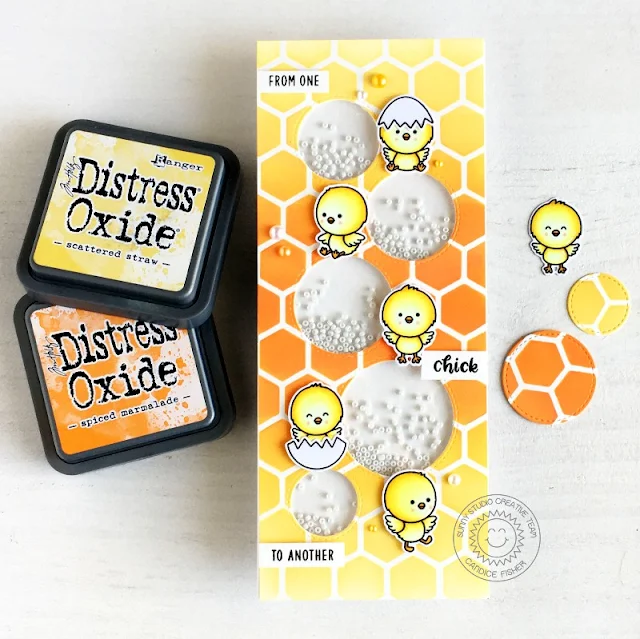
For the background, I created a stencil from the hexagon die and used it to ink over with ripe persimmon, spiced marmalade, fossilized amber & scattered straw to make the chicken wire. Another great way to extend your dies! Next, I stamped the chickies and egg shells, colored with Copic markers and cut out using the coordinating dies.

Sunny Studio Stamps: Chickie Baby Frilly Frame Dies Staggered Circle Dies Girlfriend Card by Candice Fisher

To make the shaker element, I first die cut the stitched circles at once from the one die (love that!) and adhered a strip of acetate behind them. I then used foam tape around each circle to hold in the beads and placed the card front over it. 

To finish the card, I stamped the sentiments in black, trimmed to banners and used foam tape to add dimension. I added a few white & orange pearls for a little shine.

Thank you for visiting today!

Sunny Studio Supplies Used:

A Good Egg Stamps
A Good Egg Stamps
Shop at:
Sunny Studio
Chubby Bunny Stamps
Chubby Bunny Stamps
Shop at:
Sunny Studio
Chubby Bunny Dies
Chubby Bunny Dies
Shop at:
Sunny Studio
Staggered Circles Die
Shop at:
Sunny Studio
Frilly Frames Hexagon Dies
Shop at:
Sunny Studio
Chickie Baby Stamps
Chickie Baby Stamps
Shop at:
Sunny Studio
Chickie Baby Dies
Chickie Baby Dies
Shop at:
Sunny Studio
Spring Showers Stamps
Shop at:
Sunny Studio
Spring Showers Dies
Spring Showers Dies
Shop at:
Sunny Studio

Wednesday, September 11, 2019

Embossing Folder Focused Cards with Ana and Franci

Hi crafty friends! It’s Ana here today with a super fun card featuring Lots of Dots Embossing Folder as well as Super Duper stamp set! I just love the versatility of this dotted embossing folder! The panels look fantastic when embossed on white or colored cardstock as well as the patterned papers. 

Sunny Studio Stamps: Comic Strip Speech Bubble Dies Super Duper Staggered Circles Dies Card by Ana Anderson

For today’s card I have decided to use Lots of Dots on Heroic Halftones patterned paper. I choose the blue patterned paper, created the circles with Staggered Circles Dies, then ran the paper through my die cutting machine with Lots of Dots embossing folder.

Sunny Studio Stamps: Comic Strip Speech Bubble Dies Super Duper Staggered Circles Dies Card by Ana Anderson

Next, I stamped, colored and die cut the little superheroes from Super Duper stamp set, then created the background panel by inking Salty Ocean distress ink.

Sunny Studio Stamps: Comic Strip Speech Bubble Dies Super Duper Staggered Circles Dies Card by Ana Anderson

I stamped the sentiments (from Super Duper stamp set) and die cut them with speech bubbles dies (from Comic Strip Speech Bubbles and Super Duper die sets). After adhering all the elements, I completed the scene by lining it with red cardstock and embellishing with Primary Star Confetti.

I had so much fun creating this card and I really hope you like it as much as I do! Thank you so much for stopping by and I hope you have a wonderful day!

----------------------------------------------

Hello there! Franci here with you today with a Fall- non traditional colors card full of little owls.

Sunny Studio Stamps: Woodsy Autumn Fishtail Banner Dies Fall Themed Card by Franci Vignoli

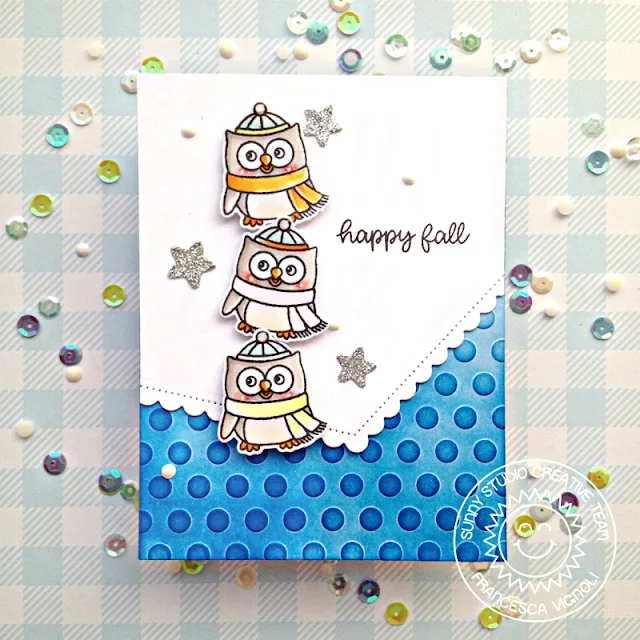
I started by creating my card base and cut 2 panels to match all out of white cardstock. Then I die cut one panel with 2 of the Fishtail Banner II set dies, I embossed the other one using the Lots of Dots embossing folder and I colored it by sponging blue Distress inks on top, to emphasize the cool design.

Sunny Studio Stamps: Woodsy Autumn Fishtail Banner Dies Fall Themed Card by Franci Vignoli

I stamped, colored and die cut 3 owls from the Woodsy Autumn set and I also die cut some little stars out of silver glitter paper using the free dies you get when you place an order at the Sunny Studio shop, while supplies last! I assembled all the elements and glued everything down with liquid glue and foam adhesive.

Sunny Studio Stamps: Woodsy Autumn Fishtail Banner Dies Fall Themed Card by Franci Vignoli

Finally I stamped my sentiment that's from the Woodsy Autumn set too and I added some Nuvo White Drops dots here and there. 

Hope you like my card and thanks a lot for stopping by today, have a lovely day!

Sunny Studio Supplies Used:

Fishtail Banner II Dies
Shop at:
Sunny Studio
Staggered Circles Die
Shop at:
Sunny Studio
Heroic Halftones 6x6 Paper
Shop at:
Sunny Studio
Lots of Dots Embossing
Shop at:
Sunny Studio
Super Duper Stamps
Super Duper Stamps
Shop at:
Sunny Studio
Super Duper Dies
Super Duper Dies
Shop at:
Sunny Studio
Woodsy Autumn Stamps
Shop at:
Sunny Studio
Woodsy Autumn Dies
Woodsy Autumn Dies
Shop at:
Sunny Studio
Comic Strip Speech Bubble Dies
Shop at:
Sunny Studio