Showing posts with label Icing Border Dies. Show all posts

Tuesday, December 14, 2021

Gingerbread House Bookmark & Card with Kavya and Isha

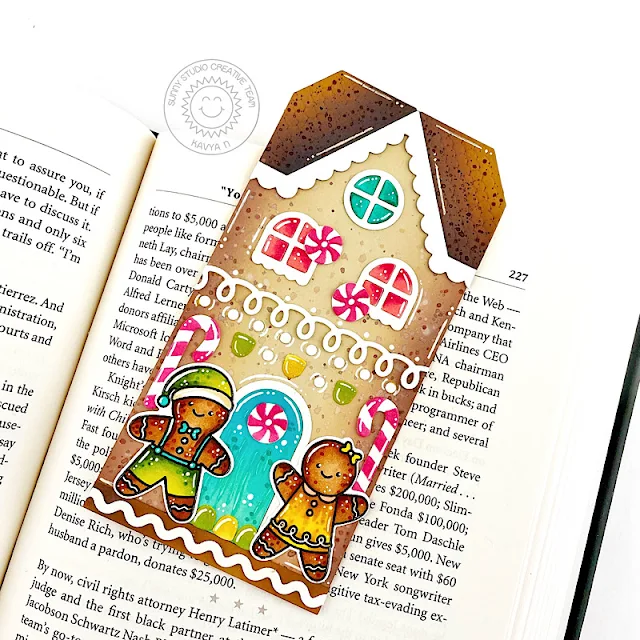
Hi folks, Kavya here. I am back on the blog with another fun project! I absolutely love the new Gingerbread House die this release and it’s just perfect for so many projects - tags, cards, gift bags and even bookmarks. I created this fun bookmark for a friend who loves the holidays. I hope they love it! 

Sunny Studio Stamps: Gingerbread House Christmas Holiday Bookmark by Kavya (featuring Icing Border Dies, Christmas Cookies)

My bookmark is sized 2.75”x 5.5”. I decided to make it a bit wider so that I can add some gingerbread critters at the end. I first started off by die cutting various components for the house using Gingerbread House die and linen, brown, cream, red, blue, green and yellow cardstock. For the house, I ink blended the edges using distress oxide inks and splattered some paint to make it a bit more realistic. I also used the Icing Border dies to add some fun! 

Sunny Studio Stamps: Gingerbread House Christmas Holiday Bookmark by Kavya (featuring Icing Border Dies, Christmas Cookies)

I added some more details using a white gel pen and finished it off using two gingerbread friends from Christmas Cookie stamp set.

That’s it! Wasn’t that a fun project! Hope you liked it! Happy Crafting!

---------------------------------------------

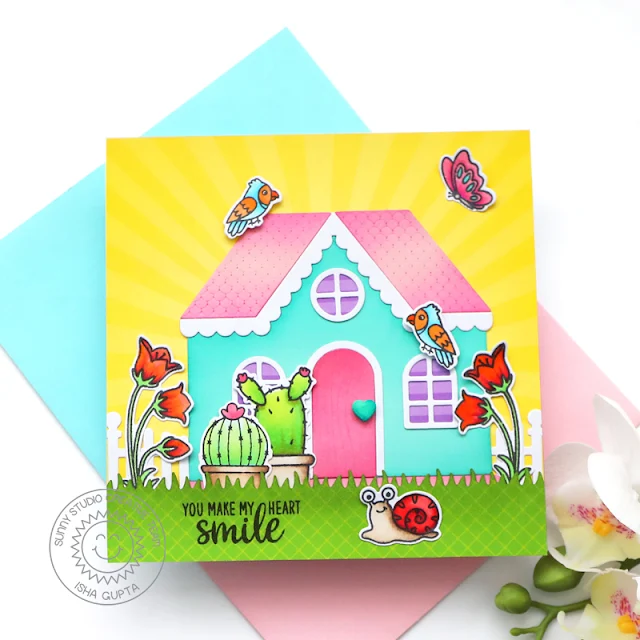
Hello everyone! Isha here sharing a fun card featuring our Gingerbread House dies. I was tempted to do a Christmas theme card but then decided to play with this fun die and created a summer theme card.

Sunny Studio Stamps: Gingerbread House Everyday Card by Isha Gupta (featuring Looking Sharp, Picket Fence Dies, Outback Critters, Scalloped Fence Dies)

I started by taking a white square card base. Add the yellow sunburst pattern paper from the Classic Sunburst Paper pack. I then die-cut the Gingerbread House pieces in various colors, sponged some distress inks to give some more depth. Adhere to the card. Adhere the stripe paper from the Sleek Stripes paper pad behind the windows.

I then die-cut the fence using the Scalloped Fence die. Adhere to both the sides of the house. Stamp the images, color using Copic markers and die-cut using the coordinating dies. Adhere them to the card to create the scene.

Cactus - Looking Sharp stamp and dies
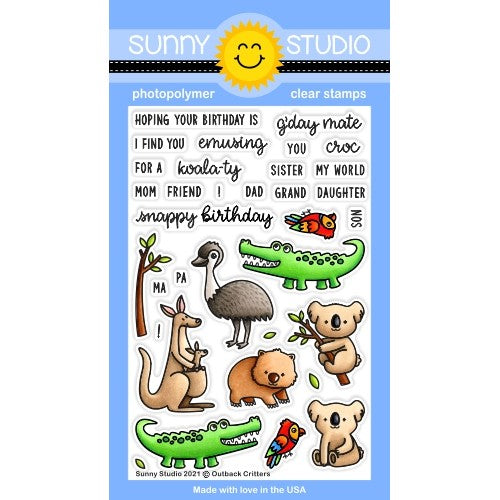
Birds - Outback Critters stamp and dies
Flowers, snail, butterfly - Garden Fairy stamp and dies
Sentiment - Snail Mail

Sunny Studio Stamps: Gingerbread House Everyday Card by Isha Gupta (featuring Looking Sharp, Picket Fence Dies, Outback Critters, Scalloped Fence Dies)

Die-cut the grass using the Picket Fence dies from the pattern paper, sponge peeled paint distress ink. Stamp the sentiment and adhere to the card.

Have a nice day and thank you for dropping by

Sunny Studio Supplies Used:

Looking Sharp Stamps
Shop at:
Sunny Studio
Looking Sharp Dies
Looking Sharp Dies
Shop at:
Sunny Studio
Outback Critters Stamps
Shop at:
Sunny Studio
Outback Critters Dies
Shop at:
Sunny Studio
Picket Fence Border Dies
Shop at:
Sunny Studio
Scalloped Fence Die
Scalloped Fence Die
Shop at:
Sunny Studio
Christmas Cookies Stamps
Shop at:
Sunny Studio
Christmas Cookies Dies
Shop at:
Sunny Studio
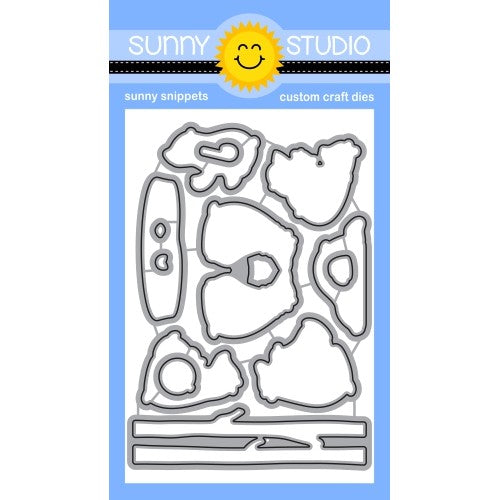
Gingerbread House Dies
Shop at:
Sunny Studio
Icing Border DIes
Icing Border DIes
Shop at:
Sunny Studio
Classic Sunburst Paper
Shop at:
Sunny Studio
Sleek Stripes Paper
Sleek Stripes Paper
Shop at:
Sunny Studio
Snail Mail Stamps
Snail Mail Stamps
Shop at:
Sunny Studio
Garden Fairy Stamps
Garden Fairy Stamps
Shop at:
Sunny Studio
Garden Fairy Dies
Garden Fairy Dies
Shop at:
Sunny Studio

Monday, November 15, 2021

Holiday Express Cards with Mayra and Ashley

Hello and happy Monday everyone!! Mayra here to share this card using the adorable Holiday Express stamp set. I made it into a gingerbread-themed train. 

Sunny Studio Stamps: Holiday Express Christmas Cookies Frilly Frame Dies Christmas Card by Mayra Duran-Hernandez

I started by coloring all of the images using Copic markers. Along with the Holiday Express stamp set, I used the Christmas Cookies, and the lollipop from the Candy Shoppe set. I then die-cut the base panel for the card using the larger rectangle from the Stitched Rectangles dies set.  Next, I used the beautiful Frilly Frames Eyelet Lace die set to add the detail to the base panel and to create a frame for the card. I really love that die set. I then die-cut the candy cane from the Gingerbread House setand a couple of borders using the Icing Borders set. 

Sunny Studio Stamps: Holiday Express Christmas Cookies Frilly Frame Dies Christmas Card by Mayra Duran-Hernandez

Next, I die-cut the poinsettia from the Window Quad Circle dies set to add to the card. I also used my favorite tag from the Window Quad Square dies set. 

I hope you enjoy the card I created to share with you today. Thank you so much for taking the time to stop by. I hope you each have a wonderful and blessed day.

-----------------------------------------------

Hello friends! It's Ashley with a super cute Christmas card to share with you today! The little penguins are getting ready for the holidays and loading a train up with gifts for everyone! 

Sunny Studio Stamps: Holiday Express Frilly Frame Dies Penguin Pals Christmas Card by Ashley Ebben

I started by stamping the trees from Bear Hugs several times in VersaMark ink onto light blue cardstock. I blended a bit of Blueprint Sketch Distress Oxide ink onto the top portion for a bit of contrast. I cut a scalloped oval frame from the center of an A2 sized piece of white cardstock using the Scalloped Oval Mat 1 dies and placed my trees behind it. Then I added the stitched detail to the outside edge with the frame from Frilly Frames - Quatrefoil.

Sunny Studio Stamps: Holiday Express Frilly Frame Dies Penguin Pals Christmas Card by Ashley Ebben

I stamped my images from Holiday Express and Penguin Pals onto Bristol smooth cardstock with waterproof ink and colored with my Zig Clean Color markers. I fussy cut the images out this time, but matching dies are available and super fast! Sometimes you just need a "zone out" activity, you know? I added the images to my card, popping the penguins up with foam tape for dimension. I finished with a sentiment from Penguin Pals stamped in VersaFine Onyx Black and embossed with clear.

Thank you so much for stopping by! Have a wonderful day!

Sunny Studio Supplies Used:

Candy Shoppe Stamps
Candy Shoppe Stamps
Shop at:
Sunny Studio
Candy Shoppe Dies
Candy Shoppe Dies
Shop at:
Sunny Studio
Stitched Rectangle Dies
Shop at:
Sunny Studio
Bear Hugs Stamps
Bear Hugs Stamps
Shop at:
Sunny Studio
Bear Hugs Dies
Bear Hugs Dies
Shop at:
Sunny Studio
Christmas Cookies Stamps
Shop at:
Sunny Studio
Christmas Cookies Dies
Shop at:
Sunny Studio
Holiday Express Stamps
Shop at:
Sunny Studio
Holiday Express DIes
Shop at:
Sunny Studio
Gingerbread House Dies
Shop at:
Sunny Studio
Icing Border DIes
Icing Border DIes
Shop at:
Sunny Studio
Frilly Frames-Eyelet Lace
Shop at:
Sunny Studio
Frilly Frames Quatrefoil
Shop at:
Sunny Studio
Window Quad Circle Die
Shop at:
Sunny Studio
Window Quad Square Die
Shop at:
Sunny Studio
Penguin Pals Stamps
Penguin Pals Stamps
Shop at:
Sunny Studio
Penguin Pals Dies
Penguin Pals Dies
Shop at:
Sunny Studio
Scalloped Oval Mat 1 Dies
Shop at:
Sunny Studio

Friday, November 12, 2021

Gingerbread House Die Focused Tag & Card with Tammy and Audrey

Hello friends! Tammy here with this sweet gift tag, that can also be repurposed as an ornament, featuring the adorable Gingerbread House Dies.

Sunny Studio Stamps: Gingerbread House Dies Icing Border Dies Christmas Cookies Holiday Tag by Tammy Stark

To begin, I die cut kraft cardstock using the Gingerbread House Dies, then ink blended the edges with Vintage Photo Distress Oxide ink to darken the edges. Next, I die cut the other elements using various colors of cardstock. I added glitter to the white scalloped pieces and the candies to give the look of sugared candy.

Next, I stamped the images from Christmas Cookies, colored with Copic markers, and die cut with the Christmas Cookies Dies. Copic Colors Used: Gingerbread: E37, E55, E31, E51, E50; Red: R39, R37, R35, R05; Green: YG17, YG03, YG01; Pink: R22, R20, RV10; White: N2, C1, C00

Sunny Studio Stamps: Gingerbread House Dies Icing Border Dies Christmas Cookies Holiday Tag by Tammy Stark

I cut a white base using the larger Gingerbread House shadow, placed my decorated gingerbread house on top and lightly traced it, then cut it. This gives the back a nice, clean look and makes the tag super sturdy. Next, I stamped the sentiment onto a white cardstock strip, punched a hole and attached it to a piece of red and white bakers twine. I covered the back of the house with heavy duty tape adhesive, then attached the two pieces, sandwiching the twine between them to create a little loop...perfect for adding to a gift or the Christmas tree!

Thanks so much for stopping by! I hope you are inspired to create your own tags or ornaments for gifting! Happy Crafting!

---------------------------------------------

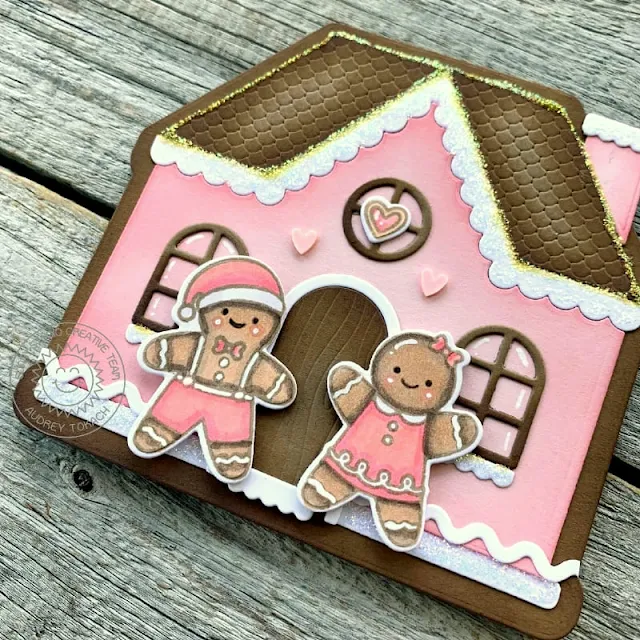
Hello friends! Audrey here with some sweet holiday wishes! I used the new Gingerbread House die to make a shaped card!  This die is a large size and nearly fills an A2 card front. It's perfect for creating shaped cards. 

Sunny Studio Stamps: Gingerbread House Dies Icing Border Dies Christmas Cookies Holiday Card by Audrey Tokach

I started off by die cutting two of the largest house dies from medium  brown cardstock, along with all of the windows, the door, and the roof. I used Vintage Photo Distress Oxide to ink the edges of each piece for more contrast. Then, I cut the window, door and roof trim from white cardstock, and the body of the house from light pink cardstock. If you have followed me for any length of time a pink gingerbread house should not surprise you at all! ;) 

The edges of the main part of the house were inked with Worn Lipstick Distress Oxide. Then, I die cut one of the Icing Borders from white cardstock glued that near the bottom of the house. I adhered all of the other pieces with liquid glue, and added Diamond Stickles to nearly everything. LOL!  I forgot that ink will make the Stickles change color slightly, and that is why my roof looks a bit gold. I think it is a fun contrast to the white. 

Sunny Studio Stamps: Gingerbread House Dies Icing Border Dies Christmas Cookies Holiday Card by Audrey Tokach

Next, I stamped the two gingerbread from the Christmas Cookies stamp set in brown ink and colored them with Copic markers. They were die cut with the coordinating Christmas Cookies dies. The brown ink makes they look a but like I did no-line coloring. I added their little faces back ink with a brown pen, and enhanced their icing stripes with a white gel pen, then popped them up with foam tape. I adhered the front of the house to a second house die cut that I scored about 1/2" front the top so the card would open properly. Finally, I added white gel pen accents to the rest of the card, and a few tiny clay hearts to finish off my card.

Sunny Studio Supplies Used:

Christmas Cookies Stamps
Shop at:
Sunny Studio
Christmas Cookies Dies
Shop at:
Sunny Studio
Gingerbread House Dies
Shop at:
Sunny Studio
Icing Border DIes
Icing Border DIes
Shop at:
Sunny Studio

Tuesday, November 9, 2021

Icing Border Die Focused Cards with Isha and Kavya

Hello everyone! Isha here, sharing a CAS shaker card with you. I am featuring the Icing Border Dies by using one of the dies to create a border for the card panel.

Sunny Studio Stamps: Icing Border Dies Christmas Critters Stitched Rectangle Dies Christmas Card by Isha Gupta

To start, I die-cut the scallops from the Icing Border Dies using various colors. Adhere to a white layer and die-cut this piece using the Stitched Rectangle die. Mat this layer with a coral card and adhere to a white card base.

Stamp the wreath from the Christmas Critters, color using Copic markers and die-cut using coordinating dies. Adhere acetate behind this piece. Now-die-cut the wreath 5 more times and stack behind the stamped wreath. This gives us a well to fill in gold dust by Studio Katia. Close this well by adhering a white circle. Now we have a shaker element ready.

Sunny Studio Stamps: Icing Border Dies Christmas Critters Stitched Rectangle Dies Christmas Card by Isha Gupta

Stamp the sentiment from the Holiday Express stamp and adhere the shaker element. Hope you enjoyed the interactive shaker element. Thank you for dropping by.

-----------------------------------------------------

Hi folks, Kavya here. I am back on the blog with another fun holiday card! The adorable icing border dies from the new release are just versatile and can be used all year long. I stretched these dies to create a fun scalloped roof and chimney, complete with a Santa peeking out! 

Sunny Studio Stamps: Icing Border Dies Santa Claus Lane North Pole Christmas Card by Kavya

I first started off creating a card base. I matted an ink blended (Chipped Sapphire, Mermaid Lagoon and Cracked Pistachio Distress Oxide inks) cardstock on top of A2 sized red and white stripped pattern paper from All is Bright paper pack. For the roof, I ink blended the edges of red cardstock using Vintage Photo and Black Soot Distress Oxide inks and splattered some red and brown paint. I added some brown die cut borders from Icing Borders to make it look like the roof has scalloped shingles. For the chimney, I did the same thing but out of brown cardstock and added the lines using a white gel pen to make it look like a brick! Finally, I hand drew and cut some ’snow’ on the roof and chimney using white glitter cardstock and added a hanging light string from Scenic Route stamp set on the roof. 

Sunny Studio Stamps: Icing Border Dies Santa Claus Lane North Pole Christmas Card by Kavya

Later, I stamped and colored a bunch of images from Santa Claus Lane and North Pole stamp set to finish off my card :) I decided not to add a sentiment because I thought my card already looked busy and the theme of the card was just so obvious! 

I hope this inspires you to use the icing border dies in your projects soon! Happy Crafting!

Sunny Studio Supplies Used:

Stitched Rectangle Dies
Shop at:
Sunny Studio
Christmas Critters Stamps
Shop at:
Sunny Studio
Christmas Critters DIes
Shop at:
Sunny Studio
Holiday Express Stamps
Shop at:
Sunny Studio
Icing Border DIes
Icing Border DIes
Shop at:
Sunny Studio
Santa Claus Lane Stamps
Shop at:
Sunny Studio
Santa Claus Lane Dies
Shop at:
Sunny Studio
Scenic Route Stamps
Scenic Route Stamps
Shop at:
Sunny Studio
Scenic Route Dies
Scenic Route Dies
Shop at:
Sunny Studio
North Pole Stamps
North Pole Stamps
Shop at:
Sunny Studio
North Pole Dies
North Pole Dies
Shop at:
Sunny Studio
All Is Bright Paper
All Is Bright Paper
Shop at:
Sunny Studio