Today's sneak peek includes 3 new stamp sets and their matching dies for Summer. I've created quite a few cards for today's peek so let's dive right in!
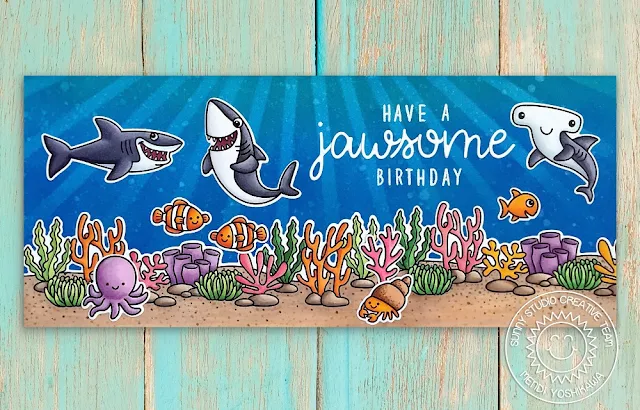
Card No. 1: Up first is the latest set in our scenic border series called Tropical Scenes. This set includes a wonderful ocean floor border that takes the guesswork out of trying to place your coral and kelp just right--With a single impression it's all done for you! However for this particular extra long slimline card I stamped it twice, hiding the seam behind my hermit crab (although with a tiny bit of masking they actually match up pretty well--I just had already cut and colored these planning them for shorter A2 sized cards)
For my background, I started by inking it up with some salty ocean distress ink. I then used Mermaid Lagoon & Blueprint Sketch distress ink with Studio Katia's Underwater Sun Rays Stencil. I masked off the rays that didn't extend to the bottom of my card and then rotating the stencil for each section until my entire card base was covered. When my entire background was done, I then spritzed on some water to created the look of bubbles.
For my scene, I paired the ocean border with the shark, fish and octopus from our new Sea You Soon Stamps which coordinate well our Best Fishes Stamps which I also used here. For my sentiment I paired our Loopy Letter Dies with our Kinsley Alphabet Stamps. This is actually a greeting inspired by a phrase from the Best Fishes set, but I was looking to duplicate it on a larger scale.
Card No. 2: For my next card I once again used the little fish from our new mini Sea You Soon Stamps together with the coral border from Tropical Scenes, but this time I took them out of the ocean and into a fishbowl.
To create my fishbowl, I started by cutting my bowl shape by using our new Stitched Semi-Circle Dies with a piece of starfish patterned paper from our Summer Splash Paper pack. For the lip of my fishbowl, I used the scalloped border from our Sweet Treats House Add-on Dies and for the base of my bowl, I elongated the oval handle die from our Sweet Treats Bag Dies, adding a little detail to them both with my Copic markers and a white gel pen. For my shaker element, I used Studio Katia's Crystal Clear Fusion sequins which have just the right iridescent shine to look like bubbles.
Card No. 3: I wanted to experiment with going black and white with my stamped border to keep things from being too visually overwhelming with my rainbow background which I created by blending distress inks. I actually really enjoyed coloring all my images with my N0, N1, N3 and N5 Copic Markers. It was freeing knowing that if I overlapped a bit on one portion of my border, it was OK because it was going to be grey too. ;)
For my focal point I turned to our Magical Mermaids Stamps and created a template to hand stitch my heart with using our Stitched Heart Dies. I started by die-cutting the heart from some scratch paper and then used my paper piercer to poke holes around the perimeter of the die-cut heart pattern. I really love the look of contrasting a colorful backdrop with black & white and I think I will try this technique again sometime soon!
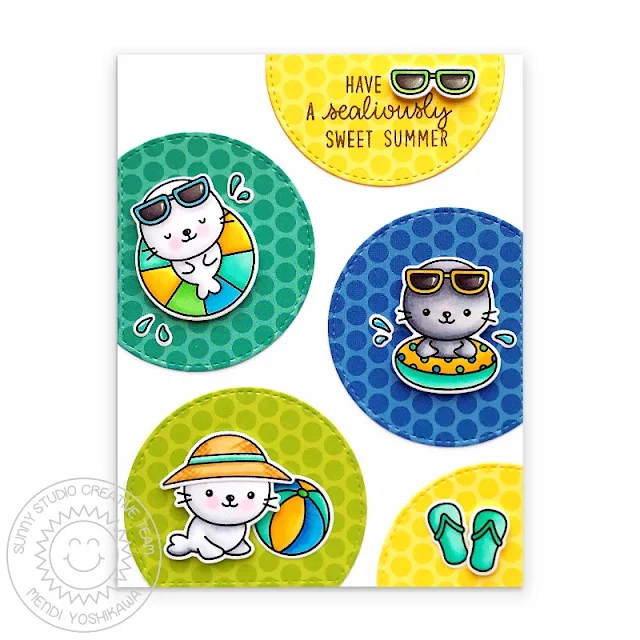
Card No. 4: My next card is a clean & simple design pairing our new Stitched Semi-Circle Dies together with our Sea You Soon Stamps and Tropical Scenes Stamps. I love how the opening looks a little bit like an aquarium window to me. I finished off my card by heat embossing my sentiment with white embossing powder onto a little banner strip which I die-cut with our Fancy Frames Rectangle dies.
Card No. 5: Switching gears I have a couple of cards using another border from our Tropical Scenes card which is a tree branch with hanging vines. I've been wanting an image like this for a long time as it's a perfect compliment to several of our past sets. For my card here I paired it with our Love Monkey Stamps and the leafy frame from our Botanical Backdrop Dies.
For my greeting I used the word "swinging by to say" from the Love Monkey stamps and then combined it with our Hello Word die, stacking several die-cuts together to give the look of chipboard. When I was done, I just couldn't get over the nagging feeling that the bottom right-hand corner of my card was empty and a bit unbalanced so I added the small palm tree from the Tropical Scenes stamps (which is the smallest of all our palm trees) and paired it with the palm tree from our Sending Sunshine Stamps.
Card No. 6: Up next is another card featuring the Tropical Scenes jungle vines. This time I turned to our Silly Sloths Stamps. To give the look that my little sloths hands are wrapping around the vine, I stamped a second set of hands and fussy cut them out to layer over the top--It didn't take long, but it's a small detail that I think goes a long way.
For my card background I masked off both above and below the band of my scene, as well as some cloud masks I created using the Sunny Sentiment Dies and Rain or Shine Dies. I then inked up my sky with some tumbled glass distress ink. A little sentiment from our Silly Sloths stamps and a few butterflies from our Spring Showers stamps completed my scene. My kids thought it looked a bit unfinished or overly simple so I decided to mix in some more color by adding a small strip of striped paper along the bottom from our Striped Silly Paper pack and rounded the corners with my We R Memory Keeper corner chomper.
Card No. 7: For another take on our Tropical Scenes stamps, I created a card focusing on the small palm tree and island from the set (which I cut in half to put on each side of my card). For card I stamped and colored two of the palm trees from the new set and two from our Sending Sunshine set. After I adhered them I had to cut off some excess leaves that went off the edge, but rather than just toss them out I thought it would be fun to adhere them on opposite sides of the card to give the look that there are more trees and the scene continues past the confines of the card.
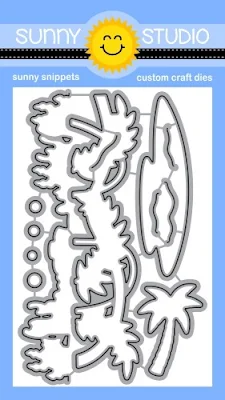
The tropical scenes stamps come with a number of waves to mimic the shape of the island which if you look closely you can see I used here. The stamp set also comes with some additional "waves" and coordinating dies to cut openings for critters or objects whether they be used in the sand or the water.
I decided I would pull out my favorite Fabulous Flamingo Stamps for my focal point, tucking their legs in the shallow waves. I also used a sentiment from the set, adding a little heart between them (which I coated in glossy accents) from our Basic Mini Shape Dies II set and yet another striped strip from our Striped Silly Paper pack to tie in with my hot pink heart.
Card No. 8: My next set of cards introduces our new Savanna Safari Stamps. I just couldn't resist stacking all these critters and the slimline card dimensions (4" wide x 9" high) are perfect for this.
I started by freehand cutting a curve in the middle of some masking material. I then put the bottom half the mask on the bottom of my card and inked up my sky in Tumbled Glass distress ink and then took the other half of the mask and covered my inked sky to ink up the ground using Tea Dye distress ink. The cute punny sentiment "Thanks A Ton" seemed appropriate for this heavy stack of creatures. I finished by adding a small strip of gingham patterned paper from our Gingham Pastels Paper pack to tie in with my sky and add a little extra interest to this clean & simple card design.
Card No. 9: For those of you that don't enjoy coloring or just want to make a quick card, I have just the card for you! This card came together so quickly and I really love the results! I wanted to recreate the look of a glowing African Sunset as the sun slips behind the horizon so I started by inking up the center of my card panel with squeezed lemonade distress ink. I then worked around the center with mustard seed distress ink and finished the outside edge with carved pumpkin distress ink.
To create the silhouette of animals, I stamped the giraffe, lion, elephant and bird from our new Savanna Safari stamps and then set to work coloring them in with a black Copic marker. I replaced the chisel end on my black Copic with a fine nib for detail work like this and I haven't missed my chisel tip even a tiny bit. If you don't have Copics, I think Sharpie's Fine Point pen would also work really well. When I was done, I flicked on some blades of tall grass below them. To save myself some black ink and once again add some extra detail, I trimmed off the bottom of my card panel and tucked in a strip of paper from our Heroic Halftones Paper pack.
Card No. 10: Up next is a fun card featuring more of the tropical leaves from our Radiant Plumeria Stamps which I shared on Monday. This leaf is super easy to layer without a stamp positioning tool that you can quickly create a patterned background like this one in about 15 minutes. My best tip for stamping them is to start with the darkest layer and work towards the lightest layer. For some reason I just I find it's easier to line up that way. Also for crisper images, I like to wait a bit between each of my layers so the the layers don't bleed together. If you're just anxious to do it without pausing between steps, working in the same order in which they were stamped each time naturally gives the ink a little time to dry completely before switching layers too.
To create my focal point, I die-cut my loopy circle using our Snowflake Circle Frame Dies from dark green cardstock. I then took the extra cardstock that popped out of the center of my die-cut to use as a template to trace around on my stamped background. From there I used a circle punch to punch inside my traced circle (just to get my cut started) and then took my scissors and fussy cut along my traced pencil lines. This gave me the perfect opening to adhere my loopy circle to with a glue pen and a window for my animals to peek through. I then took another square of green cardstock and adhered it to the back of my card panel along the edges before adding everything neatly to my card base. You could also design it to be an actual physical window with the critters adhered to the inside of the card, but I decided I wanted to allow more room to write on the inside.
Card No. 11: I couldn't let today pass without creating a scene style card with the little tree and grass tufts from our Savanna Safari Stamps set. I started by die-cutting a ric rac style mat for my card using our Frilly Frames Chevron dies, masking off the outside edge using some Purple Tape. I then cut half of an oval from masking material with our Stitched Oval dies, using both sides of the mask to ink up my pool of water and the ground around it. I also masked off a straight line for my horizon to ink up the sky as well. I then stamped my grass around the pool and added some quick freehand waves with my Copic marker. I also added just a little faint texture to the brown grass with another Copic Marker and stamped three of the Baobab trees in the distance.
For my hippo enjoying his bath, I used the longest of the small wave dies from the Tropical Scenes die set and then lengthened it just a little bit more with my scissors to slip my hippo into the water. To add another layer to my scene, I adhered the tree branch with vines from our Tropical Scenes Stamps to the top of my card. A little party hat from our Party Pups Stamps to go with the cute punny "Hippo Birthday" sentiment from the Savanna Safari stamps completed my card.
Card No. 12: I couldn't resist the urge to make a sweet baby card using the adorable elephant in our new Savanna Safari Stamps. I started by coloring my elephant pink with Copic Markers and then used a White Sharpie Extra Fine Point Paint Pen to add my polka-dots. I mounted her on a floral print paper from our Flirty Flowers Paper pack which I die-cut using our Fishtail Banner & Fishtail Banner II dies. I then heat embossed a sentiment from our Sweet Shoppe Stamps and tied a bow using some American Crafts ribbon I had in my stash. A gingham background from our Gingham Pastels Paper pack was the perfect finishing touch for this monochromatic card. Now I want to make more of these in yellow, aqua and blue!
Card No. 13: For my last card of the day I used our new Frilly Frames Herringbone dies to emboss a basket weave inspired texture onto my card panel using a Spellbinders rubber mat in place of my bottom cutting plate. The rubbery surface of the embossing mat doesn't allow the die to cut through the paper and instead turns your dies into embossing plates. This is a fabulous technique to use with all of our Frilly Frames dies and one that I sadly don't remember to use often enough.
I then added a strip of patterned paper from our Gingham Jewel Tones Paper pack and a sentiment from the sent which I heat embossed with white embossing powder onto a pennant from our Banner Basics Stamps. I wasn't able to fit the hippo on this particular card, but I did manage to fit the rest of the zoo crew.
That wraps up today's sneak peeks. I know this was a long post with a lot of information. It truly means so much to have you hang out with me and I'd love to give a $40 gift code to one lucky winner using the rafflecopter below. Make sure to keep checking back all this week for more peeks & prizes for up to five chances to win. Each contest runs through Saturday at Midnight PST with winners announced here on Sunday, April 26th. :)
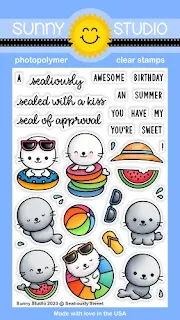
a Rafflecopter giveaway Here's a closer look at the new Sea You Soon stamps & coordinating dies, Tropical Scenes stamps & coordinating dies and Savanna Safari stamps & coordinating dies used today (available for purchase on Friday, April 24th).
Other Supplies Used:
 Fishtail Banner Dies Shop at: Sunny Studio |
 Fishtail Banner II Dies Shop at: Sunny Studio |
 Magical Mermaid Dies Shop at: Sunny Studio |
 Magical Mermaid Stamps Shop at: Sunny Studio |
|
 Stitched Heart Dies Shop at: Sunny Studio |
 Sunny Sentiments Dies Shop at: Sunny Studio |
 Sweet Shoppe Stamps Shop at: Sunny Studio |
 Fancy Frames- Rectangles Shop at: Sunny Studio | |
 Party Pups Stamps Shop at: Sunny Studio |
 Party Pups Dies Shop at: Sunny Studio |
 Hello Word Die Shop at: Sunny Studio |
 Striped Silly 6x6 Paper Shop at: Sunny Studio | |
 Gingham Jewel Tones 6x6 Paper Shop at: Sunny Studio |
 Loopy Letters Dies Shop at: Sunny Studio |
 Stitched Oval Dies Shop at: Sunny Studio |
 Gingham Pastels 6x6 Paper Shop at: Sunny Studio | |
 Flirty Flowers 6x6 Paper Shop at: Sunny Studio |
 Love Monkey Stamps Shop at: Sunny Studio |
 Love Monkey Dies Shop at: Sunny Studio |
 Botanical Backdrop Die Shop at: Sunny Studio | |
 Mini Basic Shape Dies II Shop at: Sunny Studio |
 Frilly Frames Chevron Die Shop at: Sunny Studio |
 Best Fishes Stamps Shop at: Sunny Studio |
 Best Fishes Dies Shop at: Sunny Studio | |
 Fabulous Flamingos Stamps Shop at: Sunny Studio |
 Fabulous Flamingos Dies Shop at: Sunny Studio |
 Sending Sunshine Stamps Shop at: Sunny Studio |
 Sending Sunshine Dies Shop at: Sunny Studio | |
 Silly Sloths Stamps Shop at: Sunny Studio |
 Silly Sloths Dies Shop at: Sunny Studio |
 Heroic Halftones 6x6 Paper Shop at: Sunny Studio |
 Snowflake Circle Frame Shop at: Sunny Studio | |
 Sweet Treats Gift Bag Shop at: Sunny Studio |
 Sweet Treats House Add-on Shop at: Sunny Studio |
 Banner Basics Stamps Shop at: Sunny Studio |
 Banner Basics Dies Shop at: Sunny Studio | |
 Kinsley Alphabet Stamps Shop at: Sunny Studio |
 Spring Showers Stamps Shop at: Sunny Studio |
 Spring Showers Dies Shop at: Sunny Studio |
 Radiant Plumeria Stamps Shop at: Sunny Studio | |
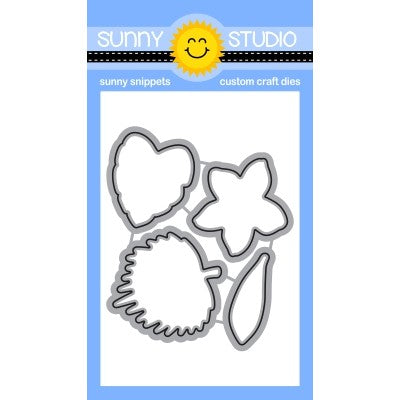 Radiant Plumeria Dies Shop at: Sunny Studio |
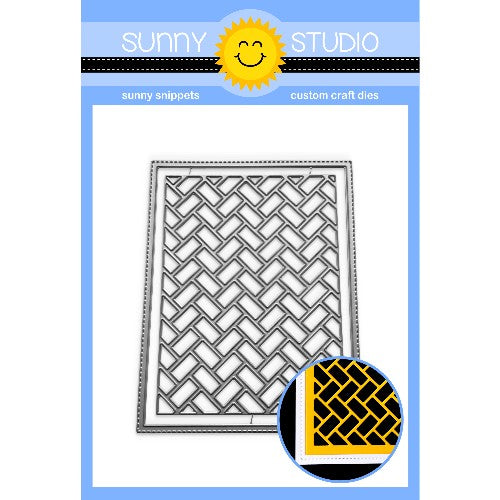 Frilly Frames Herringbone Shop at: Sunny Studio |
 Stitched Semi-Circle Dies Shop at: Sunny Studio |
 Crystal Clear Fusion Sequins Shop at: Sunny Studio | |

