Saturday, October 19, 2019

Sunny Saturday Share: More Customer Cards


Hey everyone, how are you all doing this weekend? I'm so excited to be popping in today with a Sunny Saturday Share. There have been so many amazing cards popping up on Instagram that have made my jaw drop so I couldn't wait to share them with all of you! 

Gleeful Reindeer tags by Anita Madden

Sunny Studio Stamps: Gleeful Reindeer Customer Christmas Tags by Anita Madden

Sweater Vest dies and Very Merry paper card by Cindy Major

Sunny Studio Stamps: Sweater Vest Dies Christmas Customer Card by Cindy Major

Buffalo Plaid embossing folder, Free Mini Die, and Merry Mice card by Teri Anderson


Sunny Studio Stamps: Buffalo Plaid Embossing Folder Christmas Customer Card by Teri Anderson

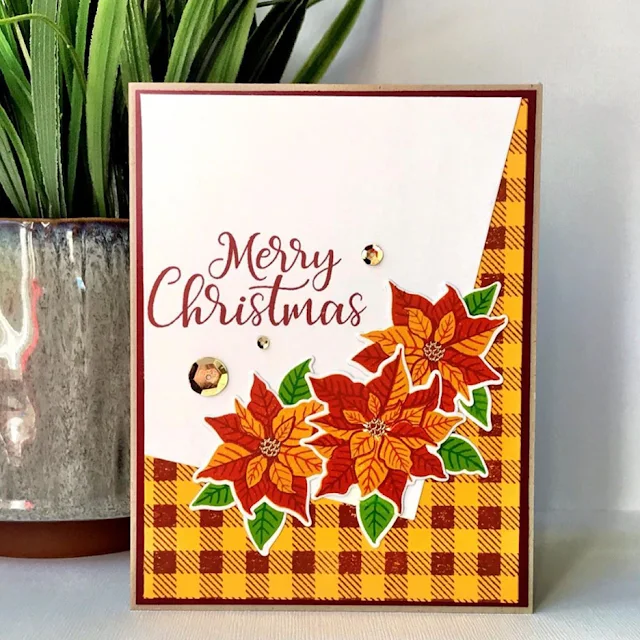
Petite Poinsettias card by Jamie 


Sunny Studio Stamps: Petite Poinsettias Customer Christmas Card by Jamie

Mug Hugs card by Kathy Schweinfurth


Sunny Studio Stamps: Mug Hugs Customer Christmas Card by Kathy Schweinfurth

Mug Hugs and Elegant Leaves card by Amy Tsuruta


Sunny Studio Stamps: Mug Hugs Customer Card by Amy Tsuruta

Elegant Leaves card by Dana Joy with video tutorial


Sunny Studio Stamps: Elegant Leaves Customer Fall Themed Card by Dana Joy

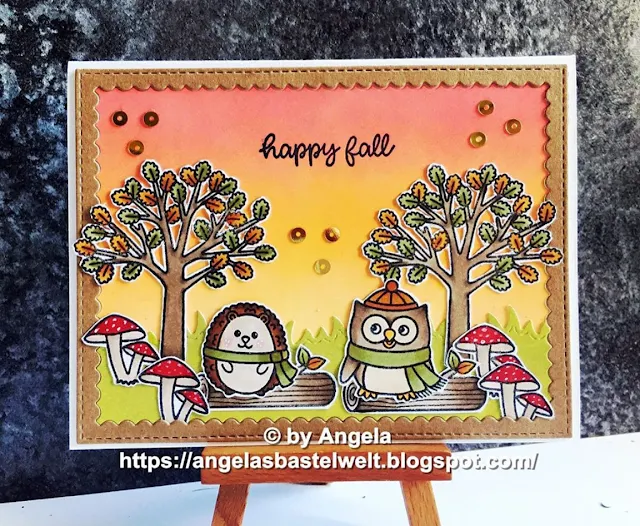
Woodsy Autumn card by Angela Pahl


Sunny Studio Stamps: Woodsy Autumn Customer Fall Themed Card by Angela Pahl

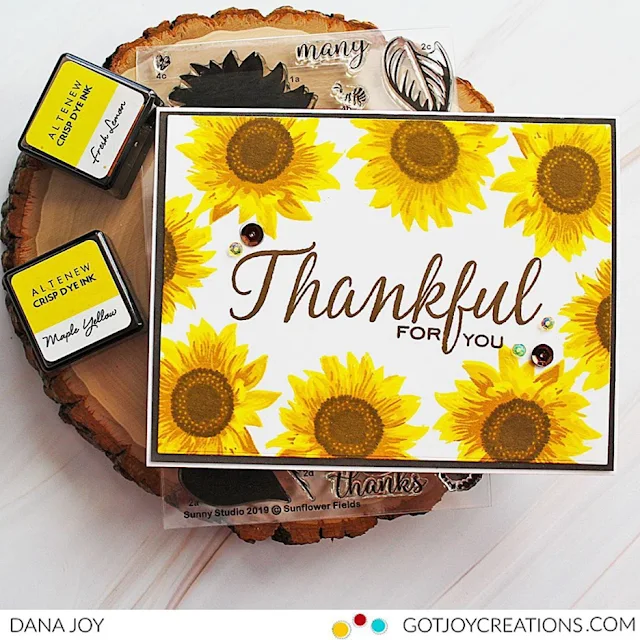
Sunflower Fields and Elegant Leaves cards by Dana Joy


Sunny Studio Stamps: Sunflower Fields Elegant Leaves Customer Thankful Card by Dana Joy

Happy Owl-o-ween and Fancy Frames Circle dies card by Lori Uren


Sunny Studio Stamps: Happy Owl-o-ween Fancy Frame Dies Customer Halloween Card by Lori Uren

Thank you for sharing all these fabulous ideas with us! I hope you will continue to share your gorgeous projects with us--It always makes my day to see them. You can tag us on instagram with the hashtag #sunnystudiostamps or share your projects with us in our flickr group or on our facebook page. ☺


Sunny Studio Supplies Used:


Gleeful Reindeer Dies
Shop at:
Sunny Studio
Gleeful Reindeer Stamps
Shop at:
Sunny Studio
Mug Hugs Dies
Mug Hugs Dies
Shop at:
Sunny Studio
Mug Hugs Stamps
Mug Hugs Stamps
Shop at:
Sunny Studio
Happy Owl-o-ween Dies
Shop at:
Sunny Studio
Happy Owl-o-ween Stamps
Shop at:
Sunny Studio
Petite Poinsettias Stamps
Shop at:
Sunny Studio
Petite Poinsettias Dies
Shop at:
Sunny Studio
Fancy Frames-Circle Dies
Shop at:
Sunny Studio
Sweater Vest Dies
Sweater Vest Dies
Shop at:
Sunny Studio
Woodsy Autumn Stamps
Shop at:
Sunny Studio
Woodsy Autumn Dies
Woodsy Autumn Dies
Shop at:
Sunny Studio
Elegant Leaves Stamps
Shop at:
Sunny Studio
Elegant Leaves Dies
Elegant Leaves Dies
Shop at:
Sunny Studio
Sunflower Fields Stamps
Shop at:
Sunny Studio
Sunflower Fields Dies
Shop at:
Sunny Studio
Very Merry 6x6 Paper
Shop at:
Sunny Studio
Buffalo Plaid Embossing
Shop at:
Sunny Studio
Merry Mice Stamps
Merry Mice Stamps
Shop at:
Sunny Studio

Friday, October 18, 2019

Season's Greetings Cards with Rachel and Candice

Hello, crafty friends! It's Rachel here and I have a Christmas Card to share with you today that features the new Season's Greetings Stamp Set. I combined this set with both the newly released Scenic Route and Hogs & Kisses Stamp Sets. Aren't those pigs just the cutest!?

Sunny Studio Stamps: Season's Greetings Scenic Route Hogs & Kisses Christmas Card by Rachel Alvarado

To start my card, I stamped a scenic hillside and two of the pigs with Memento Tuxedo Black Ink onto a sheet of Neenah Solar White 110lb Card Stock. I then colored my images with Copic Markers and used the coordinating Scenic Route and Hogs & Kisses Die Sets to cut them out. I then partially masked off the faces of the pigs with small pieces of cardstock and lightly splattered diluted Opaque White Paint onto all of my images to resemble falling snow. I set them aside to dry while I worked on the background of my card.

Sunny Studio Stamps: Season's Greetings Scenic Route Hogs & Kisses Christmas Card by Rachel Alvarado

For my background, I blended some Salty Ocean and Tumbled Glass Distress Oxide Inks onto a piece of watercolor paper. I then splattered this piece with water and let it sit for about a minute before I blotted the excess dry with a paper towel. I then splattered this piece with some diluted Opaque White Paint while leaving the middle somewhat alone so that I could heat emboss my sentiment. Once my background was dry, I then heat embossed my sentiment from the Season's Greetings Set with Fine Detail Silver Embossing Powder. It's hard to capture in photos the beautiful shine that this embossing powder gives. Lastly, I added my scenic hill with some 3D Foam Adhesive Tape for added dimension and then added my pigs last.

Thanks so much for stopping by! I hope you all have a wonderful day!

---------------------------------------------------

Hello fellow crafty friends! It's Candice here sharing a farm inspired Christmas card with you today highlighting the amazing scripts in the Season's Greetings stamp set!

Sunny Studio Stamps: Season's Greetings Hogs & Kisses Christmas Garland Frame Dies Christmas Card by Candice Fisher

The amazing new release items from Sunny Studio that I used:
I truly love how the Season's Greetings sentiment fits so perfectly into the Garland frameTo begin my card I die cut two Garland frames, one from white velvet cardstock and the second from white glitter, using a shim to get a cut through all the intricate detail. I trimmed the white velvet pieces by cutting the corners off and gluing slightly off center under the glitter frame.

Next, I used the frame to see where to put my Season's Greetings and heat embossed in white. I then glued just the edges of the frame down so the leaves could have some dimension around the sentiment.

Sunny Studio Stamps: Season's Greetings Hogs & Kisses Christmas Garland Frame Dies Christmas Card by Candice Fisher

I stamped the adorable piggy, colored with Copic markers, and cut out using the coordinating dies. I also heat embossed the hoggy in white, trimmed by hand and inked with tattered rose. I adhered them with foam dots for even more dimension.

For the final touches, I heat embossed some of the individual pine leaves in white on vellum and cut out using the coordinating dies. Using the same dies, I cut the three berries from white glitter and topped with some pearls. I added a few more pearls around the sentiment to finish off the card.

Thank you for stopping by!

Sunny Studio Supplies Used:

Season's Greetings Stamps
Shop at:
Sunny Studio
Season's Greetings Dies
Shop at:
Sunny Studio
Scenic Route Stamps
Scenic Route Stamps
Shop at:
Sunny Studio
Scenic Route Dies
Scenic Route Dies
Shop at:
Sunny Studio
Hogs & Kisses Stamps
Shop at:
Sunny Studio
Hogs & Kisses Dies
Hogs & Kisses Dies
Shop at:
Sunny Studio
Christmas Garland Frame
Shop at:
Sunny Studio

Thursday, October 17, 2019

Santa Claus Lane Cards with Anja and Vanessa

Hello everyone, Anja here with another inspiration card using products from the latest Winter Release which help to build a gorgeous holiday scene quickly.

Sunny Studio Stamps: Santa Claus Lane Christmas Garland Frame Dies Winter Themed Christmas Card by Anja Bytyqi

I immediately fell in love with this beautiful patterned paper from the Very Merry 6x6 Paper pack. It's the perfect winter night scene and the glowing moon looks amazing!

I combined it with the cute Santa Clause Lane Stamps. The images were stamped in Memento Tuxedo Black Ink and colored with Copic Markers. I used the coordinating dies to cut them out.

Sunny Studio Stamps: Santa Claus Lane Christmas Garland Frame Dies Winter Themed Christmas Card by Anja Bytyqi

For the sentiment, I die cut the word 'merry' included in the Christmas Garland Frame Die set from red glitter cardstock and adhered it across the moon. Next, I stamped the words in VersaMark Ink above and below it and heat embossed them with silver embossing powder. I added silver star sequins to complete my card.

Thank you so much for stopping by! Hope to see you again next week!

-----------------------------------------------

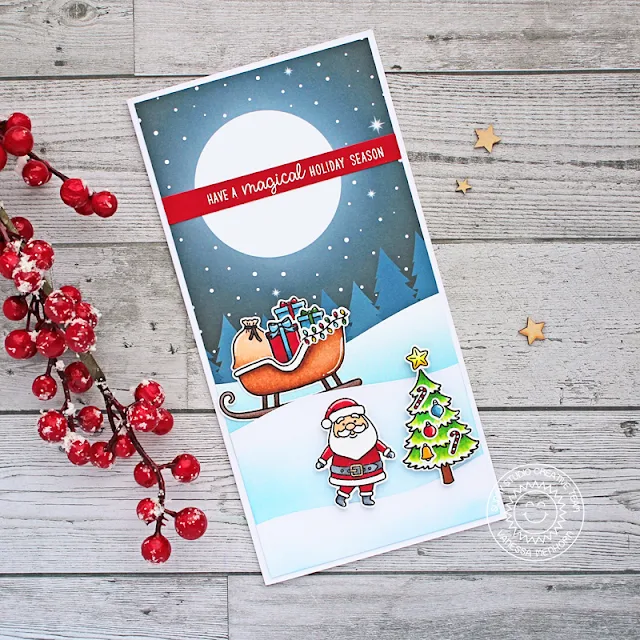
Hello to you! Vanessa here today with a slim sized card using the adorable Santa Claus Lane Stamps. I love the new Very Merry 6x6 Paper, especially the landscape backgrounds Mendi is providing with this paper pad.

Sunny Studio Stamps: Santa Claus Lane Seasonal Trees Winter Themed Christmas Card by Vanessa Menhorn

First, I trimmed the patterned paper slightly smaller than the width of the card and adhered it. Now I die-cut snow drifts, using the sand dune from the Oceans of Joy Dies, inked the bottom slightly with Distress Ink and adhered them. I stamped all the images, colored them with Copics, die-cut them with the matching dies and adhered the elements to the card.

Sunny Studio Stamps: Santa Claus Lane Seasonal Trees Winter Themed Christmas Card by Vanessa Menhorn

Finally, I stamped and heat-embossed the sentiment onto a strip of red cardstock, trimmed it and adhered it to the card. I so love the new cute Christmas stamps! Here I added a tree from the Seasonal Trees set and a larger present from the Playful Polar Bears set

Thank you for visiting today!

Sunny Studio Supplies Used:

Oceans of Joy Dies
Oceans of Joy Dies
Shop at:
Sunny Studio
Oceans of Joy Stamps
Shop at:
Sunny Studio
Playful Polar Bears Stamps
Shop at:
Sunny Studio
Playful Polar Bears Dies
Shop at:
Sunny Studio
Seasonal Trees Stamps
Shop at:
Sunny Studio
Seaonal Trees Dies
Seaonal Trees Dies
Shop at:
Sunny Studio
Very Merry 6x6 Paper
Shop at:
Sunny Studio
Santa Claus Lane Stamps
Shop at:
Sunny Studio
Santa Claus Lane Dies
Shop at:
Sunny Studio
Christmas Garland Frame
Shop at:
Sunny Studio

Wednesday, October 16, 2019

Layered Poinsettia Cards with Ana and Franci

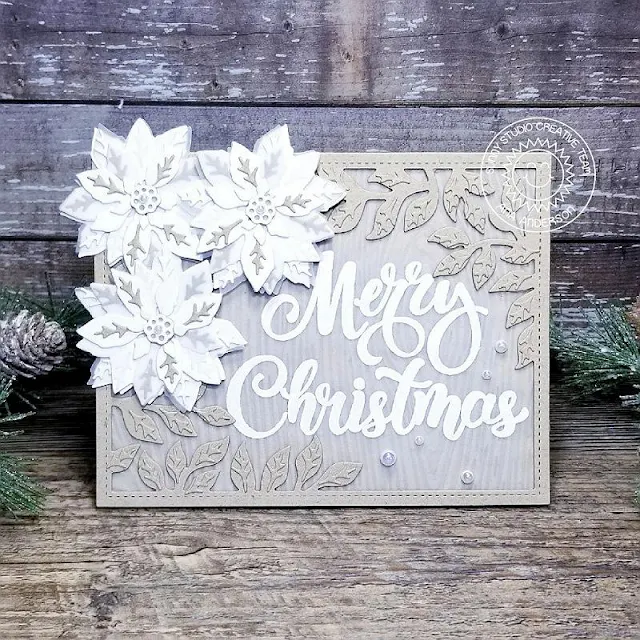
Hello friends! It’s Ana here today with a rustic Christmas card featuring gorgeous Layered Poinsettia Die set as well as Woodgrain Embossing folder from the new holiday release.

Sunny Studio Stamps: Layered Poinsettia Dies Season's Greetings Botanical Backdrop Dies Elegant Christmas Card by Ana Anderson

To create the rustic background I die cut kraft cardstock twice with Botanical Backdrop die and layered them together using liquid glue. I dry embossed another piece of kraft cardstock with Woodgrain Embossing folder. I stamped Merry Christmas sentiment (from Season’s Greetings Stamps) with VersaMark Watermark ink and white heat embossed it on a piece of vellum.

I adhered sentiment vellum piece to woodgrain panel, then added the botanical backdrop die cut on top and placed the completed background panel under large acrylic block. I die cut the poinsettia pieces from white cardstock and vellum, layered them together, adding kraft and white veins to the layers.

Sunny Studio Stamps: Layered Poinsettia Dies Season's Greetings Botanical Backdrop Dies Elegant Christmas Card by Ana Anderson

I die cut additional veins from kraft cardstock and adhered them to the leaves of the botanical backdrop background. To finish the card I embellished it with white pearls.

Thank you so much for taking the time to stop by today. Until next week, I wish you happy crafting!

----------------------------------------------

Hello crafty friends and happy Wednesday! Franci here with you today and I'm happy to share a cute little DIY project made with the new Layered Poinsettia dieI love this new set so much! Here I created 2 poinsettia pins and mounted them onto little tags so they could be perfect little handmade gift or you can use them as tags on to your Xmas presents.

Sunny Studio Stamps: Layered Poinsettia Dies Scalloped Tag Dies Elegant Christmas Tags by Franci Vignoli

I die cut the tiny Scalloped Tag Square die twice out of the new Subtle Grey Tones 6x6 paper and white cardstock, I stamped the "to and from" included in the Season's Greetings stamp set on the back and I glued them together. I also added some green ribbon and some silver twine at the top.

Sunny Studio Stamps: Layered Poinsettia Dies Scalloped Tag Dies Elegant Christmas Tags by Franci Vignoli

I colored some white cardstock by sponging some Abandoned Coral, Candid Apple and Picked Raspberry distress inks + Twisted Citron Distress inks Oxide, Shabby Shutters and Olive Crush distress inks and die cut all the different Poinsettia elements.

Sunny Studio Stamps: Layered Poinsettia Dies Scalloped Tag Dies Elegant Christmas Tags by Franci Vignoli

I assembled each flower and glued everything together with liquid glue, then I mounted my pin on the back and secured with hot glue. Finally I punched a little hole in each tags and attached my pins.

Hope you like them and thank you so much for stopping by today! 

Sunny Studio Supplies Used:

Botanical Backdrop Die
Shop at:
Sunny Studio
Subtle Grey Tones Paper
Shop at:
Sunny Studio
Woodgrain Embossing
Woodgrain Embossing
Shop at:
Sunny Studio
Season's Greetings Stamps
Shop at:
Sunny Studio
Layered Poinsettia Dies
Shop at:
Sunny Studio
Scalloped Tags-Square
Shop at:
Sunny Studio