Showing posts with label Vintage Jar. Show all posts

Thursday, December 10, 2020

Surfing Santa Cards with Vanessa and Anja

Hello to you! Vanessa here with a colorful card using the adorable Surfing Santa set. This cute little set is such fun!

Sunny Studio Stamps: Surfing Santa Stitched Arch Dies Tropical Themed Christmas Card by Vanessa Menhorn

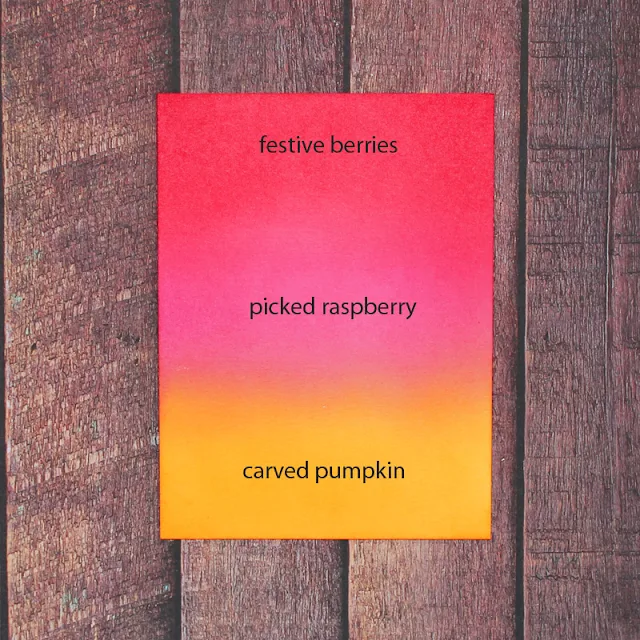
I first inked a panel of white cardstock with Distress Oxide Inks and an ink blending tool, using these colors:

Sunny Studio Stamps: Surfing Santa Stitched Arch Dies Tropical Themed Christmas Card by Vanessa Menhorn

Now I die-cut the mason jar from this panel and adhered a piece of clear cardstock behind it, created a shaker window and filled it with faux ice crystals. Then I stamped the images, colored the Santa and his board with Copic markers, die-cut the elements with the matching dies, adhered the images to the die-cut mason jar and adhered this behind the shaker window before adhering the panel to the card base. I die-cut the lid of the jar from white cardstock, inked it with black soot Distress Oxide Ink, tied-on the baker's twine and adhered the lid to the jar. 

Stamps and dies used for this card:
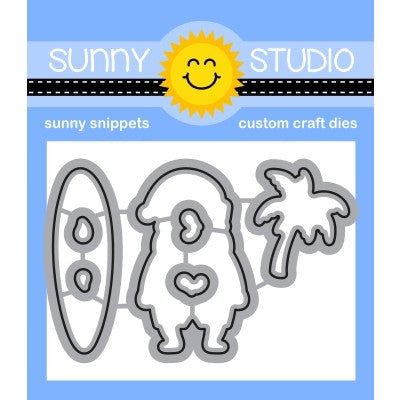
Surfing Santa stamps + dies
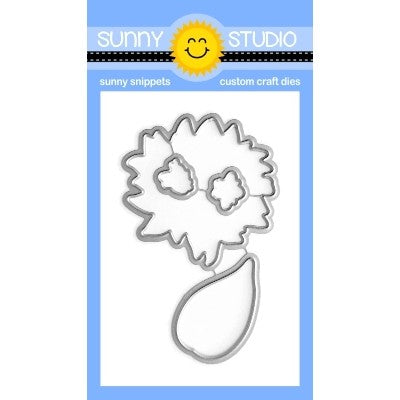
Vintage Jar dies
Stitched Arch dies

Sunny Studio Stamps: Surfing Santa Stitched Arch Dies Tropical Themed Christmas Card by Vanessa Menhorn

I die-cut the tag from white cardstock, inked it with festive berries Distress Oxide ink, stamped the sentiment and tied it on with the baker's twine. Finally I added the little trees.

We got our first snow this week so it felt strange to create a summery Christmas card. But I loved playing with this set and hope you like my take :) Thanks for visiting!

---------------------------------------------

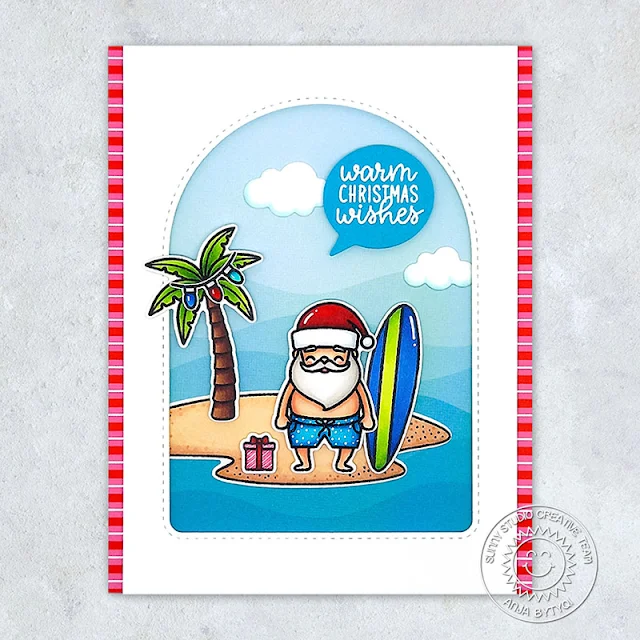
Hello everyone, Anja here and today's card makes me giggle! It features the Surfing Santa mini stamp set and I just love this cutie in his swim trunks!

Sunny Studio Stamps: Surfing Santa Stitched Arch Dies Tropical Scenes Tropical Themed Christmas Card by Anja Bytyqi

Of course I had to create a fun little ocean scene using the palm tree and sandy island from the Tropical Scenes set. For the background, I picked the waves patterned paper from the Summer Splash Paper pack. I added some light bulbs (Gleeful Reindeer Stamps) to the palm tree and a small gift (North Pole Stamps) next to Santa. The clouds are included in the Comic Strip Everyday Dies set.

I stamped the images in Memento Tuxedo Black Ink and colored them with Copic Markers. I used the coordinating dies to cut everything out and added some details with a white gelly roll pen. To frame my scene, I die cut a window from white cardstock using the largest of the Stitched Arch Dies. I trimmed off the sides a bit and adhered the striped paper from the Holiday Cheer Paper pack behind it.

Sunny Studio Stamps: Surfing Santa Stitched Arch Dies Tropical Scenes Tropical Themed Christmas Card by Anja Bytyqi

The sentiment was stamped in VersaMark Ink onto blue cardstock. I white heat embossed it and used a speech bubble die from the Comic Strip Speech Bubbles Dies set. Finally, I popped up the arch frame panel as well as some of the images with foam tape. The rest was adhered flat with liquid glue.

Thank you so much for stopping by! Hope you're having an awesome day!

Sunny Studio Supplies Used:

Gleeful Reindeer Dies
Shop at:
Sunny Studio
Gleeful Reindeer Stamps
Shop at:
Sunny Studio
Vintage Jar Dies
Vintage Jar Dies
Shop at:
Sunny Studio
Comic Strip Everyday Dies
Shop at:
Sunny Studio
Holiday Cheer 6x6 Paper
Shop at:
Sunny Studio
Summer Splash 6x6 Paper
Shop at:
Sunny Studio
Comic Strip Speech Bubble Dies
Shop at:
Sunny Studio
Tropical Scenes Stamps
Shop at:
Sunny Studio
Tropical Scenes Dies
Shop at:
Sunny Studio
Stitched Arch Dies
Stitched Arch Dies
Shop at:
Sunny Studio
North Pole Stamps
North Pole Stamps
Shop at:
Sunny Studio
North Pole Dies
North Pole Dies
Shop at:
Sunny Studio
Surfing Santa Stamps
Shop at:
Sunny Studio
Surfing Santa Dies
Surfing Santa Dies
Shop at:
Sunny Studio

Tuesday, July 23, 2019

Sunflower Fields Cards with Juliana and Angelica

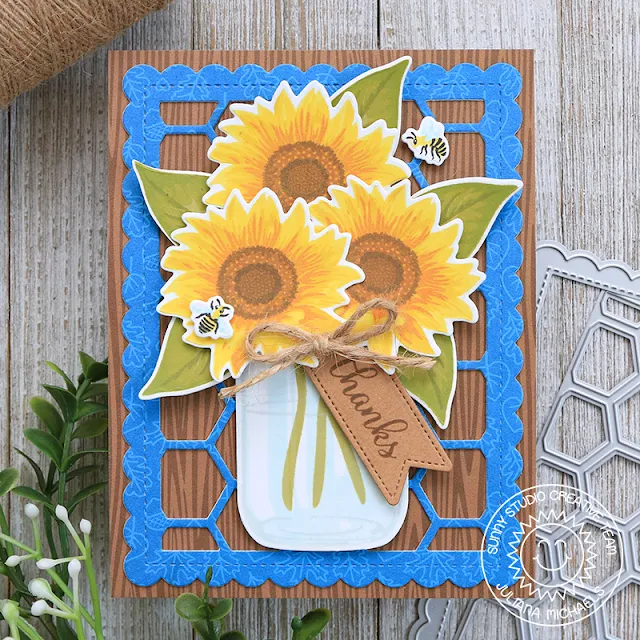
Hello friends! It's Juliana here today to share a card using the gorgeous Sunflower Fields Stamp Set. I've combined it with the Frilly Frames Hexagon and a fall color palette that captures the thankfulness we all begin to feel during the fall season.

Sunny Studio Stamps: Sunflower Fields Frilly Frames Vintage Jar Thank You Cards by Juliana Michaels

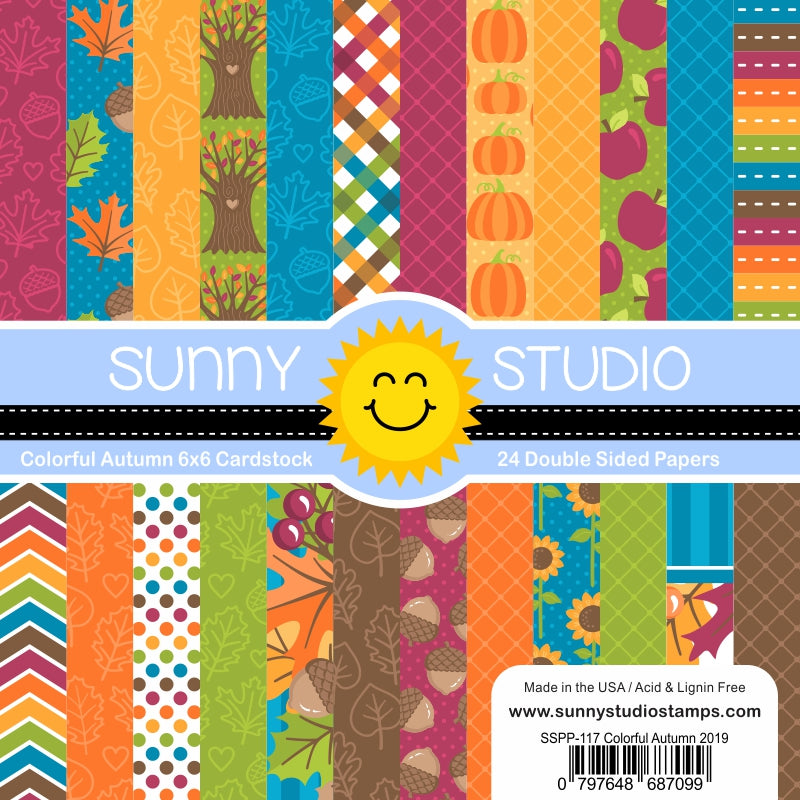
To begin, I created the background behind the flowers using the Frilly Frames Hexagon. I used Therm O Web Purple Tape to hold the scalloped mat and hexagon background together and then cut it out from a piece of patterned paper in the Colorful Autumn Paper Pad. I then layered this onto a piece of brown patterned paper from the Amazing Argyle Paper Pad.

Next, I stamped the sunflower and leaves from the Sunflower Fields Stamp using Scrapbook.com's Premium Hybrid Inks in the following colors: Petals - Lantern Light, Rubber Ducky, Honeycomb and Autumn Leaves. Flower Center – Gingerbread, Cinnamon and Dark Chocolate. Leaves – Pear, Guacamole, Succulent and Olive. I then die cut them using the Sunflower Fields Dies.

Sunny Studio Stamps: Sunflower Fields Frilly Frames Vintage Jar Thank You Cards by Juliana Michaels

I used the Vintage Jar Stamps and Vintage Jar Dies to create the jar for the sunflowers. I again used Scrapbook.com's Hybrid Inks and stamped the outline in Rainy Day and the inside with Sky Blue. I then stamped the flower stems with Succulent. Once the jar was ready, I layered on the flowers and leaves, adhering them with double sided foam tape for added dimension. I then added a tag to the jar using the pennant die from the Fancy Frames Rectangle Dies and a sentiment from the Sunflower Fields Stamps.

To complete the card I added a couple of the bees from the Sunflower Fields Stamps and a jute twine bow. When stamping the bees, I found it easier to stamp the black parts first and then line up the other parts of the stamps to achieve the layered design.

Thanks so much for stopping by today and checking out how I used the Sunflower Fields Stamps to create a fall themed thanks card!

---------------------------------------------------------

Hi friends, Angelica here with a floral thank you card using the new Sunflower Fields stamp set.

Sunny Studio Stamps: Sunflower Fields Frilly Frames Fancy Frames Thank You Cards by Angelica Conrad

Like all of Sunny Studio Stamps layered stamp sets, these flowers and leaves have amazing detail. I used my MISTI to stamp several flowers and leaves with a wide variety of inks. For the flowers: Altenew Buttercream, Warm Sunshine, Caramel toffee, Paper Bag, My Favorite Things Milk Chocolate, and Taylored Expressions Chocolate Truffle and Mocha. For the leaves: Altenew Frayed Leaf, Forest Glades, and Evergreen. I used the coordinating dies to die-cut them.

Sunny Studio Stamps: Sunflower Fields Frilly Frames Fancy Frames Thank You Cards by Angelica Conrad

For the background, I attached a panel of white card stock to iCraft Foam Adhesive, then die-cut the panel with the Frilly Frames Retro Petals dies. I adhered the panel to an A2 size card base.

Sunny Studio Stamps: Sunflower Fields Frilly Frames Fancy Frames Thank You Cards by Angelica Conrad

I used glue and foam squares to attach the flowers to the card. I stamped and gold heat-embossed the sentiment words from the stamp set. I trimmed them down to strips, and again used foam squares to attach them to the card.

I hope I have given you ideas on creating with this gorgeous new stamp set. That's all that I have for today. Thanks for stopping by!

Sunny Studio Supplies Used:

Vintage Jar Dies
Vintage Jar Dies
Shop at:
Sunny Studio
Vintage Jar Stamps
Vintage Jar Stamps
Shop at:
Sunny Studio
Fancy Frames- Rectangles
Shop at:
Sunny Studio
Amazing Argyle 6x6 Paper
Shop at:
Sunny Studio
Colorful Autumn 6x6 Paper
Shop at:
Sunny Studio
Sunflower Fields Stamps
Shop at:
Sunny Studio
Sunflower Fields Dies
Shop at:
Sunny Studio
Frilly Frames Hexagon Dies
Shop at:
Sunny Studio
Frilly Frames Retro Petals Dies
Shop at:
Sunny Studio

Monday, April 1, 2019

Therm-O-Web Cards with Lexa and Leanne


We are so excited to be partnering up with the Therm-o-web team this week. Both teams will be sharing projects all week long, combining products from both Therm-o-web and Sunny Studio Stamps, so we hope you'll stop by and visit their blog as well! 

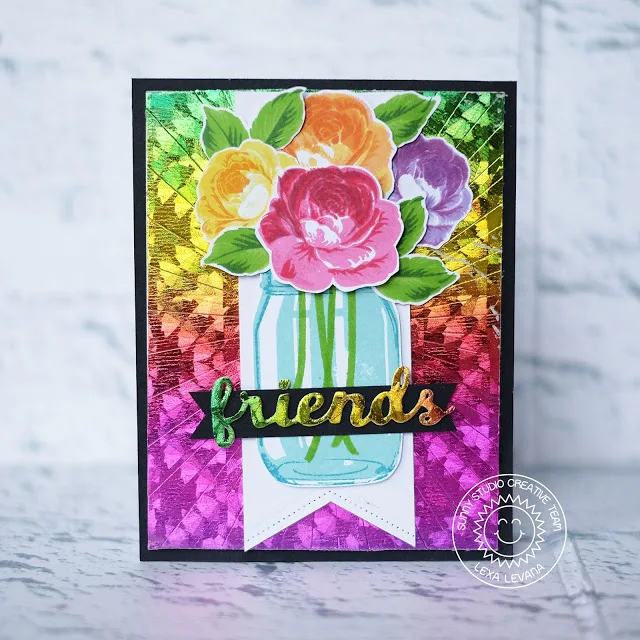
Hi there! Lexa here today with a collaboration card between Sunny Studio and Therm O Web. It's a new thing for me, believe it or not this is my very first time to use foil for my card. It's crazy how much I fall in love with the vibrant rainbow color of the foil. I knew it right away that I need to use this for my card together with the rainbow roses. 

Sunny Studio Stamps: Everything's Rosy Vintage Jar Botanical Backdrop Friends Card Congrats Card Lexa Levana Leanne West

I use Everything's Rosy Dies as the vocal point of my card. I stamped them in four colors (pink, yellow, orange and purple) after I finished with the stamping I use the coordinating dies to cut all of them at the same time. As for the background I use Deco Foil Foam Adhesive and layered it with Deco Foil Transfer Sheet in Rainbow then use Sunburst Embossing Folder. It works like magic, it's so easy and look so pretty at the same time. I found this technique on Therm-O-Web's YouTube channel. I use one of my most favorite of all time set from Sunny Studio, Vintage Jar Stamp to complete the card. It matches all the flower stamps from Sunny Studio.

Sunny Studio Stamps: Everything's Rosy Vintage Jar Botanical Backdrop Friends Card Congrats Card Lexa Levana Leanne West

With an extra leftover of the foiled foam adhesive, I use "friends" die cut from Friends & Family Word Dies for the sentiment over a black fishtail banner to make it pop out more. Behind the vase of roses I use a white cardstock with a cut on the bottom part using Fishtail Banner Dies. After I finished my card, I layered it on a piece of 4.25"x5.5" black card base. It creates a contrast which is so beautiful!

I hope you like today's card as much as I do. Thank you so much for stopping by and don't forget to leave me some love below. Have a wonderful day everyone!

--------------------------------------------------------

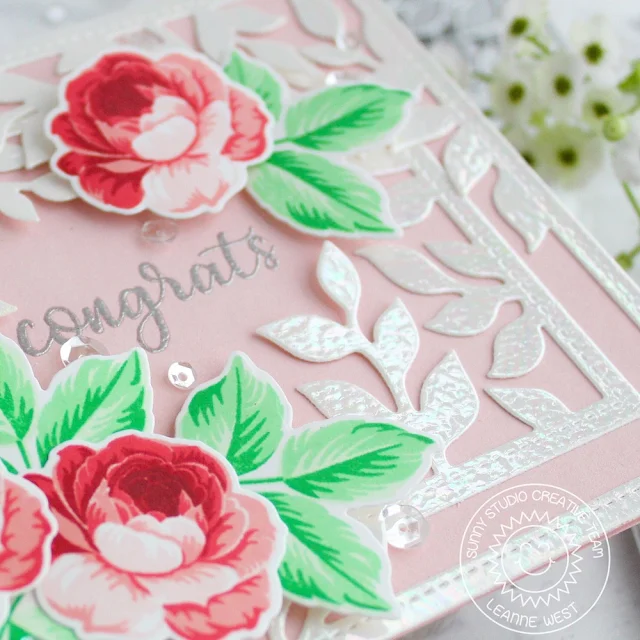
Hello there! Leanne here and I’m happy to be sharing a card today that’s combines Sunny Studio products with Therm-o-web’s gorgeous Deco Foil. This was the first time I’ve used foil on a card.  I received some Opal Deco Foil Transfer Sheets to use and I must say that the foiling adds a beautiful touch of iridescent luster to the card.   

Sunny Studio Stamps: Everything's Rosy Vintage Jar Botanical Backdrop Friends Card Congrats Card Lexa Levana Leanne West

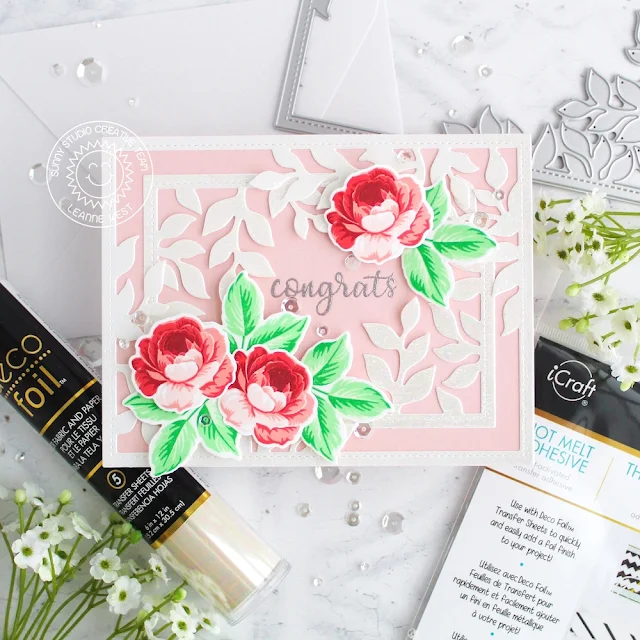
I wanted to make a wedding card using the Everything’s Rosy stamp set along with the Botanical Backdrop die. I started by applying the Opal foil to a sheet of white card stock. I used the Hot Melt Adhesive to apply the foil. It was very easy to do with a laminator. 

Sunny Studio Stamps: Everything's Rosy Vintage Jar Botanical Backdrop Friends Card Congrats Card Lexa Levana Leanne West

I then die cut two of the Botanical Backdrop from the foiled card stock. I adhered one full die cut backdrop onto an A2 sized panel of pale pink card stock. I then cut apart the second die cut backdrop and adhered it nested inside the first. The addition of the roses and leaves hide where I’ve cut the second backdrop and give the allusion of one complete frame.  

Sunny Studio Stamps: Everything's Rosy Vintage Jar Botanical Backdrop Friends Card Congrats Card Lexa Levana Leanne West

I stamped the leaves and smaller rose image from Everything’s Rosy. I adhered the roses and leaves with 3D White Foam Squares to add lots of dimension. I left room in the center of the card to silver heat emboss the greeting which is also from the Everything’s Rosy stamp set. For extra embellishment, I added some clear sparkling sequins scattered randomly around the card.

Ink colors used for the roses and leaves - Altenew cube ink sets (Tea Party & Green Meadows)

-----------------------------------------------------

We also have two giveaways going on this week - one here on the Sunny Studio blog and one over on the Therm-o-web blog. We are each giving away a $25 gift code to our online store, drawn from the comments on the blog this week. So make sure to visit both blogs each day this week to get in on those giveaways. Our winner will be announced on our blog on Sunday.

Sunny Studio Supplies Used:

Fishtail Banner Dies
Shop at:
Sunny Studio
Friends & Family Stamps
Shop at:
Sunny Studio
Vintage Jar Dies
Vintage Jar Dies
Shop at:
Sunny Studio
Vintage Jar Stamps
Vintage Jar Stamps
Shop at:
Sunny Studio
Sunburst Embossing
Sunburst Embossing
Shop at:
Sunny Studio
Everything's Rosy Stamps
Shop at:
Sunny Studio
Everything's Rosy Dies
Shop at:
Sunny Studio
Botanical Backdrop Die
Shop at:
Sunny Studio

Tuesday, February 12, 2019

Everything's Rosy Cards with Angelica and Juliana

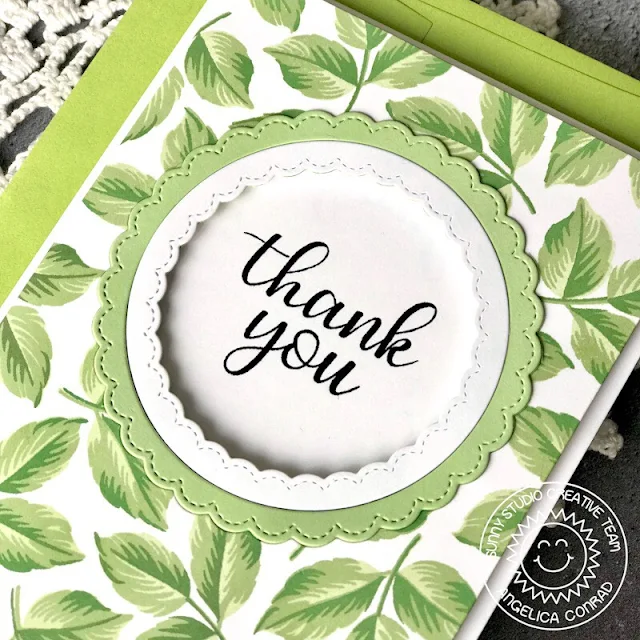
Hi friends, Angelica here with a Thank You card featuring leaves from Everything's Rosy stamp set. I love how detailed these leaves are! 

Sunny Studio Stamps: Everything's Rosy Fancy Frames Circles Everyday Greetings Thank You Card by Angelica Conrad

I started with a 5.25x4 piece of white card stock. I chose three green inks to use for the layered stamps, lightest to darkest: Altenew's Frayed Leaf and Forest Glades, and Taylored Expressions Peapod ink. I stamped the lightest layer first to make sure the leaves wouldn't touch each other. 

Sunny Studio Stamps: Everything's Rosy Fancy Frames Circles Everyday Greetings Thank You Card by Angelica Conrad

Next I used the middle size Fancy Frames Circle Die to die-cut a window. I also die-cut 2 more circles out of matching green card stock and white card stock. I flipped the stamped card front over and taped the first die cut circle back into place. I added foam tape to the back before flipping the paper back over. I glued on the card stock circles, making sure the scallops matched up perfectly. 

Sunny Studio Stamps: Everything's Rosy Fancy Frames Circles Everyday Greetings Thank You Card by Angelica Conrad

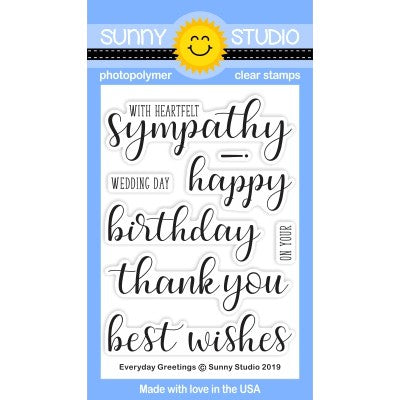
I stamped "Thank You" from the Everyday Greetings stamp set onto white card stock, stacking the words so the sentiment fit in the circle window. I attached the card front on to the sentiment, making sure the words were centered. My last step was adding the card front to an A2 size card base.

Thanks so much for stopping by!

--------------------------------------------------

Hello friends! It's Juliana Michaels here and today I'm sharing a hello card featuring the gorgeous layering stamp set called Everything's Rosy Stamp Set. I combined it with some other of my favorite stamps and dies to create this card.

Sunny Studio Stamps: Everything's Rosy Frilly Frames Lattice Vintage Jar Hello Card by Juliana Michaels

To get started, I die cut a piece of white cardstock using only the outside frame from the Frilly Frames Lattice Die. I then used the center part to emboss the design into the paper. I recommend following the directions for your specific die cutting machine to achieve this. I used Therm O Web Purple Tape to hold the die in place while I did the embossing. I then applied some Distress Oxide Ink in Peeled Paint to bring out the design. To complete the card front, I adhered this to a piece of blue patterned paper from the Flirty Flowers 6x6 Paper Pad.

Next, I stamped the images from the Everything's Rosy Stamp Set onto white cardstock using Scrapbook.com's Premium Hybrid Ink Pads. These ink pads are perfect for use with layering stamps.

Sunny Studio Stamps: Everything's Rosy Frilly Frames Lattice Vintage Jar Hello Card by Juliana Michaels

I then stamped the jar from the Vintage Jar Stamp Set. Once all of the stamping was finished, I die cut them using the Everything's Rosy Die Set and Vintage Jar Die Set. Before I assembled the flowers and leaves to create the bouquet, I stamped some stems from the Daffodil Dreams Stamp Set directly onto the jar.

Here is a list of the colors I used for the roses:  Lantern Light Yellow 1, Rubber Ducky Yellow 2, Daffodil Yellow 3, Honeycomb Yellow 4 and Sugar Cookie Tan 1.  For the leaves  and stems I used: Pear Green 1, Guacamole Green 2 and Olive Green 4. Finally, for the jar, I used Glass Slipper Sky 1 and Sky Blue Sky 2.

Sunny Studio Stamps: Everything's Rosy Frilly Frames Lattice Vintage Jar Hello Card by Juliana Michaels

Another thing I did before assembling the bouquet was to create a tag to tie around the jar. I die cut a tag using the circle tag die from the Build A Tag No. 1 Die Set. I then stamped “hello” onto it using the Chubby Bunnies Stamp Set. Once the tag was done, I tied it around the jar die cut with a piece of jute twine.

To complete the card, I then created the bouquet. I used double sided foam squares to give the flowers and leaves some dimension.

Thanks so much for stopping by today! I hope you were inspired by the hello card I created using the Everything's Rosy Stamp Set.

Sunny Studio Supplies Used:

Daffodil Dreams Stamps
Shop at:
Sunny Studio
Vintage Jar Dies
Vintage Jar Dies
Shop at:
Sunny Studio
Vintage Jar Stamps
Vintage Jar Stamps
Shop at:
Sunny Studio
Fancy Frames-Circle Dies
Shop at:
Sunny Studio
Build-A-Tag #1 Dies
Build-A-Tag #1 Dies
Shop at:
Sunny Studio
Flirty Flowers 6x6 Paper
Shop at:
Sunny Studio
Chubby Bunny Stamps
Chubby Bunny Stamps
Shop at:
Sunny Studio
Everything's Rosy Stamps
Shop at:
Sunny Studio
Everything's Rosy Dies
Shop at:
Sunny Studio
Frilly Frames Lattice Dies
Shop at:
Sunny Studio
Everyday Greetings Stamps
Shop at:
Sunny Studio