Showing posts with label Tranquil Tulips. Show all posts

Monday, March 20, 2023

Tranquil Tulips Cards with Bobbi and Cathy

Hi Sunny friends! It’s Bobbi sharing a card using the new Tranquil Tulips stamps and dies. These layered beauties are so pretty in any color. I’m using shades of oranges for my bouquet today. I arranged them in a rusty watering can using the Watering Can stamps and dies.

Sunny Studio Stamps: Tranquil Tulips Everyday Card by Bobbi Lemanski (featuring Watering Can)

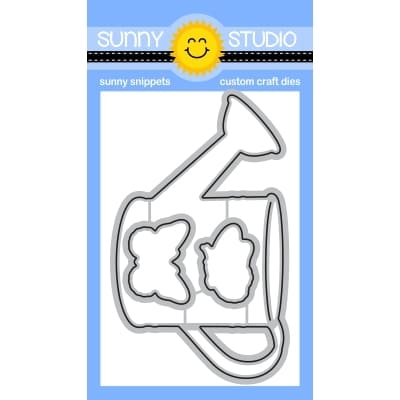
To make this 5″ X 7″ card, I stamped the tulips, stems and leaves following the layered numbers provided on the stamp set sheet. I also stamped the watering can in Ranger Distress Oxide Ink in Lost Shadow and colored it using Copic Sketch Markers in YR27, YR24, E55, E53, E50, and E40. I also used a few cool grays to shade some of the Lost Shadow inked lines. The YRs create the rusty spots! I cut the blossoms, leaves, and stems as well as the watering can using the coordinating dies.

Sunny Studio Stamps: Tranquil Tulips Everyday Card by Bobbi Lemanski (featuring Watering Can)

For the card base, I attached a grey and white paper from our Subtle Grey Tones pattern paper pack for the background and two 1/8″ strips of orange and peach to the bottom of the 6″ long pattern, leaving 1″ strip of white at the bottom of the panel. I stamped the "thinking of you" sentiment from the Watering Can set in the white space. I arranged the tulips in the watering can and added a hemp twine bow to the can’s handle to finish the card.


Thanks for stopping by today. If you want to see more ideas and inspiration from me, subscribe to my blog, BobbiHartDesign.com. I’ll send you updates on new posts! You can also find me on Instagram as @BobbiHartDesign and on Facebook as BobbiHartDesign.


-------------------------------------------------


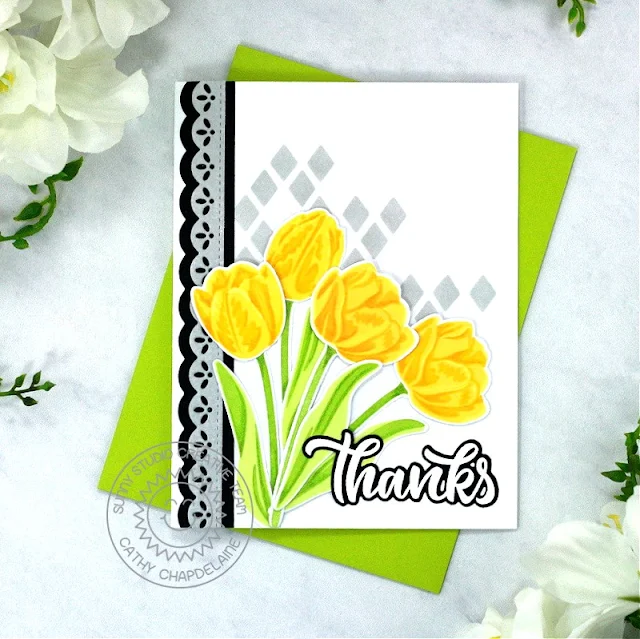
Hey friends! Cathy here today and Spring has sprung in my neck of the woods. I couldn’t be happier about the warmer weather! The tulips are blooming and inspired me on this card today featuring the beautiful Tranquil Tulips Stamps.


Sunny Studio Stamps: Tranquil Tulips Everyday Card by Cathy Chapdelaine (featuring Ribbon & Lace Border Dies, Big Bold Greetings, Frilly Frame Dies)
 

This is an A2 size card and I began with the lace borders on the left side of the card front. First, I inked a 1” x 7” piece of white cardstock with Lost Shadow Distress ink and placed a doily lace die from the Ribbon & Lace Border Dies face down along one edge. I then placed the straight stitched die from the same dies face down right next to the lace die, taped them in place and die-cut the cardstock. I cut a piece of black cardstock 3/4" x 7” and die-cut one edge with a small scallop border die from the Ribbon & Lace Border Dies. I adhered the gray piece centered on the black piece and adhered them to the card front. I then trimmed the excess from the top and bottom edges.


To add a little more gray and extra interest, I adhered gray diamonds to a portion of the card front. I first inked a piece of white cardstock with Lost Shadow Distress ink and die-cut it using the lattice portion of the Frilly Frames Lattice Die. I placed the lattice frame on the card front as a guide and adhered the die-cut diamonds in the pattern shown.


Sunny Studio Stamps: Tranquil Tulips Everyday Card by Cathy Chapdelaine (featuring Ribbon & Lace Border Dies, Big Bold Greetings, Frilly Frame Dies)
 

Next, I stamped the Tranquil Tulips Stamps on white cardstock and die-cut them using the coordinating dies. I adhered them to the card front and trimmed the excess along the bottom edge of the card.


To finish, I stamped the “Thanks” sentiment from the Big Bold Greetings Stamps in Versamark ink on black cardstock, heat embossed it in white and die-cut it using the coordinating dies.


I hope you enjoyed and thanks for stopping by today! For more inspiration, please visit my blog www.inkredibleadventures.com and you can also find me on Instagram as @cathy.chapdelaine.


Sunny Studio Supplies Used:

Frilly Frames Lattice Dies
Shop at:
Sunny Studio
Subtle Grey Tones Paper
Shop at:
Sunny Studio
Watering Can Stamps
Watering Can Stamps
Shop at:
Sunny Studio
Watering Can Dies
Watering Can Dies
Shop at:
Sunny Studio
Big Bold Greetings Stamps
Shop at:
Sunny Studio
Big Bold Greetings Dies
Shop at:
Sunny Studio
Tranquil Tulips Stamps
Shop at:
Sunny Studio
Tranquil Tulips Dies
Shop at:
Sunny Studio
Ribbon & Lace Dies
Ribbon & Lace Dies
Shop at:
Sunny Studio

Monday, March 13, 2023

Spring Fever Paper Focused Card by Cathy and Bobbi

Hey friends! Cathy here today and I’ve got a Spring wedding card for you pairing up the adorable penguins from the Wedded Bliss Stamps with the pretty papers in the Spring Fever Paper Pack.

Sunny Studio Stamps: Spring Fever Paper Focused Wedded Bliss Card by Cathy Chapdelaine (featuring Stitched Arch Dies, Ribbon & Lace Dies)

This is a mini slimline card (card base is 6 1/4" x 6 1/2", scored on the 6 1/2" side at 3 1/4" and folded in half) and I began by cutting a 3” x 6” white cardstock panel for the card front. Starting at the top of the panel, I adhered a 2” x 3” piece of the cloud paper.

Next, I die-cut an arch from ivory and silver metallic cardstock using the 2nd and 3rd largest Stitched Arch Dies. I cut along the inside stitched line of the silver arch and adhered the thin arch piece to the ivory arch for a little extra detail. I then adhered the arch to the cardstock panel 1/4" from the top and centered.

Next, I adhered a 3/4" x 3” piece of the grass paper overlapping the bottom portion of the arch and lined up with the bottom edge of the cloud paper. I cut the pink roses paper 3 1/8” x 3” and adhered it to the bottom of the cardstock panel. For some stitched detail, I die-cut the pink polka dot paper with the ribbon die from the Ribbon & Lace Border Dies, cut it to 3” long and adhered it overlapping the grass paper and the pink roses paper. I then adhered the cardstock panel to the card base.

Sunny Studio Stamps: Spring Fever Paper Focused Wedded Bliss Card by Cathy Chapdelaine (featuring Stitched Arch Dies, Ribbon & Lace Dies)

For the sentiment, I die-cut a label from the Sliding Window Dies from white cardstock and heat embossed the sentiment from the Wedded Bliss Stamps with silver embossing powder. I inked over the sentiment lightly with Spun Sugar Distress ink. I then die-cut the label twice from silver metallic cardstock and layered them beneath the sentiment piece on the card front.

To finish, I inked a piece of white cardstock with Kitsch Flamingo Distress ink and Twisted Citron Distress ink and die-cut leaves and flowers from the Wonderful Windows Dies. I adhered these to the arch and below the sentiment. I stamped the adorable newlyweds from the Wedded Bliss Stamps on Neenah Classic Crest 80lb solar white cardstock, colored them with Copics and die-cut them using the coordinating dies.

I hope they made you smile and thanks for stopping by today! For more inspiration, please visit my blog www.inkredibleadventures.com and you can also find me on Instagram as @cathy.chapdelaine.

--------------------------------------------

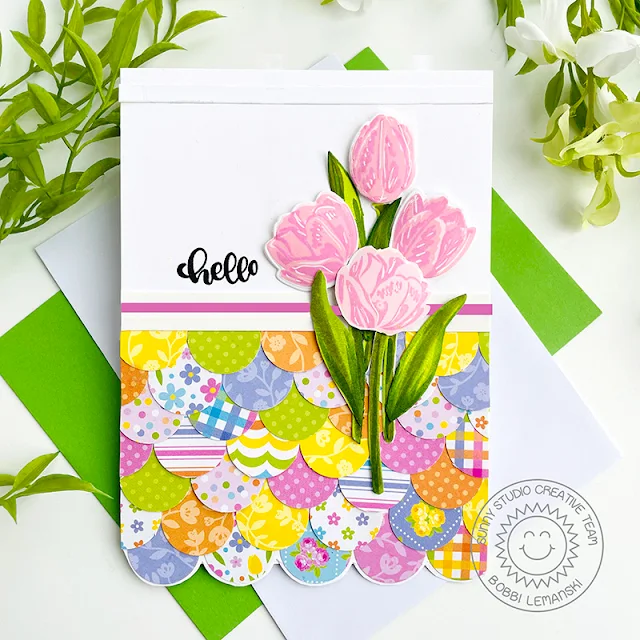
Hello! It’s Bobbi here sharing an all-occasion card featuring the fun designs of the Spring Fever paper pack. From dots to florals and stripes, this pack of 6″ X 6″ paper includes all the spring feels one needs. I created this card using 1″ circles of the fun patterns in the Spring Fever collection. This card also features the Tranquil Tulips stamp set and dies that’s new for the spring season, too.

Sunny Studio Stamps: Spring Fever Paper Focused Tranquil Tulips Card by Bobbi Lemanski

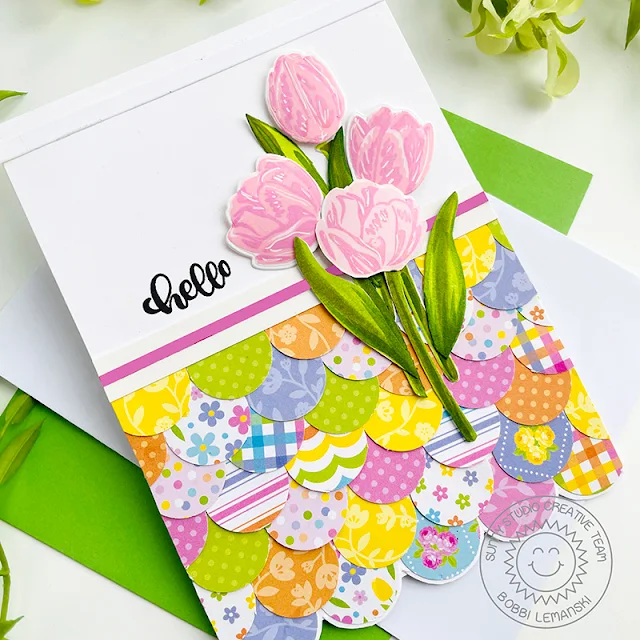
To make this 5″ X 7″ card, I created the card front panel by adhering 1″ circles to the base of the panel, offsetting and overlapping approximately half of the circle below it. I adhered the rows, from the bottom to the center of the panel, finishing with a 1/2″ strip of white cardstock and an 1/8″ strip of pink cardstock layered on top. I also added another 1/2″ white strip near the top of the panel, too. I hand cut the bottom edge into scallops, following the curve of the circles, for added interest.

Sunny Studio Stamps: Spring Fever Paper Focused Tranquil Tulips Card by Bobbi Lemanski

I stamped the four Tranquil Tulips in shades of pink for the blossoms and greens for the leaves. I attached a bouquet of tulips over the patterns. Finally, I stamped the "hello" sentiment from the Spring Bouquet set in black, right to the left of the tulips.

Thanks for stopping by today. If you want to see more ideas and inspiration from me, subscribe to my blog, BobbiHartDesign.com. I’ll send you updates on new posts! You can also find me on Instagram as @BobbiHartDesign and on Facebook as BobbiHartDesign.

Sunny Studio Supplies Used:

Sliding Window Dies
Sliding Window Dies
Shop at:
Sunny Studio
Stitched Arch Dies
Stitched Arch Dies
Shop at:
Sunny Studio
Wedded Bliss Stamps
Wedded Bliss Stamps
Shop at:
Sunny Studio
Wedded Bliss Dies
Wedded Bliss Dies
Shop at:
Sunny Studio
Spring Bouquet Stamps
Shop at:
Sunny Studio
Tranquil Tulips Stamps
Shop at:
Sunny Studio
Tranquil Tulips Dies
Shop at:
Sunny Studio
Ribbon & Lace Dies
Ribbon & Lace Dies
Shop at:
Sunny Studio
Wonderful Windows Dies
Shop at:
Sunny Studio
Spring Fever Paper
Spring Fever Paper
Shop at:
Sunny Studio

Tuesday, March 7, 2023

Big Bold Greetings Cards with Isha and Lien

Hello everyone, Isha here with you! Today I have a CAS floral card featuring the Big Bold Greetings stamp and coordinating dies. These sentiments are really lovely with beautiful fonts and size.

Sunny Studio Stamps: Big Bold Greetings Birthday Card by Isha Gupta (featuring Tranquil Tulips, Fancy Frame Dies)

I started by sponging squeezed lemonade distress ink to a white panel. Flick some water and white paint. I then stamped the tulips and leaves from the Tranquil Tulips stamp set, it has got layering stamps for beautiful results. Die-cut using the coordinating dies

Adhere the inside of the Fancy Frame Rectangle to the white panel. Adhere this panel to a pink card base.

Sunny Studio Stamps: Big Bold Greetings Birthday Card by Isha Gupta (featuring Tranquil Tulips, Fancy Frame Dies)

Adhere the images. Stamp the word "Happy Birthday" from the Big Bold Greetings stamp set using Versamark ink, sprinkle WOW! oiled slate embossing powder. Heat set and die-cut using the coordinating dies. Die-cut the word using dark pink card, stack this behind the embossed sentiment slightly offset.

Adhere to the card. Thank you for stopping by and have a nice day!

------------------------------------------

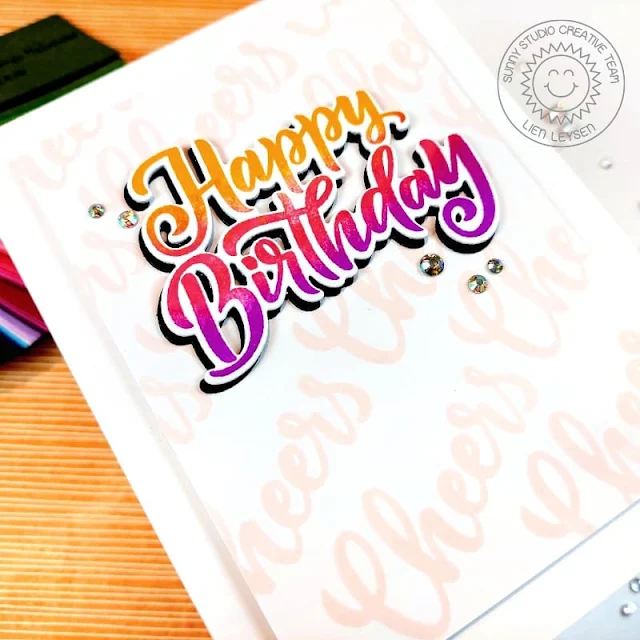
Hi crafty friends! It's Lien here, back with a very clean and simple card that makes your sentiments the star of the show. 

Sunny Studio Stamps: Big Bold Greetings Birthday Card by Lien Leysen

I'm using the 
Big Bold Greetings stamp set today and I started out by stamping my main Happy Birthday sentiment. I wanted to make it bright so I thought I'd do some ombre stamping with it. This is a very easy way to step up your large sentiment stamps if you have a Misti or another stamping tool. 

It's important to start inking with your lightest shade because you want to avoid cleaning your stamp as much as possible for the best result. I started with orange, inking up the top third of my stamp and dabbing away the harsh edge with a cloth before stamping it down onto my white cardstock. I then added some pink ink in the center and repeated the process a third time with purple. 

Sunny Studio Stamps: Big Bold Greetings Birthday Card by Lien Leysen

I cut it out with the Coordinating dies, also cutting out additional white layers and one layer of black cardstock. I'll stack the white layers behind the stamped sentiment and add those slightly offset on top of the black to add an additional shadow. 

For my background I used the Cheers stamp from the same Big Bold Greetings stamp set and stamped it repeatedly, diagonally across my background. I trimmed it down to leave a nice white border and propped it up on a piece of cardboard for sturdy dimension. I added the die cut sentiment on top and finished it up with a handful of Iridescent Jewels.

Sunny Studio Supplies Used:

Fancy Frames- Rectangles
Shop at:
Sunny Studio
Big Bold Greetings Stamps
Shop at:
Sunny Studio
Big Bold Greetings Dies
Shop at:
Sunny Studio
Tranquil Tulips Stamps
Shop at:
Sunny Studio
Tranquil Tulips Dies
Shop at:
Sunny Studio

Thursday, March 2, 2023

Tranquil Tulips Cards with Waleska and Marine

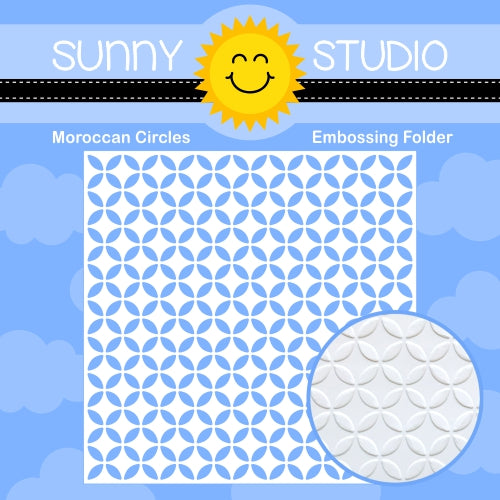
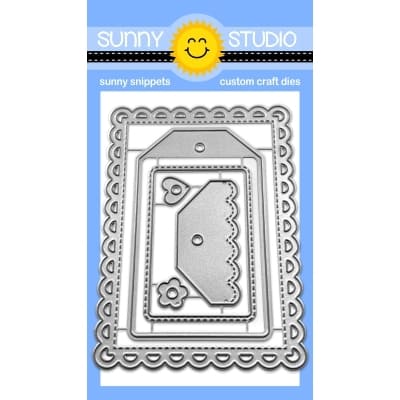
Hello there friends, Waleska here! My card today features the beautiful Tranquil Tulips Stamps from the most recent release mixed with the Moroccan Circles Embossing folder and the Mini Mat and Tag Dies #3.

Sunny Studio Stamps: Tranquil Tulips Thank You Card by Waleska Galindo (featuring Mini Mat & Tag Dies, Moroccan Embossing Folder)

For this card I wanted the Tulips to be the focal point in my card, to do that I decided to leave the tulips very colorful and the background white so they can really stand out.  I started by stamping the different layers of the tulips with the following inks: Hero Arts Ombre Pink Ink, Lawn Fawn Plastic Flamingo Ink and Lawn Fawn Lobster Ink, for the leaves I used Lawn Fawn Jalapeno Ink and Lawn Fawn Noble Fir Ink. I hand cut the tulips and arrange them in the way I wanted.

Sunny Studio Stamps: Tranquil Tulips Thank You Card by Waleska Galindo (featuring Mini Mat & Tag Dies, Moroccan Embossing Folder)

I then embossed a white panel with the Moroccan Circles Embossing folder and cut 4 of the scalloped rectangle from the Mini Mat and Tag Dies #3, I wanted to have dimension to this piece so I adhere them together.  Finally I assemble my card by using the pattern paper as a base layer from the Dots and Stripes Jewel Tones, then the embossed panel and finally the small scalloped rectangle, my sentiment is from the Big Bold Greetings.

Thank you so much for stopping by today I hope you will be inspired to create today by my post!

------------------------------------------

Hello crafty friends! Marine here, so happy to be back on the blog today with a bright & beautiful bouquet showcasing Tranquil Tulips! It's no secret that I love to create little scenes with multiple images and details, but I also really love to play with the amazing layering stamp sets we have in the Sunny Studio catalogue.

Sunny Studio Stamps: Tranquil Tulips Thank You Card by Marine Simon (featuring Thank You Word Dies, Words of Gratitude)

I started off with the background. I knew that the flowers, watering can & shaker accessories would be very bright, and I didn't want all those elements to get lost on a too colorful background, so I picked a light pattern paper from the Subtle Grey Tones paper pack, and cut a 5,5 x 4,25 inches panel. Next I took a sheet of plastic from my stash a little bit bigger than my panel, added double sided tape along the four edges, placed my grey panel in the middle of it, and while keeping the panel in place with my left hand, I cut the four plastic corners off, and this way created four plastic tabs on each side of the grey panel. I folded and attached three of those tabs at the back of the grey panel, added a mix of sequins, jewels & confetti inside the plastic pocket, and then folded and attached the fourth tab to totally close the pocket. I attached my infinity shaker panel on a white card base using double sided tape, and then moved on to the images.

Sunny Studio Stamps: Tranquil Tulips Thank You Card by Marine Simon (featuring Thank You Word Dies, Words of Gratitude)

I stamped the tulips and leaves from Tranquil Tulips, as well as the watering can from Watering Can on Strathmore bristol smooth cardstock using distress oxide inks. For the tulips, I used spun sugar + kitsch flamingo + picked raspberry. For the leaves, I used shabby shutters + mowed lawn. And for the watering can, I used salvaged patina + hickory smoke. Once all the images were stamped, I used the coordinating dies to cut them all, and then I attached everything on the infinity shaker panel using foam squares.

And finally I created my greeting in two parts. I started by cutting the word "Thanks" out of gold mirror cardstock using a die from the Thank You Words die set. Next I white heat embossed the phrase "for always being there" from Words Of Gratitude on a dark grey slim banner, and then I attached both elements on the bottom left corner of my card using liquid glue and foam squares.

And that's it! I hope that you like this new shaker card! Feels like Spring, right? Thanks for stopping by, and see you next week with more flowers!

Sunny Studio Supplies Used:


Words of Gratitude Stamps
Shop at:
Sunny Studio
Thank You Words Die
Thank You Words Die
Shop at:
Sunny Studio
Dots & Stripes Jewel Tones 6x6 Paper
Shop at:
Sunny Studio
Moroccan Circles Embossing
Shop at:
Sunny Studio
Subtle Grey Tones Paper
Shop at:
Sunny Studio
Watering Can Stamps
Watering Can Stamps
Shop at:
Sunny Studio
Watering Can Dies
Watering Can Dies
Shop at:
Sunny Studio
Mini Mat & Tag 3 Dies
Shop at:
Sunny Studio
Tranquil Tulips Stamps
Shop at:
Sunny Studio
Tranquil Tulips Dies
Shop at:
Sunny Studio

Tuesday, February 7, 2023

Tranquil Tulips Cards with Isha and Lien

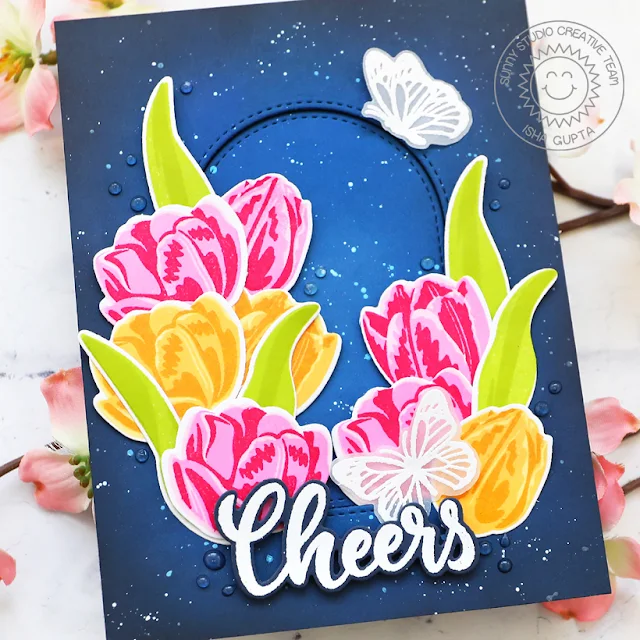
Hello everyone! Isha here with a floral card featuring the Tranquil Tulips stamps and dies. I love the layering stamp as it creates dimension without spending much time coloring.

Sunny Studio Stamps: Tranquil Tulips Card by Isha Gupta (featuring Stitched Arch Dies, Big Bold Greetings, Watering Can)

I started by sponging various blue and black soot distress inks to create the ombré background. Die-cut the window using the Stitched Arch dies. Adhere the center arc to a blue card base. Now adhere the negative part using 3d foam to the card base. Flick white paint.

Sunny Studio Stamps: Tranquil Tulips Card by Isha Gupta (featuring Stitched Arch Dies, Big Bold Greetings, Watering Can)

Stamp the images using pinks and yellows for the tulips and greens for the leaves, die-cut using the coordinating dies. Adhere to the card. Stamp the word "CHEERS" from the Big Bold Greetings stamp, using versamark ink onto a dark blue card, sprinkle WOW! opaque white embossing powder and heat set. Die-cut using the coordinating dies. Stamp and emboss the butterflies onto vellum from the Watering Can stamp, die-cut using the dies

Assemble all the images to the card. To finish I added some nuvo jewel drops in grey mist.

Thank you for dropping by and have a nice day.
________________________________________

Hi crafty friends! It's Lien here back with a fun field of tulips!

Sunny Studio Stamps Tranquil Tulips Spring Flower Field Hello Card by Lien Leysen
For this card I started out by stamping out the Tranquil Tulips quite a few times.  I wasn't entirely sure what I wanted to make yet, and mass producing some images to use later on is a great way to clear my head and get into a crafty zone. 

To mass produce layered stamped images like this, I die cut a bunch of blank pieces first with the coordinating dies. I also saved a piece of paper with all the negative spaces of the flowers in it. On the back of that, I put a bit of purple tape so the sticky side would peak through to the front. I put that piece of cardstock in my Misti and puzzled in the blank die cuts. I line up the first layer of the stamps and stamp it on all of my blanks first in different colors. I used purples, pinks, oranges and yellows. 

After the first layer is stamped on all of the blank die cuts, I puzzle them back into the guide paper and line up the second layer of the stamps. I do this for all the layers of these beautiful tulips. This saves you time because you don't have to line up the dies for every single image. 

Sunny Studio Stamps Tranquil Tulips Spring Flower Field Hello Card by Lien Leysen

For my background I used Distress Spray Stains on watercolor cardstock for a quick watercolor look. You can also do this by adding a lot of water to your ink smooshing.

I propped all of the tulips up on foam tape at the bottom of the card and finished it by die cutting a sentiment using the Hayley alphabet die sets, I used both the uppercase alphabet and the lowercase alphabet. Before die cutting the letters, I actually put a piece of foam tape on the back of my colored cardstock. It's easy to die cut through thin foam tape and make your own puffy stickers.

Sunny Studio Supplies Used:

Stitched Arch Dies
Stitched Arch Dies
Shop at:
Sunny Studio
Watering Can Stamps
Watering Can Stamps
Shop at:
Sunny Studio
Watering Can Dies
Watering Can Dies
Shop at:
Sunny Studio
Big Bold Greetings Stamps
Shop at:
Sunny Studio
Big Bold Greetings Dies
Shop at:
Sunny Studio
Tranquil Tulips Stamps
Shop at:
Sunny Studio
Tranquil Tulips Dies
Shop at:
Sunny Studio
Hayley Lowercase Alphabet Dies
Shop at:
Sunny Studio
Hayley Uppercase Alphabet Dies
Shop at:
Sunny Studio