Showing posts with label Quilted Hearts Dies. Show all posts

Tuesday, December 27, 2022

Puppy Love Cards with Kavya and Isha

Hi folks, Kavya here. I am back with another project that's a Valentine's Day special release set - Puppy Love! It might be created with Valentine's Day in mind but it can be used for any occasion :) Today's project is a generic card that can be used throughout the year.

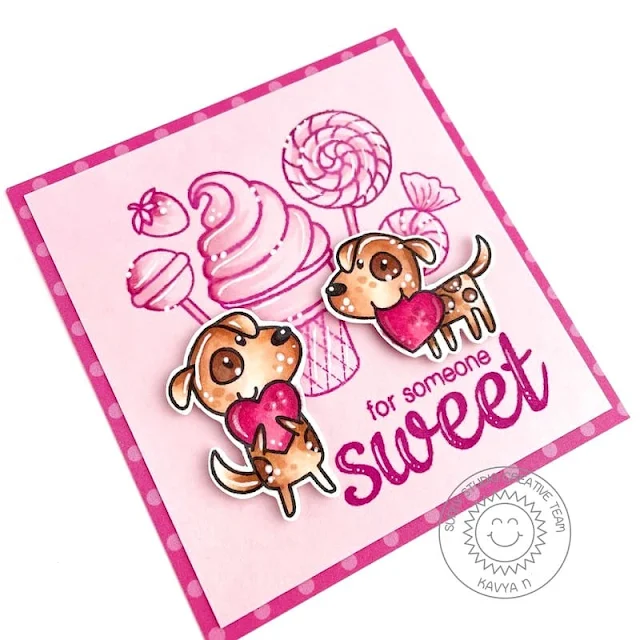
Sunny Studio Stamps: Puppy Love Love Themed Card by Kavya (featuring Candy Shoppe, Sweet Shoppe)

I started off by stamping images from Candy Shoppe and Sweet Shoppe stamps sets using pink dye ink on pale pink cardstock. I also stamped a sentiment from the sets using pink dye ink. Then, I added some highlights and shadows using a matching copic marker to make it a bit more dimensional. 

Sunny Studio Stamps: Puppy Love Love Themed Card by Kavya (featuring Candy Shoppe, Sweet Shoppe)

Later, I stamped and colored images from Puppy Love and adhered them to the card base. I finished off my card by matting the pink cardstock on some patterned paper from Dots & Stripes Pastels Paper.

I hope you liked this project! Happy Crafting.

---------------------------------------

Hello everyone! Isha today with a cute card featuring the Puppy Love stamps and coordinating dies. These puppies are so adorable.

Sunny Studio Stamps: Puppy Love Love Themed Card by Isha Gupta (featuring Quilted Heart Dies, Stitched Heart Dies)

I started by die-cutting the background from white cardstock using the Quilted Heart Landscape die. I then adhered it to a blue card base. I then die-cut a heart from the Stitched Heart 2 dies. Sponged some tumbled glass distress ink.

Sunny Studio Stamps: Puppy Love Love Themed Card by Isha Gupta (featuring Quilted Heart Dies, Stitched Heart Dies)

Next stamp the sentiment and the images from the Puppy Love stamp, colour using copic markers and die-cut using the coordinating dies. Adhere the heart to the card using 3d foam. Adhere the images using 3d foam.

Thank you for dropping by and have a nice day!

Sunny Studio Supplies Used:

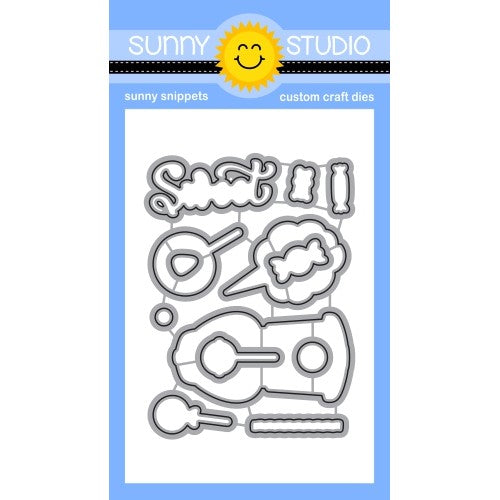
Sweet Shoppe Dies
Sweet Shoppe Dies
Shop at:
Sunny Studio
Sweet Shoppe Stamps
Sweet Shoppe Stamps
Shop at:
Sunny Studio
Candy Shoppe Stamps
Candy Shoppe Stamps
Shop at:
Sunny Studio
Candy Shoppe Dies
Candy Shoppe Dies
Shop at:
Sunny Studio
Dots & Stripes Pastels 6x6 Paper
Shop at:
Sunny Studio
Quilted Hearts Landscape
Shop at:
Sunny Studio
Stitched Heart 2 Dies
Shop at:
Sunny Studio
Puppy Love Stamps
Puppy Love Stamps
Shop at:
Sunny Studio
Puppy Love Dies
Puppy Love Dies
Shop at:
Sunny Studio

Thursday, August 11, 2022

Watering Can Cards with Marieke and Marine

Hello Sunny Studio friends, Marieke here. Today I hope to inspire you with an underwater card. 

Sunny Studio Stamps: Watering Can Card by Marieke Slaats (featuring Fintastic Friends, Tropical Scenes)

As always I made the background first. I ink blended the colors Cracked Pistachio, Peacock Feathers and Mermaid Lagoon and adhered the panel onto a white topfold base card. 

Die cut the watering can using the Watering Can dies and colored it up using my Copic markers. Then I stamped the inner second layering stamp out of the Watering Can stamp using a black ink. Heat set the sentiment that comes in the set using white embossing powder.

Sunny Studio Stamps: Watering Can Card by Marieke Slaats (featuring Fintastic Friends, Tropical Scenes)

Used Copic Colors:
Sand - E57, E55, E53, E51, E50
Green - YG67, YG63, YG03, YG01
Yellow - Y17, Y15, Y13, Y11
Pink - RV17, RV14, RV13, RV11
Stones - W6, W4, W2, W1
Blue - B04, B02, B00, B000
Purple - BV17, BV04, BV1
Teal - BG15, BG13, BG11, BG10
Pink / Red - R24, R22, R20
Watering Can - N10, N8, N6, N5, N3, N2 / YR27

Sunny Studio Stamps: Watering Can Card by Marieke Slaats (featuring Fintastic Friends, Tropical Scenes)

Stamped the images out of Fintastic Friends and Tropical Scenes stamps. Colored them up using my Copic markers and die cut them using the Tropical Scenes and Fintastic Friends dies.

Adhered all the images onto the card using foam tape or glue and finished the card by adding some clear drops.

----------------------------------------------

Hey crafty friends, happy Thursday! Marine here, super happy to be back this week with another stamp layering card! Today I'm showcasing the Watering Can stamp set again, but this time, I'm putting some beautiful sunflowers from the Sunflower Fields stamp set in it. A good way to officially start making fall cards!

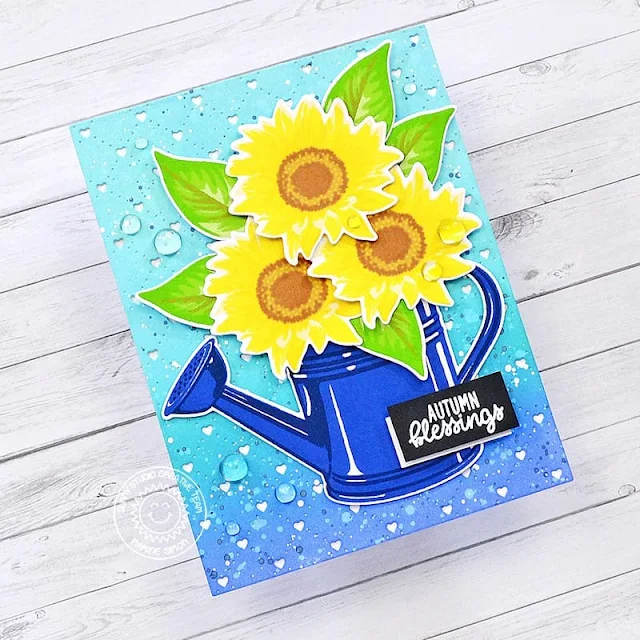
Sunny Studio Stamps: Watering Can Card by Marine Simon (featuring Sunflower Fields, Quilted Hearts Dies)

I started by stamping the watering can. I wanted it to bring a bold contrast with the sunflowers, so I stamped it using dark blue inks. Next I stamped some sunflowers and leaves, and to make sure that I was layering the stamps correctly, I used the guide on the Sunflower Fields page to help me line up everything. 

And just like the Lovely Lilacs card I shared last week, I used Lawn Fawn dye inks to stamp all the images:
Watering can: blue jay + deep sea
Leaves: celery stick + freshly cut grass + jalapeno

Sunny Studio Stamps: Watering Can Card by Marine Simon (featuring Sunflower Fields, Quilted Hearts Dies)

Next step was to create the background. I cut a Quilted Heart Portrait panel out of bristol cardstock, and used salvaged patina, peacock feathers and blueprint sketch oxide inks to color it. I added lots of texture to that panel, and once it was dry, I attached it to a piece of white cardstock.

I stuck the watering can and the sunflowers using 1mm and 2mm foam squares, and next I added my sentiment. I white heat embossed the "Autumn blessings" sentiment from Happy Harvest on black cardstock, trimmed it into a small banner and added a piece of white cardstock to create an outline, and used clear foam squares to stick that banner on the panel.

Sunny Studio Stamps: Watering Can Card by Marine Simon (featuring Sunflower Fields, Quilted Hearts Dies)

I attached the panel to a white card base, and finally glued a few clear droplets here and there to bring a touch of shine to the card. And that's it, super pretty and bright, I hope that you like it. I have a process video for you, so feel welcome to watch it for more information (click on the image above). Thank you so much for stopping by, and see you next week!

Sunny Studio Supplies Used:

Happy Harvest Stamps
Shop at:
Sunny Studio
Sunflower Fields Stamps
Shop at:
Sunny Studio
Sunflower Fields Dies
Shop at:
Sunny Studio
Tropical Scenes Stamps
Shop at:
Sunny Studio
Tropical Scenes Dies
Shop at:
Sunny Studio
Quilted Hearts Portrait
Shop at:
Sunny Studio
Fintastic Friends Stamps
Shop at:
Sunny Studio
Fintastic Friends Dies
Shop at:
Sunny Studio
Watering Can Stamps
Watering Can Stamps
Shop at:
Sunny Studio
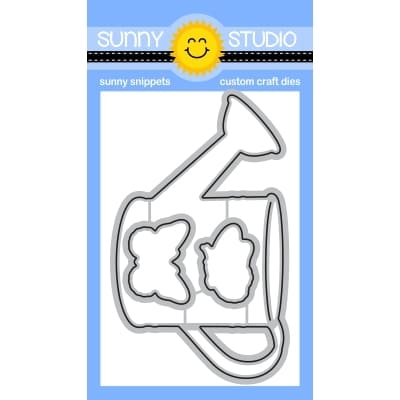
Watering Can Dies
Watering Can Dies
Shop at:
Sunny Studio

Wednesday, July 6, 2022

Wedded Bliss Cards with Gladys and Alma

Hello friends! Gladys here with a wedding card featuring the cute Wedded Bliss stamp set and dies.

Sunny Studio Stamps: Wedded Bliss Penguin Themed Wedding Cards by Gladys Marcelino (featuring Scalloped Oval Mat Dies, Quilted Hearts Dies)

To start I used the Quilted Hearts Landscape die to cut from light pink cardstock. Then I cut a light blue cardstock measuring 4 1/4" x 5 1/2" and adhered it to the back of the pink cardstock to add color to the hearts. I also used the Scalloped Oval Mat 3 die to cut from white cardstock which I used to ground my image. I ink blended tumbled glass to the center to tie in with the blue cardstock.

Sunny Studio Stamps: Wedded Bliss Penguin Themed Wedding Cards by Gladys Marcelino (featuring Scalloped Oval Mat Dies, Quilted Hearts Dies)

I colored the adorable penguin couple using Copic markers then cut with the coordinating dies. Next I stamped the sentiment on the scalloped mat and foam mounted the penguins right below it. I also used foam tape on the back of the scallop then adhered it to the quilted hearts backdrop to add more dimension. I completed the card by adding some white pearl jewels.

Thank you so much for joining me today. Have a wonderful week!!

---------------------------------------------

Hello, this is Alma and I want to show you a wedding cupcake card. For today's card I've chosen a slim line format.


Sunny Studio Stamps: Wedded Bliss Penguin Themed Wedding Cards by Alma Störk (featuring Cupcake Shaped Dies)


In the center of my card I created a big three dimensional cupcake with the amazing Cupcake Shape Dies. For the cream topping I used Subtle Grey Tones 6x6 Paper. I punched the cupcake pieces 5 times and stuck them together with glue. Then I folded the cupcakes in half and added glue on the fold line of the cupcakes. I wiped the background of the card with the Distress Oxide Inks Spun Sugar. Finally I set some highlights with the white gel pen.


Sunny Studio Stamps: Wedded Bliss Penguin Themed Wedding Cards by Alma Störk (featuring Cupcake Shaped Dies)

Then I stamped and colored the penguins from the Wedded Bliss Stamps and punched them with Wedded Bliss Dies. After that I assembled all the individual parts and stamped the hearts and the text "wedded Bliss" from the Wedded Bliss Stamps.


Don't you want to eat a piece of this yummy wedding cake?


Sunny Studio Supplies Used:

Cupcake Shape Dies
Cupcake Shape Dies
Shop at:
Sunny Studio
Subtle Grey Tones Paper
Shop at:
Sunny Studio
Scalloped Oval Mat 3 Dies
Shop at:
Sunny Studio
Quilted Hearts Landscape
Shop at:
Sunny Studio
Wedded Bliss Stamps
Wedded Bliss Stamps
Shop at:
Sunny Studio
Wedded Bliss Dies
Wedded Bliss Dies
Shop at:
Sunny Studio

Friday, June 3, 2022

Watering Can Cards with Audrey and Vanessa

Hello Friends! Audrey here with a fun floral card for you! 

Sunny Studio Stamps: Watering Can & Lovely Lilac Card by Audrey Tokach (featuring Quilted Heart Dies)

To create this card, I started off by die cutting the Quilted Hearts Portrait background from white cardstock and mounted it to a light grey card base. I stamped the Watering Can with a light and medium shade of grey ink and die cut it with the coordinating Watering Can dies. To fill the watering can, I stamped the Lovely Lilacs florals in several shades of purple and green ink, and die cut them with the coordinating Lovely Lilacs dies. I arranged the flowers, popping some foam tape for added dimension. 

To ground the focal point, I added a strip of woodgrain cardstock to the bottom of the panel which I ink blended with Vintage Photo distress ink to add some different tones to the wood look. I popped the watering can up with foam tape, and added a trio of butterflies which can be found in the Watering Can set. 

Sunny Studio Stamps: Watering Can & Lovely Lilac Card by Audrey Tokach (featuring Quilted Heart Dies)

Then, I stamped a sentiment from Watering Can to a banner die cut and adhered it to the right side of the panel, overlapping the watering can. To finish off the card, I added some white gel pen accents and some Stickles glitter to the butterfly wings.

-------------------------------------------

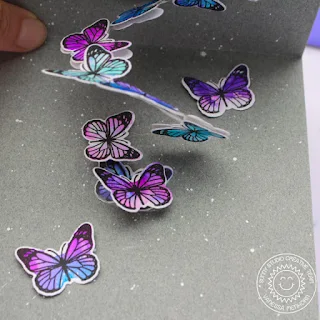
Hello to you! Vanessa here with an interactive card using the Watering Can set. On this card the fun is happening inside:

Sunny Studio Stamps: Watering Can & Lovely Lilac Card by Vanessa Menhorn (featuring Stitched Circle Dies)

I wanted to make the beautiful butterflies the star of the show, so I stamped a whole lot of them. For this, I used Koi Watercolor Pens, colored the solid stamp with various colors, spritzed the stamp with water and stamped. The result looked messy first, but with the black outlines it turned out pretty.

These are the sets I used:
Watering Can stamps + dies
Lovely Lilacs stamps + dies
Stitched Circle Large Dies

Sunny Studio Stamps: Watering Can & Lovely Lilac Card by Vanessa Menhorn (featuring Stitched Circle Dies)

I started with a grey card base and splattered white paint droplets to the inside and outside of it. After I had stamped all images, I die-cut the pieces with the matching dies. Now I die-cut a circle from clear cardstock and cut a spiral out of it. This spiral is the base for the flying butterflies. I adhered the center of the spiral to the bottom part of the card and the outer point to the top part of the card. Then I added the butterflies and adhered the images to the front of the card.

To make the inside a bigger surprise, I kept the front really simple. Because the lilacs and the watering can are layering stamps without outlines, it didn't fit the butterfly with the black details. So I simply used a black marker and added my own outlines to make the butterfly match better.

Have a lovely day everybody!

Sunny Studio Supplies Used:

Stitched Circle Large Dies
Shop at:
Sunny Studio
Quilted Hearts Portrait
Shop at:
Sunny Studio
Lovely Lilacs Stamps
Shop at:
Sunny Studio
Lovely Lilacs Dies
Lovely Lilacs Dies
Shop at:
Sunny Studio
Watering Can Stamps
Watering Can Stamps
Shop at:
Sunny Studio
Watering Can Dies
Watering Can Dies
Shop at:
Sunny Studio

Wednesday, March 16, 2022

Out On A Limb Cards with Gladys and Franci

Hello friends! Gladys here sharing a card featuring Out on a Limb die which goes well with the Cherry Blossoms layering stamp set.

Sunny Studio Stamps: Out On A Limb Card by Gladys Marcelino (featuring Quilted Hearts Dies, Cherry Blossoms)

First, I die cut the Quilted Hearts Portrait die from light blue cardstock and glued this on top of pink cardstock to add color to the hearts.

Then I stamped several flowers from the Cherry Blossom set using Altenew inks in the colors pink diamond and pinkalicious. For the green I used Lawn Fawn ink in celery stick. I wanted the white to show through so I skipped the solid stamp for the bigger flowers. Once I was done stamping I used the coordinating dies to cut them out.

Sunny Studio Stamps: Out On A Limb Card by Gladys Marcelino (featuring Quilted Hearts Dies, Cherry Blossoms)

Next I used the Out on a Limb die to cut the branch from woodgrain cardstock and the leaves from green cardstock. I arranged the flowers on the branch and adhered them with liquid glue and double sided foam tape to give dimension. I used the leaves to fill in the branches and tucked them behind the flowers.

For the sentiment I white heat embossed “Thinking of You” from Critters on the Go on black cardstock. To complete my card, I added Nuvo drops on the center of the florals for interest.

Thanks for joining me. Have a great day and I'll be back next week!

-----------------------------------------

Happy Wednesday everyone! It's Franci here with a fun colorful card showcasing the Out on a Limb set.

Sunny Studio Stamps: Out On A Limb Card by Franci Vignoli (featuring Lovey Dovey)

First of all I created my cardbase out of white cardstock and I cut out a matching panel, then I cut out a circle out of it. I backed the opening up with another piece of white cardstock I ink blended with distress inks and I glued everything onto the front of my card.

I die cut all the elements out of colored cardstock and I also added these little dragonflies to the scene (I die cut them with one of the free mini dies you get with every order at Sunny Studio!).

Sunny Studio Stamps: Out On A Limb Card by Franci Vignoli (featuring Lovey Dovey)

I glued everything down with foam adhesive and liquid glue and added my sentiment from the Lovely Dovey set + coordinated diesFinally I added a couple of sequins and my spring card is ready to be mailed! 

Thanks a lot for stopping by today and happy crafting! 

Sunny Studio Supplies Used:

Cherry Blossoms Stamps
Shop at:
Sunny Studio
Cherry Blossoms Dies
Shop at:
Sunny Studio
Critters on the Go Stamps
Shop at:
Sunny Studio
Lovey Dovey Stamps
Lovey Dovey Stamps
Shop at:
Sunny Studio
Lovey Dovey Dies
Lovey Dovey Dies
Shop at:
Sunny Studio
Out on A Limb Dies
Out on A Limb Dies
Shop at:
Sunny Studio
Quilted Hearts Portrait
Shop at:
Sunny Studio

Saturday, March 12, 2022

Guest Designer Spotlight: Bunnyville Cards with Megan Quinn

Hello! This is Megan Quinn and I am thrilled to be guest designing for Sunny Studio Stamps today! I have created two projects to share with you featuring the Bunnyville Stamp Set. This set is packed full of the sweetest little bunnies and accessories that are perfect for scene building or creating a more cute and simple design. I really love the beautiful script sentiment too!

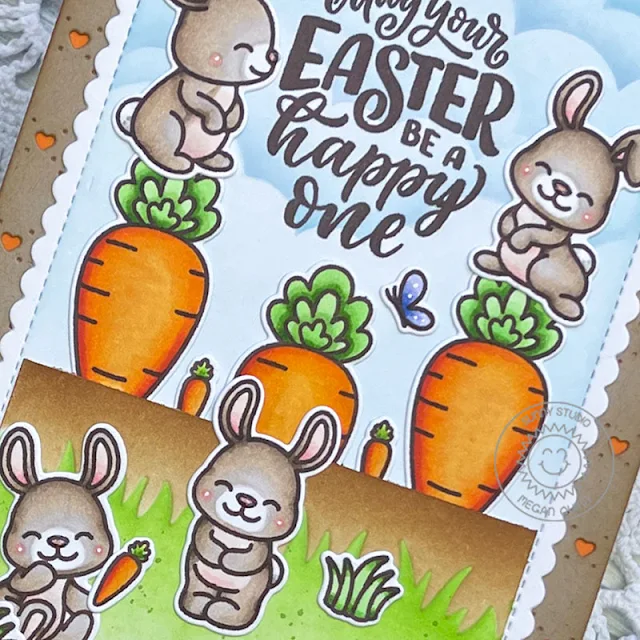
Sunny Studio Stamps: Bunnyville Card by Megan Quinn (featuring Quilted Heart Dies)

For my first card, I stamped images from Bunnyville using alcohol friendly ink onto white cardstock and colored them using Copic Markers. I then used the coordinating dies to cut the images out. 

Next, I ink blended a scene for the bunnies to frolic about in. Using dye inks and a blending brush, I created an adorable little farm. I stamped the sentiment using the same ink that I stamped the bunnies with once the panel was completely dry. Using, liquid glue and glue dots, I adhered the images to the focal panel.

Sunny Studio Stamps: Bunnyville Card by Megan Quinn (featuring Quilted Heart Dies)

For the backdrop, I used the Quilted Hearts Portrait Die. It die cuts such a pretty pattern that allows you to layer cardstock behind to give a beautiful contrasting color to compliment any design. I added a bit of ink blending the edges to give the kraft cardstock a bit more depth and interest.

Sunny Studio Stamps: Bunnyville Card by Megan Quinn (featuring Sliding Window Dies)

My second project combines one of my favorite interactive die sets, the Sliding Window Dies. It creates a fun, interactive element that will still travel through the mail well. 

I started this design just like the first one by stamping images from Bunnyville, coloring them using Copic Markers, and using the coordinating dies. I then die cut the pieces needed to make the sliding window mechanism from white cardstock. I chose to ink blend this project as well to avoid having layers that would interfere with the sliding motion of the window.

Sunny Studio Stamps: Bunnyville Card by Megan Quinn (featuring Sliding Window Dies)

After the panels dried, I adhered the images using liquid glue to the front panel. I was careful to only adhere the images close to the center fold line below where the window folds up. This allows the images to stand up once the slider is pulled. I also stamped the sentiment on the back panel before attaching the front panel with foam adhesive.

Sunny Studio Stamps: Bunnyville Card by Megan Quinn (featuring Sliding Window Dies)

For even more fun, I used thin strips of acetate to suspend one of the butterflies and the carrot balloon. This is such an easy technique and really adds that extra wow factor. I have found that glue dots work really well to attach the strips to the images.

Thank you so much for spending time with me today! I hope that you enjoyed seeing my projects featuring Bunnyville. I hope that you have a fantastic day!

Sunny Studio Supplies Used:

Sliding Window Dies
Sliding Window Dies
Shop at:
Sunny Studio
Bunnyville Stamps
Bunnyville Stamps
Shop at:
Sunny Studio
Bunnyville Dies
Bunnyville Dies
Shop at:
Sunny Studio
Quilted Hearts Portrait
Shop at:
Sunny Studio