Wednesday, April 17, 2024

Sneak Peek Week: Introducing Mermaid Kisses Stamps & Dies

Hello and welcome to Day 3 of our Summer Sneak Peek Week!  All this week I will be sharing cards showcasing our newest collection which will be available for purchase this Friday!

Card No. 1: Today I am showcasing cards using our adorable new Mermaid Kisses Stamps which feature four unique mermaids, four punny greetings, several fish, and new coral & seaweed to be used on their own or to mix and match with all our other ocean-themed stamp sets. For this card, I used three of the mermaids from the set which I colored with Copic markers to appear as if they have blue iridescent fins with pink highlights. I also paired the seashell and kelp from this set with the other seashells, oversized rock, and plants from our Fintastic Friends Stamps and Magical Mermaids Stamps to populate the ocean floor of my little scene. I completed my card by stamping bubbles in the background both around the fish and mermaids and just throughout the scene to create a subtle tone-on-tone print.

Sunny Studio Shellebrate Your Day Punny Ocean-Themed Summer Birthday Card using Mermaid Kisses & Magical Mermaids Stamps

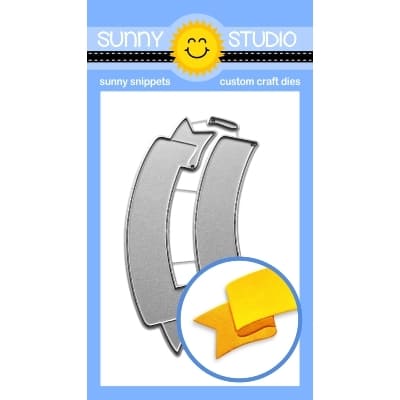
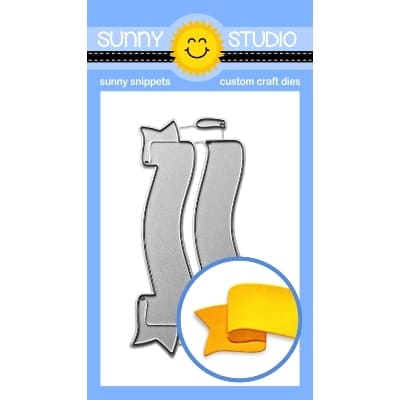
Card No. 2: Up next is another ocean scene card, this time with a portrait orientation. For this Mermaid Kisses card, I added the coral and seaweed groupings from our Ocean View Stamps, mixing in some of the coral from the new Mermaid Kisses set to tie them together. I added a sandy sea floor using our Slimline Nature Border Dies and added one of the little starfish from our Magical Mermaids Stamps. This time I added some bubbles to hide a couple ink smudges I accidentally had in my background. I finished my card by stamping the "swimming by to say hi" greeting from the set onto our Brilliant Banner 2 Dies which I inked in a pink hue to match the coral in my scene.
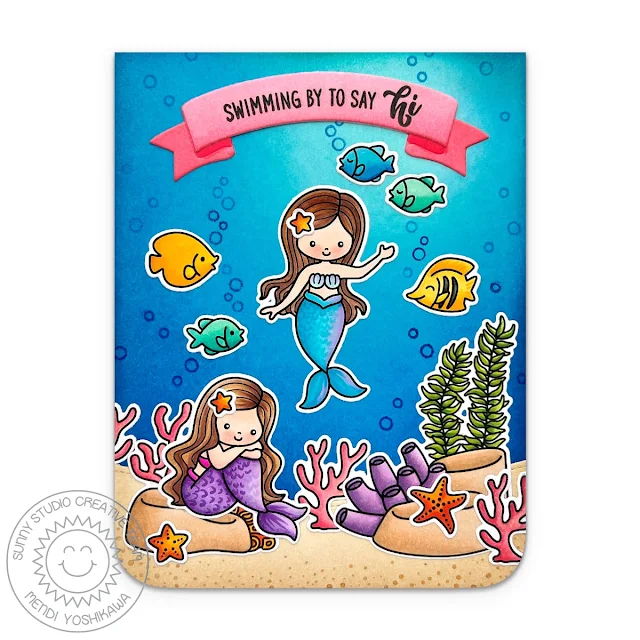
Sunny Studio Swimming By To Say Hi Mermaid Summer Card using Mermaid Kisses & Ocean View Stamps, and Brilliant Banner 2 Dies

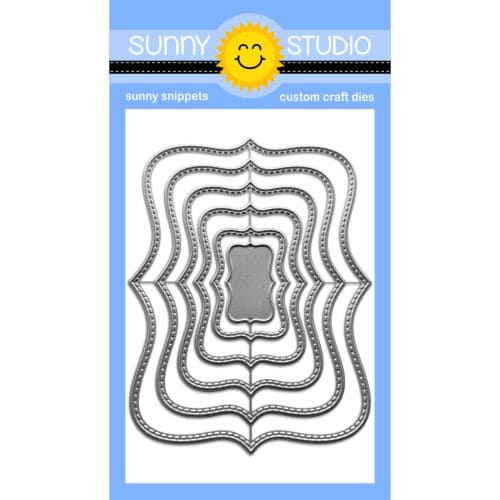
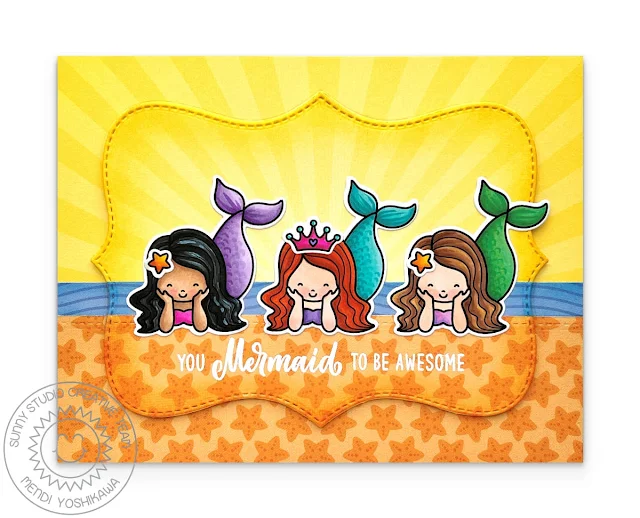
Card No. 3: Up next is a bright and happy card which came together really quickly and I just love how it turned out! I lined up three of the same mermaids in the pose where she is lying on her belly from our new Mermaid Kisses Stamps. This card isn't a scene card like the first two were, but I wanted to give the feeling that they are lined up together on the shore. I started by piecing together my card panel background using a yellow sunburst pattern from Classic Sunburst Paper for my sky and two prints from our Summer Splash Paper for my ocean and beach. To add interest between the layers, I added a stitched edge to the beach layer using our 
Ribbon & Lace Border Dies. After the layers were adhered together, I then ran the entire card panel through my die-cutting machine using the largest label die from our new Limitless Labels 1 Dies. When I was done, I inked up the edges of the label to make them stand out against the background and then cut another label from craft foam to help pop up my label and make it stand out even more. Once it was die-cut, the bottom portion of the label with the starfish print gave me a natural place to heat-emboss a sentiment from the set. I added my mermaids all in a row to the center of my card, alternating starfish barrettes and a crown for the middle mermaid.

Sunny Studio You Mermaid To Be Awesome Card using Mermaid Kisses Stamps, Summer Splash Paper, and Limitless Labels 1 Dies

Card No. 4: Next up is a Little Mermaid-inspired card with the sitting mermaid from our new Mermaid Kisses Stamps perched on the shore using the palm trees and island from our Tropical Scenes Stamps. To set the scene around them I inked up a cloudy sky using our Fluffy Cloud Border Dies together with masking material. For my ocean, I inked up a strip of white cardstock with Tumbled Glass distress ink and then used my Copic markers in similar tones to draw in soft waves. The little fish popping out of the water comes with the Mermaid Kisses Stamps and I used the coordinating dies from our Tropical Scenes Dies to create an opening for him to emerge from the waves. I added the crab from our Best Fishes Stamps and some die-cut seagulls to my sky using a die from the Tropical Trees Backdrop Dies. Lastly, I stamped a punny greeting from the set and added a stitched scalloped edge to the bottom of my card using the slimline-style Ribbon & Lace Border Dies.

Sunny Studio You Mermaid To Be Awesome Island Card using Mermaid Kisses & Tropical Scenes Stamps and Fluffy Cloud Border Dies

Card No. 5: For this card, I started by inking a super vibrant ombre background by applying my mini distress ink cubes in Peacock Feathers, Mermaid Lagoon, Salty Ocean, and Prize Ribbon directly to my white cardstock. I then spritzed it heavily with water to help the inks blend together a little bit better and give the look of bubbles in my background. I had already colored all my images from our Mermaid Kisses Stamps and the sea floor border from our Tropical Scenes Stamps, however, I just couldn't get past the feeling that my images weren't looking great on this background. They just felt so much like flat cutouts. That's when I had the bright idea to color around my images with my Copics to help them blend in with the colors in my background. It took a little extra time, but the difference was huge! It made this card go from being something I wasn't feeling very excited about to becoming one of my favorites. I heat embossed the "mermaid kisses, starfish wishes" greeting in white embossing powder in the center of my scene which really pops against the dark background and I added a couple extra small starfish from our Magical Mermaids Stamps.

Sunny Studio Mermaid Kisses Starfish Wishes Ocean-Themed Summer Card using Mermaid Kisses & Tropical Scenes 4x6 Clear Stamps

Card No. 6: For this card, I started by creating my patchwork background by using the 1.5" Stitched Square Dies together with scraps I had from our 
Summer Splash PaperDots & Stripes Pastels PaperGingham Pastels PaperPolka-Dot Parade PaperClassic Sunburst Paper, and Spring Fling Paper packs. To give the background a cohesive feel, I chose an ocean-inspired analogous color scheme in cool blue, aqua, and green tones. I then cut an oval from heavy-weight vellum using our Stitched Oval 2 Dies. By using the heavier vellum I was able to heat emboss the greeting from our new Mermaid Kisses Stamps without having to worry so much about it curling with the heat. I completed the card by adding a mermaid on either side of the greeting with the starfish from the new set.

Sunny Studio Mermaid Kisses Starfish Wishes Patchwork Summer Card using Mermaid Kisses Stamps & Stitched Square/Oval 2 Dies

That wraps up today's sneak peek. I'm so happy you joined me today! I'd love to give a $50 gift code to one lucky winner using the Rafflecopter below. Our daily sneak peek contests run through Saturday, April 20th at Midnight PST with the winners announced here on Sunday, April 21st. 

a Rafflecopter giveaway Here's a closer look at our new Mermaid Kisses Stamps and Dies used today and available for purchase on Friday, April 19th.

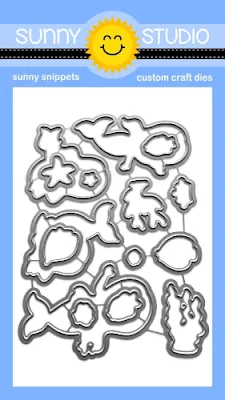
Sunny Studio Blog: Introducing Mermaid Kisses Ocean-Themed 4x6 Clear Photopolymer StampsSunny Studio Blog: Introducing Mermaid Kisses Metal Cutting Craft Dies

Other Supplies Used:

Magical Mermaid Dies
Shop at:
Sunny Studio
Magical Mermaid Stamps
Shop at:
Sunny Studio
Tsukineko Jumbo Dauber
Shop at:
Sunny Studio
Versafine Onyx Black Ink
Shop at:
Sunny Studio

Gingham Pastels 6x6 Paper
Shop at:
Sunny Studio
Dots & Stripes Pastels 6x6 Paper
Shop at:
Sunny Studio
Best Fishes Stamps
Best Fishes Stamps
Shop at:
Sunny Studio
Best Fishes Dies
Best Fishes Dies
Shop at:
Sunny Studio
Sending Sunshine Stamps
Shop at:
Sunny Studio
Sending Sunshine Dies
Shop at:
Sunny Studio
Summer Splash 6x6 Paper
Shop at:
Sunny Studio
Fluffy Clouds Border Dies
Shop at:
Sunny Studio
Spring Fling Paper
Spring Fling Paper
Shop at:
Sunny Studio
Tropical Scenes Stamps
Shop at:
Sunny Studio
Tropical Scenes Dies
Shop at:
Sunny Studio
Slimline Nature Borders
Shop at:
Sunny Studio
Classic Sunburst Paper
Shop at:
Sunny Studio
Stitched Oval 2 Dies
Shop at:
Sunny Studio
Fintastic Friends Stamps
Shop at:
Sunny Studio
Fintastic Friends Dies
Shop at:
Sunny Studio
Ocean View Stamps
Ocean View Stamps
Shop at:
Sunny Studio
Ocean View Dies
Ocean View Dies
Shop at:
Sunny Studio
Tropical Trees Backdrop
Shop at:
Sunny Studio
Ribbon & Lace Dies
Ribbon & Lace Dies
Shop at:
Sunny Studio
Brilliant Banner 2 Dies
Shop at:
Sunny Studio
Limitless Labels 1 Dies
Shop at:
Sunny Studio
Stitched Square Dies
Shop at:
Sunny Studio
Hero Arts White Detail
Shop at:
Sunny Studio
Polka-dot Parade 6x6 Paper
Shop at:
Sunny Studio
VersaMark Watermark Ink
Shop at:
Sunny Studio

Tuesday, April 16, 2024

Sneak Peek: 7 New Standalone Dies & Punny Fruit Greetings Stamps

Hello and welcome to Day 2 of our Summer Sneak Peek Week!  All this week I will be sharing cards showcasing our newest collection which will be available for purchase this Friday!

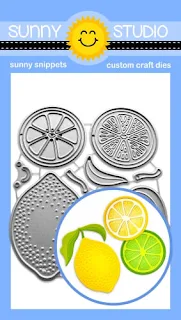
Card No. 1: Today I am sharing seven fun standalone dies and our Punny Fruit Greetings Stamps and I used all, but two of those new dies on my first card. I started with our new Build-A-Bowl Dies, which I filled with a lemon and lime (and citrus slices) from our Fresh Lemon Dies, strawberries from our Strawberry Patch Dies, cherries from our Wild Cherry Dies and a watermelon slice peeking out from behind my bowl from our Juicy Watermelon Dies. Before I adhered my fruit, I added a stitched edge to my white cardstock panel using our Ribbon & Lace Border Dies and then added a 1" high strip of rainbow gingham paper from our Rainbow Bright Paper pack. Lastly I added the sentiment "hope your day is sweet" stamped with VersaFine Onyx Black ink. 

I love how these fruit images come alive when inked up and shaded with distress inks! My strawberries for example started out cut from pink cardstock which I shaded with Candy Apple distress ink on one side and blended out to add depth and interest to the top layer of my strawberries. The citrus slices were cut out from three different colors of cardstock using the two dies from the Fresh Lemon Dies which I layer together. I cut the embossed detail portion from the middle tone of cardstock and then lighter versions for the interior portions and darker tone for the outer peel.

Sunny Studio Stamps Summer Fruit Card using Juicy Watermelon, Strawberry Patch, Fresh Lemon, Wild Cherry, & Build-a-Bowl Dies


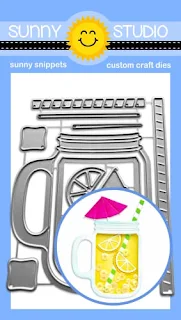
Card No. 2: My next card showcases our new Summer Jar Mug Dies which you can use to create a shaker card like I did here. The set comes with a removable center portion so you have the option to cut the shaker window or to leave it off and just use the jar by itself. I actually cut the back of my jar by cutting another jar without the cutout. You can also cut off the handle and use this as a canning jar or a "vase" for flower arrangements. 

For my lemonade drink I cut one jar from acetate to layer behind my shaker jar window and added some of the lemon slices from the Summer Jar Mug Dies set which I paired with one of the smallest circles from our Stitched Circle Large Dies for the peel and filled with some Radiant Pineapple Sequins. I then added some pink strawberries from our Strawberry Patch Dies to match the little drink umbrella. To continue the pink and yellow color scheme, I added a pink tone-on-tone striped paper from our Sleek Stripes Paper pack to the bottom of my card and layered it with a scalloped panel which I cut using our Ribbon & Lace Border Dies. The green and white striped straw matches the strawberry tops and ties everything together. As a last touch, I stamped the greeting "I couldn't ask for a sweeter friend" from our Punny Fruit Greetings Stamps. I love how fresh and summery this turned out!

Sunny Studio Sweet Friend Lemonade Shaker Card using Strawberry Patch Dies, Summer Jar Mug Dies & Punny Fruit Greeting Stamps


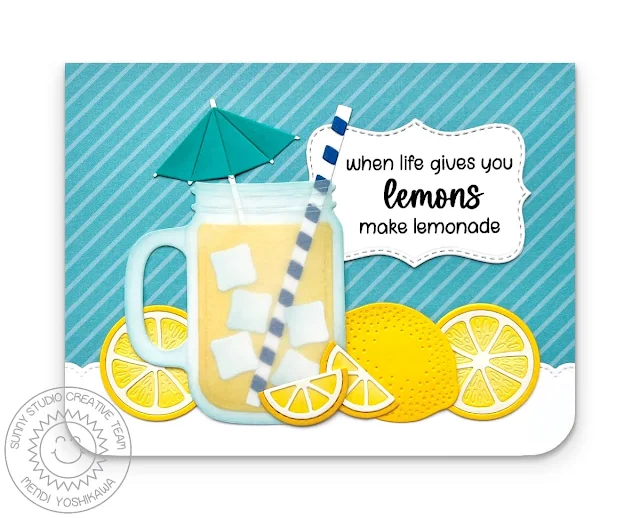
Card No. 3: Up next is a second card featuring the Summer Jar Mug Dies. This time rather than create a shaker with the set, I cut the entire jar without the cutout from vellum and white cardstock and then used the separate cutout to cut "lemonade" from yellow cardstock to sandwich between the two layers with some die-cut ice cubes from the set. I once again layered the lemon slices from the Summer Jar Mug with our Stitched Circle Large Dies to add the peel and help them feel closer in size to the lemons and lemon slices from our Fresh Lemon Dies which I arranged around my lemonade jar.

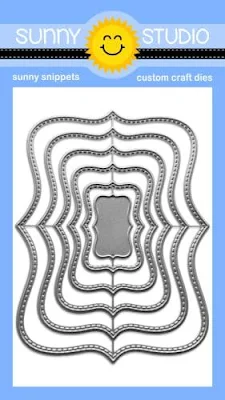
For my card background, I used an aqua diagonal striped paper from our Sleek Stripes Paper pack. I then added a stitched scalloped strip to the bottom quarter of my card to ground my little scene using the scalloped edge from our Slimline Pennant Dies. Lastly, I stamped the greeting "When life gives you lemons, make lemonade" from our Punny Fruit Greetings Stamps onto the new stitched bracket style label from our Limitless Labels 1 Dies. These dies have the feel of a vintage label and would look so cute to make custom labels for canning jars! I'm excited to use them for my scrapbook pages too with all the different sizes this set offers--They're such a great basic!

Sunny Studio When Life Gives You Lemons, Make Lemonade Card using Fresh Lemon, Summer Jar Mug, & Limitless Labels 1 Dies

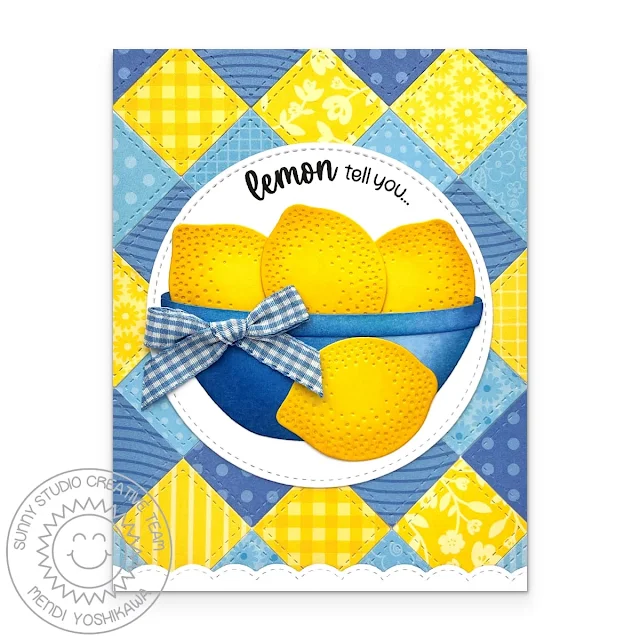
Card No. 4: This card started as a patchwork background which I created using the 1" square from our new Stitched Square Dies and a number of fun yellow, royal blue and pale blue patterned paper prints that I had saved scraps of from previous cards. I love being able to find ways to use scraps and this background was so fun to create! I simply marked a center line both vertically and horizontally to put my first square in the center placed on the diagonal. After that, I found it easiest to turn my card at an angle and to line up the squares in rows using the straight edges of that first square in a repeated pattern in terms of colors. 

When I was done, I simply trimmed off the portions that ran off the edge of my card panel and added a Stitched Circle Large die-cut to the center of my card cut from white cardstock. I then added a bowl cut with our Build-a-Bowl Dies which was cut from white cardstock and inked up to match the blue tones in my patterned paper. By starting with white cardstock, I was able to add lighter and darker tones to give my bowl more dimension. Continuing my yellow and blue color scheme, I filled the bowl with lemons from our Fresh Lemons Dies and added a blue gingham ribbon bow to the bowl to add that extra touch of country I was going for. I completed my card by stamping the "Lemon Tell You..." greeting arranged on a curve from our Punny Fruit Greetings Stamps and added the white stitched scalloped trim to the bottom of my card from our Ribbon & Lace Border Dies.

Sunny Studio Lemon Tell You Blue & Yellow Punny Summer Patchwork Card using Fresh Lemon, Build-A-Bowl, & Stitched Square Dies

Card No. 5: Our new Build-A-Bowl Dies have 3+ different looks you can create and this next card features the colander option using the extra cutouts, base, and handles. I cut mine from matte metallic shimmer cardstock for a touch of realism. Specialty cardstock like this can be a bit spendy when compared to ordinary cardstocks, but a single sheet can be stretched a long way when scrimped and saved for touches like this here and there. I'm constantly finding uses for it in my cardmaking.

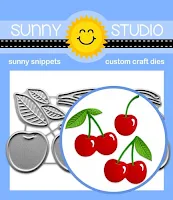
I filled the colander with various combinations of cherries using our Wild Cherry Dies. To dress up my card to match, I stamped a red gingham border using our Background Basics Stamps and added a stitched scalloped edge to my white cardstock panel to overlap using our Slimline Basic Border Dies. Lastly, I inked up a scratch piece of cardstock using mowed lawn distress ink before die-cutting it with one of the smaller labels from our Limitless Labels 1 Dies to heat emboss with the sentiment "wishing you a cherry happy birthday" from our Punny Fruit Greetings Stamps. I love how this clean and simple card came together!

Sunny Studio Stamps Cherry Happy Birthday Punny Cherries in Colander GIngham Summer Card using Wild Cherry & Build-A-Bowl Die

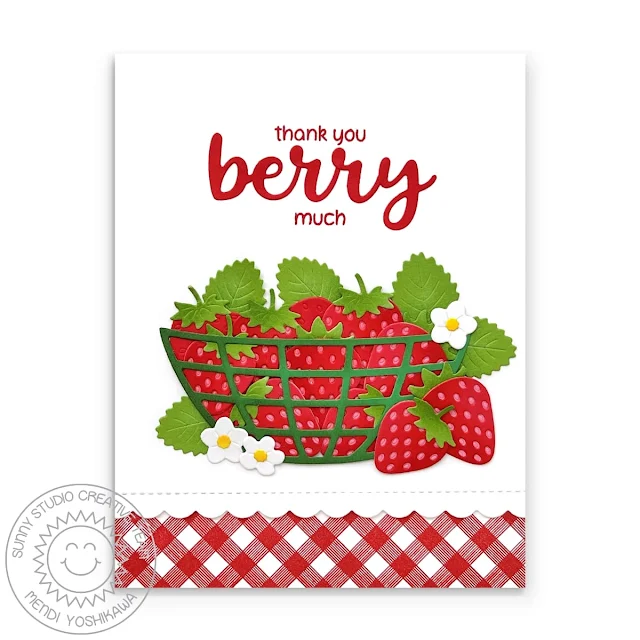
Card No. 6: While I had my gingham Background Basics Stamps and Slimline Basic Border Dies out, I went ahead and created a card with a similar feel using a portrait orientation for our Strawberry Patch Dies. This time rather than a colander, I used our new Build-A-Bowl Dies to create a produce fruit basket using the separate insert that comes with the set. Just a note about using this insert. It wasn't designed to be run through your die-cutting machine at the same time as the outer bowl die portion. I found it easiest to first cut out the inside basket portion and then to center the outside bowl around that interior basket cutout in the second step so that everything was easily lined up with a consistently spaced border on the basket's outside edge. To complete my card I stamped the thank you greeting from our Punny Fruit Greeting Stamps which I paired with the word "berry" spelled out using our Hayley Alphabet Lowercase Dies.

Sunny Studio Stamps Thank You Berry Much Punny Strawberries GIngham Summer Card using Strawberry Patch & Build-A-Bowl Dies

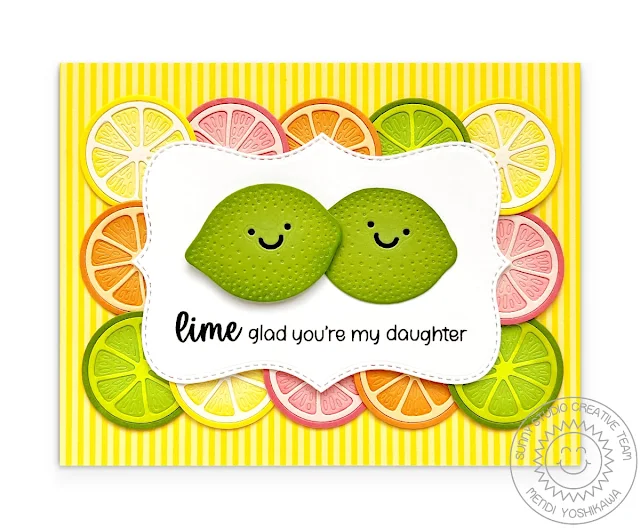
Card No. 7: For this playful card, I this time used the Fresh Lemon Dies and the included happy face to create two adorable limes. To frame them I cut out one of the larger Limitless Label 1 Dies and stamped the "Lime glad you're my daughter" sentiment from our Punny Fruit Greetings Stamps. I then framed the label with alternating orange, grapefruit, lemon, and lime slices using the citrus slice dies from the Fresh Lemon Dies backed with a simple yellow tone-on-tone striped paper from our Striped Silly Paper pack. This card turned out so happy and sunny--It just makes me smile back at them every time I see it.

Sunny Studio Stamps Lime Glad You're My Daughter Punny Citrus Slice Summer Card using Fresh Lemon & Limitless Labels 1 Dies

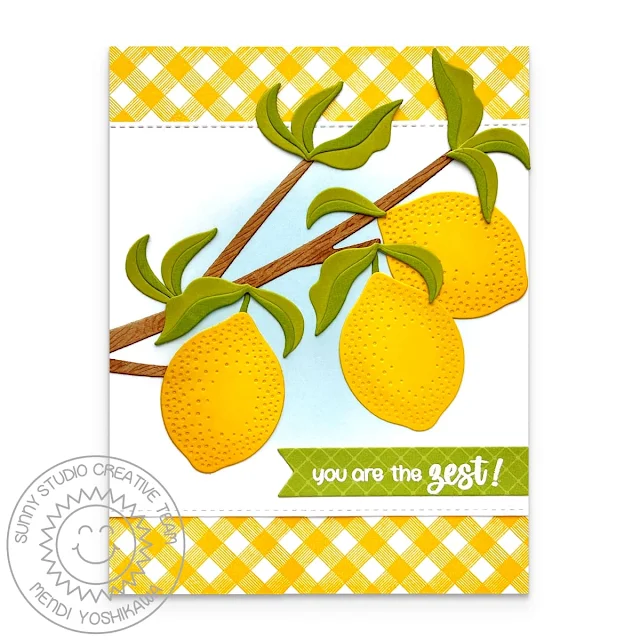
Card No. 8: Up next, I paired the Fresh Lemon Dies (which come with some leaves and stems) with our Out on A Limb Dies for a lemon tree branch, shading behind them with some Tumbled Glass Distress Ink and adding stitched edges with our Ribbon & Lace Border Dies. To continue the country feel I envisioned, I once again turned to the gingham border from our Background Basics Stamps, adding a strip to the top and bottom of my portrait-style card. I finished my card by heat embossing "You're the Zest" from the Punny Fruit Greetings Stamps onto a pennant strip cut from a green print from our Classic Gingham Paper using our Notebook Photo Corner Dies.

Sunny Studio You're The Zest Lemon Tree Branch Gingham Summer Card using Fresh Lemon Dies & Punny Fruit Greetings Stamps

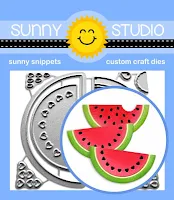
Card No. 9: My next card showcases the adorable Juicy Watermelon Dies. These dies aren't sized at the same scale as the other fruit because it would have not only made them quite a bit more expensive, but I think it also would have really limited their uses. One of the seed options for this die closely resembles the watermelon paper from our retired Summer Splash Paper pack (which we still have available in our retail store at this moment) so I couldn't resist pairing them together for a card.

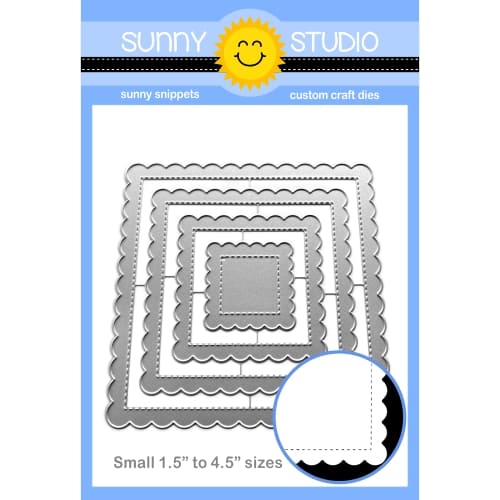
I cut mats to frame my watermelons using our Scalloped Square 2 Small Dies cut from white cardstock and our Stitched Square Dies cut from the pink print of our Gingham Pastel Paper pack. I finished my card by stamping a greeting from our Punny Fruit Greetings Stamps which I paired with the word "melon" spelled out using our Hayley Alphabet Lowercase Dies.

Want to know an easy way to add black watermelon seeds without messing with all the tiny seed dies? Cut or punch a 1.5" circle and cut it in half to slip behind the pink layer. I purposely made this watermelon just a hair larger to make that possible and not have the black edges show through. It made assembling these watermelons so much easier.  Another hack is cutting all the watermelon pieces from white cardstock and just inking them in the colors you want so you don't have to throw out certain pieces that cut out together at the same time. I didn't do this for all the watermelons I created, but it definitely helped me out when I was struggling to find cardstock in the right colors.

Sunny Studio Thanks a Melon Punny Watermelon Square Card using Juicy Watermelon & Hayley Alphabet Dies & Summer Splash Paper

Card No. 10: This card design is essentially the same as my last card, this time using the lemon print from our Summer Splash Paper pack with our Fresh Lemon Dies. To add the color peeking out from under my scalloped square, I adhered small strips of blue cardstock to the back which helped me use up scraps and conserve paper. This time I added a coordinating yellow diagonal striped paper from our Sleek Stripes Paper pack to coordinate with the lemon patterned paper. I love how easy both these cards were to make and how cute they turned out!

Sunny Studio Sending You Big Squeeze Card using Fresh Lemon, Hayley Alphabet Dies, Punny Fruit Greetings, Summer Splash Paper

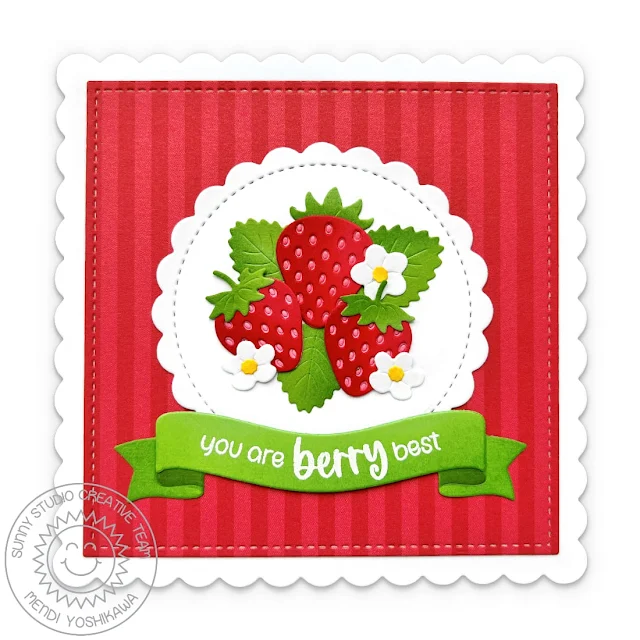
Card No. 11: Next up is another set of 4.5" wide cards using our Scalloped Square 1 Small Dies which I used to create a card base by scoring a line along the top and adding adhesive above the score line. I then cut the Stitched Square Dies from a red striped patterned paper from our Sleek Stripes Paper pack and layered it with our Scalloped Circle Mat 1 Dies. For my focal point, I grouped the strawberries, leaves, and blossoms from our Strawberry Patch Dies and heat embossed a greeting from our Punny Fruit Greetings Stamps on our Brilliant Banner 1 Dies. It wasn't until this card (and the following card) were done that I realized I missed adding the word "the" to my greeting. The set comes with it and I didn't have the time or energy to remake them after they were already completed so please use your imagination to picture them the correct way. So sorry...

Sunny Studio You're the Berry Best Strawberries Card using Strawberry Patch, Scalloped Square 1 Dies & Punny Fruit Greetings

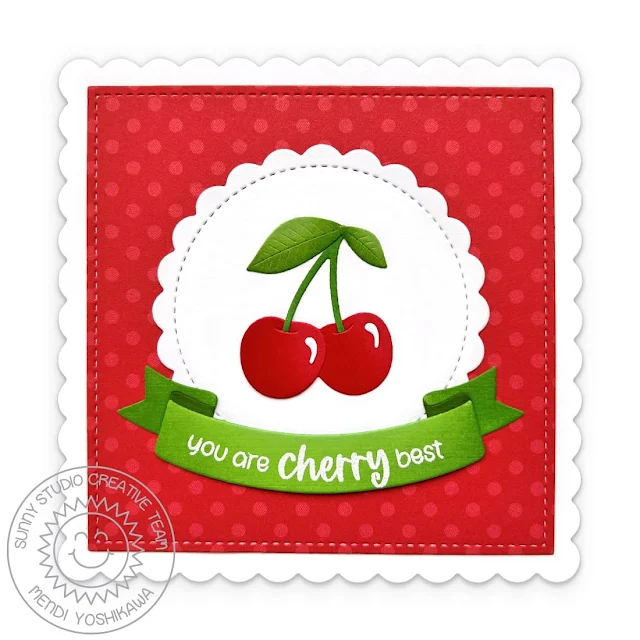
Card No. 12: My last card of the day uses the same basic design as Card No. 11, only trading the striped paper for a red print from our Polka-Dot Parade Paper pack and swapping the strawberries for cherries with our Wild Cherry Dies. I also switched to the Brilliant Banner 2 Dies for my greeting.

Sunny Studio You're the Cherry Best Cherries Card using Wild Cherry, Stitched Scalloped Square 1 Dies, Punny Fruit Greetings

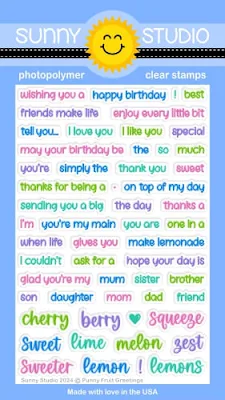
Here's a look at all the different sentiments that can be built using our new Punny Fruit Greetings Stamps. To squeeze in as many options as possible, I wasn't always able to arrange them in a way that's easy to see all the potential sentiments you can create.

Sunny Studio Blog: Sentiment Examples using Punny Fruit Greetings 4x6 Clear Photopolymer Craft Stamps

That wraps up today's sneak peek. I'm so happy you joined me today! I'd love to give a $50 gift code to one lucky winner using the Rafflecopter below. Our daily sneak peek contests run through Saturday, April 20th at Midnight PST with the winners announced here on Sunday, April 21st. 

a Rafflecopter giveaway Here's a closer look at our new Punny Fruit Greetings Stamps, Limitless Labels 1 Dies, Fresh Lemon Dies, Summer Jar Mug Dies, Strawberry Patch Dies, Juicy Watermelon Dies, Wild Cherry Dies, and Build-A-Bowl Dies used today and available for purchase on Friday, April 19th.

Sunny Studio Blog: Introducing Punny Fruit Greetings 4x6 Clear Photopolymer Sentiment Craft Stamps Sunny Studio Blog: Introducing Limitless Labels 1 Metal Cutting Craft Dies

Sunny Studio Blog: Introducing Fresh Lemon Citrus Slice Metal Cutting Craft DiesSunny Studio Blog: Introducing Summer Jar Mug Metal Cutting Craft Dies Sunny Studio Blog: Introducing Strawberry Patch Strawberries Metal Cutting Craft Dies

Sunny Studio Blog: Introducing Juicy Watermelon Melon Metal Cutting Craft Dies Sunny Studio Blog: Introducing Wild Cherry Cherries Metal Cutting Craft Dies

Sunny Studio Blog: Introducing Build-a-Bowl, Colander & Fruit Basket Metal Cutting Craft Dies

Other Supplies Used:

Tsukineko Jumbo Dauber
Shop at:
Sunny Studio
Versafine Onyx Black Ink
Shop at:
Sunny Studio
Background Basics Stamps
Shop at:
Sunny Studio
Classic Gingham 6x6 Paper
Shop at:
Sunny Studio

Polka-dot Parade 6x6 Paper
Shop at:
Sunny Studio
Gingham Pastels 6x6 Paper
Shop at:
Sunny Studio
Summer Splash 6x6 Paper
Shop at:
Sunny Studio
Spring Fling Paper
Spring Fling Paper
Shop at:
Sunny Studio
Slimline Basic Borders
Shop at:
Sunny Studio
Classic Sunburst Paper
Shop at:
Sunny Studio
Sleek Stripes Paper
Sleek Stripes Paper
Shop at:
Sunny Studio
Slimline Pennant Dies
Shop at:
Sunny Studio
Stitched Circle Large Dies
Shop at:
Sunny Studio
Out on A Limb Dies
Out on A Limb Dies
Shop at:
Sunny Studio
Hayley Lowercase Alphabet Dies
Shop at:
Sunny Studio
Ribbon & Lace Dies
Ribbon & Lace Dies
Shop at:
Sunny Studio
Spring Fever Paper
Spring Fever Paper
Shop at:
Sunny Studio
Notebook Photo Corners Dies
Shop at:
Sunny Studio
Brilliant Banner 1 Dies
Shop at:
Sunny Studio
Brilliant Banner 2 Dies
Shop at:
Sunny Studio
Stitched Square Dies
Shop at:
Sunny Studio
Scalloped Square 1 Small Die
Shop at:
Sunny Studio
Scalloped Square 1 Large Die
Shop at:
Sunny Studio
Scalloped Square 2 Small Die
Shop at:
Sunny Studio
Scalloped Square 2 Large Die
Shop at:
Sunny Studio
Hero Arts White Detail
Shop at:
Sunny Studio
Radiant Pineapple Sequins
Shop at:
Sunny Studio
VersaMark Watermark Ink
Shop at:
Sunny Studio
Striped Silly 6x6 Paper
Shop at:
Sunny Studio
Rainbow Bright 6x6 Paper
Shop at:
Sunny Studio