Thursday, November 10, 2022

Holiday Greetings Cards with Marine and Waleska

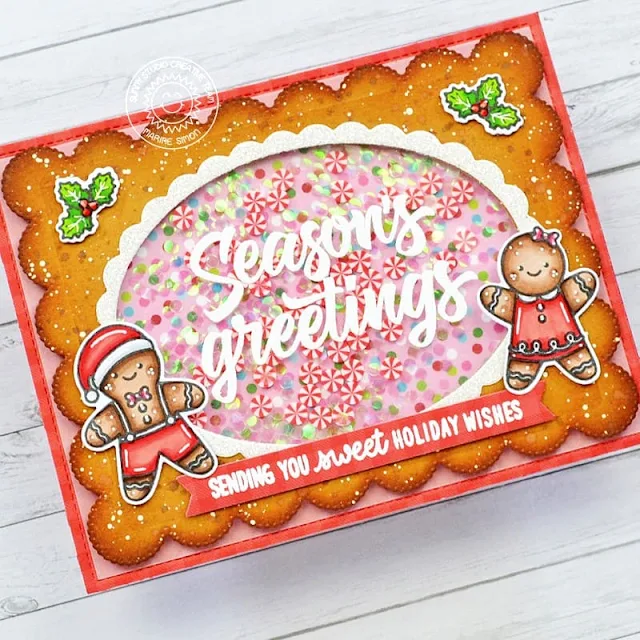
Hey crafty friends, Marine here with you today, back with this cute gingerbread shaker card that features one of the gorgeous sentiments from Holiday Greetings, as well as both characters from Christmas Cookies and the holly leaves from Holiday Express

Sunny Studio Stamps: Holiday Greetings Holiday Card by Marine Simon (featuring Christmas Cookies, Frilly Frame Dies, Scalloped Oval Mat Dies, Stitched Oval Dies)

I started off by cutting a Frilly Frame Eyelet lace panel out of kraft cardstock, and I created a giant gingerbread cookie by applying rusty hinge, vintage photo and ground espresso distress inks on that panel. I also added cookie texture all over the panel by mixing each distress ink with water to splatter droplets on the paper, as well as white ink.

Once my cookie panel was dry, I cut an opening out of it, right in the middle, using a die from the Stitched Oval 2 die set, next I white heat embossed my "Season's Greetings" sentiment from Holiday Greetings on a piece of acetate that then I attached at the back of my cookie panel.

Still at the back of the panel, I added foam stripes all along the oval opening, rubbed the foam strips edges with my powder tool to make those edges non sticky, cleaned the excess of powder using a microfiber cloth, and then poured some shaker accessories inside the oval window. And then I closed my shaker panel using a Joyful Holiday panel that I attached to the foam strips.

Sunny Studio Stamps: Holiday Greetings Holiday Card by Marine Simon (featuring Christmas Cookies, Frilly Frame Dies, Scalloped Oval Mat Dies, Stitched Oval Dies)

Next I cut a 5,5" x 4,25" red panel from the Joyful Holiday paper pack, as well as a slightly smaller vellum panel. I attached my shaker panel on top of the vellum panel, and then the vellum panel to the red panel. And to totally complete my shaker panel, I cut a white glittery frame using a die from the Stitched Oval 2 die set + another one from the Scalloped Oval Mat 1 die set, and I attached that frame around the oval window to give the illusion of icing on the gingerbread cookie.

I stamped both characters from Christmas Cookies, as well as two holly leaves from Holiday Express using an alcohol marker friendly black ink, cut them using the coordinating dies and colored everything using my alcohol markers.

To finish my card, I white heat embossed the second part of my sentiment "Sending you sweet holiday wishes" on a red banner I cut out of a Joyful Holiday pattern paper. The words "Sending you" are from Bear Hugs, and the words "Sweet holiday wishes" are from Christmas Cookies. I attached that banner below the window, as well as the images using foam squares. And finally I added highlights on the images using a white gel pen, as well as glossy accents on the holly berries.

Sunny Studio Stamps: Holiday Greetings Holiday Card by Marine Simon (featuring Christmas Cookies, Frilly Frame Dies, Scalloped Oval Mat Dies, Stitched Oval Dies)

And that's it! I hope that you like this cute and yummy Christmas shaker card! Feel welcome to watch the process video for further details about this card (click on the image above). Thank you so much for stopping by and see you next time! 

----------------------------------------------------

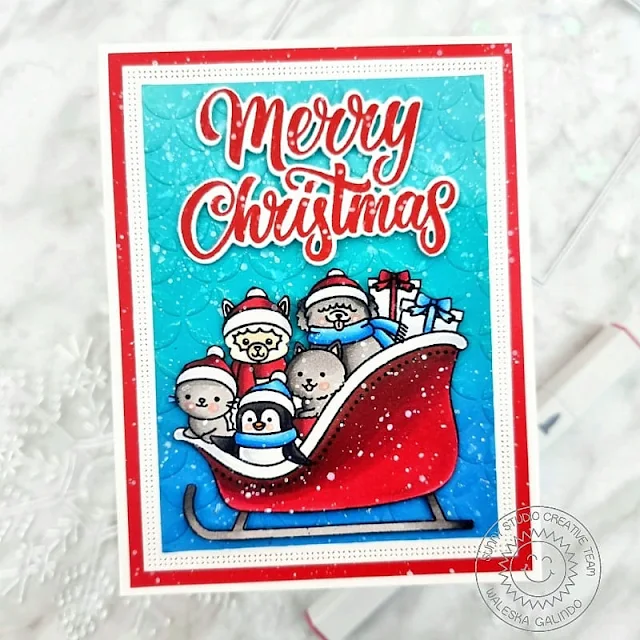
Hello Friends, Waleska here. Today I am sharing a very festive card mixing the Holiday Greetings Stamps and the Sledding Critters. I love colorful Christmas cards for this card I wanted to have red as the main color.


Sunny Studio Stamps: Holiday Greetings Holiday Card by Waleska Galindo (featuring Sledding Critters)

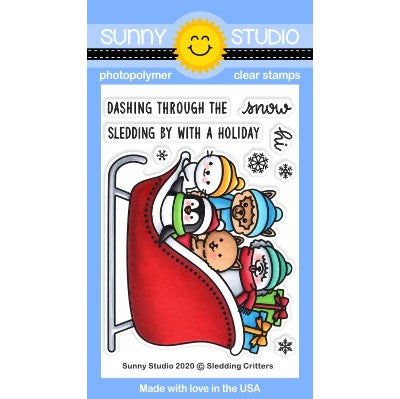
I first stamped and cut the Merry Christmas sentiment from the Holiday Greetings Stamps with red ink. I then stamped the cute Sledding Critters. I love this stamp set with all the different critters, I used copic markers to color them.  


Sunny Studio Stamps: Holiday Greetings Holiday Card by Waleska Galindo (featuring Sledding Critters)


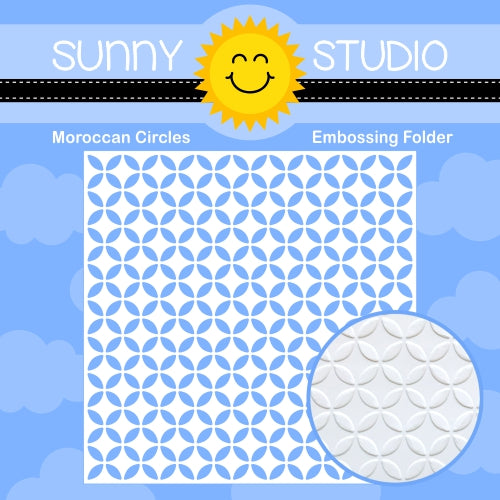
For the base of the card I inked a piece of white cardstock with Oxide Inks in colors Peacock Feathers and Mermaid Lagoon. I wanted to add more interest and texture to this piece so I used the 
Moroccan Circles embossing folder.

I added this panel to a white and red bases and finally I mixed some white acrilic paint with water to create some snow! I hope you have a wonderful day, thank you so much for stopping by!

Sunny Studio Supplies Used:

Bear Hugs Stamps
Bear Hugs Stamps
Shop at:
Sunny Studio
Christmas Cookies Stamps
Shop at:
Sunny Studio
Christmas Cookies Dies
Shop at:
Sunny Studio
Holiday Express Stamps
Shop at:
Sunny Studio
Holiday Express Dies
Shop at:
Sunny Studio
Moroccan Circles Embossing
Shop at:
Sunny Studio
Frilly Frames-Eyelet Lace
Shop at:
Sunny Studio
Scaredy Cat Dies
Scaredy Cat Dies
Shop at:
Sunny Studio
Sledding Critters Dies
Shop at:
Sunny Studio
Scalloped Oval Mat 1 Dies
Shop at:
Sunny Studio
Stitched Oval 2 Dies
Shop at:
Sunny Studio
Holiday Greetings Stamps
Shop at:
Sunny Studio
Holiday Greetings Dies
Shop at:
Sunny Studio
Joyful Holiday Paper
Shop at:
Sunny Studio

Wednesday, November 9, 2022

Reindeer Games Cards with Alma and Marie

Hello, my dears. This is Alma and today I want to show you a greeting card with an integrated advent calendar.

Sunny Studio Stamps: Reindeer Games Holiday Card by Alma Störk (featuring Warm & Cozy Dies, Cityscape Border Dies, Santa Claus Lane)

First of all, I cut out a rectangular card. Then I cut 25 squares from the Joyful Holiday Paper, 2 by 2 inches. Afterwards I punched out the glove from the Warm & Cozy Dies 25 times and the numbers 1-25 from the Chloe Number Dies. Now I wiped a white card with the Distress Oxides colours Stormy Sky, Blueprint Sketch, Chipped Saphire and Black Soot and wiped clouds with white ink. I used the clouds from the Slimline Nature Border Dies set as a stencil.

Sunny Studio Stamps: Reindeer Games Holiday Card by Alma Störk (featuring Warm & Cozy Dies, Cityscape Border Dies, Santa Claus Lane)

Now I stamped and coloured the reindeer from the Reindeer Games Stamps set and the Santa from the Santa Claus Lane Stamps set and punched them out with the corresponding Santa Claus Lane Dies and Reindeer Game Dies. Now I punched the Cityscape Border Dies in black and glued it to the cloud background. To attach the advent calendar, I punched all the individual elements with the Bind it and tied them to the card. Finally I glued all the images on it and the Christmas countdown was done!

What a great interactive card!

----------------------------------------------

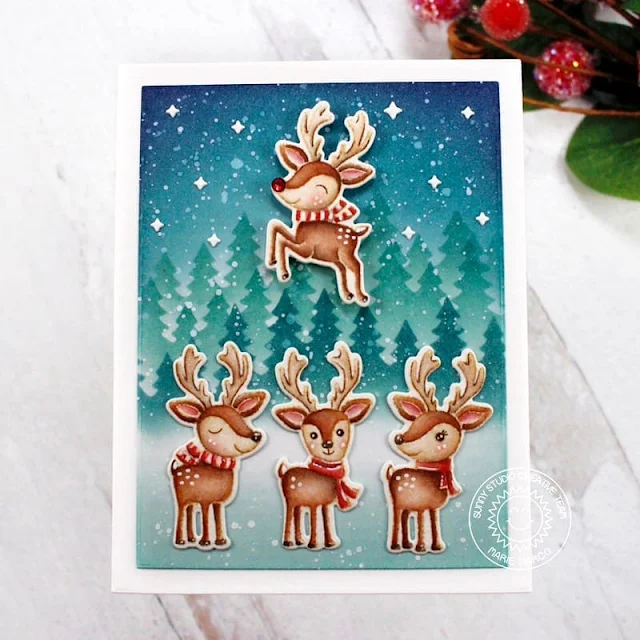
Hello Crafty Friends, Marie here. I am very happy to be back on the blog to share a new Holiday inspiration card with you featuring the recently released Reindeer Games stampsReindeers are some of my favorite images to color and create with during the holidays so I was very excited to make a card with this adorable stamp set! 

Sunny Studio Stamps: Reindeer Games Holiday Card by Marie Marco (featuring Forest Tree Stencils)

The first thing I do before anything when cardmaking is to prepare my base and my background panels. I cut out my A2 sized base panel from 110 lb Sturdy Neenah solar white cardstock paper so that I never have a problem with my cards warping. Using a slightly smaller die from a nesting A2 die set, I cut out my background panel using bristol smooth white cardstock for easy ink blending.

I then prepared my background panel using the Forest Trees stencils. This layering stencil set creates such a beautiful background of lush pine trees that look like they fade out with the distance depending on how light or dark you go with your inking. I also love that these stencils are numbered so you know the order in which to use them when inking. For my tree stencils, I used Distress Inks. For layer number 1, I used a very light hand with the color Evergreen Bough, for the 2nd layer of trees, I used the same ink color and applied it with a bit more pressure to get a darker shade. For my 3rd layer, I used a combination of Evergreen Bough, Rustic Wilderness, and Uncharted Mariner Distress Inks for the darkest shade of all the layers. 

Sunny Studio Stamps: Reindeer Games Holiday Card by Marie Marco (featuring Forest Tree Stencils)

After my trees were finished, I inked around my entire card background with Evergreen Bough and then for the top of my card, I inked a darker shade of Uncharted Mariner and Chipped Sapphire to create a night sky. I then used some water splatters and watered down acrylic paint to create a snowy backdrop. 

I stamped the reindeer images using antique Linen on watercolor paper, and used water color pencils to color my images. I did some white detailing using a white gel pen. I then cut my images using the Reindeer Games corresponding dies. I positioned my reindeers and adhered them all down using double sided tape adhesive. Flying Rudolph was adhered using double sided foam strips for dimension. I also gave Rudolph a bright shiny blinged out nose using the Red Zircon Jewels. I find adding the one single red gem embellishment so charming, perfect for Santa's favorite reindeer. 

Sunny Studio Stamps: Reindeer Games Holiday Card by Marie Marco (featuring Forest Tree Stencils)

I didn't want to leave the inside of my card blank so I added a reindeer wishing everyone a Happy Holidays with the sentiments from the stamp set placed in a word bubble stamped in Candied Apple Distress Ink. 

I am so so happy with how my card turned out! Thank you so much for stopping by the blog and I hope it gives you some ideas for all your upcoming Christmas Cardmaking and crafting! Until next week, Have an Awesome Day or Night! and as always, Happy Crafting!!! 

Sunny Studio Supplies Used:

Chloe Number Dies
Chloe Number Dies
Shop at:
Sunny Studio
Warm & Cozy Dies
Warm & Cozy Dies
Shop at:
Sunny Studio
Cityscape Border Dies
Shop at:
Sunny Studio
Santa Claus Lane Stamps
Shop at:
Sunny Studio
Santa Claus Lane Dies
Shop at:
Sunny Studio
Slimline Nature Borders
Shop at:
Sunny Studio
Forest Trees Stencils
Shop at:
Sunny Studio
Reindeer Games Stamps
Shop at:
Sunny Studio
Reindeer Games Dies
Reindeer Games Dies
Shop at:
Sunny Studio
Joyful Holiday Paper
Shop at:
Sunny Studio

Tuesday, November 8, 2022

Mini Mat & Tag Die Focused Cards with Isha and Kavya

Hello everyone! Isha here with a card using various tags from the Mini Mat and Tag dies. All the tags are special in their own way and I couldn't decide on one so I decided to share all four of them so you can check out how they all look.

Sunny Studio Stamps: Mini Mat & Tag Die Focused Holiday Tags by Isha Gupta (featuring Snowman Kisses, Penguin Party, Classy Christmas, Holiday Express)

I used various patterns from the Joyful Holiday Paper to create the tags and combined them with some stamps or dies.

Sunny Studio Stamps: Mini Mat & Tag Die Focused Holiday Tags by Isha Gupta (featuring Snowman Kisses, Penguin Party, Classy Christmas, Holiday Express)

Mini Mat and Tag 3 dies - Die-cut a white tag. Die-cut the window from the pattern paper to create a shaker element onto this card. Adhere vellum from behind.  Adhere the negative pattern piece to the white tag, add some sparkle glitter and cover it with the front piece with the vellum window. Stamp the images from the Classy Christmas stamp set onto vellum, heat emboss using WOW! opaque white embossing powder. Die-cut using the coordinating dies and colour using copic markers onto the back of the image. Adhere to the tag.

Mini Mat and Tag 4 dies -  Die-cut the tag and create the window to create the shaker element as the above tag. Stamp the images, colour and die-cut.

Snowman - Snowman Kisses stamp and dies
Gift - Holiday Express stamp and diesPenguin Party stamp and dies

Sunny Studio Stamps: Mini Mat & Tag Die Focused Holiday Tags by Isha Gupta (featuring Snowman Kisses, Penguin Party, Classy Christmas, Holiday Express)

Mini Mat and Tag 1 dies - Die-cut the tag. Cut one tag using vellum and adhere onto the pattern to soften the effect. Die-cut the twig using Winter Greenery dies, add versamark ink and sprinkle WOW! clear sparkle powder. Heat set. Adhere to the tag. Add some depth to the top green part by sponging a bit of lucky clover distress ink.

Mini Mat and Tag 2 dies - Stamp the images, colour using copic markers and die-cut. Add some Nuvo glitter drops for the sparkle to the hat and the stripe. 

Penguin - Penguin Party stamp and dies
Holly and berries - Holiday Express stamp and dies
Snow - Snowman Kisses stamp

Assemble everything together.

Thank you for dropping by and have a nice day!

------------------------------------------------------

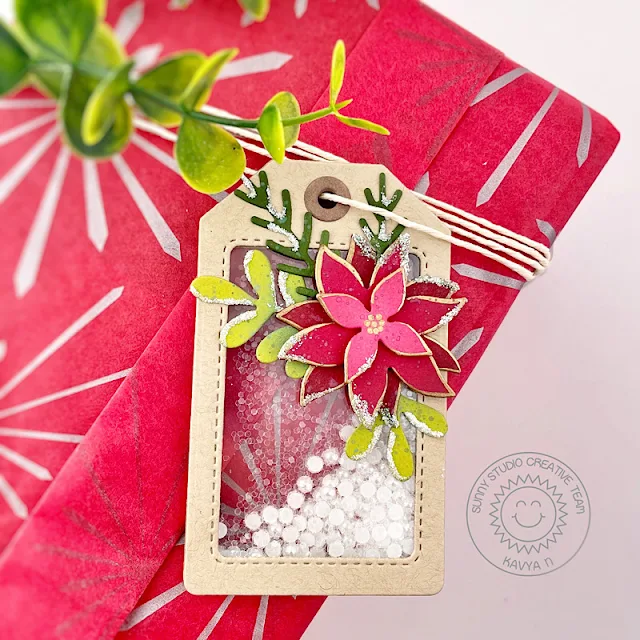
Hi folks, Kavya here. I am back on the blog today with another fun project - See through shaker tags! If you are looking for something elegant yet unique for your next holiday tags - this might be the one!

Sunny Studio Stamps: Mini Mat & Tag Die Focused Holiday Tags by Kavya (featuring Winter Greenery)

I first started off by die cutting the tag using Mini Mat & Tag 3 dies. Then, I cut the circle tag hole reinforcer using Mini Mat & Tag 4 dies. I filled my shaker using the smallest pearls similar to the ones in Ivory Lace Pearls and some white glitter. I used 1/8” foam strips to create the shaker part.

Sunny Studio Stamps: Mini Mat & Tag Die Focused Holiday Tags by Kavya (featuring Winter Greenery)

After you are done with the tag base, I created my poinsettia and winter greenery using Winter Greenery and Botanical Backdrop dies. I tried to make the floral dies more like a poinsettia by ink blending the edges and adding a thin gold border using a gold paint marker. 

Sunny Studio Stamps: Mini Mat & Tag Die Focused Holiday Tags by Kavya (featuring Winter Greenery)

I finished off my card by adding some faux snow to the die cuts by adding some glossy accent to the edges and sprinkling some glitter on top. I decided to leave out the sentiment so that the shaker bits are clearly visible :) 

That’s it! I hope you liked this fun project :) Happy Crafting!

Sunny Studio Supplies Used:

Holiday Express Stamps
Shop at:
Sunny Studio
Holiday Express Dies
Shop at:
Sunny Studio
Botanical Backdrop Die
Shop at:
Sunny Studio
Classy Christmas Stamps
Shop at:
Sunny Studio
Classy Christmas Dies
Shop at:
Sunny Studio
Winter Greenery DIes
Shop at:
Sunny Studio
Penguin Party Stamps
Shop at:
Sunny Studio
Penguin Party Dies
Penguin Party Dies
Shop at:
Sunny Studio
Snowman Kisses Stamps
Shop at:
Sunny Studio
Snowman Kisses Dies
Snowman Kisses Dies
Shop at:
Sunny Studio
Mini Mat & Tag 1 Dies
Shop at:
Sunny Studio
Mini Mat & Tag 2 Dies
Shop at:
Sunny Studio
Mini Mat & Tag 3 Dies
Shop at:
Sunny Studio
Mini Mat & Tag 4 Dies
Shop at:
Sunny Studio
Joyful Holiday Paper
Shop at:
Sunny Studio

Monday, November 7, 2022

Winter Wreaths Cards with Bobbi and Cathy

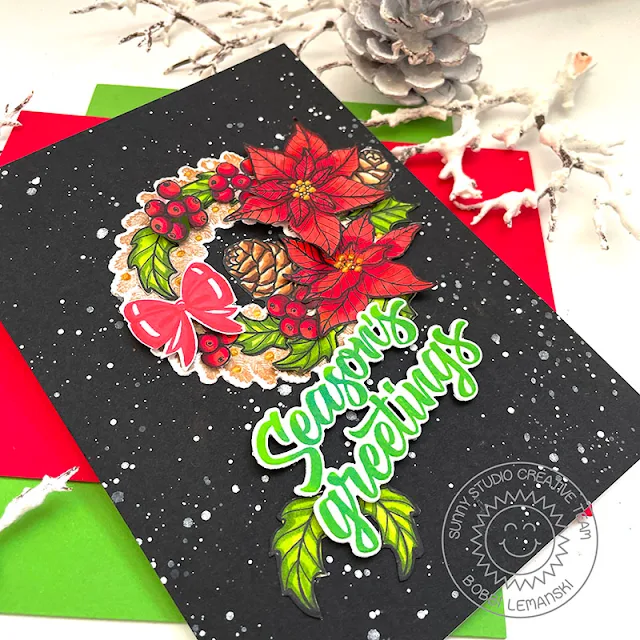
Hello Sunny friends. It’s Bobbi here with a holiday card featuring the Winter Wreaths stamps and dies. I’ve paired this wreath set with the Classy Christmas stamps and dies and the Holiday Greetings stamps and dies. 

Sunny Studio Stamps: Winter Wreaths Holiday Card by Bobbi Lemanski (featuring Classy Christmas, Holiday Greetings)

To make this 5″ X 7″ card, I splattered the card front panel with white paint on black cardstock. While the paint was drying, I stamped the evergreen wreath using a gold metallic ink on white cardstock and die cut the wreath using the coordinating die. I love that the center of the wreath is cut out with the die!

Sunny Studio Stamps: Winter Wreaths Holiday Card by Bobbi Lemanski (featuring Classy Christmas, Holiday Greetings)

I stamped two poinsettias, two pine cones, and a number of holly leaves and berries to decorate the wreath. I also added a bow from the wreath set. I colored the images using the following Copic colors:

Reds for berries and poinsettias: R89, R46, R24, R17, R14
Greens for leaves: YG67, YG63, YG03
Browns: E59, E57, E55, E53, E40


Sunny Studio Stamps: Winter Wreaths Holiday Card by Bobbi Lemanski (featuring Classy Christmas, Holiday Greetings)

The bow was stamped in two colors of red and the sentiment was stamped in green ink.  After cutting the images, I added gold metallic NUVO drops to the poinsettia centers and around the wreath. I also attached the one poinsettia, bow and the “Season’s Greetings” phrase using black foam tabs to make them stand out. I added more Nuvo metallic gold drops to the wreath to finish the card.


Thanks for stopping by today. If you want to see more ideas and inspiration from me, subscribe to my blog, BobbiHartDesign.com. I’ll send you updates on new posts! You can also find me on Instagram as @BobbiHartDesign and on Facebook as BobbiHartDesign. Bobbi Hartmann Lemanski, Bobbi Hart♥ Design, Adding h♥art into every design.


-------------------------------------------------


Hey friends! Cathy here today sharing a serene card for the Holiday season featuring the Winter Wreaths Stamps and coordinating dies. Just inking and die-cutting involved on this one which makes it fairly quick to make during these next few busy months.


Sunny Studio Stamps: Winter Wreaths Holiday Card by Cathy Chapdelaine (featuring Rustic Winter Dies, Holiday Greetings, Forest Tree Stencils)

I started with the background by inking a 4 1/4” x 5 1/2" piece of white cardstock with Tattered Rose Distress ink at the bottom followed by Speckled Egg, Salvaged Patina and Peacock Feathers. I placed a Forest Trees Stencil across the piece and inked it with Pumice Stone Distress ink. I adhered this piece to an A2 card base.


Next, I die-cut the Tropical Trees Backdrop from light gray cardstock and white cardstock. I adhered the gray frame portion to the card base and set the white snow (sand) portion aside. I just love how this die can also be used for winter scenes!


Before I adhered the snow, I die-cut 3 birch trees from white and dark gray cardstock using the Rustic Winter Dies. I adhered one tree to the right side of the card front and trimmed it along the top where it meets the gray frame. I then adhered the snow to the bottom and added the other 2 trees to the left side. I die-cut the deer from the Rustic Winter Dies from dark gray cardstock.


Sunny Studio Stamps: Winter Wreaths Holiday Card by Cathy Chapdelaine (featuring Rustic Winter Dies, Holiday Greetings, Forest Tree Stencils)

I stamped the wreath on white cardstock using Northern Pine Memento ink, the bow using Spun Sugar, Saltwater Taffy and Abandoned Coral Distress inks, the pine boughs using Peeled Paint Distress ink and the pinecones using Brushed Corduroy and Walnut Stain Distress inks. I die-cut all these elements using the coordinating dies.


To finish, I heat embossed the sentiment from the Holiday Greetings Stamps with pink embossing powder on white cardstock and inked over the top with Saltwater Taffy Distress ink. I then die-cut it using the coordinating dies.


I hope you enjoyed and thanks for stopping by today! For more inspiration, please visit my blog www.inkredibleadventures.com and you can also find me on Instagram as @cathy.chapdelaine.


Sunny Studio Supplies Used:

Rustic Winter Dies
Rustic Winter Dies
Shop at:
Sunny Studio
Classy Christmas Stamps
Shop at:
Sunny Studio
Classy Christmas Dies
Shop at:
Sunny Studio
Forest Trees Stencils
Shop at:
Sunny Studio
Tropical Trees Backdrop
Shop at:
Sunny Studio
Holiday Greetings Stamps
Shop at:
Sunny Studio
Holiday Greetings Dies
Shop at:
Sunny Studio
Winter Wreaths Stamps
Shop at:
Sunny Studio
Winter Wreaths Dies
Winter Wreaths Dies
Shop at:
Sunny Studio