Thursday, April 21, 2022

Sneak Peek: Baby Elephants, Wedded Bliss & Inside Greetings Congrats

Hello and welcome to day four of our Sneak Peek Week!  Each morning this week I have been showcasing cards using our newest Summer collection which will be available to purchase tomorrow morning.

Today I am sharing ideas using our newest Baby Elephants StampsWedded Bliss Stamps and Inside Greetings Congrats Stamps. Let's get started!

Card No. 1: For my first card, I turned to our new Wonky Windows Dies which I cut twice side-by-side to create six openings for a grid style card to fill with the elements from our new Baby Elephants Stamps. I started by coloring the six star balloons in pastel colors using my Copic markers and then set out to find ink colors to match to fill the openings behind my windows, using a variety of PinkFresh Studio and Hero Arts dye inks from our store. For my sentiment I combined the word "sweet" from the Baby Elephants Stamps, together with the "Birthday Wishes" greeting from our Daffodil Dreams Stamps in the same font. I love how they look like they were made for each other! Sunny Studio Pastel Rainbow CAS Grid Style Birthday Card (using Baby Elephants & Daffodil Dreams Stamps, Wonky Windows Dies)

Card No. 2: While this set is called Baby Elephants and the sentiments in the stamp set lean towards baby cards, there are so many great everyday uses for these adorable elephants. For this card I started by inking up a piece of light blue cardstock with some Salty Ocean Distress ink and layering the sky with some clouds from our Tropical Trees Backdrop Die. I then cut two grassy slopes from the two green papers from our Classic Sunburst Paper pack using our Slimline Nature Border Dies. For all the other elements in my card including the kite, tulips, butterflies, butterfly net and greeting I used our Spring Showers Stamps (and one butterfly from our Spring Scenes Stamps). Finally I added a small scalloped edge to the bottom of my card using our Slimline Basic Border Dies.
Sunny Studio Kite & Butterflies Card (using Baby Elephants, Spring Showers Stamps, Classic Sunburst Paper, Tropical Trees Backdrop & Slimline Nature Border Dies)

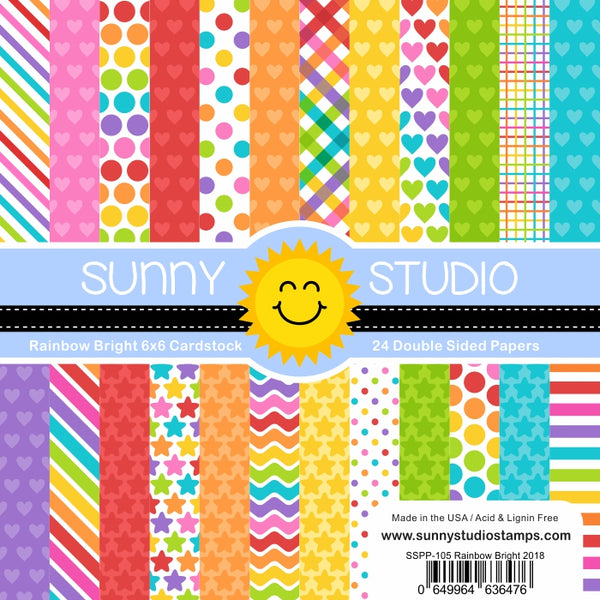
Card No. 3: For this card featuring our new Baby Elephants Stamps I paired them with the striped party hats from our Froggy Friends Stamps and the star balloons that come with the elephant stamps. For my background I trimmed down a rainbow patterned paper from our Rainbow Bright Paper pack and layered a stitched scalloped mat over the top from our Frilly Frames Hexagon Dies. My greeting was created my combining the words and phrases from our Happy Thoughts Stamps and Prancing Pegasus Stamps. For my curly balloon strings I used the stamp image from our Party Pups Stamps and then topped each of my balloons with some Glossy Accents to make them look more like real shiny balloons.
Sunny Studio: Rainbow Birthday Party Card (using Baby Elephants, Froggy Friends, Happy Thoughts Stamps, Rainbow Bright Paper, Frilly Frames Hexagon Dies)

Card No. 4: My next two cards are part of a series using many of the same supplies featuring our Baby Elephants Stamps. I started both cards by embossing white 120 lb. cardstock panels using our Sunburst Embossing Folder. For this card I then die-cut a panel to frame my scene using our Stitched Semi-Circle Dies which I inked up using Salty Ocean, Prize Ribbon and Chipped Sapphire distress inks. I then added a stitched cloud border to the bottom using our Slimline Nature Border Dies which I inked up using the light amount of Prize Ribbon distress ink I still had leftover on my ink tool. 

For my focal point image I used the cute elephant sleeping on the cloud, cradled in the moon and two of the little clouds on either side colored with Copic Markers to match the cloud border. I heat embossed the words "sweet dreams baby" arranged on a slight curve.  Unfortunately the magnet in my MISTI tool got in the way and didn't allow a full impression and when I went to stamp a second time my paper had shifted a tiny bit so the words came out thicker than I would have liked, but by this point I had already spent considerable time on my card and decided it was better to live with it, than start over. I completed my card by adding some stars to my sky from the set, in addition to white dots created with a Sharpie White Paint Pen.
Sunny Studio Sweet Dreams Baby with Moon & Stars in the Clouds Card (using Baby Elephants Stamps, Stitched Semi-Circle & Slimline Nature Border Die, Sunburst Embossing Folder)

Card No. 5: This card uses all the same supplies as the previous card, but this time I chose a vertical orientation framing my scene using our Stitched Arch Dies. For my focal point I stamped three star balloons, adding the optional happy faces and taped metallic gold thread to the backs of each so I could tie them in a knot and adhere them below my elephant's trunk to give the appearance he was holding them. My "welcome sweet baby" sentiment was stamped directly on my cloud border using coordinating dye ink.
Sunny Studio Welcome Sweet Baby with Star Balloons in the Clouds Card (using Baby Elephants Stamps, Stitched Arch & Slimline Nature Border Die, Sunburst Embossing Folder)

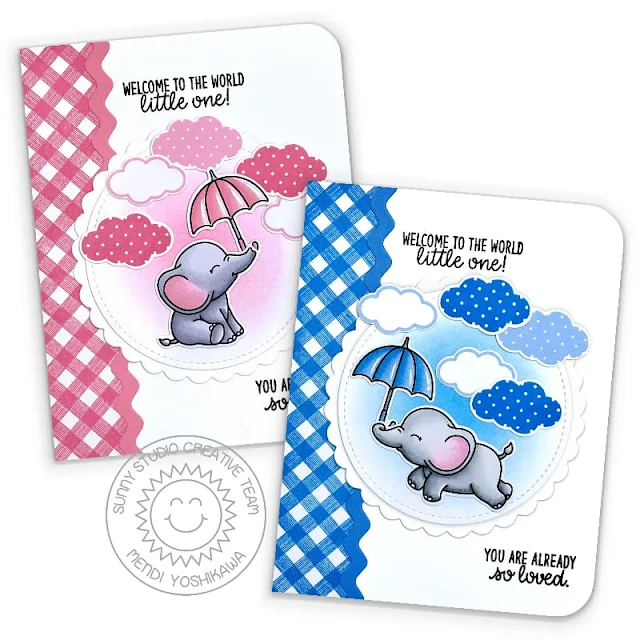
Card No. 6: Up next is a set of baby girl and boy cards using the Baby Elephant Stamps with the same layout and elements. I love to make cards like this at the same time to speed up the process and have on hand when I need them. I started my cards by stamping the gingham border on left side of each card using our Background Basics Stamps and topping with a Ric-Rac Border trim piece. I then layered our Stitched Circle Small Dies over the top of our Scalloped Circle Mat 1 Dies, inking the centers to coordinate with each card. I then added elephants holding umbrellas in their trunks and a mix of clouds including the adorable polka-dot cloud that comes with this set. Lastly, I rounded the corners on the right side and stamped the two baby sentiments that go hand in hand together from our new Inside Greetings Congrats Stamps using VersaFine Onyx Black Ink.
Sunny Studio Baby Girl & Boy Umbrella Gingham Card (using Baby Elephants, Background Basics, Inside Greetings Congrats Stamps, Ric Rac Border Dies, Scalloped Circle Mat 1, Stitched Circle Small Dies)

Card No. 7: Next I have a series of cards featuring the new penguin bride & groom from our new mini Wedded Bliss Stamps. I shared this particular card on Monday, but just in case you missed it earlier, my scene was created using our new Tropical Trees Backdrop die which includes the stitched frame, palm trees, clouds, grassy hill and seagulls. For my sandy beach I added a piece of kraft cardstock cut with our Slimline Nature Border Dies and stamped a speckled sand texture along the top edge using small stamp images included with our new Ocean View Stamps.Sunny Studio: Penguin Bride & Groom Beach Wedding Couple Card (using Wedded Bliss Stamps & Tropical Trees Backdrop Die)

Card No. 8: For this wedding card featuring the Wedded Bliss Stamps, I started by inking up a puffy cloud background using spun sugar distress ink and masks created using our Slimline Nature Border Dies. To create my arch I nested two of the dies from the Stitched Semi-Circle Dies cut from green cardstock. I then covered it using the mini flowers from the Chubby Bunny and Chickie Baby Stamps. I covered the bottom portion of my arch using the grassy border from our Picket Fence Dies. I then stamped the tufts of grass using images from the Chickie Baby stamps. To create my penguin best man and maid of honor, I turned to our Passionate Penguins Stamps, dressing them up with a bow tie and hair bow from the set. I stamped my sentiment in the center using VersaFine Black Onyx with our new Inside Greetings Congrats Stamps. Finally I added three little butterflies from our Spring Scenes and Spring Showers stamps.
Sunny Studio Penguin Bride & Groom Wedding Card (using Wedded Bliss, Inside Greetings Congrats, Chubby Bunny, Chickie Baby, Spring Scenes & Spring Showers Stamps, Picket Fence, Stitched Semi-Circle & Slimline Nature Border Dies)

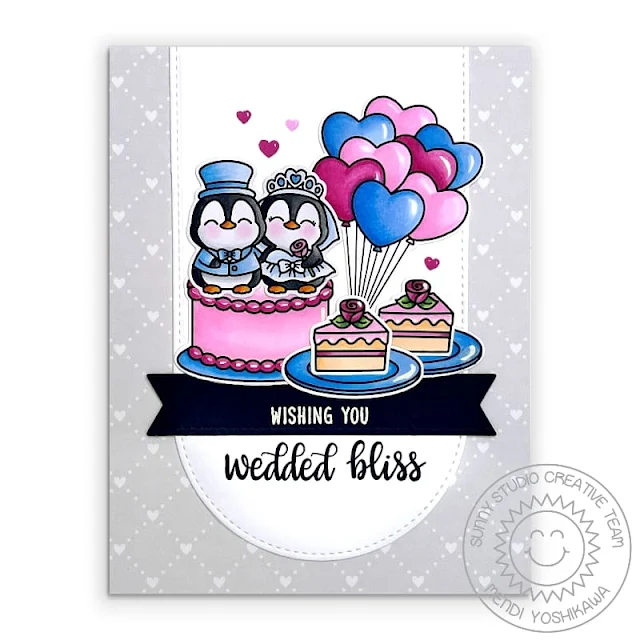
Card No. 9: For my last Wedded Bliss card, I used the bride & groom couple as figurines for my wedding cake topper. For my cake and slices I used our Make A Wish Stamps, adding plates from our Blissful Baking Stamps and balloons using our Heart Bouquet Stamps. To ground my vignette, I cut a panel using our Stitched Semi-Circle Dies (elongating it by running it through my machine a second time and hanging half the die off the cutting plate) and mounted it onto a heart print patterned paper from our Subtle Grey Tones Paper pack. I heat embossed my scripty greeting from the Wedded Bliss Stamp set on a elongated banner cut using our Slimline Pennant Dies. Finally I stamped four of the mini puffy heart images from the Wedded Bliss set to balance out some of the open spaces in my scene.
Sunny Studio Penguin Bride & Groom Wedding Cake with Heart Balloons Card (using Wedded Bliss, Make a Wish & Heart Bouquet Stamps, Stitched Arch & Slimline Pennant Dies, Subtle Grey Tones Paper)

That wraps up today's sneak peeks. I'm so happy you spent part of your day with me today. I read all your comments and they mean so much!  I'd love to give a $50 gift code to one lucky winner using the rafflecopter below. 

Our daily contests this week run through Saturday, April 23rd at Midnight PST with winners announced here on Sunday, April 24th. :)

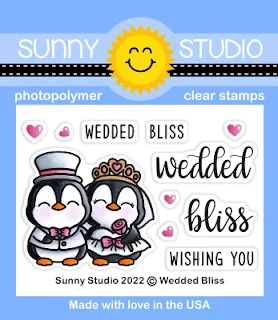
a Rafflecopter giveaway Here's a closer look at the our new Baby Elephants Stamps & DiesWedded Bliss Stamps & Dies and Inside Greetings Congrats Stamps used today (which will be available to purchase starting on April 22nd):

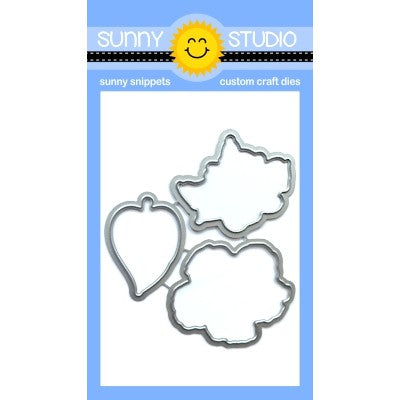
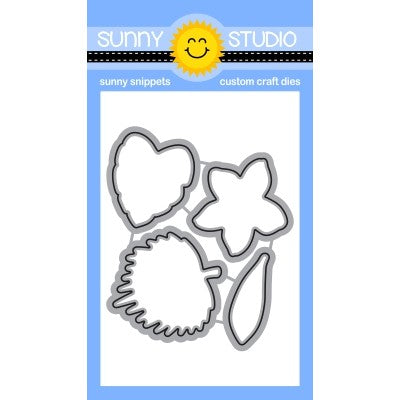
Sunny Studio Blog: Baby Elephants 4x6 Photopolymer Clear StampsSunny Studio Blog: Baby Elephants Metal Cutting Die Set

Sunny Studio Blog: Wedded Bliss 2x3 Penguin Bride & Groom Wedding Couple Photopolymer Clear StampSunny Studio Blog: Wedded Bliss Wedding Bridal Penguins Metal Cutting Die Set

Sunny Studio Blog: Inside Greetings Congrats Congratulations Sentiments 4x6 Clear Photopolymer Stamp Set

Other Supplies Used:

Blissful Baking Dies
Shop at:
Sunny Studio
Blissful Baking Stamps
Shop at:
Sunny Studio
Froggy Friends Dies
Froggy Friends Dies
Shop at:
Sunny Studio
Froggy Friends Stamps
Shop at:
Sunny Studio

Tsukineko Jumbo Dauber
Shop at:
Sunny Studio
Versafine Onyx Black Ink
Shop at:
Sunny Studio
Ric Rac Border Dies
Ric Rac Border Dies
Shop at:
Sunny Studio
Party Pups Stamps
Party Pups Stamps
Shop at:
Sunny Studio
Background Basics Stamps
Shop at:
Sunny Studio
Rainbow Bright 6x6 Paper
Shop at:
Sunny Studio
Happy Thoughts Stamps
Shop at:
Sunny Studio
Sunburst Embossing
Sunburst Embossing
Shop at:
Sunny Studio
Chubby Bunny Stamps
Chubby Bunny Stamps
Shop at:
Sunny Studio
Chubby Bunny Dies
Chubby Bunny Dies
Shop at:
Sunny Studio
Make A Wish Stamps
Make A Wish Stamps
Shop at:
Sunny Studio
Make A Wish Dies
Make A Wish Dies
Shop at:
Sunny Studio
Frilly Frames Hexagon Dies
Shop at:
Sunny Studio
Subtle Grey Tones Paper
Shop at:
Sunny Studio
Chickie Baby Stamps
Chickie Baby Stamps
Shop at:
Sunny Studio
Chickie Baby Dies
Chickie Baby Dies
Shop at:
Sunny Studio
Prancing Pegasus Stamps
Shop at:
Sunny Studio
Spring Scenes Stamps
Shop at:
Sunny Studio
Spring Scenes Dies
Spring Scenes Dies
Shop at:
Sunny Studio
Spring Showers Stamps
Shop at:
Sunny Studio
Spring Showers Dies
Spring Showers Dies
Shop at:
Sunny Studio
Stitched Arch Dies
Stitched Arch Dies
Shop at:
Sunny Studio
Stitched Semi-Circle Dies
Shop at:
Sunny Studio
Slimline Basic Borders
Shop at:
Sunny Studio
Slimline Nature Borders
Shop at:
Sunny Studio
Classic Sunburst Paper
Shop at:
Sunny Studio
Scalloped Circle Mat 1 Dies
Shop at:
Sunny Studio
Slimline Pennant Dies
Shop at:
Sunny Studio
Stitched Circle Small Dies
Shop at:
Sunny Studio
Heart Bouquet Stamps
Shop at:
Sunny Studio
Heart Bouquet Dies
Heart Bouquet Dies
Shop at:
Sunny Studio
Passionate Penguins Stamps
Shop at:
Sunny Studio
Passionate Penguins Dies
Shop at:
Sunny Studio
Ocean View Stamps
Ocean View Stamps
Shop at:
Sunny Studio
Tropical Trees Backdrop
Shop at:
Sunny Studio
Wonky Windows Die
Wonky Windows Die
Shop at:
Sunny Studio
Hero Arts White Detail
Shop at:
Sunny Studio
VersaMark Watermark Ink
Shop at:
Sunny Studio
Cottontail Embossing Powder Tool
Shop at:
Sunny Studio
Ranger Glossy Accents
Shop at:
Sunny Studio
Picket Fence Border Dies
Shop at:
Sunny Studio
Domed Ink Blending Foam
Shop at:
Sunny Studio

Wednesday, April 20, 2022

Sneak Peek: Lovely Lilacs, Watering Can Stamps & Summer Greenery Dies

Hello and welcome to day 3 of our Sneak Peek Week!  Each morning this week I am showcasing cards using our newest Summer collection which will be available to purchase on April 22nd.

Today I am sharing ideas using our newest Lovely Lilacs layering stamps, Watering Can layering stamps and Summer Greenery Dies. I hope you love them as much as I do!

Card No. 1: For my first card of the day I chose to go with a red, white and blue color scheme (and a touch of yellow) for my Patriotic Fourth of July inspired card. I stamped my Lovely Lilacs in blue shades and created a shiny red Watering Can to hold them. Red is my favorite color and I would love to own a watering can like this! To continue my grouping, I added Lemons and a slice of watermelon using our Slice of Summer Stamps. A blue gingham print from our Classic Gingham Paper pack and a ric rac edge from our Ric-Rac Border Dies were the perfect way to ground my scene and balance out my blue flowers. Lastly I stamped the word hello from the Potted Rose Stamps. I love that the curve in the word worked so well with the curve of the handle, allowing me to stamp my greeting on the diagonal with the limited space I had left.

Sunny Studio Lemons & Watermelon Card (using Lovely Lilacs, Watering Can, Slice of Summer, Potted Rose Stamps, Classic Gingham Paper & Ric Rac Border Dies)

Card No. 2: For this 5-1/2" square card featuring the Lovely Lilacs Stamps I started by embossing a panel using our Dapper Diamond Embossing Folder and then layered a scalloped square in the center using our Fancy Frames Square dies. To get the frame to match my flowers, I inked it up using the same PinkFresh Blue Jay ink used for one of the stamp layers. My Mother's Day sentiment was borrowed from our Captivating Camellias Stamps and stamped over the top my Watering Can image. 

To ink up my layered butterflies from the Watering Can Stamps, I used my MISTI tool and applied ink to my first stamp layer using a little finger dauber so that I could blend different ink colors, stamping in between the different colors added. I did this for all the butterflies shared today, stamping them assembly line style by adding lighter inks near the center and working darker toward the wing tips. Using the sponge dauber to apply ink to my stamp image gave it a nice soft blend with no harsh edges. It only took a tiny bit more time, but I think the beautiful blends made it well worth it.

Finally for this card, I adhered some
Pure White Jewels to help visually balance out the bare space in the top, right corner of my card--I decided to go with white so they wouldn't compete with the other images and be visually distracting.Sunny Studio Butterflies Square Mother's Day Card (using Lovely Lilacs, Watering Can & Captivating Camellias Stamps, Fancy Frames Square Dies & Dapper Diamonds)

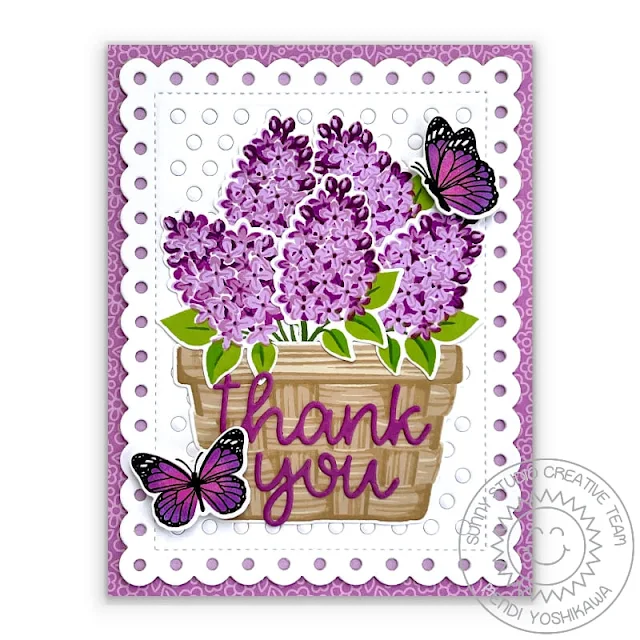
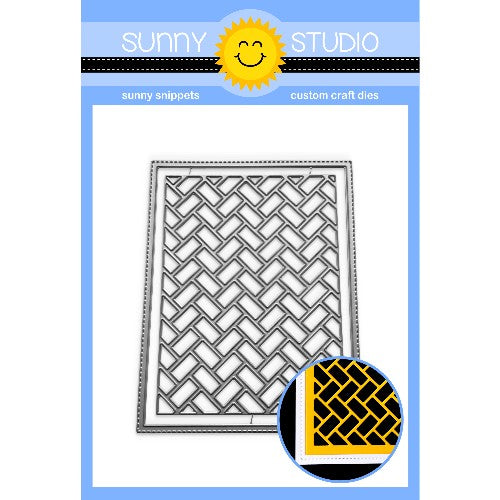
Card No. 3: For this card featuring the Lovely Lilacs Stamps, I paired the pretty flowers with our Layered Basket Stamps and two more of the butterflies from the Watering Can Stamps. It worked out perfectly that one of the shades from our Flirty Flowers Paper pack perfectly complemented the Lawn Fawn inks I had used for my flowers. I layered it with our Frilly Frames Polka-dot dies, choosing to only punch out the dots around the scalloped edge and leaving the others in place to keep my background from becoming overly busy. For my greeting I used our Thanks You Words die cut from a shade of purple cardstock to match my butterflies.
Sunny Studio Card (using Lovely Lilacs, Layered Basket, Watering Can Stamps, Flirty Flowers Paper, Than You Words & Frilly Frames Polka-dot Dies)

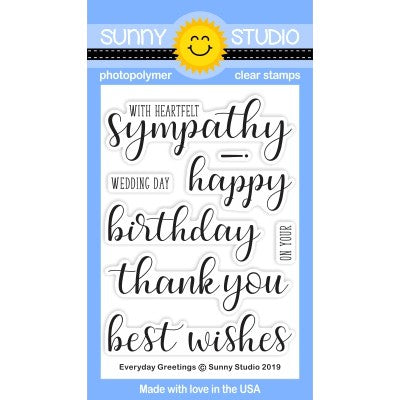
Card No. 4: Up next is a card pairing the Lovely Lilacs Stamps with our Botanical Backdrop die cut from green cardstock and inked up along the edges using Mowed Lawn Distress ink. Behind my leafy frame, I inked up a white cardstock panel using Picked Raspberry distress ink applying it darker on the outside edges and keeping the inside portion more light and airy. I tucked the lilacs around the frame to give the look that they were still growing on the bush, adding my birthday sentiment to the center using our Everyday Greetings Stamps with Versafine Onyx Black Ink. Finally I added a couple of pink butterflies from the Watering Can Stamps and a sprinkling of Pink Spinel Jewels to give my card a bit of sparkle.
Sunny Studio Butterflies & Flowers Birthday Card (using Lovely Lilacs, Watering Can, Everyday Greetings Stamps  & Botanical Backdrop Die)

Card No. 5: The new Watering Can Stamps aren't limited to just being paired with our new lilac images and in fact are a wonderful complement to so many of our layered flower sets! For this card I turned to our Cheerful Daisy Stamps to create my flower arrangement. I was delighted to realize after my scene was set, that the colors almost all could be found in the striped print from our Summer Splash Paper pack. I added my stitched scalloped edge using our Fishtail Banner II Dies and stamped my sentiment on the diagonal to match the angle using our Happy Thoughts Stamps. Lastly I added a rainbow butterfly using the same finger dauber method described for my second card to apply all the colors to my image. I love how it turned out!
Sunny Studio Colorful Daisy Card (using Cheerful Daisies, Watering Can, Happy Thoughts Stamps, Fishtail Banner II Dies & Summer Splash Paper)

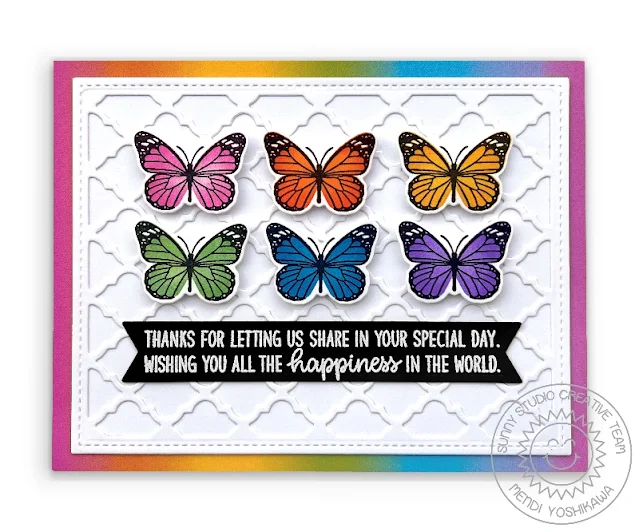
Card No. 6: For this clean and simple card I wanted to make the butterflies from the Watering Can Stamps the star of the show, arranging them in a rainbow grid pattern. I started by cutting a rainbow panel from our Spring Fling Paper pack and then layered it with the largest Stitched Rectangle Die which I die-cut a second time using our Frilly Frames Quatrefoil Dies in the center. For my sentiment I white heat embossed a phrase from our new Inside Greetings Congrats Stamps (which I will be sharing more of on Thursday) onto a black banner cut using our Slimline Pennant Dies.Sunny Studio Rainbow Butterfly Butterflies Card (using Watering Can & Inside Greetings Congrats Stamps, Frilly Frames Quatrefoil & Slimline Pennant Dies, Spring Fling Paper)

Card No. 7: Switching gears, I have a series of cards featuring the tropical leaves from our new Summer Greenery Dies. For this card, I started by die-cutting the leaves from a number of colorful cardstock scraps and then inked them up along one edge with distress inks to add a little extra interest. I then set to work arranging them to fill my entire card front, cutting off any excess and saving them to add where I had openings along the edges. I kept the rest of my card fairly simple since the background was plenty busy, adding a small ric rac edge along the bottom using our Ric-Rac Border Dies. For my greeting I stamped the word "Summer" from our Radiant Plumeria Stamps using Versamark Ink on a Stitched Oval and sprinkled on coordinating colored embossing powders to match the tropical leaves in my background. I then heat embossed the word "greetings" from that same stamp set onto a leftover scrap of patterned paper from our Spring Fling Paper pack (in fact leftover from Card No.6).

Sunny Studio Colorful Rainbow Tropical Leaves Card (using Summer Greenery, Stitched Ovals, Ric Rac Border Dies & Radiant Plumeria Stamps)


Card No. 8: I created a tropical leaf frame for my next card, pairing the Summer Greenery Dies together with an opening cut using our Stitched Circle Small Dies. For my scene,  I used the boy from our new Kiddie Pool Stamps, together with the beach scene border from our Ocean View Stamps. To mask my black ink that had smeared during stamping, I decided to add some white sea foam using a Sharpie White Paint Pen and I ended up liking the happy accident. It just goes to show that the old adage is true; There are no mistakes in crafting, just opportunities to embellish. I complimented my little scene I added a coordinating yellow flower, leaves and aloha greeting from Hawaiian Hibiscus Stamps.Sunny Studio Boy in Beach Chair with Tropical Leaf Frame Card (using Kiddie Pool, Ocean View & Hawaiian Hibiscus Stamps, Summer Greenery Dies)

Card No. 9: My last card of the day pairs the Summer Greenery Dies with our Radiant Plumeria Stamps and Hawaiian Hibiscus Stamps. To help them blend together seamlessly, I chose to fussy cut all my floral images out by hand and added interest to my Summer Greenery green cardstock leaves by inking them up along one side using Rustic Wilderness Distress Ink. For my natural kraft background I combined the outside stitching from our Frilly Frames Retro Petals Dies with the inside portion from our Frilly Frames Herringbone Dies. My "Aloha" greeting was created by die-cutting the letters from our Classic Gingham Paper using our Chloe Alphabet Dies.
Sunny Studio Tropical Flowers & Leaves Aloha Card (using Summer Greenery, Chloe Alphabet, Frilly Frames Herringbone Dies, Radiant Plumeria & Hawaiian Hibiscus Stamps)

I frequently am asked which ink colors I used for my layered images. While I think there are so many great options out there, these are the colors I used today for my stamped images from light to dark:

Lavender Lilac (card no. 2 & 4)
PinkFresh Studio Soft Lilac
PinkFresh Studio Lavender
Gina K. Wild Lilac
Hero Arts Grape Juice

Lilac Alternative (card no. 3)
Lawn Fawn Fresh Lavender
Lawn Fawn Grape Soda
Lawn Fawn Juice Box
Hero Arts Grape Juice

Pink Lilac (card no. 2)
PinkFresh Ballet Slipper
Hero Arts Soft Pink
Hero Arts Bubblegum
Gina K.Passionate Pink

Blue Lilac (card no. 1 & 2)
Hero Arts Dusty Blue
Hero Arts Cornflower
PinkFresh Studio Blue Jay
PinkFresh Studio Sapphire

Green Leaves
PinkFresh Studio Grassy Knoll
PinkFresh Studio Key Lime
PinkFresh Studio Olive

Grey Watering Can
Hero Arts Soft Granite
Hero Arts Charcoal

Red Watering Can
Gina K. Red Hot
Concord & 9th Cranberry


Yellow Watering Can
PinkFresh Studio Sweet Mustard
PinkFresh Studio Marigold

Green Watering Can
PinkFresh Studio Key Lime
Hero Arts Fresh Lawn

Blue Watering Can
Gina K. Blue Raspberry
Versafine Clair Paradise

Basket (card no. 3)
Hero Arts Soft Sand
Gina K. Sandy Beach
Memories Sand
MFT Kraft

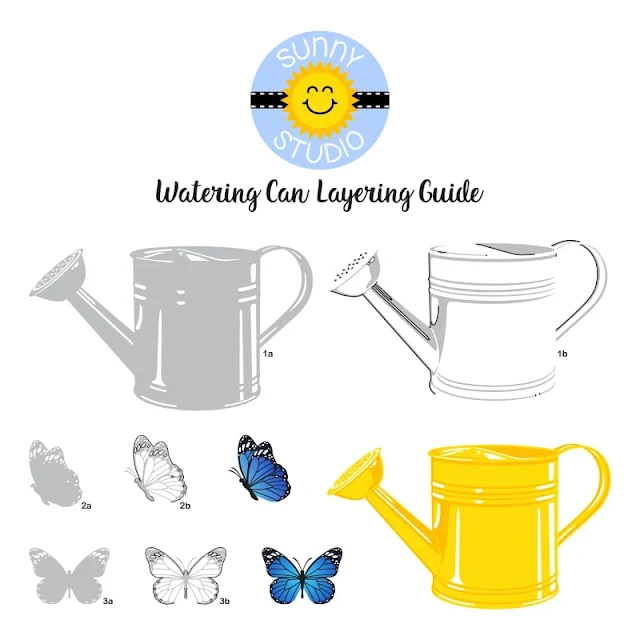
To help you line up our layered stamps I've created a special layering guide (you can click on the photo below to view it larger).  The guide shows the stamps starting with the lightest ink color, working towards the darkest, but sometimes I find it easier to start backward when setting up my layers. They both work depending on what your preference is.  The black outline indicates where that layer touches the previously stamped layer. 

Sunny Studio Blog: Layered Lovely Lilacs Clear Photopolymer Stamp Layering Guide

Sunny Studio Blog: Watering Can Layering Layered Butterfly Butterflies Stamp Alignment Guide

That wraps up today's sneak peeks. I'm so happy you spent part of your day with me today. I read all your comments and they mean so much!  I'd love to give a $50 gift code to one lucky winner using the rafflecopter below. 

Our daily contests this week run through Saturday, April 23rd at Midnight PST with winners announced here on Sunday, April 24th. :)

a Rafflecopter giveaway Here's a closer look at the our new Lovely Lilacs Stamps & Dies, Watering Can Stamps & Dies and Summer Greenery Dies used today (which will be available to purchase starting on April 22nd):

Sunny Studio Blog: Watering Can Layering Layered Butterfly Butterflies 4x6 Clear Photopolymer Spring & Summer StampsSunny Studio Blog: Lovely Lilacs Layering Layered Clear Photopolymer Stamp Set for Spring & Summer

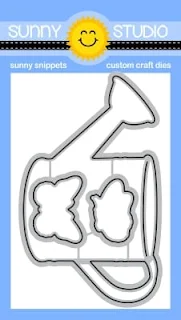
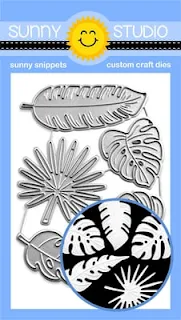
Sunny Studio Stamps Blog: Watering Can & Butterflies Metal Cutting Dies SetSunny Studio Stamps Blog: Summer Greenery Tropical Leaves Metal Cutting DiesSunny Studio Stamps Blog: Lovely Lilacs Metal Cutting Dies Set

Other Supplies Used:

Fishtail Banner II Dies
Shop at:
Sunny Studio
Chloe Alphabet Dies
Chloe Alphabet Dies
Shop at:
Sunny Studio
Thank You Words Die
Thank You Words Die
Shop at:
Sunny Studio
Versafine Onyx Black Ink
Shop at:
Sunny Studio

Fancy Frames-Square Dies
Shop at:
Sunny Studio
Classic Gingham 6x6 Paper
Shop at:
Sunny Studio
Happy Thoughts Stamps
Shop at:
Sunny Studio
Dapper Diamonds Embossing
Shop at:
Sunny Studio
Stitched Oval Dies
Stitched Oval Dies
Shop at:
Sunny Studio
Flirty Flowers 6x6 Paper
Shop at:
Sunny Studio
Botanical Backdrop Die
Shop at:
Sunny Studio
Frilly Frames Polka-Dot
Shop at:
Sunny Studio
Everyday Greetings Stamps
Shop at:
Sunny Studio
Hawaiian Hibiscus Stamps
Shop at:
Sunny Studio
Hawaiian Hibiscus  Dies
Hawaiian Hibiscus Dies
Shop at:
Sunny Studio
Slice of Summer Stamps
Shop at:
Sunny Studio
Slice of Summer Dies
Shop at:
Sunny Studio
Summer Splash 6x6 Paper
Shop at:
Sunny Studio
Cheerful Daisies Stamps
Shop at:
Sunny Studio
Cheerful Daisies Dies
Shop at:
Sunny Studio
Spring Fling Paper
Spring Fling Paper
Shop at:
Sunny Studio
Potted Rose Stamps
Potted Rose Stamps
Shop at:
Sunny Studio
Radiant Plumeria Stamps
Shop at:
Sunny Studio
Radiant Plumeria Dies
Shop at:
Sunny Studio
Frilly Frames Herringbone
Shop at:
Sunny Studio
Frilly Frames Quatrefoil
Shop at:
Sunny Studio
Captivating Camellias Stamps
Shop at:
Sunny Studio
Layered Basket Stamps
Shop at:
Sunny Studio
Layered Basket Dies
Layered Basket Dies
Shop at:
Sunny Studio
Slimline Pennant Dies
Shop at:
Sunny Studio
Ocean View Stamps
Ocean View Stamps
Shop at:
Sunny Studio
Ocean View Dies
Ocean View Dies
Shop at:
Sunny Studio
Kiddie Pool Stamps
Kiddie Pool Stamps
Shop at:
Sunny Studio
Kiddie Pool Dies
Kiddie Pool Dies
Shop at:
Sunny Studio
Inside Greetings Congrats
Shop at:
Sunny Studio
Pink Spinel Jewels
Pink Spinel Jewels
Shop at:
Sunny Studio

Ric Rac Border Dies
Ric Rac Border Dies
Shop at:
Sunny Studio
Hero Arts White Detail
Shop at:
Sunny Studio
Pure White Jewels
Pure White Jewels
Shop at:
Sunny Studio
VersaMark Watermark Ink
Shop at:
Sunny Studio