Friday, July 23, 2021

Candy Shoppe Cards with Candice and Kay

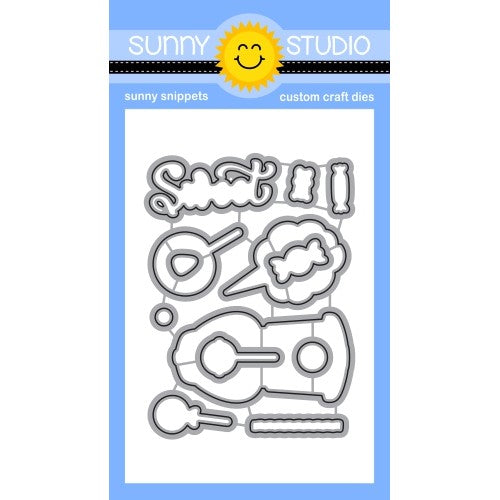
Hello, Candice here with a very sweet thank you card using the awesome Candy Shoppe stamp set!

Sunny Studio Stamps: Candy Shoppe Frilly Frame Dies Slimline Dies  Candy Themed Cards by Candice Fisher

I used these Sunny Studio products to create my slimline design:

I began my slimline with an 8 1/2 x 3 1/2 card base. For the background, I first die cut the stitched panel from Bristol Smooth cardstock, using a stencil I created from the Frilly Frames Stripes die I inked it with hickory smoke and glued to the center of my card front.

Sunny Studio Stamps: Candy Shoppe Frilly Frame Dies Slimline Dies  Candy Themed Cards by Candice Fisher

Next, I stamped the lollipops, gummy bears, and candies, colored them in rainbow with Copic markers, and used the coordinating dies to cut them out. I then heat embossed the sentiments in white on black cardstock and either trimmed into stripes or used the die cut to cut out the 'sweet'. To put the card together, I arrange them on my card front and adhered with foam tape. I finished with a sprinkle of rainbow jewels listed above!

Thank you again for visiting with me this Friday!

---------------------------------------------

Hello! Kay here, and I have a fun card to share with you today featuring the Candy Shoppe stamp set and Candy Shoppe coordinating dies. The images in this stamp set are so cute and with all of the different sentiments included, this stamp set can be used for so many different occasions!

Sunny Studio Stamps: Candy Shoppe Candy Themed Card by Kay Miller

I started by blending some Peacock Feathers distress ink onto Bristol Board cardstock. I then sprinkled with water and patted it dry with a paper towel, and lastly speckled it with some of the same ink diluted with water. With my background all made, I then stamped and colored all of the cute images from the Candy Shoppe stamp set with Copic markers.

Sunny Studio Stamps: Candy Shoppe Candy Themed Card by Kay Miller

I cut all of the images out with the Candy Shoppe coordinating dies. I stamped the sentiment and cut it out also and then added everything to my card using foam tape.

I just love how it turned out and I have plans to give this to a little niece of mine who has a birthday this month! I think it's perfect! I hope you have enjoyed my card today! Thanks so much for stopping by!

Sunny Studio Supplies Used:


Candy Shoppe Stamps
Candy Shoppe Stamps
Shop at:
Sunny Studio
Candy Shoppe Dies
Candy Shoppe Dies
Shop at:
Sunny Studio
Frilly Frames Stripes Die
Shop at:
Sunny Studio
Slimline Scalloped Frame
Shop at:
Sunny Studio

Thursday, July 22, 2021

Cupcake Shaped Die Focused Cards with Anja and Vanessa

Hello everyone, Anja here today sharing a fun shaped birthday card made with the Cupcake Shape Dies. Who wouldn't want to receive a big yummy cupcake like this?!

Sunny Studio Stamps: Cupcake Shape Die Slimline Dies Woodsy Autumn Birthday Card by Anja Bytyqi

These dies are so easy to work with! First, I cut out the base from white cardstock. The cupcake pieces were cut from Bristol smooth cardstock, Kraft cardstock and Gingham patterned paper (Gingham Pastels 6x6 Paper).

I went with some sort of Vanilla frosting and blended on a bit of Antique Linen Distress Oxide Ink. I also added tiny ink splatters with a paint brush. Next, I inked the edges of the cake portion die-cut with Frayed Burlap and splattered on lots of ink to create texture. The die for the wrapper piece creates some fine lines which I enhanced with Copic Markers.

Sunny Studio Stamps: Cupcake Shape Die Slimline Dies Woodsy Autumn Birthday Card by Anja Bytyqi

To decorate the cupcake wrapper, I stamped the adorable baking fox from the Woodsy Autumn set in Memento Tuxedo Black Ink. I masked off the original pie and replaced it with a little cupcake included in the Party Pups set. I colored the image as well as the cherry die-cut with Copics. I fussy cut the fox and applied a thick layer of Glossy Accents to the red part of the cherry to make it look shiny and dimensional.

I die cut the word 'congrats' from the Slimline Scalloped Frame Dies set out of turquoise glitter cardstock and adhered it to the frosting. The birthday sentiment (Sealiously Sweet Stamps) was stamped in VersaMark Ink onto black cardstock strips and I heat embossed it in white. Finally, I popped up the fox with foam tape.

Thank you so much for stopping by! Wishing you a sweet day!

------------------------------------------------

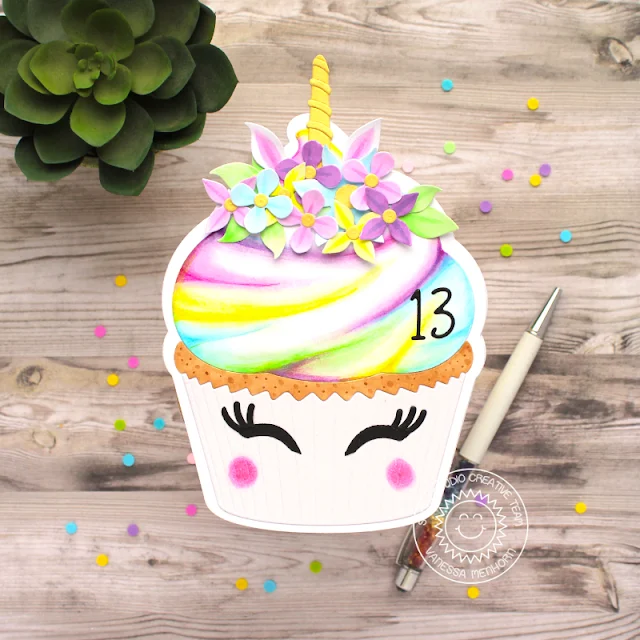
Hello to you! Vanessa here with a cute unicorn card using the Cupcake Shape Dies. I can't tell you how much I love this die! Here I created a card for my girl's birthday, no stamping included this time:

Sunny Studio Stamps: Cupcake Shape Die Loopy Letter Dies Botanical Backdrop Dies Birthday Card by Vanessa Menhorn

First, I created a card base from two large cupcake silhouettes. Now I die-cut the cupcake shapes from white cardstock, colored them with Copic markers and adhered them to the card. I die-cut the candle from gold cardstock, rounded the bottom and adhered it upside down for the horn. Then I die-cut the flowers and leaves from Botanical Backdrop Die from white cardstock, colored them with Copics and adhered the pieces to the cupcake, popping-up some elements with foam tape.

Supplies:
Cupcake Shape Dies
Botanical Backdrop Die
Loopy Letters Dies

Sunny Studio Stamps: Cupcake Shape Die Loopy Letter Dies Botanical Backdrop Dies Birthday Card by Vanessa Menhorn

The ears of my unicorn are made with the leaves dies and simply colored differently. Finally, I die-cut the 13, the eyes (made with the leaves die again) and the lashes (the stripes from the candle) from black cardstock and adhered everything.

I love how this turned out, exactly what I had in mind! I hope this inspires you to take a closer look at your supplies and see what you can make of them :) Thanks for stopping by!

Sunny Studio Supplies Used:

Cupcake Shape Dies
Cupcake Shape Dies
Shop at:
Sunny Studio
Party Pups Stamps
Party Pups Stamps
Shop at:
Sunny Studio
Party Pups Dies
Party Pups Dies
Shop at:
Sunny Studio
Loopy Letters Dies
Loopy Letters Dies
Shop at:
Sunny Studio
Gingham Pastels 6x6 Paper
Shop at:
Sunny Studio
Botanical Backdrop Die
Shop at:
Sunny Studio
Woodsy Autumn Stamps
Shop at:
Sunny Studio
Woodsy Autumn Dies
Woodsy Autumn Dies
Shop at:
Sunny Studio
Sealiously Sweet Stamps
Shop at:
Sunny Studio
Slimline Scalloped Frame
Shop at:
Sunny Studio

Wednesday, July 21, 2021

Picket Fence Cards with Julia and Franci

Hey crafty friends! It’s Julia here with a cute friendship card!

Sunny Studio Stamps: Picket Fence Border Dies Home Sweet Gnome Chloe Alpha Die Slimline Dies Card by Julia Englich

First, I stamped all my images from Home Sweet Gnome, Garden Fairy and A Bird's Life onto Strathmore Bristol Smooth paper and I colored them in using Zig Clean Color Real Brush Markers.

Then, I ink blended my background using a cloud stencil and Distress Oxide inks. I die cut two grassy borders using the Slimline Nature Borders and the Picket Fencer Border die set. I ink blended those grassy panel with Distress Oxides, too. While my ink blended panels were drying, I die-cut the beautiful little picket fence, as well as the woodgrain detail pieces from the Picket Fence Border dies out of white cardstock. I adhered the little woodgrain panels onto the base fence piece with liquid glue. I also die-cut the Comic Strip Everyday die and I just snipped off the inside pieces to create a white frame for my card.

Inks used: Tumbled Glass, Salty Ocean, Twisted Citron, Mowed Lawn, Rustic Wilderness Distress Oxides. Zig Markers used: 999; 30, 36; 73, 76, 64, 65, 66; 200; 22, 26; 52.

Sunny Studio Stamps: Picket Fence Border Dies Home Sweet Gnome Chloe Alpha Die Slimline Dies Card by Julia Englich


I adhered my cloud panel to an A2-sized card base. Then, to create a bolder sentiment, I die cut the word "gnome" using the Chloe Alphabet dies. To complete my sentiment, I stamped the rest of the greeting straight onto the background and then I just added the die-cut letters in between!

Finally, it was time to add all my die cuts and images to my little scene. I added white Nuvo drops onto the white dots on my mushroom house for a little bit of extra shine and dimension. I had lots of fun making this sweet little scene card and I really hope you like it!!


Thank you so much for stopping by today! Have an amazing day!


-----------------------------------------------------

Happy Wednesday everyone! It's Franci here with you today, with a cute Fall themed card showcasing the new Picket Fence Border dies.

Sunny Studio Stamps: Picket Fence Border Dies Bountiful Autumn Card by Franci Vignoli

First of all I stamped, colored and cut out all the images from the Bountiful Autumn set and added some details with a white gel pen.

Then I die cut my white panel using the Stitched Rectangles dies with the partial die cutting technique, inked the center with some Distress Ink and created a coordinated card base out of light grey cardstock.

Sunny Studio Stamps: Picket Fence Border Dies Bountiful Autumn Card by Franci Vignoli

I die cut the new border out of white cardstock, glued it down with liquid glue and added all the elements with foam adhesive into this cute scene. I stamped my sentiment at the bottom from the Harvest Mice set and adhered my decorated panel onto my card base with more foam adhesive. 

I love this card and I can't wait to celebrate the next season with it! Thanks a lot for stopping by today and have a lovely day!

Sunny Studio Supplies Used: 

A Bird's Life Stamps
Shop at:
Sunny Studio
A Bird's Life Dies
A Bird's Life Dies
Shop at:
Sunny Studio
Chloe Alphabet Dies
Chloe Alphabet Dies
Shop at:
Sunny Studio
Picket Fence Border Dies
Shop at:
Sunny Studio
Stitched Rectangle Dies
Shop at:
Sunny Studio
Comic Strip Everyday Dies
Shop at:
Sunny Studio
Home Sweet Gnome Stamps
Shop at:
Sunny Studio
Home Sweet Gnome Dies
Shop at:
Sunny Studio
Slimline Nature Borders
Shop at:
Sunny Studio
Bountiful Autumn Stamps
Shop at:
Sunny Studio
Bountiful Autumn Dies
Shop at:
Sunny Studio
Harvest Mice Stamps
Harvest Mice Stamps
Shop at:
Sunny Studio
Harvest Mice Dies
Harvest Mice Dies
Shop at:
Sunny Studio
Garden Fairy Stamps
Garden Fairy Stamps
Shop at:
Sunny Studio
Garden Fairy Dies
Garden Fairy Dies
Shop at:
Sunny Studio

Tuesday, July 20, 2021

Looking Sharp Cards with Kavya and Isha

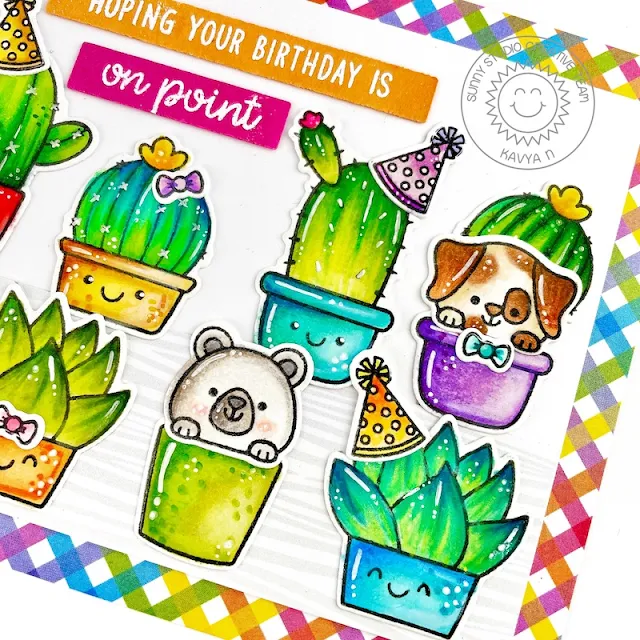
Hi folks, Kavya here. After my last week’s card, I thought I would try coming up with another unconventional combo and I think I found one - critters and succulents! I always think that the smallest stamp sets offer the largest variety and the new Looking Sharp stamp set doesn’t disappoint! The critters from Beach Buddies also happened to be just the perfect size for the succulent pots! 

Sunny Studio Stamps: Looking Sharp Beach Buddies Cactus Themed Birthday Card by Kavya

I first started off by creating a fun rainbow card base. I used and A2 sized stripped rainbow pattern paper from Spring Sunburst and then placed a light gray wood pattern paper from Subtle Gray Tones at the bottom half of a smaller white cardstock. Later, I stamped a bunch of succulents from Looking Sharp and critters from Beach Buddies. I stamped some extra succulents and cut the plant portion so that I could use it for the critters. 

Sunny Studio Stamps: Looking Sharp Beach Buddies Cactus Themed Birthday Card by Kavya

While making the card, I decided to reuse some of the ‘plant’ portions by adding them behind the critters! Then, I finally heat embossed a sentiment from Looking Sharp on colored cardstock to finish the card! 

Nothing fancy at all. But by combining two totally different sets and by using vibrant colors, you can easily create a fun card! Check back tomorrow for more inspiration :) 

--------------------------------------------------

Hello everyone! Isha here featuring the Looking Sharp stamps and dies with this whimsical CAS card. I really like these cute images :)

Sunny Studio Stamps: Looking Sharp Loopy Letter Dies Cactus Themed Birthday Card by Isha Gupta

To start, I stamped the images from the Looking Sharp stamp set using alcohol friendly ink. I also stamped some smiley faces on the pots to give a more whimsical feel. Color using copic markers, die-cut using the coordinating dies. Take a white mat layer. Adhere a stripe to the left using Subtle Grey Tones paper, now adhere a thin stripe from the Flirty Flowers paper pack. 

Sunny Studio Stamps: Looking Sharp Loopy Letter Dies Cactus Themed Birthday Card by Isha Gupta

Stamp the solid hearts from the Happy Hamsters stamp set. Die-cut the letters from the Loopy Letters Lower dies to create the word "FABULOUS". Adhere to the mat layer. Adhere this layer to the card. Stamp the sentiment onto a white stripe and add above the word FABULOUS. Adhere all the images using 3D foam and the card is done.

Thank you for dropping by.

Sunny Studio Supplies Used:

Beach Buddies Stamps
Shop at:
Sunny Studio
Beach Buddies Dies
Beach Buddies Dies
Shop at:
Sunny Studio
Happy Hamsters Stamps
Shop at:
Sunny Studio
Happy Hamsters Dies
Happy Hamsters Dies
Shop at:
Sunny Studio
Looking Sharp Stamps
Shop at:
Sunny Studio
Looking Sharp Dies
Looking Sharp Dies
Shop at:
Sunny Studio
Loopy Letters Dies
Loopy Letters Dies
Shop at:
Sunny Studio
Spring Sunburst 6x6 Paper
Shop at:
Sunny Studio
Flirty Flowers 6x6 Paper
Shop at:
Sunny Studio
Subtle Grey Tones Paper
Shop at:
Sunny Studio