Monday, April 19, 2021

Poppy Fields Cards with Ashley and Mayra

Hi friends! It's Ashley with a pretty floral card today featuring the new Poppy Fields set! I am so excited to have another addition to the gorgeous layering florals from Sunny Studio!

Sunny Studio Stamps: Poppy Fields Stitched Rectangle Dies Gift Card Pocket Dies For You Card by Ashley Ebben

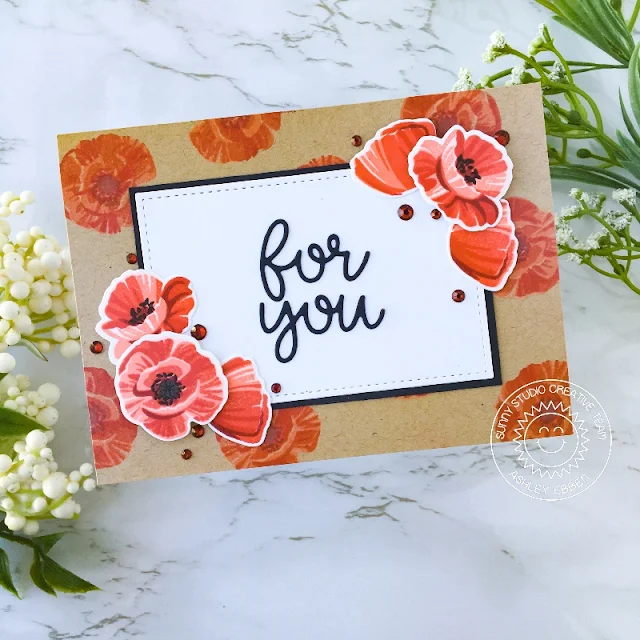
I started this card by stamping the largest poppy flower from Poppy Fields repeatedly onto kraft cardstock using the Pinkfresh Studio Heartbeat ink cube set to create a patterned paper look. Instead of using black and grey for the centers, I used a darker red for a more subdued look in the background. I cut a rectangle from white cardstock using the smallest of the new Stitched Rectangle dies. I added a thin border of black cardstock before adhering it to the center of my stamped background.

Sunny Studio Stamps: Poppy Fields Stitched Rectangle Dies Gift Card Pocket Dies For You Card by Ashley Ebben

I stamped more poppies from Poppy Fields, this time using several sizes, onto white cardstock using the same Pinkfresh Studio inks. I cut them out with the matching dies, then added them to the corners of the white rectangle, popping some up with foam tape for dimension. I cut the "for you" from the new Gift Card Pocket dies from black cardstock and glued it to the middle of the white rectangle. I finished with a scattering of Red Garnet jewels for some sparkle.

Thanks so much for stopping by! Have a wonderful day.

-----------------------------------------------

Hello everyone!! Mayra here with you. I am so excited about the newest release, isn't it wonderful?! For today, I used the beautiful Poppy Fields stamp set and coordinating die set

Sunny Studio Stamps: Poppy Fields Frilly Frame Dies Gift Card Pocket Dies For You Card by Mayra Duran-Hernandez

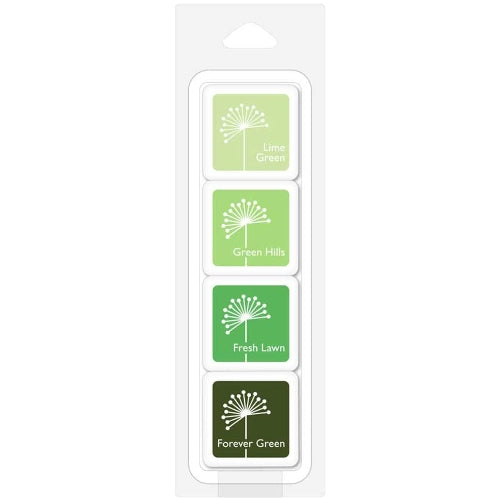
I started by stamping each of the layers using Altenew ink and Gina K ink. I started with Pastel Sunrise, then Canyon Clay, Burnt Red, next I used Red Velvet (Gina K. ink), and lastly Mahogany Bark. For the leaves, I used Green Hills (Hero Arts) and Lucky (Simon Says Stamp) inks.  

Sunny Studio Stamps: Poppy Fields Frilly Frame Dies Gift Card Pocket Dies For You Card by Mayra Duran-Hernandez

Next, I die used the larger of the stitched rectangles from the new Stitched Rectangles die set to die cut the top and bottom layers for the base panel. I then used the lattice layer from the Frilly Frames Lattice die set to die cut the lattice pattern onto the top layer. Next, I used foam tape to adhere the top layer to the bottom layer. I then die-cut the phrase 'for you' from the Gift Card Pocket die set from black cardstock. I die-cut it three times to give it a bit of dimension. 

I hope you enjoy the card I created to share with you today. Thank you very much for taking the time to stop by. I pray you each have a wonderful and blessed day. 

Sunny Studio Supplies Used:

Gift Card Pocket
Gift Card Pocket
Shop at:
Sunny Studio
Stitched Rectangle Dies
Shop at:
Sunny Studio
Poppy Fields Stamps
Poppy Fields Stamps
Shop at:
Sunny Studio
Poppy Fields Dies
Poppy Fields Dies
Shop at:
Sunny Studio
Frilly Frames Lattice Dies
Shop at:
Sunny Studio
Red Garnet Jewels
Red Garnet Jewels
Shop at:
Sunny Studio
Hero Arts Fresh Foilage Ink
Shop at:
Sunny Studio
PinkFresh Heartbeat Ink
Shop at:
Sunny Studio

Sunday, April 18, 2021

Sunny Studio Summer 2021 Sneak Peek Winners

Sunny Studio Stamps: Summer 2021 Collection Release

Thank you to everyone who helped us celebrate our Summer release countdown.  

We have the five winners for our $50 gift code giveaways. Without further ado they are:

Monday
Eve Gomi

Tuesday
Dolly / Scrap That

Wednesday
Donna Esmiol

Thursday
Becca Yahrling

Friday
Renae Van Ry

The winners have been emailed so please check your spam folder if you missed my email.

Thanks again. 
Hoping your Sunday is extra relaxing and full of sunshine! ❤️

Friday, April 16, 2021

Sneak Peek Week: Introducing Poppy Fields & Looking Sharp Stamps

Hello and welcome to the final day of our Summer Peek Week!  All this week I have been showcasing cards using our newest collection which is now available for purchase. Before you run off and shop though, make sure to check out our our last peek at three new stamp sets below, including two brand new inside greetings sentiment sets and a video showing a closer look at everything.

Card No. 1: My first set of cards spotlight our newest floral layering stamps called Poppy Fields. For this set of cards I created a simple flower bouquet using the three blossoms from the set along with the leaf and two accompanying stems. I created these cards to mass produce for our brick & mortar stores and the stamping of the flowers were fairly time consuming all on their own so I wanted to keep the rest of my design fairly simple. The bows, the bold summer greeting from our Radiant Plumeria Stamps, and the red prints from our Classic Sunburst Paper & Sleek Stripes Paper sets all helped to add some extra interest with taking a ton of extra time. If you are looking to step things up just a tiny bit you can add stitching with our Slimline Basic Border dies (as shown on the right) or keep things simple (like the card on left).
Sunny Studio: "Summer Greetings" Poppies Bouquet Card (using Poppy Fields & Radiant Plumeria Stamps and Classic Sunburst & Sleek Stripes Paper)

Card No. 2:
 When creating the Poppy Fields Stamps, this next card is what I kept envisioning in my mind's eye. I haven't been fortunate enough to visit a field of poppies in real life, but red is my favorite color and I am always so enamored with the gorgeous photos I see. For this card, I started by inking up a piece of cardstock with Salty Ocean and Mowed Lawn distress ink and then die-cut it using the outer stitched rectangle from our Frilly Frames Quatrefoil Dies.

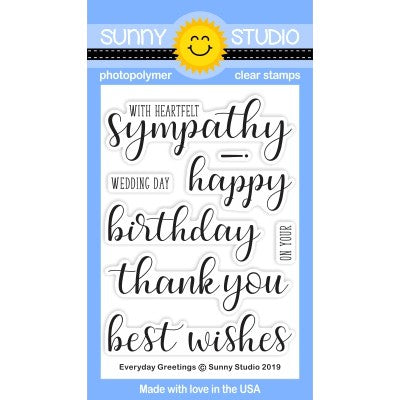
To get the extra height for my poppies, I pulled out and used one of the stems from our Timeless Tulips Stamps and then added the little ladybug from our Layered Basket Stamps. When my background was good and dry I stamped the "best wishes" greeting from our Everyday Greetings Stamps using Versamark Ink and heat embossing with Hero Arts White Detail Embossing Powder.
Sunny Studio Poppies Layered Flowers Best Wishes Card (using Poppy Fields & Everyday Greetings Stamps)

Card No. 3: This next card almost needs to be framed for my living room wall because it would blend right in with our current color scheme and style. To create the card I started with the red diagonal print from our Classic Sunburst Paper pack and then die-cut a panel from black cardstock combining the outer portion of our Frilly Frame Retro Petal Dies with the inner portion of our Frilly Frames Quatrefoil Dies, before backing it with a piece of white cardstock. I then layered a smaller stitched rectangle mat cut from black cardstock using the die from our Wrap Around Box Dies and layered it with the stitched label from our Sliding Window Dies which was stamped with a sentiment from our Autumn Greetings Stamps. After arranging my Poppies from the new Poppy Fields Stamps, I sprinkled in a few of our Red Zircon Jewels that I adhered with liquid adhesive.
Sunny Studio Thanks for your Kindness Layered Poppies Floral Card Card (using Poppy Fields Stamps,  Frilly Frames Quatrefoil Dies, Sliding Window Dies, Autumn Greetings Stamps & Classic Sunburst Paper)

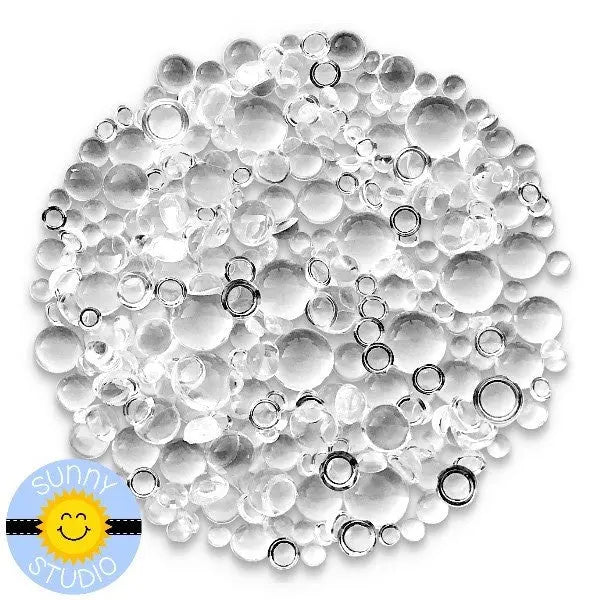
Card No. 4: Last, but not least I have a larger, fuller poppies bouquet inspired by THIS photo (which really makes me wish I had chosen a poppy themed wedding after scrolling through all the pretty photos, but I digress). I mounted my bouquet onto kraft cardstock, stamping my sentiment in red using a combination of greetings from both our Color Me Happy Stamps (for the word "happy") and our Happy Thoughts Stamps. Down the left side of my card, I heat embossed the polka-dot print onto black cardstock using our Background Basics Stamps and then added a sliver of red striped paper from our Striped Silly Paper pack. As a last touch, I adhered some faux water droplets with a liquid adhesive using our Clear Drops Mix.
Sunny Studio: "We're so happy for you" Poppies Bouquet Polka-dot Card (using Poppy Fields, Background Basics & Happy Thought Stamps, Striped Silly Paper)

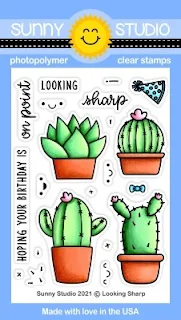
Card No. 5: Switching gears the last new set I have to share from the Summer release is called Looking Sharp which features 3 cute potted cacti and one succulent plant. Once again for those who prefer to not have faces on their inanimate objects, the different faces come as a separate set of images and extra little spiky spines are included to fill in any empty spaces instead.

For this card I cut a pink striped panel for my background from our Sleek Stripes Paper pack and then mounted a scalloped mat over the top using our Frilly Frames Eyelet Lace Dies. I then lightly inked up to center of my panel blending Tumbled Glass to Twisted Citron distress inks for my sky and grass. For my fence I cut down and used a portion of our new Picket Fence Dies which gave me a perfect place to tie the star balloons from our North Pole Stamps. The Looking Sharp set comes with the party hat and the cute punny greeting which I stamped using VersaFine Onyx Black ink.  
Sunny Studio Hoping Your Birthday is On Point Cactus Card (using Looking Sharp & North Pole Stamps, Picket Fence Die, Frilly Frames Eyelet Lace Die & Sleek Stripes Paper)

Card No. 6:
Up next is a card using the Looking Sharp Stamps without the faces and adding some of the extra quill-like spikes instead. To create my indoor scene I cut four little windows using our Sweet Treats House Add-on Dies, first using the two separate pieces together to cut my window panes from white and then cutting a second set from aqua cardstock using only the outside portion of the die so that I could layer them together. 

For my background I used a pink stripe from our Dots & Stripes Pastels Paper pack and then added a 3/8" wide strip of white cardstock to look like the wall's base molding. For my wood floor, I got crafty and cut the tips off of the woodgrain embossed pieces from our new Picket Fence dies, inked them up with some Tea Dye distress ink and staggered them for my floor. I felt like I was installing real wood floors in a dollhouse, but I am so in love with the results! For my sleeping kitty cat and ball of yarn I used images from our Pet Sympathy Stamps. Lastly I stamped the words "Hi Friend" taking the word "hi" from our Happy Hamsters Stamps and the word "friend" from our new Outback Critters Stamps.
Sunny Studio Kitty Sleeping in front of Window with Cactus & Succulent Plant Card (using Looking Sharp & Pet Sympathy Stamps, Picket Fence Die, Sweet Treat House Add-on Die & Striped Silly Paper)
 

Card No. 7:
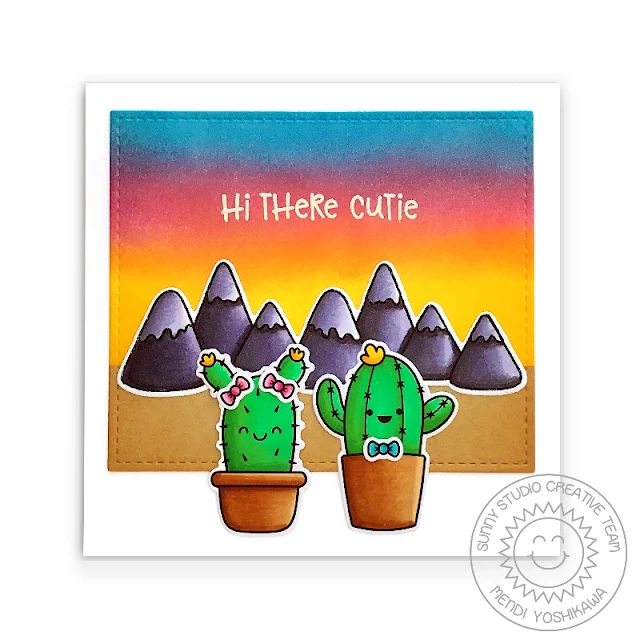
Drumroll please... For my 40th and final project for the Summer release I have one last card featuring a boy and girl cactus couple from our new Looking Sharp Stamps, together with the bow / bow tie from the set. I just love how the one cactus looks like she has pigtails! Makes me smile. 

For my background I created a sunset by blending Salty Ocean, Worn Lipstick, Carved Pumpkin & Mustard Seed distress inks. I then cut it out using the top portion of our Stitched Rectangle Dies and did the same to cut my ground from kraft cardstock. This allowed me to "scrunch" my rectangle from a vertical format to a much shorter rectangle with a horizontal orientation to sort of make my 4.25" square card look like a Polaroid photo. I bridged the gap between between my sky and ground with a mountain range from our Alpaca Holiday Stamps and finished off my card with a heat embossed sentiment from our Coastal Cuties Stamps.
Sunny Studio: "Hi There Cutie" Girl & Boy Catcus at Sunset Polaroid Style Card (using Looking Sharp, Alpaca Holiday, Coastal Cuties Stamps & Stitched Rectangle Dies)

Well that wraps up my card shares for the week. I frequently am asked which ink colors I used for my layered images.  While I think there are so many great options out there, these are the colors I used today for my poppy images from light to dark:

Red Poppy (cards no.1, 3 & 4)
Gina K. Peach Bellini
Gina K. Lipstick
Gina K. Coral Reef
Hero Arts Red Royal

Stampin' Up Lovely Lipstick

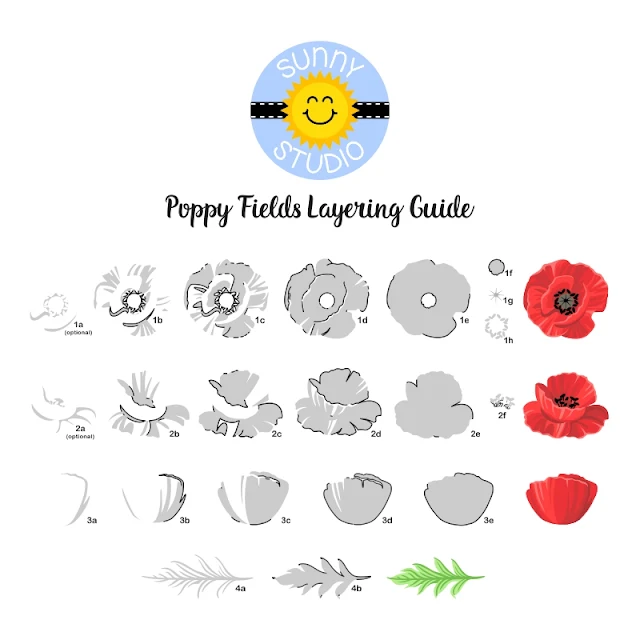
To help you line up our layered stamps like a pro I've created a special layering guide (you can click on the photo below to view it larger). The guide shows the stamps starting with the lightest ink color, working towards the darkest, but sometimes I find it easier to start backwards. They both work depending on what your preference is.  The black outline indicates where that layer touches the previously stamped layer.  :)

Sunny Studio Stamps: Poppy Fields Layered Poppies Floral Flower Ink Color Layering Guide

In honor of our big release today I created a video sharing a closer look at all of our newest products, along with the cards I created using them. You can also view it on our YouTube Channel HERE.


Here's a look at this season's free mini fish die that will automatically come with all orders while supplies last.

Sunny Studio Stamps Website Exclusive: Free Mini Fish Die Free with Every Summer 2021 Order

Also, just a reminder that we are continuing to offer free shipping on all USA Retail orders over $35 using the discount code FREESHIP or to save $5 on in order over $49 using discount code SAVE5. Limit one discount code per order.


That wraps up today's sneak peeks. I'm so happy you joined me this week! I'd love to give a $50 gift code to one lucky winner using the rafflecopter below.  If you haven't had a chance to enter the four other giveaways from earlier in the week, there's still a little time. The contests run through Saturday, April 17th at Midnight PST with winners announced here on Sunday, April 18th. :)

a Rafflecopter giveaway

Here's a closer look at the our new Poppy Fields Stamps & Dies and Looking Sharp Stamps & Dies used today and are now available for purchase.

Sunny Studio Blog: Poppy Fields Layering Layered Poppies 4x6 Clear Photopolymer Stamps  Sunny Studio Blog: Poppy Fields Layering Layered Poppies companion metal cutting dies

Sunny Studio: Looking Sharp 3x4 Cactus & Succulent Plant Clear Photopolymer Stamps  Sunny Studio Blog: Looking Sharp catcus companion metal cutting dies

Other Sunny Studio Supplies Used:

Color Me Happy Stamps
Shop at:
Sunny Studio
Picket Fence Border Dies
Shop at:
Sunny Studio
Stitched Rectangle Dies
Shop at:
Sunny Studio
Versafine Onyx Black Ink
Shop at:
Sunny Studio

Pet Sympathy Dies
Pet Sympathy Dies
Shop at:
Sunny Studio
Pet Sympathy Stamps
Pet Sympathy Stamps
Shop at:
Sunny Studio
Background Basics Stamps
Shop at:
Sunny Studio
Striped Silly 6x6 Paper
Shop at:
Sunny Studio
Happy Thoughts Stamps
Shop at:
Sunny Studio
Sliding Window Dies
Sliding Window Dies
Shop at:
Sunny Studio
Alpaca Holiday Stamps
Shop at:
Sunny Studio
Alpaca Holiday Dies
Alpaca Holiday Dies
Shop at:
Sunny Studio
Everyday Greetings Stamps
Shop at:
Sunny Studio
Coastal Cuties Stamps
Shop at:
Sunny Studio
Sweet Treats House Add-on
Shop at:
Sunny Studio
Frilly Frames-Eyelet Lace
Shop at:
Sunny Studio
Radiant Plumeria Stamps
Shop at:
Sunny Studio
Frilly Frames Quatrefoil
Shop at:
Sunny Studio
North Pole Stamps
North Pole Stamps
Shop at:
Sunny Studio
North Pole Dies
North Pole Dies
Shop at:
Sunny Studio
Classic Sunburst Paper
Shop at:
Sunny Studio
Sleek Stripes Paper
Sleek Stripes Paper
Shop at:
Sunny Studio
Red Zircon Jewels
Red Zircon Jewels
Shop at:
Sunny Studio
Hero Arts White Detail
Shop at:
Sunny Studio
Timeless Tulips Dies
Shop at:
Sunny Studio
Timeless Tulips Stamps
Shop at:
Sunny Studio
Layered Basket Stamps
Shop at:
Sunny Studio
Layered Basket Dies
Layered Basket Dies
Shop at:
Sunny Studio

Autumn Greetings Stamps
Shop at:
Sunny Studio
Clear Drops Mix
Clear Drops Mix
Shop at:
Sunny Studio
VersaMark Watermark Ink
Shop at:
Sunny Studio