Showing posts with label Christmas Garland Frame. Show all posts

Monday, November 1, 2021

Christmas Critters Tags & Card with Mayra and Ashley

Hello everyone, Mayra here. Happy Monday and happy November!!! I am sharing a set of tags to share with you today. I used the adorable new Christmas Critters stamp set. 

Sunny Studio Stamps: Christmas Critters Stitched Circle Dies Scalloped Circle Mat Dies Christmas Tags by Mayra Duran-Hernandez

I began by coloring the images using Copic markers. I used R14, R24, R46, R59, and E09 for the red areas. E89, E87, E84, E55, E31, and E41 for the sloths.

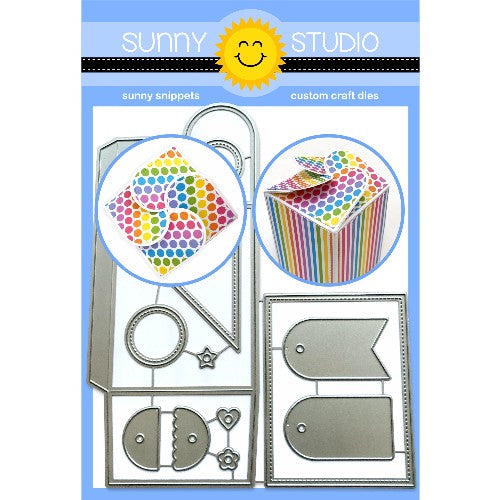
Next, I used the Frilly Frames Eyelet Lace die to die-cut the base panels for the tags. I used the circles from the Stitched Circle Large and the Stitched Circle Small dies to die-cut the base for the tags and to create the frame for the tags design. To create the frame, I used the Scalloped Circle Mat 1 dies. I then used the tags from the Window Quad Square dies set, the Wrap Around Box dies, and the tag from the Sweet Treat Bag die set. 

Sunny Studio Stamps: Christmas Critters Stitched Circle Dies Scalloped Circle Mat Dies Christmas Tags by Mayra Duran-Hernandez

I then stamped the sentiments onto each of the separate tags. I used the sentiments from the Christmas CrittersLazy ChristmasInside Greetings-Holiday, and the Christmas Cookies stamp sets. 

I hope you enjoy the tags I created to share with you today. Thank you very much for taking the time to stop by. I hope you each have a wonderful and blessed day. 

-----------------------------------------

Hi friends! It’s Ashley today with a simple but still adorable Christmas card! The Christmas Critters set I used is full of options, so you could even create different versions of this same design!

Sunny Studio Stamps: Christmas Critters Stitched Rectangle Dies Christmas Garland Frame Dies Christmas Card by Ashley Ebben

I started by blending Distress Oxide inks in Bundled Sage, Pine Needles, and Black Soot onto white cardstock. I die cut the piece with the largest Stitched Rectangle for some subtle interest, then added it to a warm, light gray card base. 

I stamped the wreath and kitty from Christmas Critters in Lawn Fawn Jet Black ink and colored with Copics. I cut them out using the matching dies, then added them to my card front. I popped the kitty up with foam tape to give him a bit of dimension. 

Sunny Studio Stamps: Christmas Critters Stitched Rectangle Dies Christmas Garland Frame Dies Christmas Card by Ashley Ebben

For the sentiment, I stamped the “meowy” in VersaMark ink and embossed with gold. I cut the “Christmas” from the Christmas Garland Frame die set from gold glitter cardstock and used it to finish the sentiment. I finished by using a gold marker to add some dots and crosses to the background for interest. 

Thank you so much for stopping by! Have a wonderful day!

Sunny Studio Supplies Used:

Stitched Rectangle Dies
Shop at:
Sunny Studio
Christmas Cookies Stamps
Shop at:
Sunny Studio
Christmas Critters Stamps
Shop at:
Sunny Studio
Christmas Critters DIes
Shop at:
Sunny Studio
Lazy Christmas Stamps
Shop at:
Sunny Studio
Wrap Around Box Die
Wrap Around Box Die
Shop at:
Sunny Studio
Christmas Garland Frame
Shop at:
Sunny Studio
Sweet Treats Gift Bag
Shop at:
Sunny Studio
Window Quad Square Die
Shop at:
Sunny Studio
Inside Greetings-Holidays
Shop at:
Sunny Studio
Scalloped Circle Mat 1 Dies
Shop at:
Sunny Studio
Stitched Circle Small Dies
Shop at:
Sunny Studio
Stitched Circle Large Dies
Shop at:
Sunny Studio

Monday, December 21, 2020

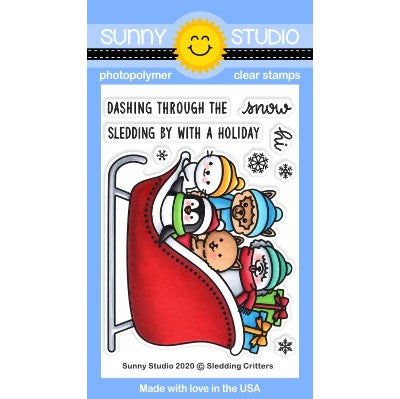
Sledding Critters Cards with Ashley and Mayra

Hello friends! It's Ashley with one more Christmas card for you all! I can't believe Christmas is this week already! I decided to use more non-traditional colors, and go with a pink scene this week featuring the adorable Sledding Critters

Sunny Studio Stamps: Sledding Critters Christmas Garland Frame Winter Themed Christmas Card by Ashley Ebben

I started by blending Distress Oxide inks in Picked Raspberry and Spun Sugar onto white cardstock. I splattered the piece with water and white paint for a snowy look and dried it with my heat gun. I cut a snowy hill from white cardstock with a Slimline Nature Borders die and added it to the bottom of the card. I then die cut the Christmas Garland Frame from light pink cardstock and glue it on top.

Sunny Studio Stamps: Sledding Critters Christmas Garland Frame Winter Themed Christmas Card by Ashley Ebben

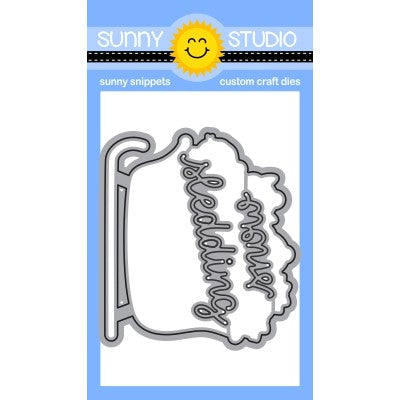
I stamped the image from Sledding Critters in Lawn Fawn Jet Black ink on white cardstock. I colored it with Copics, sticking with pinks and greys for a monochromatic feel, then cut it out with the matching die. I used the snowflakes from the Snowflake Circle Frame die on both white and white glitter cardstocks and scattered them around the edge of the card. I stamped a sentiment from Feeling Frosty in VersaMark ink onto black cardstock and embossed with white before adding it to the card with foam tape. I finished with some pink snowflake sequins from Colorful Snowflake Sequins for extra shine.

Thank you so much for stopping by! Have a wonderful day and Christmas!

-------------------------------------------------

Hello everyone, Mayra here with you today. WOW!! Christmas is this Friday!! I hope you all have been having a wonderful Holiday season so far. I created this card to share with you. I used the very cute Sledding Critters stamp set. 

Sunny Studio Stamps: Sledding Critters Rustic Winter Winter Themed Christmas Card by Mayra Duran-Hernandez

I began by coloring the image using Copic markers. I then die cut the stitched rectangle from the Frilly Frames Quatrefoil dies set. I die cut it using Bristol Smooth Cardstock. I also used the same stitched rectangle to die cut a layer from glittery cardstock. Next, I created two layers of snowy hills using the Slimline Nature Border dies. I also die cut a couple of birch trees using the Rustic Winter dies set. I then die cut the larger of the two tags from the Scalloped Tag Square dies set using red cardstock. I then cut a smaller square to fit within the tag. I also die cut a smaller square using the glittery cardstock. I then die cut the snowy slopes from the smaller glittered square. 

Copic colors used: Red: R46, R17, R05; Green: YG03, YG17, YG67, G29; Tan: E31, E55, E35, E41; Gray/Off White: E40, E41, W1, N3, W3

Sunny Studio Stamps: Sledding Critters Rustic Winter Winter Themed Christmas Card by Mayra Duran-Hernandez

I used Distress Inks to add color to both the stitched rectangle panel and the small square panel. I started with Chipped Sapphire Distress Ink, Blueprint Sketch Distress Oxide, Chipped Sapphire Distress Oxide, and a bit of Black Soot Distress Ink. I then added white splatters over both panels and a bit over the colored image and tag. Next, I used Copic markers to add some color to the die cut Birch trees. 

I hope you enjoy the card I created to share with you today. I pray you each have a wonderful and super blessed Christmas. 

Sunny Studio Supplies Used:

Rustic Winter Dies
Rustic Winter Dies
Shop at:
Sunny Studio
Feeling Frosty Stamps
Shop at:
Sunny Studio
Snowflake Circle Frame
Shop at:
Sunny Studio
Scalloped Tags-Square
Shop at:
Sunny Studio
Christmas Garland Frame
Shop at:
Sunny Studio
Frilly Frames Quatrefoil
Shop at:
Sunny Studio
Slimline Nature Borders
Shop at:
Sunny Studio
Scaredy Cat Dies
Scaredy Cat Dies
Shop at:
Sunny Studio
Sledding Critters Dies
Shop at:
Sunny Studio

Tuesday, December 8, 2020

Retro Ornament Cards with Juliana and Isha

Hello Sunny Studio friends! It's Juliana and today I'm here sharing a slimline card I created using the Retro Ornaments Stamp Set.

Sunny Studio Stamps: Retro Ornaments Christmas Garland Frame Dies Slimline Dies Christmas Cards by Juliana Michaels

I began with the the Retro Ornaments Dies and cut the base shape from various colors of cardstock. I then used the coordinating Retro Ornaments Stamp for that shape and stamped the image with embossing ink. I then heat embossed it with gold embossing powder. To finish off each ornament I added a gold bow.

For the card base, I used the Slimline Scallop Frame Die. Once the base was completed, I used the Christmas Garland Frame Die to cut green cardstock and create the foliage/tree for the ornaments to hang from. I trimmed it to fit the size of the slim line card front and glued it in place.

Sunny Studio Stamps: Retro Ornaments Christmas Garland Frame Dies Slimline Dies Christmas Cards by Juliana Michaels

To complete the card, I adhered the ornaments using double sided foam adhesive to give them a little dimension. I then finished it off by adding the sentiment to the bottom right hand corner.

Thanks so much for stopping by today and I hope you enjoyed learning how I created this slimline card using the Retro Ornaments Stamp Set

---------------------------------------------

Hello everyone! Isha here with a playful Christmas card featuring the Retro Ornaments Stamp and dies.

Sunny Studio Stamps: Retro Ornaments Christmas Card by Isha Gupta

I started by stamping the ornaments from the Retro Ornaments stamp set. I inked the stamp using the lighter ink first, then I added a bit of darker ink towards the bottom and stamped it again to get slight depth. Die-cut the image using the coordinating dies. Stamp the metal part of the ornaments using embossing ink, sprinkle with WOW! metallic silver embossing powder and heat set.

Take a watercolor panel. Add a wash of twisted citron and peacock feathers distress inks. Let dry. Stamp and emboss the sentiment. Place the ornaments to see the placements and then die-cut this panel using the dies. I overlapped the ornaments on the right, so die-cut it accordingly. Tie the twine to hang the ornaments.

Sunny Studio Stamps: Retro Ornaments Christmas Card by Isha Gupta

Cut a striped black paper from the Sleek Stripes paper pad. Adhere to the card base on the left side. Adhere the panel using 3d foam. Adhere the ornaments to the card using liquid glue. To finish, I added some snowflakes from the Colorful Snowflake sequin mix.

Hope you enjoyed this creation. Thank you for dropping by!

Sunny Studio Supplies Used:

Christmas Garland Frame
Shop at:
Sunny Studio
Slimline Scalloped Frame
Shop at:
Sunny Studio
Retro Ornaments Stamps
Shop at:
Sunny Studio
Retro Ornaments Dies
Shop at:
Sunny Studio
Sleek Stripes Paper
Sleek Stripes Paper
Shop at:
Sunny Studio

Wednesday, December 25, 2019

Snowflake Frame Die Focused Cards with Franci and Ana

Hello crafty friends and Merry, merry Christmas!! Hope you're having a super happy Holiday time with all your loved one, it's Franci here and I'm so happy to pop in too today to wish you all the best and send Merry Wishes with this sweet Santa Claus Sunny Studio card.

Sunny Studio Stamps: Snowflake Frame Dies Hogs & Kisses Santa Claus Lane Christmas Cards by Franci Vignoli

First of all I created my card base out of white cardstock and I trimmed a coordinated white panel down to size too. I die cut this using the large Layered Snowflake Frame and I also die cut my "Merry" out of some silver sparkle cardstock using the Merry Christmas die included in the Christmas Garland Frame set. 

I inked the front of my card with Salty Ocean and Blueprint Sketch Distress Inks and I glued my window panel to the card. I also glued the "Merry" and stamped "Christmas" on the bottom. Then I stamped, colored with Copics and die cut some images from the Santa Claus Lane set and glued them down with some foam adhesive.

Sunny Studio Stamps: Snowflake Frame Dies Hogs & Kisses Santa Claus Lane Christmas Cards by Franci Vignoli

I added lots of details to all my little scene with a white gel pen, also added a little heart I stamped and die cut from the Hogs & Kisses set. Finally I added some little pearl embellishments here and there and I love how they looks so much!!

Hope you like my card and thank you so much for stopping by today! Now let's celebrate, shall we?! Merry, merry Christmas!

------------------------------------------------

Hello everyone and Merry Christmas! It is Ana here today with a water colored Christmas card featuring Layered Snowflake Frame dies and one of my favorite mini stamps Christmas Chapel.

Sunny Studio Stamps: Snowflake Frame Dies Christmas Garland Frame Dies Christmas Chapel Christmas Card by Ana Anderson

I absolutely adore the Snowflake frames and really wanted to combine it with Christmas Chapel and watercolor both panels for softer, winter wonderland look. I started with die cutting the front panel with larger Snowflake Frame die (I used Canson XL watercolor paper for both panels).  I added very light blue shades of color to the die cut panel and set it aside to dry.

I stamped the Christmas Chapel in Antique Linen Distress Ink (the lightest water-soluble ink I have) so I could do no line water coloring. I used Prima watercolors for both the front die cut snowflake frame panel, the chapel and the background/snow banks.

Sunny Studio Stamps: Snowflake Frame Dies Christmas Garland Frame Dies Christmas Chapel Christmas Card by Ana Anderson

To the chapel panel I added white (acrylic paint mixed with water) splatter. Once both my panels were dry, I stamped the sentiment - from Christmas Chapel set - to the front (snowflake frame) panel. I added foam tape to the snowflake frame pop it up and adhered both panel to A2 card base.

Thank you so much for spending time with us today! I really hope you like today’s winter wonderland project! Wishing you a blessed holiday season!

Sunny Studio Supplies Used:

Christmas Chapel Stamps
Shop at:
Sunny Studio
Christmas Chapel Dies
Shop at:
Sunny Studio
Santa Claus Lane Stamps
Shop at:
Sunny Studio
Santa Claus Lane Dies
Shop at:
Sunny Studio
Hogs & Kisses Stamps
Shop at:
Sunny Studio
Hogs & Kisses Dies
Hogs & Kisses Dies
Shop at:
Sunny Studio
Layered Snowflake Frame
Shop at:
Sunny Studio
Christmas Garland Frame
Shop at:
Sunny Studio

Saturday, December 14, 2019

Guest Designer Spotlight: Cards with Keeway Tsao

Hello friends! It’s Keeway Tsao from Kiwi Koncepts and I’ll be sharing some fun holiday inspirations with you today! We’re less than a couple weeks away, but there’s still time to make some last minute cards!

Sunny Studio Stamps: Merry Mice Santa Claus Lane Christmas Garland Frame Dies Layered Snowflake Frame Dies Winter Themed Holiday Cards by Keeway Tsao

I really love the Merry Mice set, the mice are so cute! When I saw those cheese trees, I knew I must create a winter scene with it. I stamped several images from the set in a dark brown hybrid ink and colored them up with Copic markers. I then used the matching dies to die cut the images out.

Sunny Studio Stamps: Merry Mice Santa Claus Lane Christmas Garland Frame Dies Layered Snowflake Frame Dies Winter Themed Holiday Cards by Keeway Tsao

Next, I worked on ink blending a snowy sky and used Pine Needles, Peacock Feathers, Cracked Pistachio, and Old Paper distress oxide inks. I splattered white acrylic paint generously. Then die cut some snow drifts out of white card stock and blended the edges with Broken China distress oxide ink.

Sunny Studio Stamps: Merry Mice Santa Claus Lane Christmas Garland Frame Dies Layered Snowflake Frame Dies Winter Themed Holiday Cards by Keeway Tsao

After adding my snow layers, I added my images onto the scene with foam tape. I used the large ‘winter wishes’ sentiment die cut from the Layered Snowflake Frame Die. It is die cut out of white card stock and adhered right on the background, and that completes the card!

Sunny Studio Stamps: Merry Mice Santa Claus Lane Christmas Garland Frame Dies Layered Snowflake Frame Dies Winter Themed Holiday Cards by Keeway Tsao

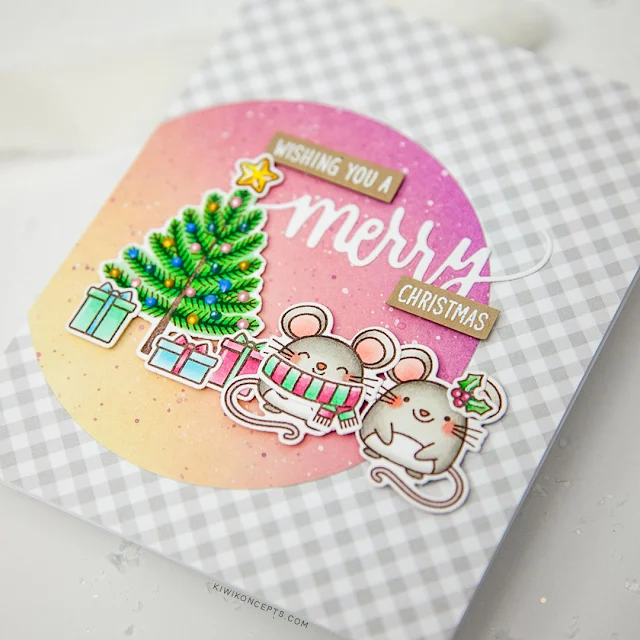
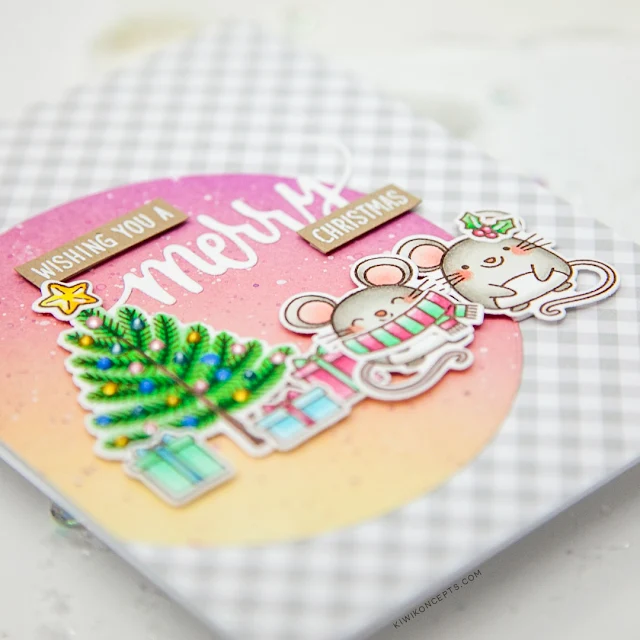
My next card once again uses the Merry Mice set, but I also borrowed some images from the Santa Claus Lane set. Again, I stamped my images in a dark brown hybrid ink and colored them with Copic markers. I die cut the images out with the matching dies.

Sunny Studio Stamps: Merry Mice Santa Claus Lane Christmas Garland Frame Dies Layered Snowflake Frame Dies Winter Themed Holiday Cards by Keeway Tsao

I ink blended a background with Wilter Violet, Victorian Velvet and Antique Linen and die cut it with a simple circle die. I offset this background on some grey plaid pattern paper from Subtle Grey Tones 6x6 Paper.

Sunny Studio Stamps: Merry Mice Santa Claus Lane Christmas Garland Frame Dies Layered Snowflake Frame Dies Winter Themed Holiday Cards by Keeway Tsao

I added my images thereafter with foam tape for dimension. For the sentiment, I die cut the ‘merry’ using the sentiment die found in the Christmas Garland Frame. I then heat embossed the ‘wishing you a’ and ‘christmas’ from the Santa Claus Lane set in white onto kraft card stock. I trimmed it down to thin strips and added it above and below the ‘merry’ with foam tape.

I hope you enjoy today’s inspiration. Happy holidays folks!

Sunny Studio Supplies Used:

Subtle Grey Tones Paper
Shop at:
Sunny Studio
Santa Claus Lane Stamps
Shop at:
Sunny Studio
Santa Claus Lane Dies
Shop at:
Sunny Studio
Merry Mice Stamps
Merry Mice Stamps
Shop at:
Sunny Studio
Merry Mice Dies
Merry Mice Dies
Shop at:
Sunny Studio
Layered Snowflake Frame
Shop at:
Sunny Studio
Christmas Garland Frame
Shop at:
Sunny Studio