Showing posts with label Basic Mini Shapes. Show all posts

Friday, November 5, 2021

Stitched Oval Die Focused Cards with Vanessa and Audrey

Hello to you! Vanessa here with a rocking card using the Stitched Oval 2 Dies and Scalloped Oval Mat 1 Dies.

Sunny Studio Stamps: Stitched Oval Die Scalloped Oval Mat Die Foxy Christmas Christmas Card by Vanessa Menhorn

To create the base, I simply die-cut the largest Scalloped Oval from white cardstock and scored the middle. Then I die-cut the stitched oval and embossed it with the Cable Knit Embossing Folder. I die-cut a little snow hill and adhered the piece to the card base. After I had backed the oval with another one on the back, I die-cut the greenery and adhered these. Now I stamped the foxes, colored the images with Copic markers, die-cut the pieces with the matching dies and adhered them with foam tape. 

Supplies used:
Foxy Christmas stamps + dies
Bear Hugs stamps
Stitched Oval 2 Dies
Scalloped Oval Mat 1 Dies
Cable Knit Embossing Folder
Winter Greenery Dies
Slimline Nature Border Dies

Sunny Studio Stamps: Stitched Oval Die Scalloped Oval Mat Die Foxy Christmas Christmas Card by Vanessa Menhorn

I stamped and heat-embossed the sentiment onto a strip of red cardstock, notched the edges and adhered the strip. Finally, I added clear gems to the card.

Have a wonderful weekend everybody! Thanks for stopping by!

---------------------------------------------------

Hello friends!  Audrey here with a fun and frosty card to share with you today! 

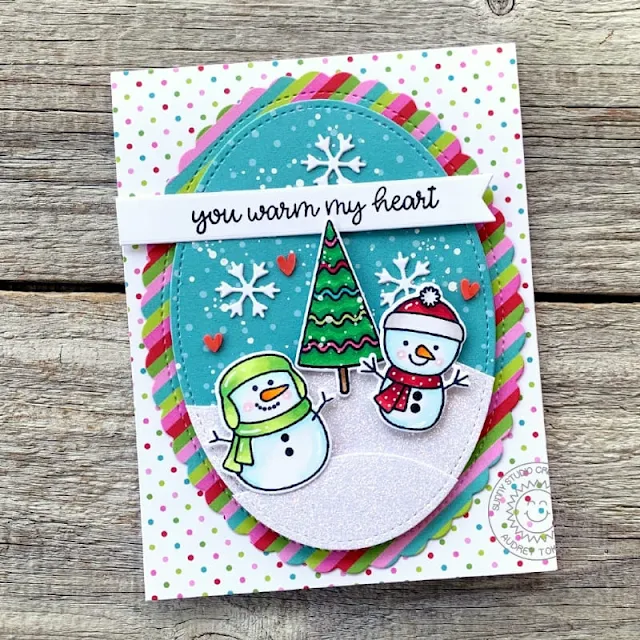
Sunny Studio Stamps: Stitched Oval Die Scalloped Oval Mat Die Feeling Frosty Christmas Card by Audrey Tokach

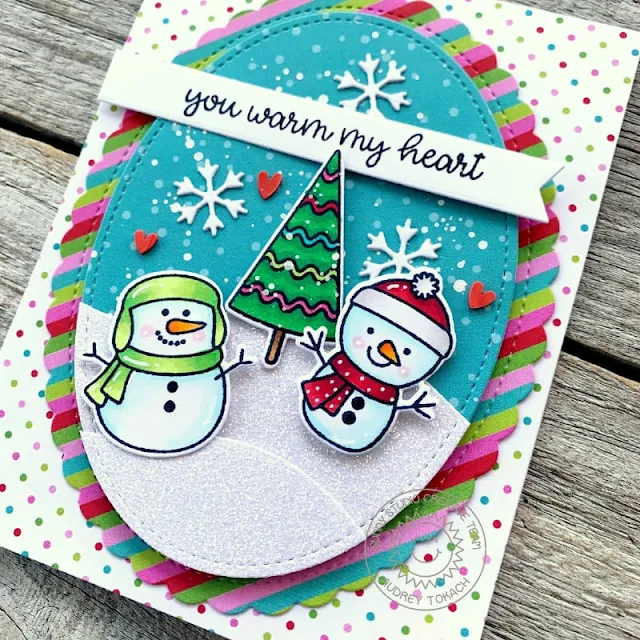
To create this card, I started off by adhering a piece of polka dot paper from the All Is Bright 6x6 paper pad to the front of an A2 card base. Then, using more patterned papers from the collection, I die cut the largest oval from both the Stitched Oval 2 Dies and the Scalloped Oval Mat 1 Dies. I splattered on some watered down white paint to the stitched die cut and adhered them together with liquid glue. Then, I ran the Stitched Oval die through my die cut machine twice more with white glitter paper and the Slimline Nature Border dies to create the snowy hills to ground my adorable snowmen.

Sunny Studio Stamps: Stitched Oval Die Scalloped Oval Mat Die Feeling Frosty Christmas Card by Audrey Tokach

I stamped and colored two snowmen and the tree from Feeling Frosty stamp set, and die cut them with the coordinating Feeling Frosty dies. I arranged my scene, and popped the elements up with foam tape for added dimension. Then, I stamped a sentiment from the set on a banner die cut, and tucked a few tiny snowflakes around it to fill the sky. The snowflakes are from the Basic Mini Shapes II die set. Finally, I adhered the oval focal point to the card base, and added some white gel pen accents and tiny clay hearts to finish off my card.

Sunny Studio Supplies Used:

Bear Hugs Stamps
Bear Hugs Stamps
Shop at:
Sunny Studio
Cable Knit Embossing
Shop at:
Sunny Studio
Foxy Christmas Stamps
Shop at:
Sunny Studio
Foxy Christmas Dies
Foxy Christmas Dies
Shop at:
Sunny Studio
Mini Basic Shape Dies II
Shop at:
Sunny Studio
Feeling Frosty Stamps
Shop at:
Sunny Studio
Feeling Frosty Dies
Feeling Frosty Dies
Shop at:
Sunny Studio
Slimline Nature Borders
Shop at:
Sunny Studio
Scalloped Oval Mat 1 Dies
Shop at:
Sunny Studio
Stitched Oval 2 Dies
Shop at:
Sunny Studio
Winter Greenery DIes
Shop at:
Sunny Studio
All Is Bright Paper
All Is Bright Paper
Shop at:
Sunny Studio

Friday, October 29, 2021

Holiday Express Cards with Audrey and Tammy

Hello friends! Audrey here with a fun holiday card to share with you! 

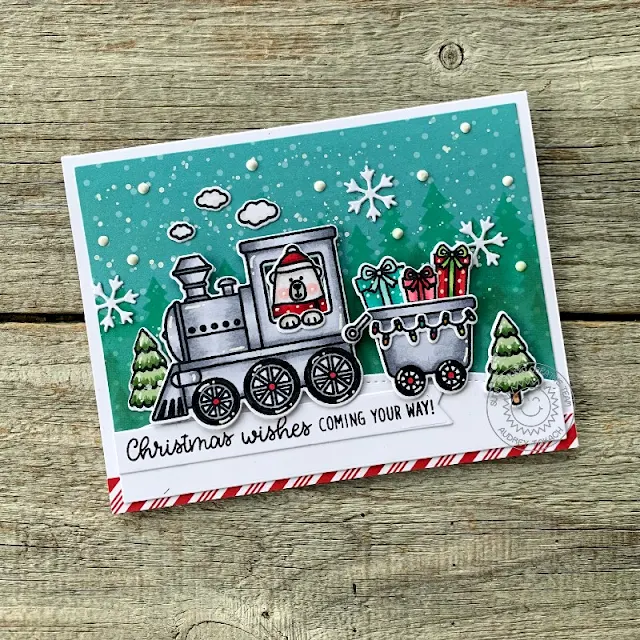
Sunny Studio Stamps: Holiday Express Slimline Dies Forest Tree Stencils Train Themed Christmas Card by Audrey Tokach

To create my card, I started off with a piece of patterned paper from the All Is Bright 6x6 paper pad cut to 4" x 5.25". I used the Forest Trees Stencil and teal and green shades of Distress Oxide ink to add a tree line near the top of the panel, when splattered the paper with watered down white paint to add more snowflakes to the background. I added a snowy hill to the bottom of the panel using the Slimline Nature Borders dies and some white cardstock. Then, I stamped and colored images from the Holiday Express stamp set with my Copic markers and die cut them with the coordinating Holiday Express diesI popped those images up with foam tape once I was happy with the arrangement.

Sunny Studio Stamps: Holiday Express Slimline Dies Forest Tree Stencils Train Themed Christmas Card by Audrey Tokach

I stamped a sentiment from the set onto a die cut banner and adhered it under the train on the snow bank. Next, I added some die cut snowflakes to the sky above the train using the Basic Mini Shapes II dies, along with some snowflakes made with white Nuvo Drops. Before mounting the panel to an A2 card base with foam tape, I added a strip of candy cane striped paper from the All is Bright paper pad. I finished off my card with some white gel pen accents.

------------------------------------------

Hello friends! Tammy here today with this fun holiday card, featuring the adorable set, Holiday Express. Santa and his reindeer are traveling by train this year to deliver all the Christmas packages, haha! 

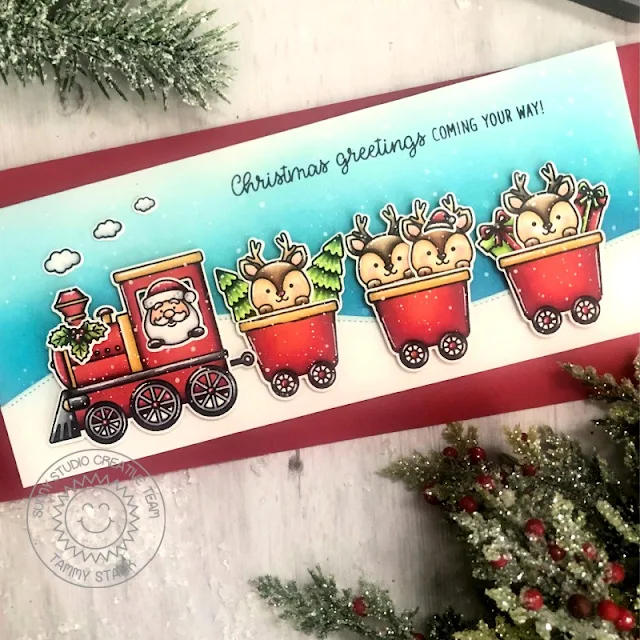
Sunny Studio Stamps: Holiday Express Slimline Dies Train Themed Christmas Card by Tammy Stark

To begin, I cut a piece of Bristol smooth cardstock to 3 1/2 X 8 1/2" and ink blended the background with Peacock Feathers, Broken China, and Tumbled Glass Distress Oxide inks. I cut a snowy border using the Slimline Nature Borders Dies, lightly inking the edge with Tumbled Glass ink before attaching to the bottom of the inked background. Next, I splattered white acrylic paint onto the background for a snowy effect.

I stamped the images from Holiday Express, colored with Copic markers, and die cut with the Holiday Express Dies. I then splattered white acrylic paint, thinned with water, onto the die cut images to give the appearance of freshly fallen snow.

Sunny Studio Stamps: Holiday Express Slimline Dies Train Themed Christmas Card by Tammy Stark

Next, I attached all the images to my card, using foam tape for dimension. Lastly, I stamped the sentiment in black ink across the top of my card then attached it to a 3 1/2 X 8 1/2 white card base to complete my card. 

Thanks so much for stopping by! Have a wonderful weekend!

Sunny Studio Supplies Used:

Holiday Express Stamps
Shop at:
Sunny Studio
Holiday Express DIes
Shop at:
Sunny Studio
Mini Basic Shape Dies II
Shop at:
Sunny Studio
Slimline Nature Borders
Shop at:
Sunny Studio
Forest Trees Stencils
Shop at:
Sunny Studio
All Is Bright Paper
All Is Bright Paper
Shop at:
Sunny Studio

Friday, September 10, 2021

Bewitching Cards with Vanessa and Audrey

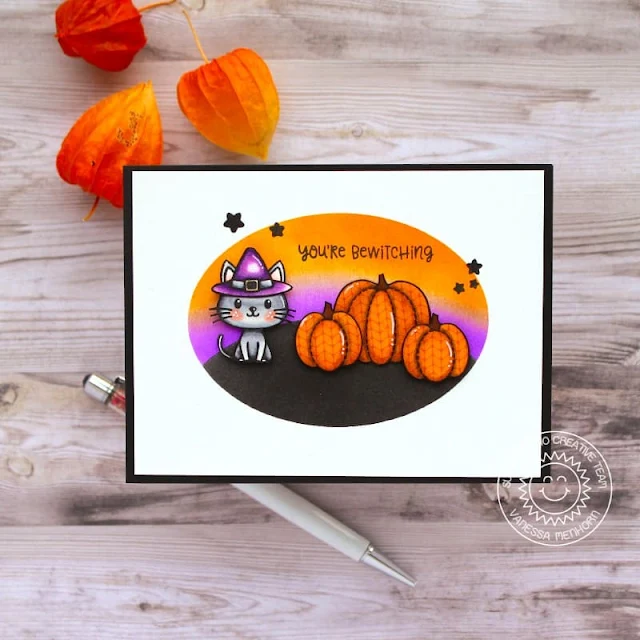
Hello to you! Vanessa here with a cute Halloween card using the adorable new Bewitching stamp set.

Sunny Studio Stamps: Bewitching Stitched Ovals Dies Halloween Card by Vanessa Menhorn

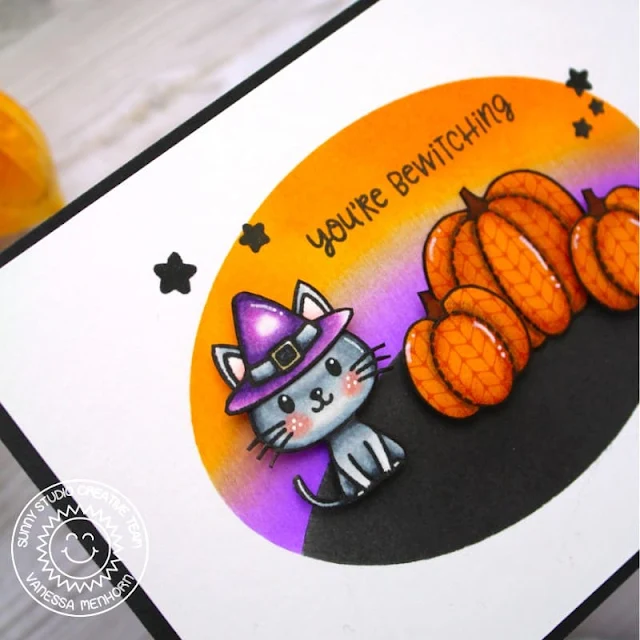
I first created a mask, die-cutting the oval from a scrap of paper. Now I used this over my white cardstock panel and inked the background with Carved Pumpkin, Wilted Violet and Black Soot Distress Oxide inks. Then I stamped the sentiment and the stars and adhered the panel to a black card base. I stamped the cat and the hat, colored the images with Copic markers, fussy-cut the pieces and adhered them. Finally, I paper-pieced the pumpkins with patterned paper, fussy-cut them and added these to the card.

Sunny Studio Stamps: Bewitching Stitched Ovals Dies Halloween Card by Vanessa Menhorn

Here comes a list of the products I used today:
Bewitching stamps
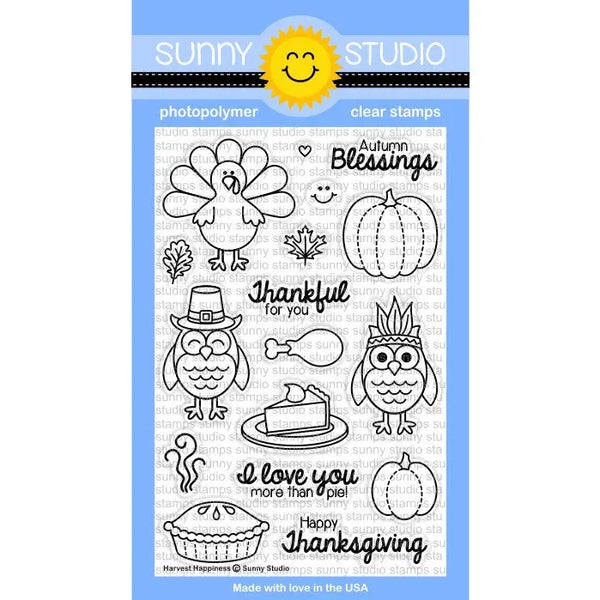
Harvest Happiness stamps
Stitched Ovals 2 Dies
Sweater Weather 6x6 paper

It's been fun to do paper-piecing again, I hope you like it! Thanks for stopping by!

----------------------------------------------

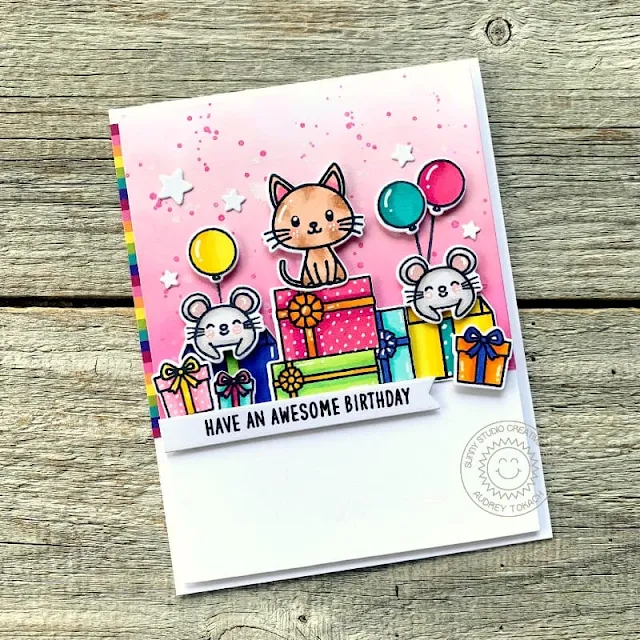
Hello there!  It's Audrey here with a card using the new Bewitching stamp set!  One of the things I love most about Sunny Studio images is that they can me mixed and matched for endless possibilities!  For this card, I paired the adorable little cat from the Bewitching stamp set with images from several other sets to create a fun birthday scene. 

Sunny Studio Stamps: Bewitching Christmas Critters Basic Mini Shape Dies Birthday Card by Audrey Tokach

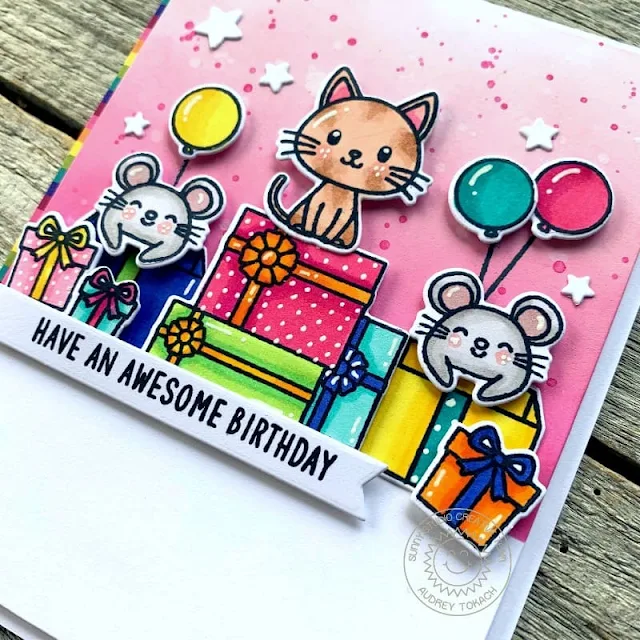
To create my card I started off with a piece of white cardstock cut to 4" x 5.25".  I masked off the bottom portion of the panel, and used Distress Oxide inks in Picked Raspberry, Kitsch Flamingo and Spun Sugar to ink blend some color on the top of the panel.  I splattered on clean water, and some pink watercolor paint to add interest.  Then I stamped and colored my images using Copic Markers, and die cut them with their coordinating dies.  The cat is from the Bewitching stamp set, the large stack of presents is from the Lazy Christmas stamps set, the large boxes and mice are from the Christmas Critters stamp set, the smaller presents are from the Holiday Express stamp set, and the tiny Balloons are from the Bear Hugs stamp set. 

Sunny Studio Stamps: Bewitching Christmas Critters Basic Mini Shape Dies Birthday Card by Audrey Tokach

I arranged my scene, and adhered everything to the panel, gluing some images flat with glue pen and popping some up with foam tape for dimension.  Then, using the Basic Mini Shape II dies, I added a scattering of tiny stars.  The sentiment is a combination of words from the Sealiously Sweet stamp set.  Before, I popped the panel up on an A2 card base, I added a tiny strip of bright striped paper from the new Sweater Weather 6x6 paper collection.  Lastly, I added some white gel pen accents to finish off my card.

Sunny Studio Supplies Used:

Harvest Happiness Stamps
Shop at:
Sunny Studio
Bear Hugs Stamps
Bear Hugs Stamps
Shop at:
Sunny Studio
Bear Hugs Dies
Bear Hugs Dies
Shop at:
Sunny Studio
Bewitching Stamps
Bewitching Stamps
Shop at:
Sunny Studio
Bewitching Dies
Bewitching Dies
Shop at:
Sunny Studio
Christmas Critters Stamps
Shop at:
Sunny Studio
Christmas Critters DIes
Shop at:
Sunny Studio
Holiday Express Stamps
Shop at:
Sunny Studio
Holiday Express DIes
Shop at:
Sunny Studio
Lazy Christmas Stamps
Shop at:
Sunny Studio
Lazy Christmas Dies
Lazy Christmas Dies
Shop at:
Sunny Studio
Mini Basic Shape Dies II
Shop at:
Sunny Studio
Sealiously Sweet Stamps
Shop at:
Sunny Studio
Stitched Oval 2 Dies
Shop at:
Sunny Studio
Sweater Weather Paper
Shop at:
Sunny Studio

Friday, February 5, 2021

Meow & Furever Cards with Candice and Tammy

Hello! Candice back with you today sharing a fun way to use the new Meow & Furever stamp set!

Sunny Studio Stamps: Meow & Furever Window Quad Dies Slimline Dies Friendship Cards by Candice Fisher

I used these Sunny Studio products for my mini slimline card:

I began my mini slimline with a 6 1/2 x 4 card base. For the background, I trimmed a piece of thick white cardstock a little smaller than my card base and ran it through with the Window Quad Circle dies and then a second time with just half of it with the partial die cut method.

Sunny Studio Stamps: Meow & Furever Window Quad Dies Slimline Dies Friendship Cards by Candice Fisher

I then stamped the friend onto the panel and adhered the panel over the polka dot coral pattern paper with foam tape. Next, I stamped the cute kitties, colored them with copic markers and used the coordinating dies to cut them out. I put the card together by placing a layered hello, with the top layer in gold glitter cardstock, above the stamped friend and a banner with the sentiment across the bottom circle. I adhered all the stamped images with a double layer of foam tape for some extra pop and finished with some gold glitter hearts and white pearl domes!

Thank you for visiting!

---------------------------------------------

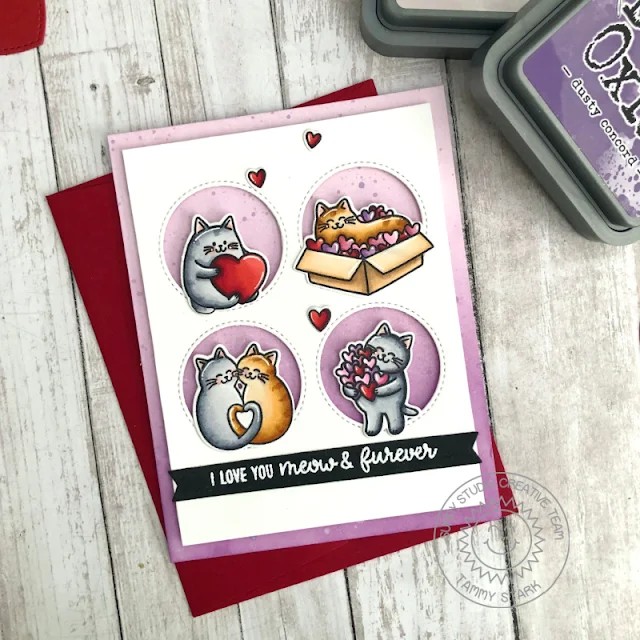
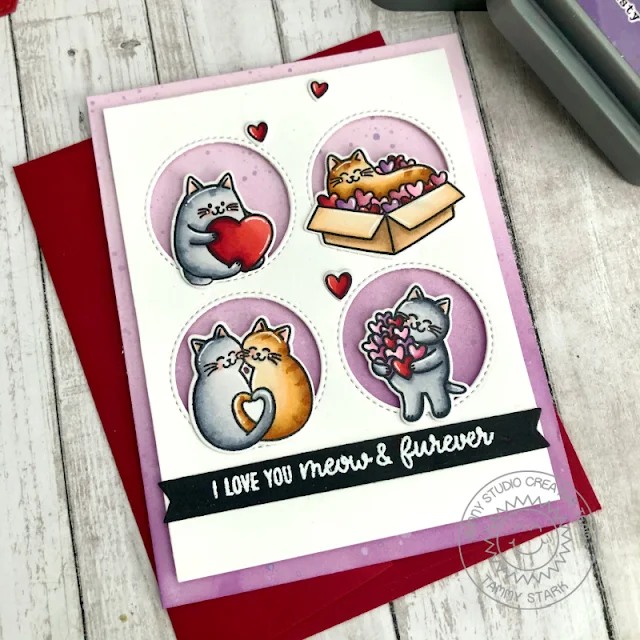
Hi friends! Tammy here sharing a card featuring these adorable kitties from the new set, Meow & Furever. This set is Purr-fect for so many occasions, and I'm in love with the punny greetings!

Sunny Studio Stamps: Meow & Furever Window Quad Dies Friendship Card by Tammy Stark

To begin, I cut Bristol cardstock to an A2 size and ink blended it with Milled Lavender and Dusty Concord Distress Oxide inks. I splattered some Dusty Concord, thinned with water, onto the background to create a bit of interest. Next, I cut a piece of white cardstock smaller than my background, then cut a circle grid using the Window Quad Circles Dies. I then attached it to the inked background using foam tape for dimension.

Next, I stamped the images from Meow & Furever, colored with Copic markers, and cut them out with the Meow & Furever Dies.  I arranged the images onto my card, using foam tape on the kitties. 

Sunny Studio Stamps: Meow & Furever Window Quad Dies Friendship Card by Tammy Stark

Lastly, I white heat embossed the sentiment onto a black cardstock sentiment strip and attached my card front to a white card base to finish it up!

Thanks so much for stopping by! Have a wonderful weekend!

Sunny Studio Supplies Used:

Dots & Stripes Pastels 6x6 Paper
Shop at:
Sunny Studio
Mini Basic Shape Dies II
Shop at:
Sunny Studio
Tea-riffic Stamps
Tea-riffic Stamps
Shop at:
Sunny Studio
Slimline Scalloped Frame
Shop at:
Sunny Studio
Window Quad Circle Die
Shop at:
Sunny Studio
Meow & Furever Stamps
Shop at:
Sunny Studio
Meow & Furever Dies
Meow & Furever Dies
Shop at:
Sunny Studio