Showing posts with label Background Basics. Show all posts

Tuesday, October 1, 2019

Layered Poinsettia Cards with Angelica and Juliana

Hi Friends! Angelica here, and I am so excited to share my first Christmas Release project! Today we are focusing on the beautiful Layered Poinsettia Die Set.

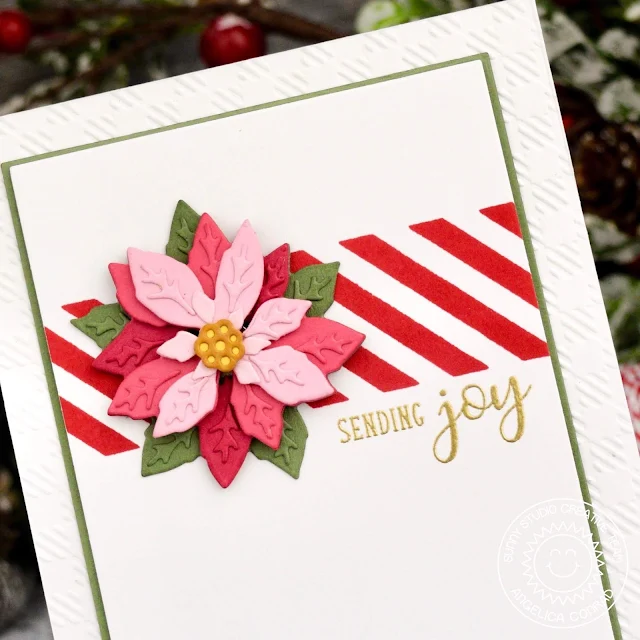
Sunny Studio Stamps: Layered Poinsettia Dies Petite Poinsettias Background Basics Holiday Card by Angelica Conrad

I started by pulling out random scraps of pink card stock. I used a cactus green card stock for the back piece. Before assembling the flower together, I used Scor Tape to add a small minus (-) side magnet to the middle of the green bottom layer. I die-cut the pieces, then pieced the poinsettia together with thin foam squares and glue.

Sunny Studio Stamps: Layered Poinsettia Dies Petite Poinsettias Background Basics Holiday Card by Angelica Conrad

I used the stripe stamp from the Background Basics stamp set to add red stripes, then stamped and gold heat-embossed a sentiment from the Petite Poinsettias stamp set. I trimmed the panel down, and added the positive magnet to the back of the panel with Scor Tape. I used thin foam squares to attach the panel to a cactus green panel. I used the new Buffalo Plaid Embossing Folder to emboss white card stock, and attached it to a card base. I added the stamped panel with Scor Tape to the card base to finish the card.

Sunny Studio Stamps: Layered Poinsettia Dies Petite Poinsettias Background Basics Holiday Card by Angelica Conrad

Now the recipient has a pretty Poinsettia that can be kept out when it's time to put the Christmas cards away! I hope I have given you ideas on ways to use this die. That's all that I have for today. Thanks for stopping by!

------------------------------------------------------

Hello Sunny Studio Friends! It's Juliana here and today I'm excited to share my first Christmas card of the season! I'm featuring the Sunny Studio Layered Poinsettia Die paired with the Christmas Garland Frame Die and the Woodgrain Embossing Folder for a slightly rustic design.

Sunny Studio Stamps: Layered Poinsettia Dies Christmas Garland Frame Dies Holiday Card by Juliana Michaels

I began by die cutting a mix of red, green and yellow cardstock using the Layered Poinsettia Die. After all the die cutting, I lightly inked the edges using Vintage Photo Distress Ink and an ink blending tool. Using a fine tipped liquid adhesive applicator, I adhered all of the layers together. I found it helpful to refer to the instructions that come with the die to help line up all the layers. I repeated this twice to have a flower for each corner of my card.

Sunny Studio Stamps: Layered Poinsettia Dies Christmas Garland Frame Dies Holiday Card by Juliana Michaels

Next, I took a piece of green cardstock and die cut it using the tree garland frame from the Christmas Garland Frame Die. This die is super intricate and I highly recommend using a metal shim to get a clean cut with your manual die cutting machine.

Sunny Studio Stamps: Layered Poinsettia Dies Christmas Garland Frame Dies Holiday Card by Juliana Michaels

I knew I wanted to achieve a slightly rustic feel, so I cut a piece of white cardstock to 4.25 x 5.5 inches and embossed it with the Woodgrain Embossing Folder. I then adhered the tree garland frame on top of this. For the sentiment, I die cut a piece of yellow cardstock using the Merry Christmas phrase from the Christmas Garland Frame Die. I adhered this to the center of the framed piece. I then adhered the poinsettia die cuts using double sided foam adhesive. For further embellishment, I added some berries using the red pearls from the Rainbow Pearls.

Sunny Studio Stamps: Layered Poinsettia Dies Christmas Garland Frame Dies Holiday Card by Juliana Michaels

Thanks so much for stopping by today! I hope you enjoyed the slightly rustic style Christmas Card featuring the Layered Poinsettia Die, Christmas Garland Frame Die and Woodgrain Embossing Folder.

Sunny Studio Supplies Used:


Petite Poinsettias Stamps
Shop at:
Sunny Studio
Background Basics Stamps
Shop at:
Sunny Studio
Buffalo Plaid Embossing
Shop at:
Sunny Studio
Woodgrain Embossing
Woodgrain Embossing
Shop at:
Sunny Studio
Layered Poinsettia Dies
Shop at:
Sunny Studio
Christmas Garland Frame
Shop at:
Sunny Studio

Wednesday, April 17, 2019

Slice Of Summer Cards with Mona and Franci

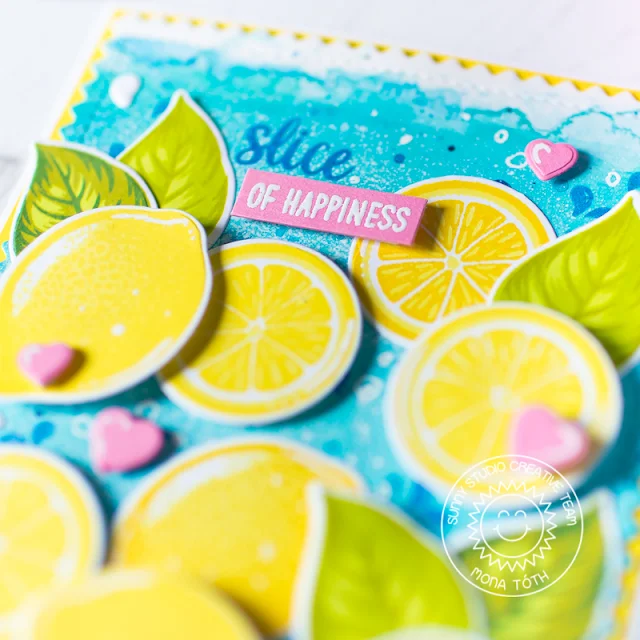
Hi crafty friends! It's Mona here, today I am showing you a yummy and fresh card featuring the Slice of Summer stamp set.

Sunny Studio Stamps: Slice Of Summer Hawaiian Hibiscus Frilly Frames Hello Word Everyday Cards by Mona Toth and Franci Vignoli

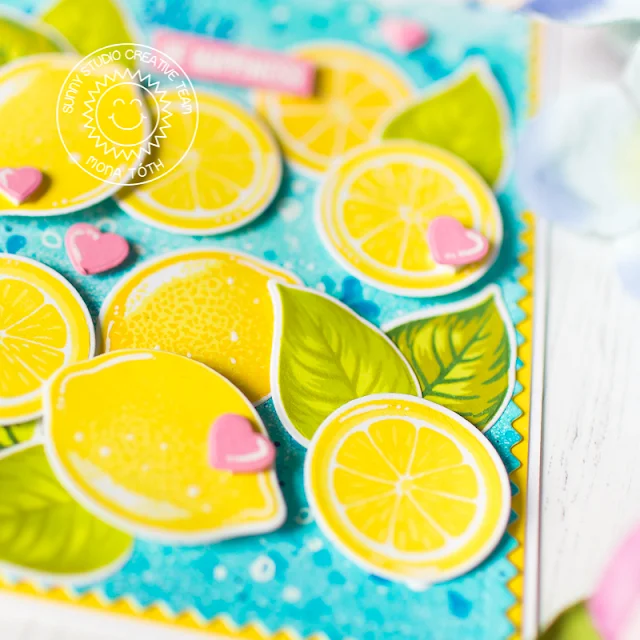
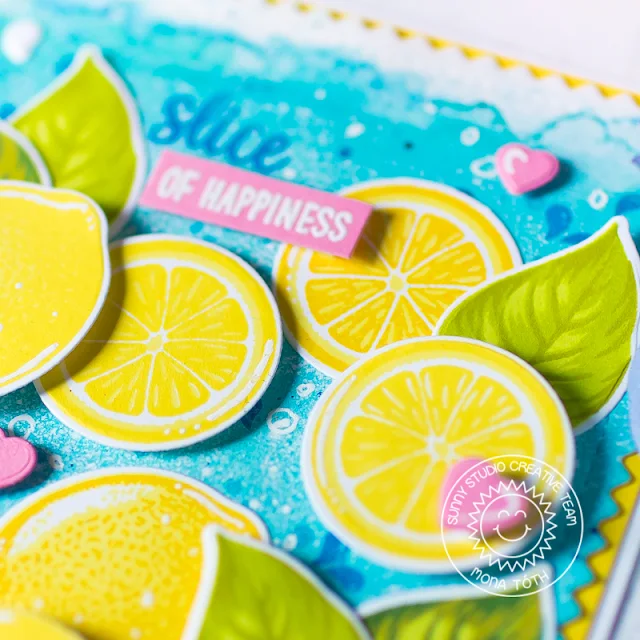
This time I started the card making with stamp layering. For the stamping I used Hybrid Inks from Scrapbook.com and green colored mini ink cubes from Altenew. As you can see I also stamped a few leaves from the Hawaiian Hibiscus stamp set. For the leaves I used the Bamboo, Parrot and Moss colors. For the lemon I used the Yellow Group. When it was done I die-cut the images with the coordinating dies.

Sunny Studio Stamps: Slice Of Summer Hawaiian Hibiscus Frilly Frames Hello Word Everyday Cards by Mona Toth and Franci Vignoli

The next step was the background which I made with teal and blue watercolors. While it dried I run it through my die-cut machine with the new Frilly Frames Chevron Dies.

Sunny Studio Stamps: Slice Of Summer Hawaiian Hibiscus Frilly Frames Hello Word Everyday Cards by Mona Toth and Franci Vignoli

Next I heat embossed the sentiment to a pink piece of cardstock and created pink hearts from the same pink cardstock as an embellishment.

Sunny Studio Stamps: Slice Of Summer Hawaiian Hibiscus Frilly Frames Hello Word Everyday Cards by Mona Toth and Franci Vignoli

In the end I styled my card and adhered the tasty images to my card base, embellished the card and yay, it was done. Thank you very much for reading through my post, I hope that you have enjoyed it and I have inspired you! If you like my creations let's be friends on Instagram. :)

------------------------------------------

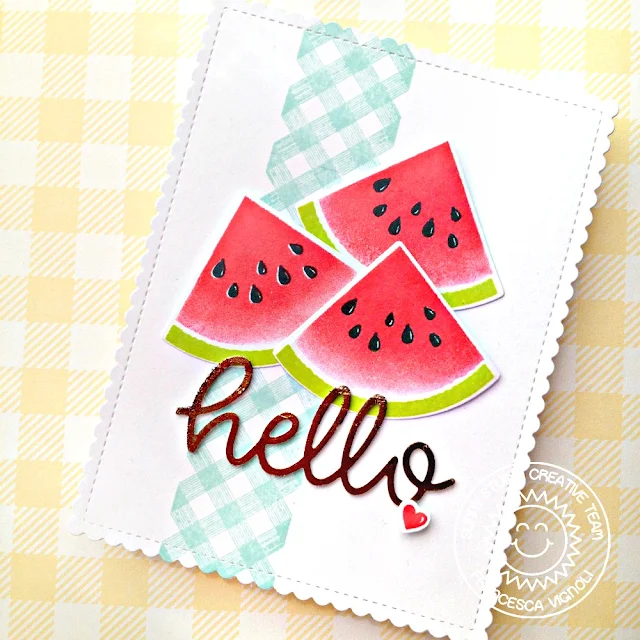
Hello there! Franci here with you today and I'm super happy to show you my first project with the new amazing summer release!! I'll showcase the Slice Of Summer set today with a cool watermelon card.

Sunny Studio Stamps: Slice Of Summer Hawaiian Hibiscus Frilly Frames Hello Word Everyday Cards by Mona Toth and Franci Vignoli

I love layering sets but what I love the most of them is having solid images that I can shade myself playing with inks. That's what I did here with my watermelon slices. I just used a red ink pad and I stamped the 3a layer multiple times, dabbing the ink away with a clean towel along the bottom of the slice. That created a natural shaded effect that I love!

I cut all my slices out with the coordinating dies and then I stamped the seeds and all the green parts with the same technique. I also die cut the card panel out of white cardstock using the new Frilly Frames Stripes die and stamped it with the Background Basic stamp set in a light teal ink.

Sunny Studio Stamps: Slice Of Summer Hawaiian Hibiscus Frilly Frames Hello Word Everyday Cards by Mona Toth and Franci Vignoli

Then I die cut the word Hello Word die from some double sided foam tape and I foiled it in gold rose. I glued everything down with a combo of liquid glue and foam tape and mounted my decorated panel onto a white card base.

Hope you like my card and thank you so much for stopping by today :) 

Sunny Studio Supplies Used:

Background Basics Stamps
Shop at:
Sunny Studio
Hello Word Die
Hello Word Die
Shop at:
Sunny Studio
Frilly Frames Chevron Die
Shop at:
Sunny Studio
Frilly Frames Stripes Die
Shop at:
Sunny Studio
Hawaiian Hibiscus Stamps
Shop at:
Sunny Studio
Hawaiian Hibiscus  Dies
Hawaiian Hibiscus Dies
Shop at:
Sunny Studio
Slice of Summer Stamps
Shop at:
Sunny Studio
Slice of Summer Dies
Shop at:
Sunny Studio

Wednesday, March 27, 2019

Everything's Rosy Cards with Mona and Franci

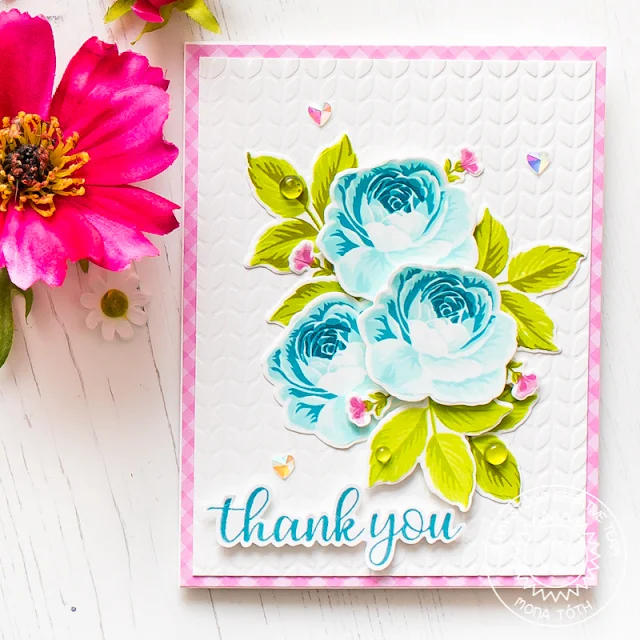
Hi crafty friends! It's Mona here, today I am showing you a bright floral card featuring the Everything's Rosy stamp set. I love this stamp set soo much and it is currently my favorite rose stamp set.


Sunny Studio Stamps: Everything's Rosy Everyday Greetings Thank You Card by Mona Toth

This time I started the card making with stamp layering. For the stamping I used Hybrid Inks from Scrapbook.com and green colored mini ink cubes from Altenew. For the leaves I used the Bamboo, Parrot and Moss colors. For the rose I used the Sky hybrid ink combo and for the tiny flower I used the Rose color combo from Scrapbook.com. When it was done I die-cut the images with the coordinating dies.


Sunny Studio Stamps: Everything's Rosy Everyday Greetings Thank You Card by Mona Toth

The next step was the background. I dry embossed a piece of white cardstock with Cable Knit Embossing Folder and backed it with Gingham Pastels Paper.


Sunny Studio Stamps: Everything's Rosy Everyday Greetings Thank You Card by Mona Toth

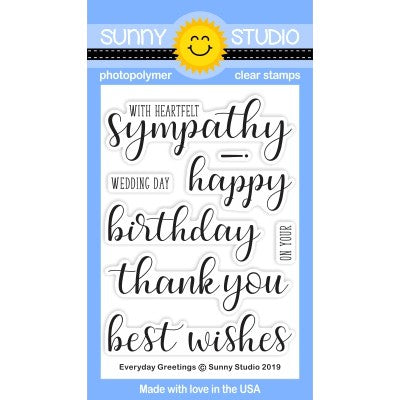
When it was done, I stamped the "Thank you" sentiment from the Everyday Greetings Stamp Set and after a quick fussy cutting I adhered it to the cardbase.


Sunny Studio Stamps: Everything's Rosy Everyday Greetings Thank You Card by Mona Toth

In the end I styled my card and adhered the flowers to my card base, embellished the card with Iridescent Hearts and Clear Drops and it was done. Thank you very much for reading through my post, I hope that you have enjoyed it and I have inspired you! If you like my creations let's be friends on Instagram. :)

------------------------------------------------------

Hello there! Franci here with you today with a classic "Best Wishes" card.


Sunny Studio Stamps: Everything's Rosy Everyday Greetings Background Basics Best Wishes Card by Franci Vignoli

First of all I created my landscape card base out of white cardstock and I cut out a coordinated panel in blue cardstock. I inked my blue cardstock with Chipped Sapphire distress ink to darken it up a little bit, I cut out 2 strips out of it and I let them dry completely.

I stamped the images from the Everything's Rosy set with just 1 ink each using the second generation stamping technique and I cut them out with their coordinated diesI added a strip of iridescent foil on to one of the blue strips, I also cut out a little strip of white cardstock and I stamped my sentiment from the Everyday Greetings set


Sunny Studio Stamps: Everything's Rosy Everyday Greetings Background Basics Best Wishes Card by Franci Vignoli

I also stamped that super cool pattern from the Background Basics set on to the front of my card with a light blue ink and then I assembled all the elements. I glued down the rose with foam tape and I also added some clear drops.

Hope you like my card and thank you so much for stopping by! 

Sunny Studio Supplies Used:

Background Basics Stamps
Shop at:
Sunny Studio
Cable Knit Embossing
Shop at:
Sunny Studio
Everything's Rosy Stamps
Shop at:
Sunny Studio
Everything's Rosy Dies
Shop at:
Sunny Studio
Everyday Greetings Stamps
Shop at:
Sunny Studio

Friday, March 8, 2019

Miss Moo Cards with Lexa and Rachel

Hi everyone! Lexa here today with a card that featuring Miss Moo Stamps and the coordinating dies. Couple weeks ago I saw the tutorial video on Jennifer McGuire's YouTube channel how to create a side pull on card. It's so easy to make and pretty fun too. So I try to create one for today's blog.

Sunny Studio Stamps: Miss Moo Barnyard Buddies Build-A-Tag Background Basics Fancy Frames Punny Card by Lexa Levana

Here's how the card looks like when it's closed. It looks like a regular 4.25"x5.5" card, but actually the message is on the right side of the card.

Sunny Studio Stamps: Miss Moo Barnyard Buddies Build-A-Tag Background Basics Fancy Frames Punny Card by Lexa Levana

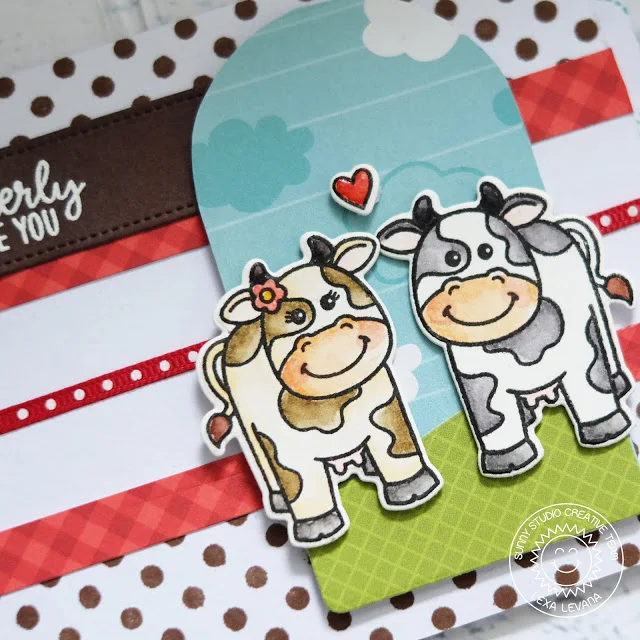
First, I stamp the cows from Miss Moo and Barnyard Buddies with Versafine black ink and watercolor them with Distress Markers. After I finished with coloring I use the coordinating dies and run them through die cutting machine. For the scene background I use Build-A-Tag #1 Dies and cover the top part which has a hole on it with clouds patterned paper. 

Sunny Studio Stamps: Miss Moo Barnyard Buddies Build-A-Tag Background Basics Fancy Frames Punny Card by Lexa Levana

I white embossed "I udderly adore you" sentiment on a piece of brown cardstock and use the fishtail banner dies from Fancy Frames Rectangle Dies. At the top and bottom part of my card base, I stamped brown polka dots using Background Basics Stamps. I keep the color coordinate red, brown and white to make the little scene pops out more. 

Sunny Studio Stamps: Miss Moo Barnyard Buddies Build-A-Tag Background Basics Fancy Frames Punny Card by Lexa Levana

Here how it looks like when you fully pull out the side tab. Take a look at these adorable cows. I add glossy accent to the red heart. 

Thank you so much for stopping by today. I hope you like today's card and have a wonderful day!

-------------------------------------------------------

Hello everyone! Rachel here and I have a card to share with you today featuring the new Miss Moo Stamp Set combined with the previously released Barnyard Buddies Set.  The cute little Miss Moo Cow goes perfectly with her farm friends from this other set.

Sunny Studio Stamps: Miss Moo Barnyard Buddies Woodland Borders Fancy Frames Punny Card by Rachel Alvarado

I created an A6-sized Shadow Box Card that measures at 4 1/2" x 6 1/4" when folded. To start, I cut 2 pieces of white card stock to 7 3/4" x 4 1/2". I then scored each piece along the long side at 1 1/5" & 6 1/4". These two pieces will be the front and back of your shadow box. Simply choose whatever shape you want to die cut into the front piece. I used a square-shaped die to cut my card window.

Sunny Studio Stamps: Miss Moo Barnyard Buddies Woodland Borders Fancy Frames Punny Card by Rachel Alvarado

I stamped all of my images with Copic friendly black ink, colored with Copics and then cut them out with their coordinating dies. I added some grassy hills on the inside of the card using the Woodland Borders Die Set. These grassy strips measured at 5 1/2" (varying heights) and were scored along the 5.5" side at 3/8" and 5 1/8" prior to die cutting my hilly border.


Sunny Studio Stamps: Miss Moo Barnyard Buddies Woodland Borders Fancy Frames Punny Card by Rachel Alvarado


I attached all of my images with liquid adhesive to the inside of the card and used 3D foam adhesive squares to the images on the outside.

Sunny Studio Stamps: Miss Moo Barnyard Buddies Woodland Borders Fancy Frames Punny Card by Rachel Alvarado

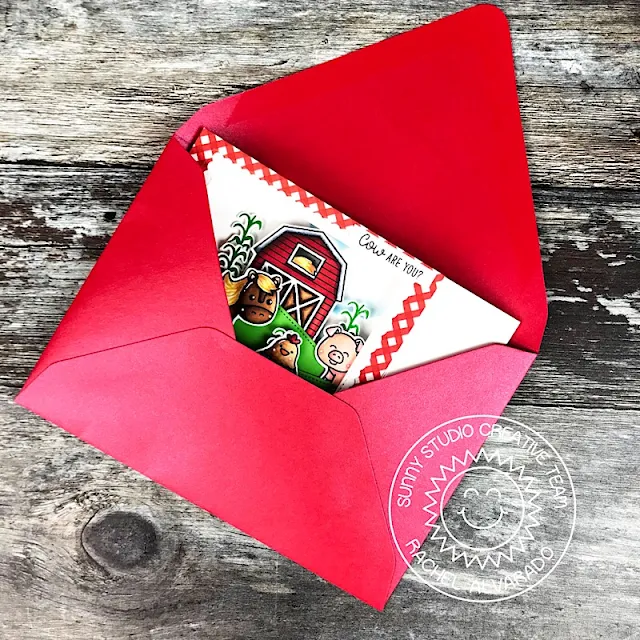
This card collapses and fits perfectly into an A-6 sized envelope but fits nicely into a 5x7 as well (shown above).

I hope you enjoyed my card today! I appreciate you taking the time to stop by. Have a wonderful day!

Sunny Studio Supplies Used:

Barnyard Buddies Dies
Shop at:
Sunny Studio
Barnyard Buddies Stamps
Shop at:
Sunny Studio
Fancy Frames- Rectangles
Shop at:
Sunny Studio
Background Basics Stamps
Shop at:
Sunny Studio
Woodland Borders Dies
Shop at:
Sunny Studio
Build-A-Tag #1 Dies
Build-A-Tag #1 Dies
Shop at:
Sunny Studio
Miss Moo Stamps
Miss Moo Stamps
Shop at:
Sunny Studio
Miss Moo Dies
Miss Moo Dies
Shop at:
Sunny Studio