Wednesday, January 11, 2023

Sneak Peek: Build-A-Birdhouse, Rainy Days and Ribbon & Lace Borders

Hello and welcome to day 3 of our Spring Peek Week!  All this week I am sharing cards showcasing our newest collection which will be available for purchase this Friday! Today I am sharing ideas with three new standalone die sets.

Card No. 1: Up first is a card showcasing our new Build-A-Birdhouse Dies. This die set comes with two birdhouse base images, three roof options, three different openings, other small accessories to customize your birdhouses and all the pieces you need to create two small birds.

For my first card I used our Out On A Limb Dies, cutting the tree branch portions from a woodgrain print from our Amazing Argyle Paper pack. For the leaves, they come with an embossed vein print which I emphasized by tracing them with my Copic Marker. I did the same by shading the embossing slats on my birdhouses to make them standout a bit more. For my background, I used a cloud print paper from our new Spring Fever Paper pack. A similar print can also be found in our Spring Fling Paper pack--It was one of my favorites so I knew I needed to make sure to have it live on in the new set as well. Lastly, I heat embossed a birthday greeting from our A Bird's Life Stamps onto a pendant strip from our Stitched Rectangle Dies.
Sunny Studio Blog: Birdhouses Hanging From A Tree Branch with Birds Card (using Build-A-Birdhouse & Out on A Limb Dies and Spring Fever Paper)

Card No. 2: For my next Build-A-Birdhouse card, rather than having my birdhouses hanging, I added them to posts which I created by cutting small strips of woodgrain embossed cardstock by Ranger (although Lawn Fawn and Simon Says Stamps both offer something similar as well). For my birdhouses I cut them from lavender, pink and yellow polka-dot tone-on-tone prints from our new Spring Fever Paper pack. I feel everything is cuter in polka-dots and I wish I had these birdhouses in real life! To keep things interested I mixed and matched the different styles to make them each unique.

I created my background by first inking up a white cardstock panel with Twisted Citron Distress ink and then cut grassy borders from masking material using our Slimline Nature Border Dies. I then used the mask with Mowed Lawn Distress Ink to add several grassy slopes to give the appearance my birdhouses are at the bottom of a small hill, cutting one grassy hill from actual cardstock to tuck my birdhouse posts behind. I then layered a white Picket Fence over the top, added a couple of blue jay birds from the die set and a "miss you" sentiment stamped in pink ink from our new Big Bold Greetings Stamps. I finished off my card by heat embossing the words "my friend" from our Super Duper Stamps onto a piece of dark grey cardstock to coordinate with the openings for my birdhouses. 
Sunny Studio Miss You My Friend Birds with Birdhouse, Grass & Fence (using Big Bold Greetings Stamps, Build-a-Birdhouse, Picket Fence & Slimline Nature Border Dies)

Card No. 3: For this Build-a-Birdhouse card I once again pulled out the tree branch from our Out On A Limb Dies, but this time rather than using my Copic markers to accentuate the veining detail in the leaves, I used a small finger sized foam dauber to accentuate one side of my leaf with Rustic Wilderness Distress Ink. For my landscape oriented card, I started by inking my white cardstock panel lightly with Broken China Distress Ink and then repeatedly ran the 2 stitched clouds from our Fluffy Cloud Dies through my die-cutting machine to create a full subtle background of clouds. I then assembled another trio of birdhouses, but this time I kept them all yellow with brown roofs and alternated the patterns for each using small patterned paper scraps I had on hand from our Spring Fling, Sleek Stripes and Dots & Stripes Pastels Paper packs. 

Rather than using the birds that come with the die set, this time I added small birds from our Little Birdie Stamps which I colored to look like canaries. When I was creating my cloud background the washi tape I was using to hold my dies in place caught the edge of my panel and tore the surface of my cardstock off, revealing the white core. However, I was determined to find a way to hide the boo-boo rather than start all over again since I was nearly done at that point. With this in mind, I stamped a sentiment from that same Little Birdie stamp set onto a thin stitched strip from our new Ribbon & Lace Border Dies using Versafine Clair Acorn Ink and adhered it along the bottom edge my the card to cover the mistake. It just goes to show almost every mistake can be covered with a little creativity.
Sunny Studio Bird Themed Birthday Card (using Build-A-Birdhouse, Out on A Limb, Ribbon & Lace, Fluffy Cloud Dies & Little Birdies Stamps)

Card No. 4: I created a Valentine's Day themed card for my last idea today using the new Build-A-Birdhouse Dies. For my background I layered the Quilted Hearts Portrait Dies cut from white cardstock over the top of a kraft cardstock panel. I also added a stitched scalloped edge to both using our new slimline style Ribbon & Lace Border Dies. For the bottom of my card, I added a strip of red heart print patterned paper from our Rainbow Bright Paper pack and layered a loopy heart border also in red over the top from our Heartstrings Border Dies. I love the little extra detail and texture the heart border adds without competing visually with my birdhouse as the focal point.

For my birdhouse, I cut the body of the house from kraft cardstock, adding a stitched heart opening and using small scraps of red gingham paper from our Classic Gingham Paper pack to embellish my house. As a way to hang my birdhouse, I added a garland of leaves from our Spring Greenery Dies, cutting three and layering them to form a swag across the top of my card. I then cut a red Scalloped Heart to center behind my birdhouse, added a simple red twine bow and stamped "For My Tweetheart" greeting, heat embossed on a small strip of kraft cardstock from our Little Birdie Stamps.Sunny Studio Tweetheart Punny Valentine's Day Card (using Build-a-Birdhouse, Hayley Alphabet, Quilted Hearts, Heartstring Borders, Ribbon & Lace Borders, Spring Greenery & Scalloped Heart Dies)

Card No. 5: Switching gears, I now have a series of cards to share featuring our new Rainy Days Dies which include all the pieces you need to create a layered umbrella, rain boots and several small groupings of raindrops. For this card I took all the small raindrops from the set and ran them through my die-cutting machine over and over again to create a custom background. If this is sounds too fussy or involved for you, I completely understand and I have shared an easier take on this look for card no. 8.

I started by cutting out all the pieces for my rain boots and umbrella from white cardstock and then inked them up piece by piece in the colors I wanted using distress ink with finger daubers, blending the colors of the rainbow for my polka-dot rain boots. While I had all my inks out and handy I also colored a small strip of paper for my stitched pennant which I cut out using our Stitched Rectangle Dies and heat embossed with a sentiment from our Over The Rainbow Stamps (heating it really well with a heat gun beforehand so my embossing powder wouldn't stick where I didn't want it). For the bottom of my card, I added three alternating layers of stitched scallops from our slimline length Ribbon & Lace Border Dies which I think almost look like ruffles. I needed something to visually balance the raindrops on the top of my card without being too distracting and I thought they fit the bill. Lastly I scattered some small red hearts from our Basic Mini Shape 2 Dies.

Sunny Studio Blog: Umbrella & Rain Boots Scalloped Cards (using Rainy Days Dies, Ribbon & Lace Dies and Over The Rainbow Stamps)

Card No. 6: If you're not feeling like having every pair of rain boots you make be polka-dot it's very easy to just eliminate the polka-dot layer from our new Rainy Days Dies and use the base of the boot die to determine the color of your boot which I did here using small scraps of patterned paper from our new Spring Fever Paper pack. Ironically I still gravitated towards polka-dot boots, but it opens up so many possibilities. This is yet another time I wish I could have these in real life! I think the rainbow gingham pair is my favorite! To frame my rain boots I used our Window Quad Square Dies which I cut from a tone-on-tone stripe from our Subtle Grey Tones Paper pack and added a lacy scalloped edge with our new Ribbon & Lace Border Dies. To back my square grid openings, I didn't want to add a color to compete with my colorful rain boots and white was feeling too washed out so I chose a soft grey cardstock (by Heffy Doodle) which I love!  I definitely must be better at incorporating grey in more of my projects. It's such a great neutral! I finished my card with the phrase "When it rains, look for a rainbow" from our Over The Rainbow Stamps
Sunny Studio Blog: Rain Boots Scalloped Cards (using Rainy Days Dies, Ribbon & Lace Dies, Over The Rainbow Stamps, Spring Fever & Subtle Grey Tones Paper)

Card No. 7: Next up is a fun card where I coordinated my paper pieced rain boots and umbrella from the Rainy Days Dies to my background. For my background I cut various pink and blue tone-on-tone strips of patterned paper from a number of different paper packs using the thin stitched ribbon die from our new Ribbon & Lace Border Dies. Almost all of these were using leftover pieces of paper I had after trimming down a 6x6 piece of paper for an A2 card front. I always keep a small Ziploc bag of these on hand and hoard my paper scraps for instances like this. I then alternated and adhered these strips on the diagonal in a repetitive pattern like a patchwork quilt, trimming off the excess as I went. To give your eye a tiny bit of rest (just a tiny bit) I layered a Stitched Circle Small Die with our Scalloped Circle Mat 3 Die, both cut from white cardstock. I then arranged my coordinating umbrella and rain boots in the center and stamped the sentiment "You Brighten My Day" from our Spring Showers Stamps, adding another small pink heart from our Basic Mini Shape 2 Dies.
Sunny Studio Umbrella & Rain Boots Diagonal Stripes Card (using Rainy Days, Ribbon & Lace Borders, Scalloped Circle Mat 3, Stitched Circle Small Dies & Various 6x6 Papers)

Card No. 8: My last card of the day focuses on the umbrella from our new Rainy Days Dies, creating a card that would be perfect for a bridal or baby shower. I cut five umbrellas from white cardstock and used a metallic silver Sharpie to color the metal portions of my umbrellas before layering the colorful portions over the top. I kept each individual umbrella a bright and happy monochromatic shade, alternating every other section with a different subtle tone-on-tone print from our Spring Fever, Gingham Pastels and Spring Fling Paper Packs. Before adhering my umbrellas to my card front, I stamped the background with raindrops using our Rain Showers Stamps. It's a mini 3x2 stamp set offering an excellent value! It has been designed to perfectly line up side to side and top to bottom on your card front in a repetitive pattern. I masked off the bottom portion of my card so that the raindrops would not fall below where I planned to add my row of umbrellas. Using our new Hayley Uppercase Alphabet Dies and Hayley Lowercase Alphabet Dies I created a custom greeting by spelling out the word "showering" and paired it with the words "You With Love" from our Spring Showers Stamps. Lastly I added a white scalloped border to the bottom of my card using our Ribbon & Lace Border Dies.
Sunny Studio Showering You With Love Baby or Bridal Shower Umbrella Card (using Rainy Days, Hayley Alphabet, Ribbon & Lace Border Dies and Spring Fever, Gingham Pastel & Spring Fling Paper)

That wraps up today's sneak peek. I'm so happy you joined me today! I'd love to give a $50 gift code to one lucky winner using the rafflecopter below. Our daily sneak peek contests run through Saturday, January 14th at Midnight PST with the winners announced here on Sunday, January 15th. :)

a Rafflecopter giveaway

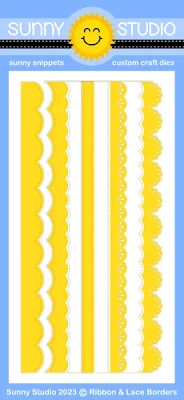
Here's a closer look at the our new Ribbon & Lace Dies, Build-A-Birdhouse Dies and Rainy Days Dies used today and available for purchase on Friday, January 13th.


Other Sunny Studio Supplies Used (some items are not available until January 13):

A Bird's Life Stamps
Shop at:
Sunny Studio
A Bird's Life Dies
A Bird's Life Dies
Shop at:
Sunny Studio
Picket Fence Border Dies
Shop at:
Sunny Studio
Stitched Rectangle Dies
Shop at:
Sunny Studio

Rain Showers Stamps
Rain Showers Stamps
Shop at:
Sunny Studio
Classic Gingham 6x6 Paper
Shop at:
Sunny Studio
Rainbow Bright 6x6 Paper
Shop at:
Sunny Studio
Gingham Pastels 6x6 Paper
Shop at:
Sunny Studio
Dots & Stripes Pastels 6x6 Paper
Shop at:
Sunny Studio
Mini Basic Shape Dies 2
Shop at:
Sunny Studio
Fluffy Clouds Dies
Fluffy Clouds Dies
Shop at:
Sunny Studio
Super Duper Stamps
Super Duper Stamps
Shop at:
Sunny Studio
Subtle Grey Tones Paper
Shop at:
Sunny Studio
Spring Showers Stamps
Shop at:
Sunny Studio
Spring Showers Dies
Spring Showers Dies
Shop at:
Sunny Studio
Heartstrings Border Dies
Shop at:
Sunny Studio
Spring Fling Paper
Spring Fling Paper
Shop at:
Sunny Studio
Slimline Nature Borders
Shop at:
Sunny Studio
Window Quad Square Die
Shop at:
Sunny Studio
Classic Sunburst Paper
Shop at:
Sunny Studio
Sleek Stripes Paper
Sleek Stripes Paper
Shop at:
Sunny Studio
Little Birdie Stamps
Shop at:
Sunny Studio
Little Birdie Dies
Little Birdie Dies
Shop at:
Sunny Studio
Out on A Limb Dies
Out on A Limb Dies
Shop at:
Sunny Studio
Quilted Hearts Portrait
Shop at:
Sunny Studio
Scalloped Heart Dies
Shop at:
Sunny Studio
Spring Greenery Dies
Shop at:
Sunny Studio
Big Bold Greetings Stamps
Shop at:
Sunny Studio
Big Bold Greetings Dies
Shop at:
Sunny Studio
Hayley Lowercase Alphabet Dies
Shop at:
Sunny Studio
Hayley Uppercase Alphabet Dies
Shop at:
Sunny Studio
Spring Fever Paper
Spring Fever Paper
Shop at:
Sunny Studio
Versafine Onyx Black Ink
Shop at:
Sunny Studio
Versafine Clair Ink- Acorn
Shop at:
Sunny Studio
Hero Arts White Detail
Shop at:
Sunny Studio
VersaMark Watermark Ink
Shop at:
Sunny Studio
Striped Silly 6x6 Paper
Shop at:
Sunny Studio
Polka-dot Parade 6x6 Paper
Shop at:
Sunny Studio
Scalloped Circle Mat 3 Dies
Shop at:
Sunny Studio
Stitched Circle Small Dies
Shop at:
Sunny Studio

Tuesday, January 10, 2023

Sneak Peek: Wonderful Windows, Garden Critters & Spring Fever Paper

Hello and welcome to day 2 of our Spring Peek Week!  All this week I will be sharing cards showcasing our newest collection which will be available for purchase this Friday!

Card No. 1: Up first is a card featuring our new Wonderful Window Dies! I am over the moon excited about these dies--I have been having a blast with them as you will see throughout the week. The set comes with the classic style window frame, two different arched window options with unique window panes to pop into the exterior frame (or to use all on their own), a pair of curtains, a flower box, miniature flowers, shutters and hinges.

For my card, I started by covering the front panel with 5/8" wide strips of yellow cardstock which I had inked up with mustard seed distress ink on one side and then layered them overlapping, spacing them 1/2" apart to look like a home's lap siding. I then embellished my window, adding acetate behind the cutout to look like glass and cut a small piece of pink cardstock which I added a scalloped edge to using our Slimline Basic Border Dies to become my roller shade. It would have been really cute and easy to turn this into a shaker card, but in the end I decided I preferred a clean and simple look. For my flower box, watering can and bumblebee images I used our brand new Garden Critters Stamps. Lastly I die-cut the word "hello" from our Slimline Scalloped Frame Dies. I adore how the curve of the word matches the curve of the arched window!
Sunny Studio Blog: Hello Spring Window Card (using Wonderful Windows & Slimline Scalloped Frame Dies and Garden Critters Stamps)

Card No. 2: I specifically designed the interior portion of the Wonderful Windows shutters to pop out so you can "paint" them an alternating color or cut multiples and build up the molding for a touch of realism. If you want them all a single color like in my first card example, you will need to glue them in place or tape them from the back to hold them in place. Even when created in one color I like the extra detail and definition that the cut line provides vs. just having double embossed lines there. 

For this card I used the alternate arched window option in my exterior frame and assembled the adorable little flowerbox and flowers from the die set. For my curtains, I cut them out using a yellow floral print from our newest Spring Fever Paper pack and then added a little doggy peeking out from our Beach Buddies Stamps. For the grass below, I die-cut the grassy edge using our Picket Fence Dies cut from a grass print patterned paper also from our new Spring Fever Paper pack. Lastly I heat embossed the "thinking of you" sentiment under my window using a greeting from our Watering Can Stamps.Sunny Studio Blog: Thinking of You Window Card (using Wonderful Windows Dies, Beach Babies and Watering Can Stamps)


Card No. 3: My next Wonderful Windows card uses just the arched portion of the windows to create a indoor living room scene with a view to the outside world. For my outdoor portion of my scene I cut a hillside using our Slimline Nature Border Dies and added some of the branches from our Autumn Tree Die. Since this is intended to be a Valentine's Day card I kept my branches without any leaves just like they would be in February.

For my living room, I added hot pink striped wallpaper using our Sleek Stripes Paper pack and then added a hardwood floor with some inked up woodgrain embossed cardstock (Mine came from Ranger, but I know Lawn Fawn & Simon Says Stamp also offer them). For my sofa, side tables, pillows and lamp images I turned to our Cozy Chrismas Stamps and then added the penguin couple from our Passionate Penguins Stamps. Lastly I cut a black pennant strip using our Stitched Rectangle Dies and heat embossed a sentiment from our City Street Stamps using White Detail Embossing Powder.
Sunny Studio Penguins Sitting on Sofa Valentine's Day Card (using Wonderful Windows & Autumn Tree Dies, Cozy Christmas & Passionate Penguins Stamps)

Card No. 4: Up next is another Valentine's Day Card showcasing all the adorable critters from our new Garden Critters Stamps! To build my mini scenes, I cut a frame using our Comic Strip Speech Bubble Dies from a fuchsia gingham print found in our Classic Gingham Paper pack. To continue the Valentine feel, I used a subtle pink flower print paper for my sky from our Flirty Flowers Paper pack and added some stitched clouds from our Fluffy Cloud Die set. Lastly I cut the grassy patterned paper from our new Spring Fever Paper pack using the grass border die from our Picket Fence Dies to arrange all my critters on. I'm always a sucker for a hot pink and lime green color scheme so I love how this turned out!
Sunny Studio Hot Pink Bugs & Kisses Valentine's Day Card (using Garden Critters Stamps, Fluffy Cloud & Comic Strip Speech Bubble Dies, Classic Gingham, Flirty Flowers & Spring Fever Paper)

Card No. 5: For this spring thank you card I started by cutting stitched "ribbon" strips from the tone-on-tone polka-dot prints found in our new Spring Fever Paper pack using our new slimline style Ribbon & Lace Border Dies. I then cut them down to 1.5" wide sections and adhered them in rainbow order onto either side of my card front before adding a white stitched cardstock panel down the center of my card, which had been wrapped in twine and tied with a bow in the middle. For my four butterflies from the new Garden Critters Stamps, I colored them in monochromatic tones to match the different polka-dot prints and arranged them in a square grid. Lastly, I stamped the word "thanks" from our new Big Bold Greetings Stamps and added the phrase "for going above & beyond" right below it from our Words of Gratitude Stamps.  Sunny Studio Rainbow Butterfly Thank You Card (using Garden Critters, Big Bold Greetings, Words of Gratitude Stamps and Ribbon & Lace Border Dies)

Card No. 6: I went bright and happy with this scard featuring the Garden Critters Stamps and the colorful rainbow scalloped print from our new Spring Fever Paper pack. To frame my little scene I layered circles from both our Stitched Circle Small Dies and Stitched Circle Large Dies, cutting the bottom mat from white cardstock to create some separation between the different prints. For my greeting, the "bugs and kisses" stamp from the Garden Critters set felt a little too small for the space so I emphasized the word "bugs" by cutting it out from white cardstock using our new Hayley Lowercase Alphabet Dies (to be shared more on Thursday) and then heat embossed the "& Kisses" words from our Hogs & Kisses Stamps instead.
Sunny Studio Rainbow Bugs & Kisses Card (using Garden Critters, Stitched Circle Dies, Hayley Alphabet Dies and Spring Fever Paper)

Card No. 7: For my last card of the day I couldn't resist pairing the new little honey bees and sunshine images from the Garden Critters set with the Beehive from our Just Bee-Cause Stamps and the tree branch from our A Bird's Life Stamps! I started by adhering a yellow floral tone-on-tone print from our new Spring Fever Paper pack onto my card front. I then inked up a fluffy cloud background using masking material which had been cut using our Slimline Nature Border Dies. When I am done inking I actually adhere my mask to a piece of acetate so it doesn't collect dust between projects and I'm able to use it over and over again for a number of cards before having to toss it out and cut a new one. I then trimmed down my cloud panel using our Stitched Rectangle Dies and topped my little scene with a white Picket Fence. Lastly I combined the word "hap-bee" from the Garden Critters Stamps with the word "birthday" from our Love Monkey Stamps (or one of our many other sets with the same birthday word) which were stamped onto a small banner from our Little Birdie Stamps.
Sunny Studio Hap-bee Birthday Punny Bumblebee Card (using Garden Critters & Little Birdie Stamps, Picket Fence & Slimlne Nature Border Dies, Spring Fever Paper)

That wraps up today's sneak peek. I'm so happy you joined me today! I'd love to give a $50 gift code to one lucky winner using the rafflecopter below. Our daily sneak peek contests run through Saturday, January 14th at Midnight PST with the winners announced here on Sunday, January 15th. :)

a Rafflecopter giveaway

Here's a closer look at the our new Garden Critters Stamps & Dies, Wonderful Windows Dies and Spring Fever Paper used today and available for purchase on Friday, January 13th.

Sunny Studio Blog: Garden Critters Bugs & Spring Critters 4x6 Clear Photopolymer Stamps  Sunny Studio Blog: Garden Critters Bugs & Spring Critters Metal Cutting Dies

Sunny Studio Stamps: Wonderful Windows Mix & Match Metal Cutting Dies Sunny Studio Stamps: Spring Fever Double-Sided 24 Sheet Patterned Paper

Other Sunny Studio Supplies Used (
some items are not available until January 13):

A Bird's Life Stamps
Shop at:
Sunny Studio
A Bird's Life Dies
A Bird's Life Dies
Shop at:
Sunny Studio
City Streets Stamps
City Streets Stamps
Shop at:
Sunny Studio
Picket Fence Border Dies
Shop at:
Sunny Studio


Words of Gratitude Stamps
Shop at:
Sunny Studio
Tsukineko Jumbo Dauber
Shop at:
Sunny Studio
Versafine Onyx Black Ink
Shop at:
Sunny Studio
Classic Gingham 6x6 Paper
Shop at:
Sunny Studio
Flirty Flowers 6x6 Paper
Shop at:
Sunny Studio
Dots & Stripes Pastels 6x6 Paper
Shop at:
Sunny Studio
Fluffy Clouds Dies
Fluffy Clouds Dies
Shop at:
Sunny Studio
Comic Strip Speech Bubble Dies
Shop at:
Sunny Studio
Slimline Basic Borders
Shop at:
Sunny Studio
Slimline Nature Borders
Shop at:
Sunny Studio
Slimline Scalloped Frame
Shop at:
Sunny Studio
Sleek Stripes Paper
Sleek Stripes Paper
Shop at:
Sunny Studio
Stitched Circle Small Dies
Shop at:
Sunny Studio
Stitched Circle Large Dies
Shop at:
Sunny Studio
Little Birdie Stamps
Shop at:
Sunny Studio
Little Birdie Dies
Little Birdie Dies
Shop at:
Sunny Studio
Passionate Penguins Stamps
Shop at:
Sunny Studio
Passionate Penguins Dies
Shop at:
Sunny Studio
Watering Can Stamps
Watering Can Stamps
Shop at:
Sunny Studio
Cozy Christmas Stamps
Shop at:
Sunny Studio
Cozy Christmas Dies
Cozy Christmas Dies
Shop at:
Sunny Studio
Autumn Tree Die
Autumn Tree Die
Shop at:
Sunny Studio
Hayley Lowercase Alphabet Dies
Shop at:
Sunny Studio
Ribbon & Lace Dies
Ribbon & Lace Dies
Shop at:
Sunny Studio
Stitched Rectangle Dies
Shop at:
Sunny Studio
Girly Heart Confetti
Shop at:
Sunny Studio
Hero Arts White Detail
Shop at:
Sunny Studio
VersaMark Watermark Ink
Shop at:
Sunny Studio
Gingham Pastels 6x6 Paper
Shop at:
Sunny Studio
Love Monkey Stamps
Love Monkey Stamps
Shop at:
Sunny Studio
Hogs & Kisses Stamps
Shop at:
Sunny Studio