Tuesday, May 5, 2020

Grad Cat Cards with Angelica and Mindy

Hi friends! This is Angelica, and today we are showcasing the new Grad Cat stamp set.

Sunny Studio Stamps: Grad Cat Sunburst Embossing Folder Graduation Card by Angelica Conrad

I used the following Copic Markers to color the cat and books: T7, T3, T1; R20, R00; Y28, Y23, Y21; E25. For the background, I mounted black Heroic Halftones Pattern Paper onto yellow card stock. 

Sunny Studio Stamps: Grad Cat Sunburst Embossing Folder Graduation Card by Angelica Conrad

I embossed a white card stock panel with Sunburst Embossing Folder, and attached it to a card base. I attached the pattern paper, and used foam squares to add the die-cut cat, books, and sentiment.

That's all that I have for today. Thanks so much for stopping by!

--------------------------------------------------

Hello! It’s Mindy from My Creative Scoop.Today I’m sharing a graduation card using the new stamp set Grad Cat!

Sunny Studio Stamps: Grad Cat Fancy Frame Dies Graduation Card by Mindy Baxter

I decided to color a bunch of different type cats and use the sun ray with the grass sheet of paper from the Spring Fling Paper Pad. I’m also using the Fancy Frames Rectangle Dies to border the kitties.

I stamped my cats in Memento Ink and Stamped onto my Copic xpress it blending card. I used the following Copic Markers to color my cats: N0, N1, N3, N5, N7, N9, YR00, YR12, YR04, Y21, E70, E71, E74, E77, R32, R30, B99, B29.

Sunny Studio Stamps: Grad Cat Fancy Frame Dies Graduation Card by Mindy Baxter

The Graduation caps are the same color as my daughter’s school – she’s graduating this year. Thank you so much for stopping by. I hope you enjoyed my card.

Sunny Studio Supplies Used:

Fancy Frames- Rectangles
Shop at:
Sunny Studio
Sunburst Embossing
Sunburst Embossing
Shop at:
Sunny Studio
Heroic Halftones 6x6 Paper
Shop at:
Sunny Studio
Spring Fling Paper
Spring Fling Paper
Shop at:
Sunny Studio
Grad Cat Stamps
Grad Cat Stamps
Shop at:
Sunny Studio
Grad Cat Dies
Grad Cat Dies
Shop at:
Sunny Studio

Monday, May 4, 2020

Summer Sweets Cards with Lynn and Ashley

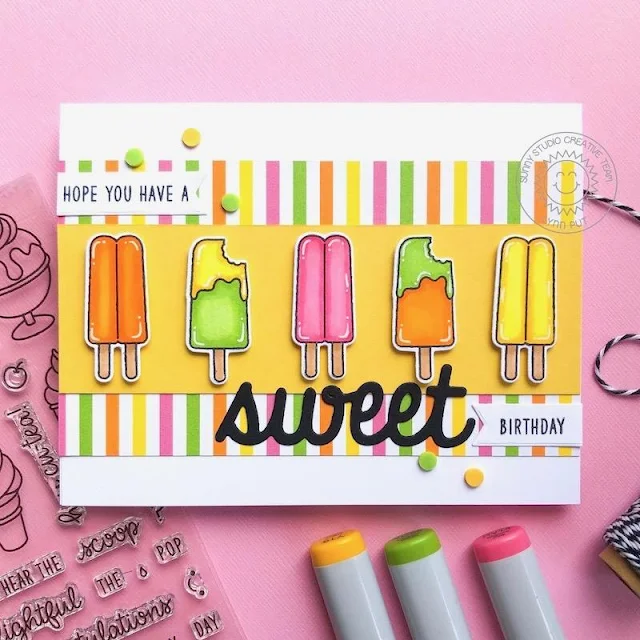
Hello there! It’s Lynn and today I’m sharing a fun summer birthday card I created featuring the new Summer Sweets stamp set and dies.

Sunny Studio Stamps: Summer Sweets Sweet Word Die Birthday Card by Lynn Put

This was such a fun card to create and totally gets me in the mood for summer. I used the new Summer Sweets stamp set and stamped out the different popsicle images, colored them using Copic markers and die cut them out using the coordinating dies

Sunny Studio Stamps: Summer Sweets Sweet Word Die Birthday Card by Lynn Put

Next I used a piece of striped Summer Splash patterned paper, it’s bright colors were perfect to go along with the popsicles, and on top of that, I used a piece of yellow card stock. I adhered my popsicles using foam tape and added my sentiment, which I stamped onto two banners, along the top and bottom. After that I used the Sweet Word die and die cut it from black card stock and added that underneath my popsicles. The last thing I added to my card was to glue on a few of the Rainbow Dot Confetti.

Thanks for stopping by!

------------------------------------------------------------


Hello everyone! It's Ashley today with a sweet card featuring the new Summer Sweets and Sealiously Sweet sets! I think the combination of these sets is just adorable!

Sunny Studio Stamps: Summer Sweets Sealiously Sweet Frilly Frame Dies Everyday Card by Ashley Ebben

I started by blending Distress Oxides in Tumbled Glass and Antique Linen onto white cardstock. These two colors are my go-to beachy summer inks! I splattered water and white paint for some extra interest and dried with my heat gun. I used the Frilly Frames Stripes frame to add the scalloped edge and stitching and added the die cut background to a piece of Summer Splash paper.

I stamped my sweets from Summer Sweets and two seals from Sealiously Sweet in Lawn Fawn Jet Black ink and colored with Copics before cutting everything out with the matching dies. I added the images to my card, popping the seals up with foam tape for dimension. I just love the happy faces you can add to the sweets! And the seal fits so perfectly on top of the ice cream sandwich!

Sunny Studio Stamps: Summer Sweets Sealiously Sweet Frilly Frame Dies Everyday Card by Ashley Ebben

I stamped part of the sentiment in Jet Black from Sealiously Sweet. I then used the Sweet Word die once on the same patterned paper from Summer Splash and twice from heavy white cardstock. I stacked the die cuts together for one big dimensional word and added it to my card. I finished with a few light blue sequins from some shine.

Thank you so much for stopping by! Stay safe and well, and have a wonderful day!

Sunny Studio Supplies Used:

Sweet Word Die
Sweet Word Die
Shop at:
Sunny Studio
Frilly Frames Stripes Die
Shop at:
Sunny Studio
Summer Splash 6x6 Paper
Shop at:
Sunny Studio
Sealiously Sweet Stamps
Shop at:
Sunny Studio
Sealiously Sweet Dies
Shop at:
Sunny Studio
Summer Sweets Stamps
Shop at:
Sunny Studio
Summer Sweets Dies
Summer Sweets Dies
Shop at:
Sunny Studio

Saturday, May 2, 2020

Guest Designer Spotlight: Sealiously Sweet Cards with Nicky Meek

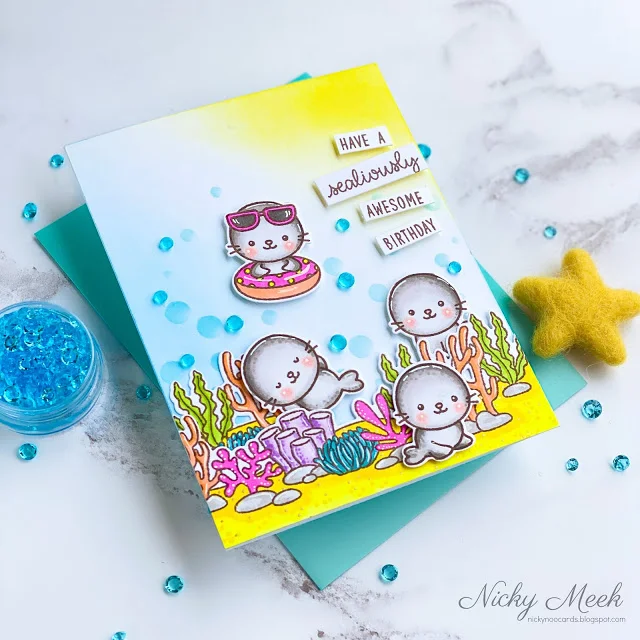
Hey everyone, it's Nicky Meek here with you. Today I'm happily guest designing for Sunny Studio Stamps again and I'm featuring the stamp set Sealiously Sweet from their most recent release. I have two cards today so keep on scrolling!

Sunny Studio Stamps: Sealiously Sweet Tropical Scenes Summer Themed Cards by Nicky Meek

This first card features and ink blended and 'bubble' stenciled background. Layered over the top is the coral seabed image from Tropical Scenes which I stamped and Copic coloured in vivid hues then die cut with the coordinating dies, backed with foam tape and applied to the background.

Sunny Studio Stamps: Sealiously Sweet Tropical Scenes Summer Themed Cards by Nicky Meek

The adorable seals were also stamped and Copic coloured and similarly applied with points highlighted with a white gel pen.

Sunny Studio Stamps: Sealiously Sweet Tropical Scenes Summer Themed Cards by Nicky Meek

To finish out the card I applied see thru jewels for more bubbles and I stamped the sentiments and arranged them at playful angles backed with dimensional tape.

Sunny Studio Stamps: Sealiously Sweet Stitched Semi-Circle Dies Summer Themed Cards by Nicky Meek

My second card is a shaker card and uses the new Sealiously Sweet set and the Stitched Semi-Circles die set. An opening was made in white panel using the largest die and the panel backed with acetate. A background panel was ink blended in yellows and blues and applied to a card base. I pooled a mix of sparkling sequins, beads and other shaker contents from my stash on the background. I applied tape around the back of the shaker window and applied it down on to the card base sealing in the contents.

Sunny Studio Stamps: Sealiously Sweet Stitched Semi-Circle Dies Summer Themed Cards by Nicky Meek

On Copic friendly paper the seals were stamped and Copic coloured then die cut and applied directly to the scene. A few points were highlighted with a white gel pen.

Sunny Studio Stamps: Sealiously Sweet Stitched Semi-Circle Dies Summer Themed Cards by Nicky Meek

To finish up the card I stamped and heat embossed the sentiment on a strip of cardstock and applied it backed with foam tape and then a few sparkling clear sequins were applied on top of the shaker window.

I hope you've enjoyed my cards today and take away a little inspiration for your own projects. Thank you for coming by to read!

Sunny Studio Supplies Used:

Sealiously Sweet Stamps
Shop at:
Sunny Studio
Sealiously Sweet Dies
Shop at:
Sunny Studio
Tropical Scenes Stamps
Shop at:
Sunny Studio
Tropical Scenes Dies
Shop at:
Sunny Studio
Stitched Semi-Circle Dies
Shop at:
Sunny Studio

Friday, May 1, 2020

Potted Rose Cards with Candice and Rachel

Candice with you today and it is the exciting time of a whole new release over at Sunny Studio Stamps and I am kicking it off with the new layered stamp set, Potted Rose!

Sunny Studio Stamps: Potted Rose Frilly Frame Dies Stitched Arch Dies Friendship Card by Candice Fisher

I used a few new release products for my card:
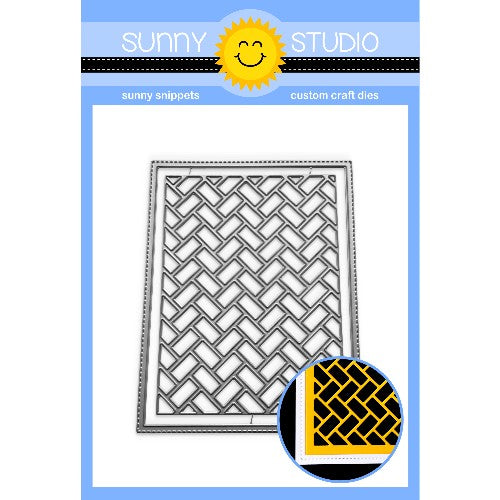
I began the card with an 8 1/2 x 3 1/2 card base perfect for your standard size envelopes. For the background, I first die cut the three stitched arches and then inked the inside pieces with broken china and tumbled glass. I created my own stencil by die cutting a piece of thick cardstock from the new herringbone die. I taped off and worked in sections inking with tea dye and antique linen to give it a Tuscan feel.

Next, I stamped the layered roses in rainbow colors using oxide inks and 4 of the 6 layers and then die cut out using the coordinating dies. Then I stamped the pots using the 3 layers in some Close to My Heart inks and used the coordinating dies to cut out and trimmed the bottoms.

Sunny Studio Stamps: Potted Rose Frilly Frame Dies Stitched Arch Dies Friendship Card by Candice Fisher

To add the roses to the pots, I simply used my paper trimmer and cut slits in the dirt and tucked the roses in. I used foam tape to pop them in the windows. I do love the effect it gives! To finish, I stamped the hello in versafine black and fussy cut out and then stamped the friend on Kraft cardstock and trimmed into a banner. I also adhered this with foam tape and added some Rainbow Pearls for a bit of shine.

Thank you for visiting with me today!

----------------------------------------------------------------

Hello crafty friends, Rachel here! I hope you have been enjoying all of the amazing new stamps and dies that have just been released! My card today showcases the new Potted Rose Stamp Set. I love how these layering stamps allow you to achieve so much detail from just stamping.

Sunny Studio Stamps: Potted Rose Frilly Frame Dies Everything's Rosy Friendship Card by Rachel Alvarado

To start, I stamped a few roses from this set using some pink inks (Ballet Slipper, Sparkling Rose, Bubble Gum, and Raspberry Bliss) from Pinkfresh Studio. I also stamped a few darker roses from the Everything's Rosy Stamp Set using some pink inks (Pink Diamond, Pinkalicious, Rubellite, and Razzleberry) from Altenew. I used the coordinating Potted Rose and Everything's Rosy dies to cut everything out.

Sunny Studio Stamps: Potted Rose Frilly Frame Dies Everything's Rosy Friendship Card by Rachel Alvarado

I also used some orange Pinkfresh Studio Inks to stamp my pot (Peach Fuzz, Apricot, and Clementine) as well as some green inks (Fresh Pear, Grassy Knoll, and Key Lime) for my leaves. For my background, I die cut some white card stock using the new Frilly Frames Herringbone Die Set and blended some Catherine Pooler Garden Party Ink onto my base prior to adhering my die cut panel with liquid adhesive. 

I used Memento Tuxedo Black Ink to stamp my sentiment and then adhered my pot and roses to my card front using some subtle 3D Foam Adhesive Squares. Voila! Super easy and perfect for quick, yet elegant cards.

Thank you all for dropping by today! Wishing you a safe and wonderful weekend!

Sunny Studio Supplies Used:

Everything's Rosy Stamps
Shop at:
Sunny Studio
Everything's Rosy Dies
Shop at:
Sunny Studio
Potted Rose Stamps
Potted Rose Stamps
Shop at:
Sunny Studio
Potted Rose Dies
Potted Rose Dies
Shop at:
Sunny Studio
Frilly Frames Herringbone
Shop at:
Sunny Studio
Stitched Arch Dies
Stitched Arch Dies
Shop at:
Sunny Studio

Thursday, April 30, 2020

Cruisin' Cuisine Cards with Vanessa and Anja

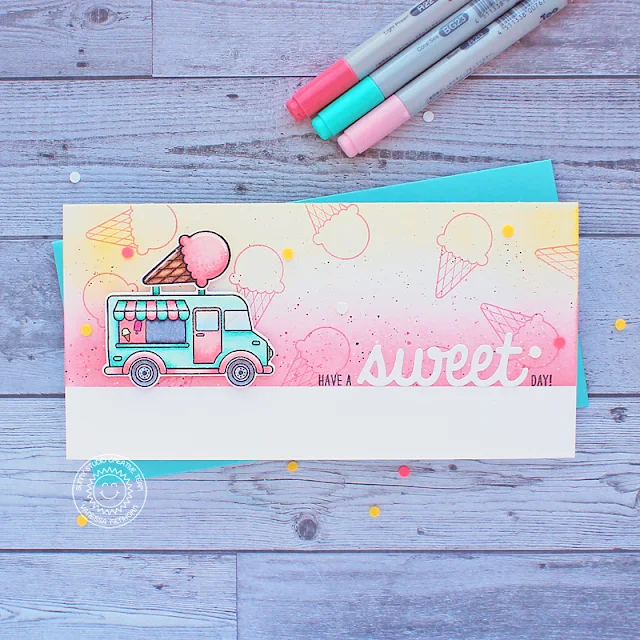
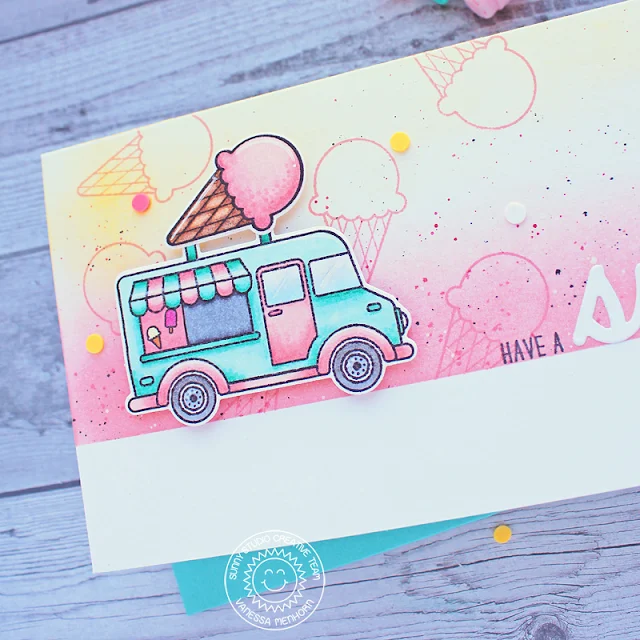
Hello to you! Vanessa here with a sweet card using the new Summer 2020 Release set Cruisin' Cuisine. This set is so cute and fun:

Sunny Studio Stamps: Cruisin' Cuisine Sweet Word Die Everyday Card by Vanessa Menhorn

For this slimline card, I masked a stripe on the front and stamped the ice cone from the set repeatedly with coral ink. Then I inked the area with coral and yellow ink and applied ink droplets. After removing the mask, I stamped the sentiment, die-cut the Sweet Word Die from white cardstock and adhered it.

Sunny Studio Stamps: Cruisin' Cuisine Sweet Word Die Everyday Card by Vanessa Menhorn

I stamped the van and the ice cone onto white cardstock, added a "board" with a black marker, colored the images with Copics, die-cut the elements with the matching dies and adhered everything to the card with foam tape. Finally, I added Birthday Cake Dot Sprinkles.

I love everything from the new release!! How about you? Thanks for visiting!

--------------------------------------------------------

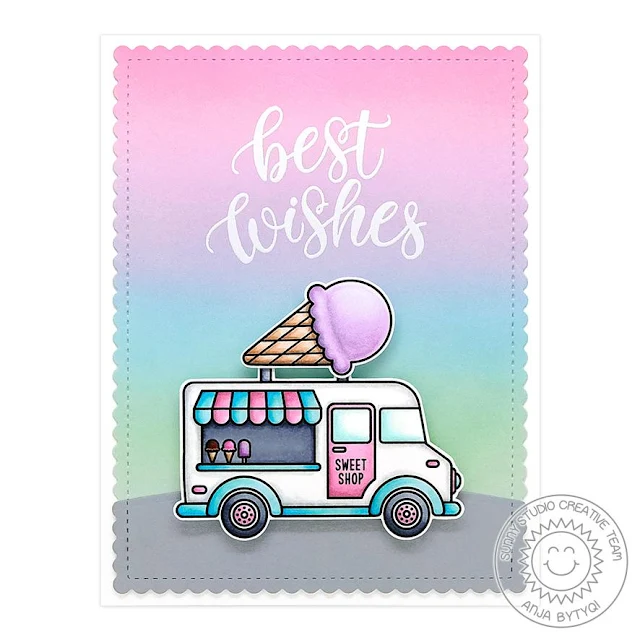
Hi everyone, Anja here and I'm thrilled to share my first card using new products from the freshly released Summer ReleaseToday I'm kicking it off with the fun Cruisin' Cuisine Stamps. From the moment I saw this set, I knew I wanted to create an ice cream truck!


Sunny Studio Stamps: Cruisin' Cuisine Frilly Frame Dies Everyday Card by Anja Bytyqi
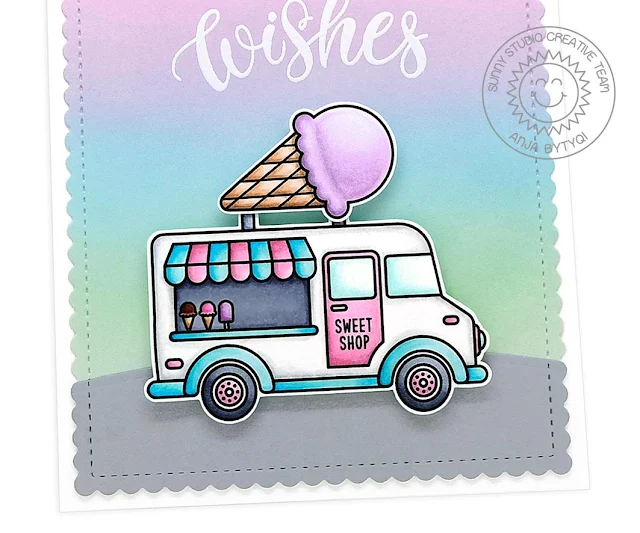
The stamp set comes with various food accessories and sentiments. I stamped the images in Memento Tuxedo Black Ink and colored them with Copic Markers. For the ink blended background, I used yummy pastel Distress Oxide Ink colors (Picked Raspberry, Spun Sugar, Milled Lavender, Tumbled Glass and Cracked Pistachio) which remind me of ice cream.

Sunny Studio Stamps: Cruisin' Cuisine Frilly Frame Dies Everyday Card by Anja Bytyqi

I stamped the scripty sentiment from the Pink Peonies set in VersaMark Ink and heat embossed it with white embossing powder. Next, I cut a small road hill from grey cardstock. I used the stitched scalloped die from the Frilly Frames Stripes set to add a decorative border to the background panel and the hill. I adhered them to a white A2 card base and popped up the ice cream cone and truck with foam squares.

Thank you so much for stopping by! Have an amazing day!

Sunny Studio Supplies Used:

Sweet Word Die
Sweet Word Die
Shop at:
Sunny Studio
Frilly Frames Stripes Die
Shop at:
Sunny Studio
Pink Peonies Stamps
Pink Peonies Stamps
Shop at:
Sunny Studio
Cruisin' Cuisine Stamps
Shop at:
Sunny Studio
Cruisin' Cuisine Dies
Shop at:
Sunny Studio

Wednesday, April 29, 2020

Tool Time Cards with Ana and Tammy

Hello friends! It’s Ana here today with a masculine card showcasing adorable new Tool Time stamp set and it’s coordinating dies – from the new summer release! We have a lot of boys/men in our family and I am always finding myself needing masculine cards! I was so excited to see this set! It is perfect for birthdays, achievements and upcoming Father’s Day!

Sunny Studio Stamps: Tool Time Father's Day Card by Ana Anderson

For my card today I used only two images from the set –a hammer and a nail. I thought stamping the nail around the edges of the panel would create a really cool visual frame. I stamped the nails in two rows, using darker gray ink for the outside and medium gray for the inside line.

Next, I created the word YOU using the same nail stamp, then added coloring/shading with Copic C markers to all the nail images.

Sunny Studio Stamps: Tool Time Father's Day Card by Ana Anderson

I stamped, colored and die cut the hammer 3 times and adhered it to the background, then added the sentiment and finished it off with and additional nail that serves as an exclamation point.

I love how this card turned out! Tool Time set is so versatile – images in the set can be transformed from masculine to super cute by using the smiley face included in the set!

Thank you so much for joining us today and until next time I hope you have a wonderful day!

-------------------------------------------------------------


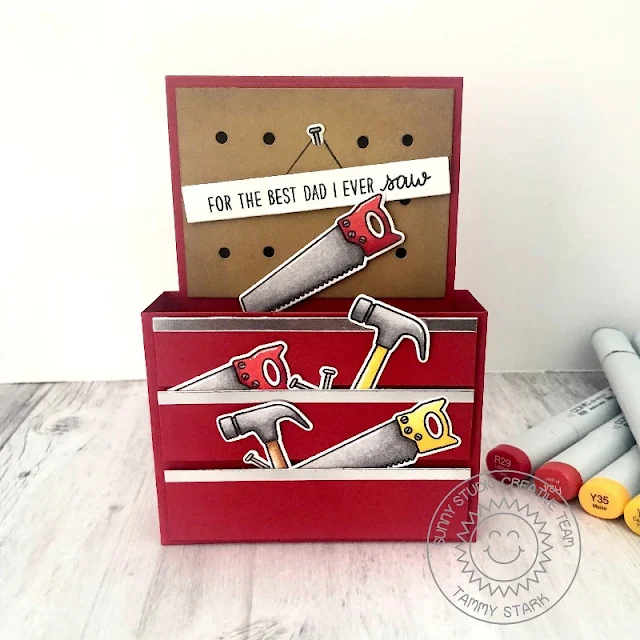
Hi crafty friends! Tammy here and I am so excited to be sharing my first post as a Design Team Member for Sunny Studio Stamps! Today, I have a fun tool box card to share with you that showcases the new Tool Time Stamp Set

Sunny Studio Stamps: Tool Time Father's Day Box Card by Tammy Stark

My card measures approximately 3 1/2" wide X 5" tall, and fits perfectly into an A2 envelope when folded flat. I stamped my images with Memento Tuxedo Black Ink onto Bristol smooth cardstock and colored with Copic Markers. I then used the coordinating Tool Time Dies to cut out my images.

Copic Colors used: Yellow: Y35, Y15, Y11; Red: R24, R29, R39; Gray: N0, N2, N4

Sunny Studio Stamps: Tool Time Father's Day Box Card by Tammy Stark

To create the peg board, I cut a piece of kraft cardstock and inked it with Brushed Corduroy Distress Oxide. I used a spring loaded hole punch to create the holes for the pegboard, layered on top of black cardstock, then attached to the red backing. The drawers were created by cutting strips of red cardstock, approximately 4 3/4" wide X 1" tall. I then cut a  thin strip of silver foil cardstock, attached to the top of each drawer, and attached to the front of the box using foam tape for dimension.

Thanks so much for stopping by! For more crafty inspiration, check out my Instagram feed!

Sunny Studio Supplies Used:

Tool Time Stamps
Tool Time Stamps
Shop at:
Sunny Studio
Tool Time Dies
Tool Time Dies
Shop at:
Sunny Studio