Showing posts with label Winter Greenery. Show all posts

Friday, November 10, 2023

Love & Light Card with Tina

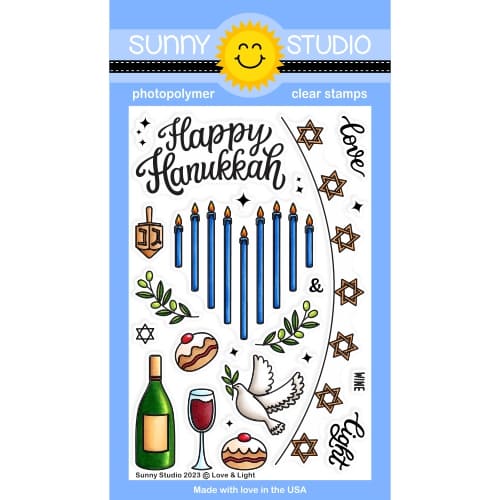
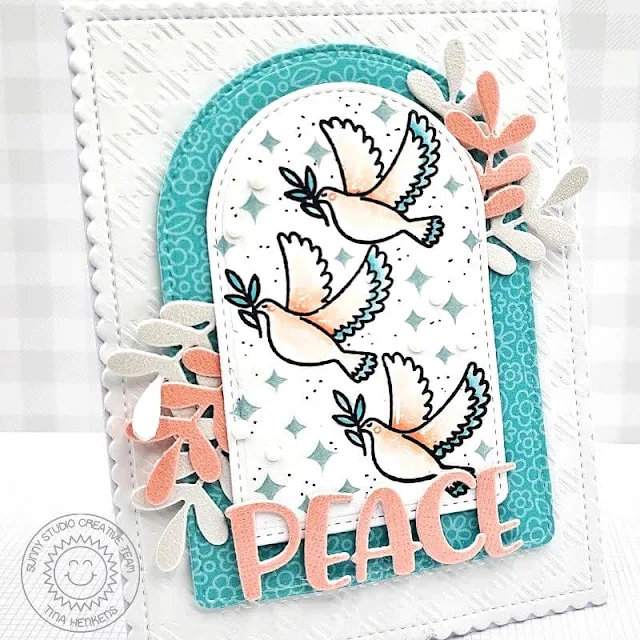
Hello crafty friends, it’s Tina and today I am featuring a card using the beautiful dove image from the Love & Light stamp and die set

Sunny Studio Stamps: Love & Light Card by Tina Henkens (featuring Chloe Alphabet Dies, Stitched Arch Dies, Winter Greenery Dies, Frilly Frame Dies)

The color palette for this project is kept very soft and pastel. I started by creating a white card base. Next I made a dry embossed panel using the Buffalo Plaid Folder for some elegant details in the background. This panel was cut with the outer die of the Frilly Frames Stripes die which gives a pretty stitched scalloped border to your card panel. 

The focal point of this card consists of two arched panels. I used the largest of the Stitched Arch dies to cut a beautiful teal flower paper from Flirty Flowers. A second arch was created from white card stock.

Smaller images like the dove and stars from the Love & Light stamp are perfect to make your own patterned background. I used a piece of scrap paper to figure out which layout would fit the best into the arch shape. All the coloring was done with Copic markers in soft shades of pink and teal. I added some details with a white gel pen.

Next, I stamped the stars onto the panel with Distress Oxide Speckled Egg, the perfect match for the teals and pinks in this project. A few dots with a black marker provided a ‘splattering effect’.

Sunny Studio Stamps: Love & Light Card by Tina Henkens (featuring Chloe Alphabet Dies, Stitched Arch Dies, Winter Greenery Dies, Frilly Frame Dies)

I love the look of the two layered arches, but adding some greenery on both sides of the design really enhances the card. I die cut several small branches from the Winter Greenery Dies from shiny pink and white card stock from my stash. I love this die set so much; I use it a lot in my cards. For my sentiment I created the word ‘peace’ using the beautiful letter dies from the Chloe Alphabet and the same shiny pink card stock as some of the branches. I stacked three layers to give the letters lots of dimension.

Finally, I added a few Pure White Jewels as embellishments and that finishes the card! Thank you for joining me and happy crafting!

Sunny Studio Supplies Used:

Flirty Flowers 6x6 Paper
Shop at:
Sunny Studio
Frilly Frames Stripes Die
Shop at:
Sunny Studio
Buffalo Plaid Embossing
Shop at:
Sunny Studio
Stitched Arch Dies
Stitched Arch Dies
Shop at:
Sunny Studio
Winter Greenery DIes
Shop at:
Sunny Studio
Love & Light Stamps
Love & Light Stamps
Shop at:
Sunny Studio
Love & Light Dies
Love & Light Dies
Shop at:
Sunny Studio

Monday, November 6, 2023

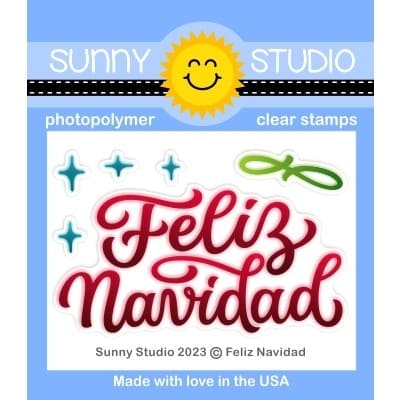
Feliz Navidad Card with Bobbi

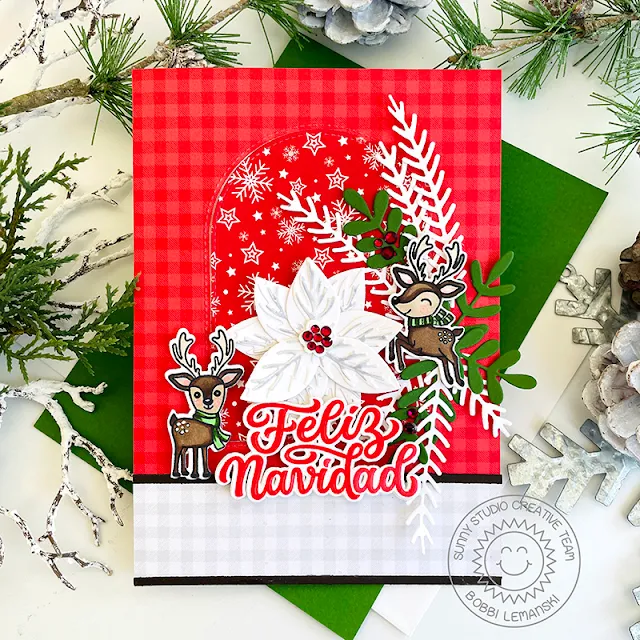
Hello friends. It’s Bobbi here, sharing a card featuring the new Feliz Navidad stamps and coordinating diesThis sentiment is bold and a generous size. It can be combined with other Christmas sets to make your holiday cards.

Sunny Studio Stamps: Feliz Navidad Holiday Card by Bobbi Lemanski (featuring Reindeer Games, Winter Greenery, Pristine Poinsettia Dies, Stitched Arch Dies)

I’m using the following Sunny Studio Stamps products:

Feliz Navidad stamps and coordinating dies

Reindeer Games stamps and coordinating dies

Winter Greenery dies

Pristine Poinsettia dies

Joyful Holiday Paper Pad

Stitched Arch dies


Sunny Studio Stamps: Feliz Navidad Holiday Card by Bobbi Lemanski (featuring Reindeer Games, Winter Greenery, Pristine Poinsettia Dies, Stitched Arch Dies)

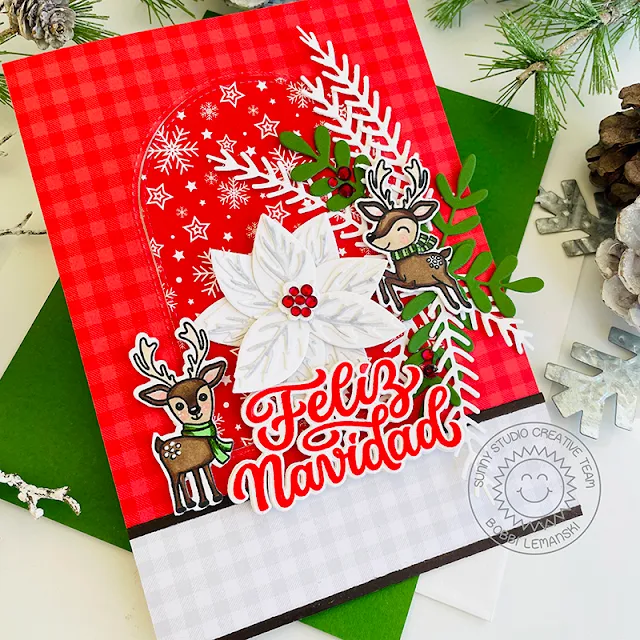
To create this 5″ X 7″ card, I used festive paper from the Joyful Holiday paper pad and the largest arch die to create the background. I also stamped the sentiment in a bright red and cut it using the dies. I stacked four of the die cuts to make the sentiment stand out. I stamped the two deer, colored them using Copic Sketch Markers and cut them out using the dies. I used the following Copics:


  • Browns: E57, E55, E44, E43 and E42
  • Reds: R00, R22
  • Greens: YG67, YG17, YG03

I cut the foliage stems using the Winter Greenery Dies along with white and green cardstock. I also cut the Pristine Poinsettia – three layered sets of white cuts – and glued the layers together to make the large white poinsettia. I applied Copic C1 to the top layer of the petals. I also glued in some Ruby Red Jewels in the center of the poinsettia for a little sparkle.


Sunny Studio Stamps: Feliz Navidad Holiday Card by Bobbi Lemanski (featuring Reindeer Games, Winter Greenery, Pristine Poinsettia Dies, Stitched Arch Dies)

I assembled the card and used foam dots behind the deer to make them stand out. The poinsettia was glued in place in the center of the arch window. Greenery, the sentiment, deer and foliage were all added to the card front. I felt like the card needed a little more contrast so I also added 1/8″ strips of a dark brown cardstock above and below the checkered, gray paper.  More Ruby Read jewels were added to this card front to complete it.

Thanks for stopping by today. If you want to see more ideas and inspiration from me, subscribe to my blog, BobbiHartDesign.com. I’ll send you updates on new posts! You can also find me on Instagram as @BobbiHartDesign and on Facebook as BobbiHartDesign.

Sunny Studio Supplies Used:

Stitched Arch Dies
Stitched Arch Dies
Shop at:
Sunny Studio
Pristine Poinsettia Dies
Shop at:
Sunny Studio
Winter Greenery DIes
Shop at:
Sunny Studio
Reindeer Games Stamps
Shop at:
Sunny Studio
Reindeer Games Dies
Reindeer Games Dies
Shop at:
Sunny Studio
Joyful Holiday Paper
Shop at:
Sunny Studio
Feliz Navidad Stamps
Shop at:
Sunny Studio
Feliz Navidad Die
Feliz Navidad Die
Shop at:
Sunny Studio

Friday, November 3, 2023

Woolen Mitten Die Focused Card with Tina

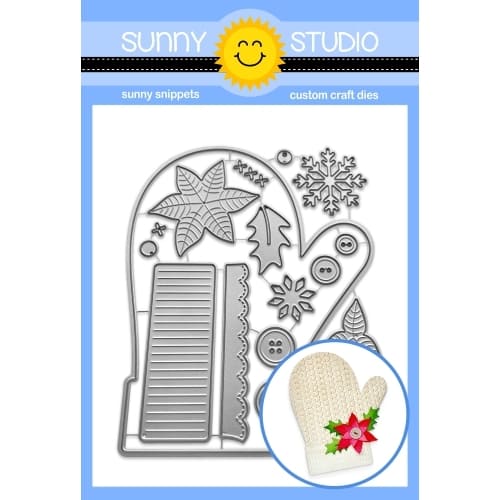
Hello crafty friends, Tina here featuring the gorgeous Woolen Mitten Die set! I am a huge fan of shaped cards and I love that this mitten is big enough to add lots of details to it. Such as the festive wreath I am creating today.

Sunny Studio Stamps: Woolen Mitten Holiday Card by Tina Henkens (featuring Winter Wreaths, Winter Greenery, Ribbon & Lace Border Dies)

I am kicking off this project by creating a white mitten card base by folding a sheet of white card stock in two and using the mitten die, making sure the top part stayed intact. Next, I cut another mitten from a beautiful snowflake paper (Joyful Holiday) and added some dimension by inking the edges with a blending brush and Distress Oxide Uncharted Mariner.

I did the same for the cuff of the mitten which I created with a polka dot paper (Joyful Holiday). A small white border (Ribbon & Lace Border dies) was added as extra embellishment. After gluing all the elements of the mitten to my shaped card base, I was ready to work on my wreath.

Sunny Studio Stamps: Woolen Mitten Holiday Card by Tina Henkens (featuring Winter Wreaths, Winter Greenery, Ribbon & Lace Border Dies)

The smallest wreath die from Winter Wreaths was the perfect size for my base. This immediately gives you the perfect circle shape to add the branches from Winter Greenery Dies. I stacked two layers of branches in the same teal blue color as my base. I also cut three extra branches from a shiny white card stock to give some contrast with the blue mitten.

I used the smallest Poinsettia leaf die from the Woolen Mitten set and cut it from red, pink and white card stock. This creates the most adorable little flowers with a small white gem from the Pure White Jewels as a center. I added the flowers to the wreath with some foam tape and glued the whole piece onto the mitten shape. Finally, I stamped a sentiment from Feeling Frosty to a small white strip using Versafine Onyx black ink and added it to the cuff of the mitten.

I am sure you will love this beautiful mitten die as much as I do!

Sunny Studio Supplies Used:

Feeling Frosty Stamps
Shop at:
Sunny Studio
Winter Greenery DIes
Shop at:
Sunny Studio
Winter Wreaths Stamps
Shop at:
Sunny Studio
Winter Wreaths Dies
Winter Wreaths Dies
Shop at:
Sunny Studio
Joyful Holiday Paper
Shop at:
Sunny Studio
Ribbon & Lace Dies
Ribbon & Lace Dies
Shop at:
Sunny Studio
Woolen Mitten Dies
Woolen Mitten Dies
Shop at:
Sunny Studio

Thursday, October 26, 2023

Pristine Poinsettia Die Focused Card with Marine

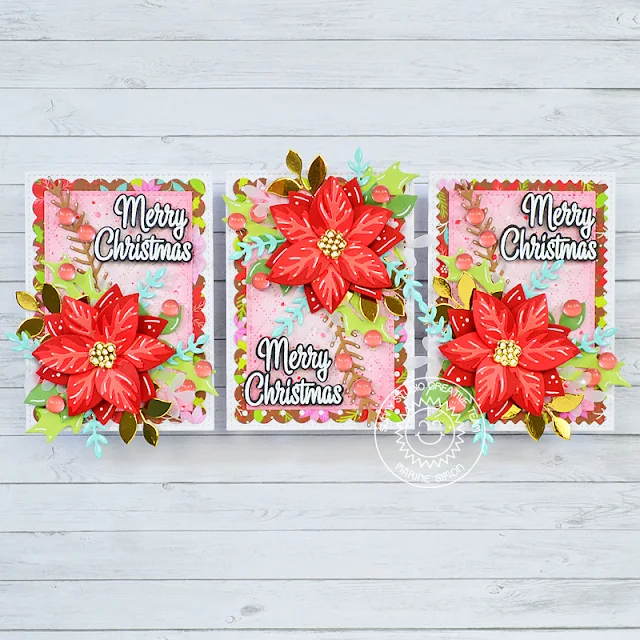
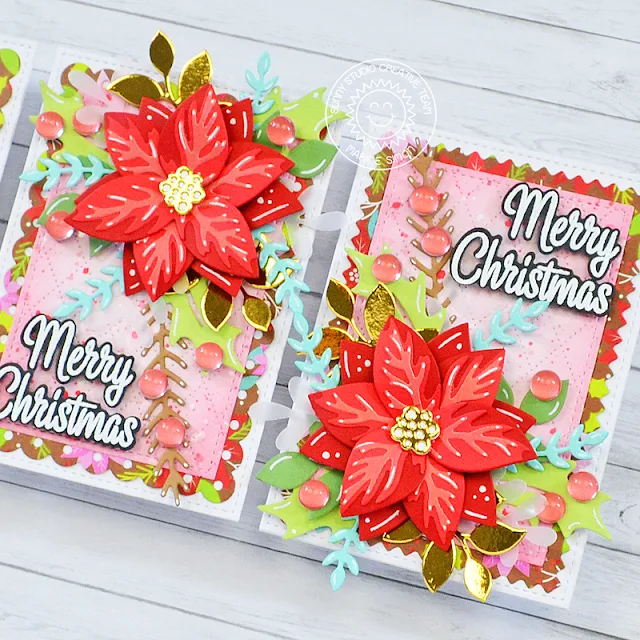
Hello crafty friends, Marine here, back again today with more poinsettias and those three bright and cheerful mini cards using the Pristine Poinsettia die set. Love this set so much! Last year I used that same set to make a cold and frosty holiday card, and this time I went for more traditional colors.

Sunny Studio Stamps: Pristine Poinsettia Christmas Cards by Marine Simon (featuring Mini Mat & Tag Dies, Winter Greenery Dies, Spring Greenery Dies, Dotted Diamond Dies)

I started off by creating and assembling three almost identical card bases following the same process:

1. Cut three Stitched Rectangles out of white cardstock

2. Cut three All Is Bright panels using Mini Mat & Tag 1 + Mini Mat & Tag 2 + Mini Mat & Tag 4 dies

Sunny Studio Stamps: Pristine Poinsettia Christmas Cards by Marine Simon (featuring Mini Mat & Tag Dies, Winter Greenery Dies, Spring Greenery Dies, Dotted Diamond Dies)

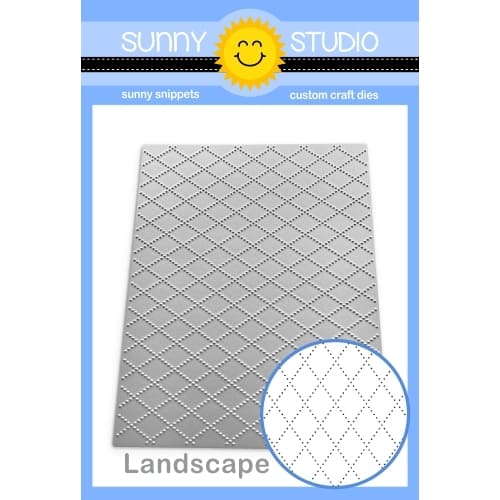
3. Cut two Dotted Diamond Landscape panels, and cut three small Stitched Rectangles out of those two panels. Color those three textured panels using spun sugar and worn lipstick distress inks. Add splatters using festive berries mixed water, and white ink mixed with water

4. Layer and attach the panels on top of each other, and then on card bases

Sunny Studio Stamps: Pristine Poinsettia Christmas Cards by Marine Simon (featuring Mini Mat & Tag Dies, Winter Greenery Dies, Spring Greenery Dies, Dotted Diamond Dies)

Next I cut all the flower, greenery and berry pieces using dies from Pristine PoinsettiaWinter Greenery and Spring Greenery. I cut the flower elements out of three different shades of red cardstock, and cut the greenery elements out of brown, aqua, green, white, vellum and gold cardstock.

I first started by layering and attaching the Pristine Poinsettia pieces together using liquid glue. Next I stuck a flower on each card base, and then added greenery around each one of them. I added berries here and there, and glued a clear droplet on each to bring more shine and dimension.

Sunny Studio Stamps: Pristine Poinsettia Christmas Cards by Marine Simon (featuring Mini Mat & Tag Dies, Winter Greenery Dies, Spring Greenery Dies, Dotted Diamond Dies)

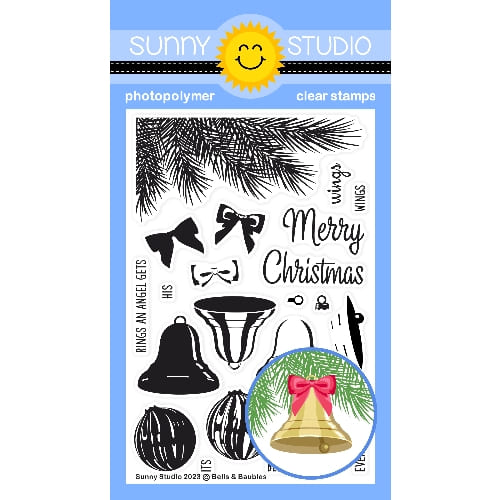
The last step was to create three greetings, and I used the "Merry Christmas" sentiment from Bells & Baubles that I white heat embossed on black cardstock, cut using the matching dies, and attached on the opposite corner of each poinsettia using 2mm foam squares. And finally I added highlights and details at some places using a white gel pen.

And that's it! As always I had a lot of fun making those mini cards, I love how bright and beautiful they turned out, and I hope that you like them. Thank you so much for stopping by, and see you next time.

Sunny Studio Supplies Used:

Stitched Rectangle Dies
Shop at:
Sunny Studio
Pristine Poinsettia Dies
Shop at:
Sunny Studio
Winter Greenery DIes
Shop at:
Sunny Studio
All Is Bright Paper
All Is Bright Paper
Shop at:
Sunny Studio
Spring Greenery Dies
Shop at:
Sunny Studio
Mini Mat & Tag 1 Dies
Shop at:
Sunny Studio
Mini Mat & Tag 2 Dies
Shop at:
Sunny Studio
Mini Mat & Tag 4 Dies
Shop at:
Sunny Studio
Dotted Diamond Landscape
Shop at:
Sunny Studio
Bells & Baubles Stamps
Shop at:
Sunny Studio

Monday, October 23, 2023

Winter Greenery Card with Bobbi

Hello friends, Bobbi here. I wanted to share a card with you today that features a new foliage die set by Sunny Studio Stamps. I am totally in love with the Winter Greenery dies. I feel like I’m reaching for this set a lot lately. The greens are the perfect size to embellish my fall and winter tags and cards. My favorite die in the set is this sweet rounded leaf shaped stem. It is so pretty and dainty and looks great with anything. I used just two types of stems from this set, however, there are four different shapes and coordinating berry dies, too!

Sunny Studio Stamps: Winter Greenery Christmas Card by Bobbi Lemanski

To make this 5″ X 7″ card, I started with a piece of watercolor paper that I had sitting in my scrap bin. The colors were a minty green and a soft peach. I splattered on a bit of gold metallic paint and added a few splatters of a peachy orange, too. I attached the piece to the white card front and added strips of gold metallic cardstock below the watercolor strip for a finished edge.

Sunny Studio Stamps: Winter Greenery Christmas Card by Bobbi Lemanski

Next, I cut the greenery from white cardstock and glued it to the top of the watercolor strip. I kept them white to pop off the background. I hid the stems’ edges with more strips of metallic cardstock. My strips are around 1/8″ thick and I added two above and two below. I added some die cut berries that I colored using Copic Markers in R14, R32 and R20. I also added pearl gem stickers in ivory and a peach to the colored strip. Finally, I stamped the sentiment, “noel” from the Classy Christmas stamp set using gold metallic ink right under the strips.

Thanks for stopping by today. If you want to see more ideas and inspiration from me, subscribe to my blog, BobbiHartDesign.com. I’ll send you updates on new posts! You can also find me on Instagram as @BobbiHartDesign and on Facebook as BobbiHartDesign.

Sunny Studio Supplies Used:

Classy Christmas Stamps
Shop at:
Sunny Studio
Winter Greenery DIes
Shop at:
Sunny Studio

Monday, October 16, 2023

Holiday Hugs Card with Bobbi

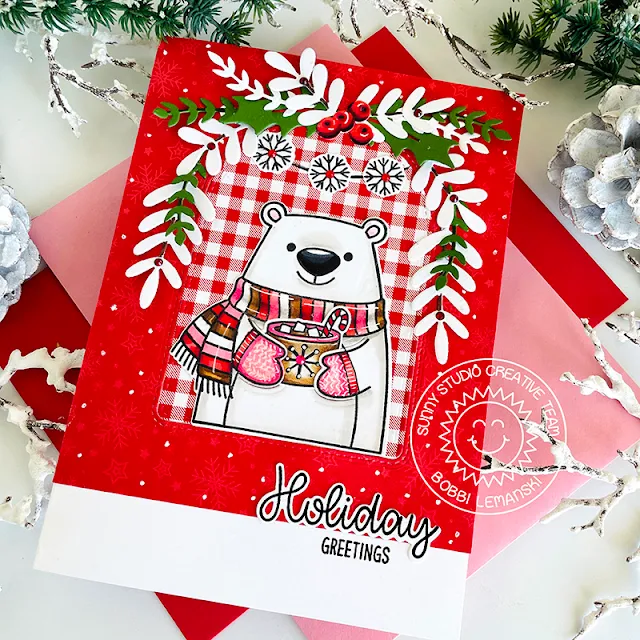
Hello friends! It’s Bobbi here with one big “Holiday Hug” for you! This 5″ X 7″ card includes the adorable bear from this new multi seasonal / holiday stamp set by Sunny Studio Stamps.

Sunny Studio Stamps: Holiday Hugs Christmas Card by Bobbi Lemanski (featuring Winter Greenery, Stitched Arch Dies)

The card base is made from 80lb Classic Crest Solar White cardstock. To create the front panel, I cut a piece of snowflake pattern paper from the Joyful Holiday Paper pack, to the size of 5″ wide X 6″ long. I cut an arch from the paper using the largest die from the Stitched Arch Die set. I also cut the same size arch from a red and white check pattern paper, too. Both frame and arch were secured to a white card base, leaving 1″ white space at the bottom. I added a few white dots to the snowflake paper using my white Gelly Roll pen.

Sunny Studio Stamps: Holiday Hugs Christmas Card by Bobbi Lemanski (featuring Winter Greenery, Stitched Arch Dies)

I stamped, colored and cut out the bear and the cup of hot cocoa. The bear die includes a separate die for the front paws, allowing smaller images from the set to be placed in the bear’s hands. How cute is that?! I added mittens to the bear with a couple of simple curved lines at both wrists. To color the bear and cup of hot cocoa, I used the following Copic Marker colors: E59, E57, E55, R89, R46, R17, R14, R20, RV13, RV14, W3, W0, 100, C7, C5. I used the same reds to color the berries, too. I stamped a snowflake on the cocoa cup and accented it with my white Gelly Roll Pen.

I attached the bear inside the arch window. I added three snowflakes inside the arch and hand drew a string to hang them from. I added sparkly rhinestones to the centers of the hanging snowflakes and the snowflake on the cup.  I added greenery around the top of the arch window using the Winter Greenery Dies. I cut greens from green and white cardstock and mixed the two to create the swag. Berries were added at the top.

Sunny Studio Stamps: Holiday Hugs Christmas Card by Bobbi Lemanski (featuring Winter Greenery, Stitched Arch Dies)


I stamped and die cut the "holiday"
sentiment and attached it at the bottom of the card front. I stamped "greetings" in the 1″ white space, right below "holiday" to finish the card.

Thanks for stopping by today. If you want to see more ideas and inspiration from me, subscribe to my blog, 
BobbiHartDesign.com. I’ll send you updates on new posts! You can also find me on Instagram as @BobbiHartDesign and on Facebook as BobbiHartDesign.

Sunny Studio Supplies Used:

Stitched Arch Dies
Stitched Arch Dies
Shop at:
Sunny Studio
Winter Greenery DIes
Shop at:
Sunny Studio
Joyful Holiday Paper
Shop at:
Sunny Studio
Holiday Hugs Stamps
Holiday Hugs Stamps
Shop at:
Sunny Studio
Holiday Hugs Dies
Holiday Hugs Dies
Shop at:
Sunny Studio

Friday, October 13, 2023

Bells & Baubles Card with Tina

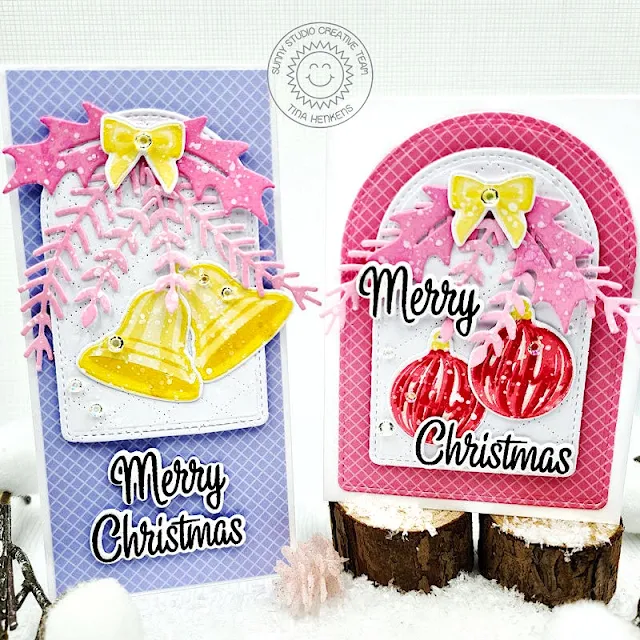
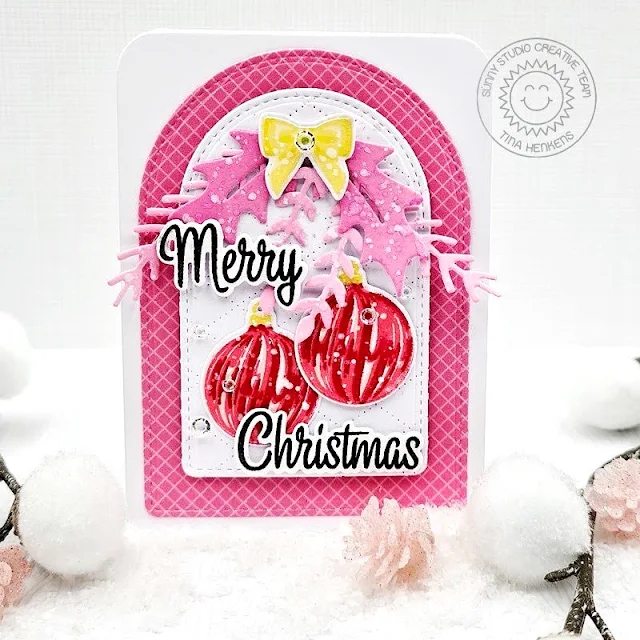
Hello crafty friends, it’s Tina with a set of festive cards featuring the beautiful Bells & Baubles layering stamp and die set. I had so much fun working with these products that I created two cards using similar supplies!

Sunny Studio Stamps: Bells & Baubles Christmas Holiday Cards by Tina Henkens (featuring Stitched Arch Dies, Winter Greenery Dies, Dotted Diamond Background Dies)

Both cards start with a base layer of white card stock cut with the middle of the Stitched Arched Dies. This arch was embellished with the Dotted Diamond Portrait die. Next, I cut colored panels from a pink and purple sheet (Gingham Pastel paper pad) using the largest of the Stitched Arched Dies and a slimline die from my stash. I adhered the white arch to the bright papers with foam tape and glued these pieces to white card bases.

Sunny Studio Stamps: Bells & Baubles Christmas Holiday Cards by Tina Henkens (featuring Stitched Arch Dies, Winter Greenery Dies, Dotted Diamond Background Dies)

After die cutting a bunch of branches from the Winter Greenery set, I used a paper pouncer and Distress Oxides in pink tones (Spun Sugar, Picked Raspberry)  to add some nontraditional colors to these Christmas greens. I love opting for bright happy colors! Then I got out my Misti and several inks from my stash to do the layered stamping. As always, I used the stamp sheet as my layering guide!

For the baubles, I went with pink and red tones, while the bells and bows were stamped in traditional yellow golden colors. It’s always magical to see all the details these layers create!  

Lastly, I stamped the Merry Christmas sentiment from the Bells & Baubles layering stamp with Versafine Onyx Black ink and used the coordinating dies to cut out the words.

Sunny Studio Stamps: Bells & Baubles Christmas Holiday Cards by Tina Henkens (featuring Stitched Arch Dies, Winter Greenery Dies, Dotted Diamond Background Dies)

I used some temporary tape runner to place the branches together so they would create a nice arch shape. When I was happy with the layout, I glued them to the white panel. Next, I adhered the bows, baubles, and bells with liquid glue. To finish the cards, I added the sentiments and a few Chrystal Clear Jewels.

I hope you will have fun creating with these gorgeous layering stamps! Thank you for joining me and happy crafting!

Sunny Studio Supplies Used:

Gingham Pastels 6x6 Paper
Shop at:
Sunny Studio
Stitched Arch Dies
Stitched Arch Dies
Shop at:
Sunny Studio
Winter Greenery DIes
Shop at:
Sunny Studio
Dotted Diamond Portrait
Shop at:
Sunny Studio
Bells & Baubles Stamps
Shop at:
Sunny Studio
Bells & Baubles Dies
Shop at:
Sunny Studio

Sunday, October 8, 2023

Pretty Poinsettia Card with Rachel

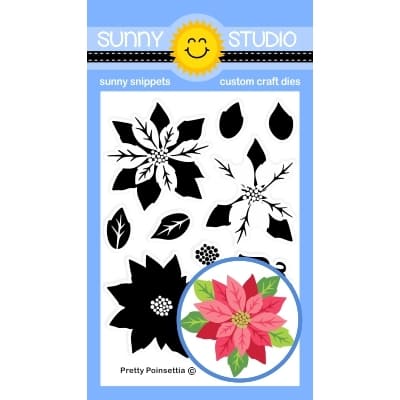
Hello crafty friends! It's Rachel here, and I have a Christmas shaker card to share with you today featuring the beautiful Pretty Poinsettia layering clear stamps set. I combined this set with the gorgeous Frilly Frames Quatrefoil Die Set to add both texture and interest to my background. The nice thing about this card is that it's super easy to re-create because there is only stamping, die cutting, and gluing involved and no coloring.

Sunny Studio Stamps: Pretty Poinsettia Christmas Card by Rachel Alvarado (featuring Winter Greenery, Frilly Frame Dies)

To start, I first stamped out three separate poinsettias using some Pinkfresh Studio Ink. The colors I used (in this order) were Passion Fruit, Candy Apple, and Espresso. I like using a dark brown ink when layering stamps with red ink, because I feel like the color really helps the image to pop and still appears as a dark red instead of a brown. I only used three of the layering stamps when creating my poinsettias. Following this, I used the Pretty Poinsettia Die Set to cut them out. Next, I die cut some holly leaves using the holly die that comes in the new Woolen Mitten Dies. There are also holly dies in the Winter Greenery Die Set (which I also used for the red foliage).

Sunny Studio Stamps: Pretty Poinsettia Christmas Card by Rachel Alvarado (featuring Winter Greenery, Frilly Frame Dies)

I set aside my florals to work on my background and adhered the back of my cutout to a 4.25" x 5.5" piece of clear acetate with liquid adhesive. Next, I attached some 1/4" wide foam adhesive tape to the back frame of my frilly quatrefoil cutout and then added some shimmery shaker embellishments to the inside of this piece. I then adhered a 4.25" x 5.5" piece of light gray card stock over the back of my card to hold in my embellishments. Once my shaker base was finished, I then heat embossed my sentiment on a 1.5" x 5.75" piece of clear heavy-duty vellum with some Liquid Platinum Fine Detail Embossing Powder. I wrapped this strip around the middle of my card and attached the folded tabs to the back of my panel prior to adhering my card to a top-folding A2 sized card base. Lastly, I added my florals to the front of my card with either 3D foam adhesive tape or liquid adhesive depending on which pieces I wanted to add dimension or not.

Thanks so much for taking the time to stop by today! If you liked this card and want more card making inspiration, please feel free to check out my INSTAGRAM FEED.

Wishing you all a lovely day!

Sunny Studio Supplies Used:

Frilly Frames Quatrefoil
Shop at:
Sunny Studio
Winter Greenery DIes
Shop at:
Sunny Studio
Pretty Poinsettia Stamps
Shop at:
Sunny Studio
Pretty Poinsettia Dies
Shop at:
Sunny Studio