Showing posts with label Sweet Treats House Add-on. Show all posts

Thursday, February 24, 2022

Paris Afternoon Cards with Anja and Marine

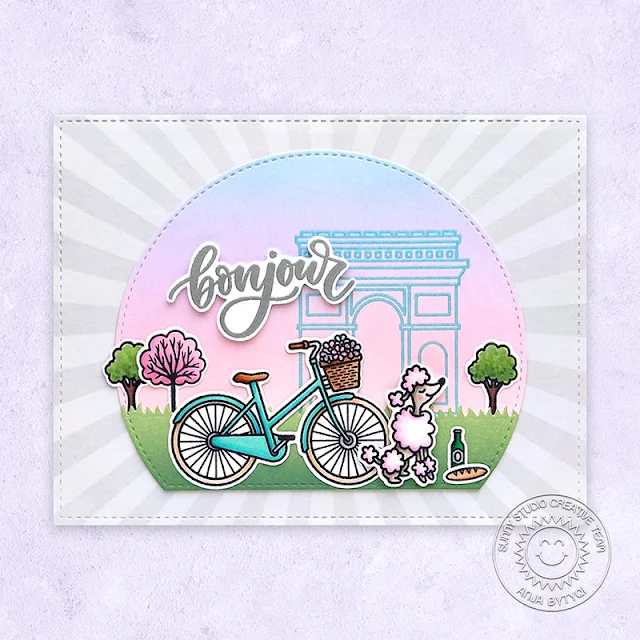
Hi everyone, Anja here with you today. I'm already looking forward to spring! So I created a scene with the Paris Afternoon Stamps. Sweet "Madame Poodle" is dreaming of a picnic at the park.

Sunny Studio Stamps: Paris Afternoon Card by Anja Bytyqi (featuring Charming City, Stitched Semi-Circle Dies)

First, I used the Frilly Frames Quatrefoil stitched rectangle die to cut out a full-size A2 mat from the Subtle Grey Tones sunburst paper. I adhered it to a top folding landscape card base.

For my pastel background, I did some ink blending with Distress Oxides (Tumbled Glass, Shaded Lilac, Milled Lavender and Spun Sugar) onto a piece of Bristol cardstock. I stamped the arch image from the Charming City set in VersaMark Ink and heat embossed it with Salvaged Patina Distress Embossing Glaze.

On another Bristol cardstock strip, I blended together Bundled Sage and Rustic Wilderness Distress Oxide Ink for the grass. At the top I used the the grass border die included in the Comic Strip Everyday Dies set. I die cut both ink blended pieces with the largest of the Stitched Semi-Circle Dies and layered the grass border over the background.

Sunny Studio Stamps: Paris Afternoon Card by Anja Bytyqi (featuring Charming City, Stitched Semi-Circle Dies)

Next, I stamped the images (the trees are from Charming City and Critters on the Go) in Memento Tuxedo Black Ink and colored them with Copic Markers. I used the coordinating dies to cut everything out. The word 'bonjour' was stamped in VersaMark Ink and heat embossed with silver embossing powder. Since there isn't a matching die, I carefully fussy cut it with scissors.

Finally, I assembled my scene by adhering the images and popping up the sentiment and poodle with foam tape.

Thank you so much for stopping by! Hope you're having a beautiful day!

----------------------------------------------

Hi crafty friends, Marine here, I'm back with this cute and sweet bakery storefront showcasing Paris Afternoon

Sunny Studio Stamps: Paris Afternoon Card by Marine Simon (featuring Critters On The Go, Farm Fresh, Chloe Alphabet Dies)

I started off by making the storefront panel. I cut a 5,5 x 4,25" light blue panel, masked 1cm along the bottom edge using washi tape, and created a brick texture on the paper using tumbled glass distress ink and a brick stencil. Next I carefully removed the washi tape, and applied a little bit of hickory smoke distress ink on the bottom edge to bring some texture and contrast.

I picked a rectangle die from my stash, taped it in the middle of the brick panel, right above the pavement section, and sent everything to my die cutting machine to cut a window out of this brick panel. And to finish this window nicely, I created a frame. I used the same rectangle die as before and a second one slightly bigger, I taped both dies on a piece of white cardstock and cut a frame that I glued on the brick panel.

Sunny Studio Stamps: Paris Afternoon Card by Marine Simon (featuring Critters On The Go, Farm Fresh, Chloe Alphabet Dies)

Next I cut a 5,5 x 4,25" vellum panel, and on the left side I white heat embossed the croissant and the word "Bonjour" from Paris AfternoonI added double sided tape at the back of the brick panel and attached it on the vellum panel. I also created a simple pink awning using a paper from the Dots & Stripes Pastels paper pack and the roof die from the Sweet Treat House Add-On.

I cut a light blue card base, and stuck a piece of rainbow polka dot paper from the Spring Sunburst paper pack on top. I added foam tape at the back of the brick panel, all around the rectangle window, next I poured some colorful confetti inside the vellum window and then I attached my card base to the foam to finally close and complete my shaker background. I attached the pink awning above the window using double side tape at the top and foam tape along the scalloped edges to bring dimension, and then I stamped, die cut and colored all my images using my alcohol markers.

Sunny Studio Stamps: Paris Afternoon Card by Marine Simon (featuring Critters On The Go, Farm Fresh, Chloe Alphabet Dies)

In addition to Paris Afternoon, here are the stamp sets I used:
Charming City for the word "Bonjour"
Critters on the Go for the sitting bear and fox
Farm Fresh for the pile of hay and the crows that I turned into pigeons

Once the coloring was done, I cut the word "Friends" twice using the Chloe Alphabet die set: out of yellow cardstock and out of white cardstock. I attached the white letters behind the yellow letters to create an outline, and I stuck those letters on the pink awning. I also white heat embossed the words "So happy we're" from Fall Friends on black cardstock, and trimmed it into a slim banner that I attached below the word "Friends".

Sunny Studio Stamps: Paris Afternoon Card by Marine Simon (featuring Critters On The Go, Farm Fresh, Chloe Alphabet Dies)

I finished my card by adding highlights and details to the images using a white gel pen, and that's it! I hope that you like this cute Parisian scene! We have coffee, croissant and baguette and of course some pigeons ready to steal a few crumbs! As always, you are more than welcome to check the process video (click on the image above)! Thanks for stopping by, and see you next Thursday! Have an amazing day!

Sunny Studio Supplies Used:

Chloe Alphabet Dies
Chloe Alphabet Dies
Shop at:
Sunny Studio
Fall Friends Stamps
Fall Friends Stamps
Shop at:
Sunny Studio
Comic Strip Everyday Dies
Shop at:
Sunny Studio
Spring Sunburst 6x6 Paper
Shop at:
Sunny Studio
Dots & Stripes Pastels 6x6 Paper
Shop at:
Sunny Studio
Subtle Grey Tones Paper
Shop at:
Sunny Studio
Sweet Treats House Add-on
Shop at:
Sunny Studio
Stitched Semi-Circle Dies
Shop at:
Sunny Studio
Frilly Frames Quatrefoil
Shop at:
Sunny Studio
Farm Fresh Stamps
Farm Fresh Stamps
Shop at:
Sunny Studio
Farm Fresh Dies
Farm Fresh Dies
Shop at:
Sunny Studio
Charming City Stamps
Shop at:
Sunny Studio
Charming City Dies
Charming City Dies
Shop at:
Sunny Studio
Critters on the Go Stamps
Shop at:
Sunny Studio
Critters on the Go Dies
Shop at:
Sunny Studio
Paris Afternoon Stamps
Shop at:
Sunny Studio
Paris Afternoon Dies
Shop at:
Sunny Studio

Thursday, October 28, 2021

Gingerbread House Die Focused Cards with Marine and Anja

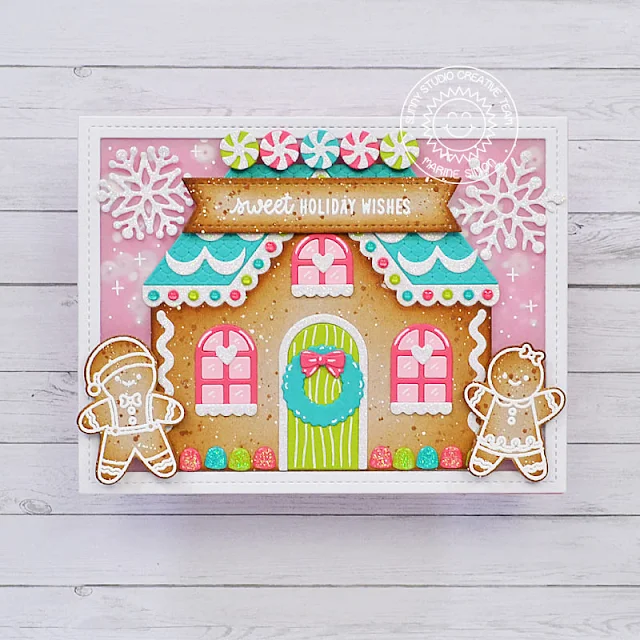
Hello crafty friends, Marine here, I'm back today with a cute and colorful shaker card showcasing the Gingerbread House Dies. Most of the elements I used to build this sweet little house come from that set, but I also used the wreath and bow dies from the Sweet Treat House Add-On die set and two Icing Border dies to help me decorate the house.

Sunny Studio Stamps: Gingerbread House Dies Sweet Treats House Add-On Dies Christmas Cookies Christmas Card by Marine Simon

I cut all the bits and pieces using a pink + green + blue combination, some were cut using sparkling white cardstock to create the icing, and I picked a kraft paper to create the gingerbread cookie.

To emphasize the gingerbread cookie effect, I applied vintage photo distress ink on the house edges. And then to add a cookie texture, I smooshed my vintage photo ink pad onto my glass surface, added a bit of water to the ink and then used a small brush to splatter small droplets on the house. And for a bit of contrast, I mixed some Copic opaque white ink with a drop of water to create more splatters on the house.

Once the house was dry, I glued it on a piece of cardstock, and then I assembled all the other elements: roof, windows, icing pieces, candy, etc. using liquid glue. For the smallest pieces, I used my twizzlers to keep my fingers away from the glue, and used my quick stick tool to pick up the tiniest things, such as the small circles.

Next I moved on to the shaker panel and cut a 5,5 x 4,25" panel out of a pink pattern paper from the Very Merry 6x6 paper pack. I also cut a frame out of white cardstock, and glued that frame on vellum. The vellum will mute the shaker background so it won't steal the gingerbread house thunder but we will still be able to see the shaker material.

Sunny Studio Stamps: Gingerbread House Dies Sweet Treats House Add-On Dies Christmas Cookies Christmas Card by Marine Simon

I trimmed the vellum around the frame, and applied foam strips at the back of that frame, on the four edges. And to keep the shaker material away from those foam strips, I applied powder all along the foam edges. This way the sequins and beads won't stick to the foam.

I cleaned the vellum window using a microfiber cloth, and then added the shaker material into the window: white beads, clear sequins, and a bunch of small pink jewels. I peeled the backing paper off the foam strips, and placed my pink panel directly on those foam strips to close the shaker panel.

Next I stuck the gingerbread house in the middle of the vellum panel using liquid glue, and also added more decorative pieces at the top of the house using foam squares.

For the last final details, I cut two sparkling white Lacy Snowflakes, cut a kraft banner using a die from Stitched Rectangle and white heat embossed my sentiment from Christmas Cookies on top of it. I also white heat embossed two gingerbread cuties from Christmas Cookies on kraft cardstock, and I created the same texture on those elements as the one on the house.

I attached those gingerbread cuties on both sides of the house using foam squares, stuck the banner on the roof, and then the snowflakes on both sides of the roof.

And finally, I added some details around the house, directly on the vellum, using a white gel pen, and brought more shine and sparkles by adding a dot of glossy accents on each little circle below the roof, and glitter on the candy at the bottom of the house.

Sunny Studio Stamps: Gingerbread House Dies Sweet Treats House Add-On Dies Christmas Cookies Christmas Card by Marine Simon

And that's it, I hope that you like this very cute, bright and shiny and colorful gingerbread house. Feel more than welcome to check the process video above (click on the photo), maybe it will inspire you to create your own gingerbread house! Thanks for stopping by and see you next week! 

--------------------------------------------

Hi everyone, Anja here and today's shaped card was made with the sweet Gingerbread House Dies.

Sunny Studio Stamps: Gingerbread House Dies Sweet Treats House Add-On Dies Christmas Cookies Christmas Card by Anja Bytyqi

First, I die cut the house shadow base from cream cardstock. Next, I die cut all the elements from colored cardstock. The scalloped trims for the roof and windows as well as the bottom piece were cut from glitter cardstock. I sponged the edges of the kraft gingerbread house die-cut with brown ink and added some splatters with a paint brush. To decorate the top window, I picked the cute little bow from the Sweet Treat House Add-on Dies set.

Now comes the fun part of putting the gingerbread house together by adhering all the die-cuts. I covered the gumdrops with Crystal Stickles to match the glitter cardstock. To make the pink part of the peppermint candy shiny, I applied a coat of Glossy Accents. I also turned it into a lollipop by putting it on a stick.

Sunny Studio Stamps: Gingerbread House Dies Sweet Treats House Add-On Dies Christmas Cookies Christmas Card by Anja Bytyqi

Of course I had to decorate the house with one of the adorable Christmas Cookies. I stamped the gingerbread girl and heart cookie in Memento Tuxedo Black Ink and colored them with Copic Markers. I used the coordinating dies to cut out the images and adhered them with foam tape.

Finally, I stamped the 'Merry Christmas' sentiment from the Bear Hugs set in VersaMark Ink onto a dark brown cardstock strip and heat embossed it with white embossing powder.

Thank you so much for stopping by! Have an awesome day!

Sunny Studio Supplies Used:

Stitched Rectangle Dies
Shop at:
Sunny Studio
Bear Hugs Stamps
Bear Hugs Stamps
Shop at:
Sunny Studio
Christmas Cookies Stamps
Shop at:
Sunny Studio
Christmas Cookies Dies
Shop at:
Sunny Studio
Gingerbread House Dies
Shop at:
Sunny Studio
Icing Border DIes
Icing Border DIes
Shop at:
Sunny Studio
Lacy Snowflakes Die
Lacy Snowflakes Die
Shop at:
Sunny Studio
Very Merry 6x6 Paper
Shop at:
Sunny Studio
Sweet Treats House Add-on
Shop at:
Sunny Studio

Monday, August 2, 2021

Teacher Appreciation Cards with Mayra and Ashley

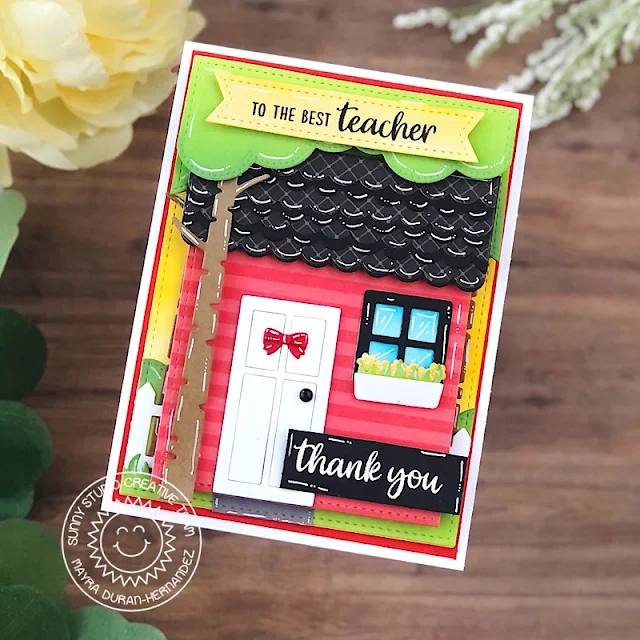
Hello everyone. Happy Monday. Mayra here with you today sharing this teacher thank you-themed card. I used the Sweet Treat House Add-on die to create the schoolhouse, along with the wonderful Teacher Appreciation stamp set. 

Sunny Studio Stamps: Teacher Appreciation Sweet Treat House Add-on Dies Slimline Dies Teacher Card by Mayra Duran-Hernandez

I began by die cutting the layers I needed to create the scene for the schoolhouse, I used Sweet Treat House Add-on die to create the schoolhouse, the Stitched Rectangle dies to create the schoolhouse building, and the base panel. I also used the Picket Fence Borders die, to create the trees, and bushes, I used the cloudy border from the Slimline Nature Border dies, and the tree base from the Rustic Winter dies set. After die-cutting the layers, I added a bit of color to the green layers using Distress Oxide inks. I used Twisted Citron, Mowed Lawn, and Rustic Wilderness. For the base panel and schoolhouse, I used the patterned paper from the Classic Sunburst paper pad and the Sleek Stripes paper pad. 

Sunny Studio Stamps: Teacher Appreciation Sweet Treat House Add-on Dies Slimline Dies Teacher Card by Mayra Duran-Hernandez

Next, I stamped the sentiment from the Teacher Appreciation stamp set onto the banner from the Stitched Rectangles dies set. I hope you enjoy the card I created to share with you today. Thank you very much for taking the time to stop by. I hope you each have a wonderful and blessed day. 

------------------------------------------

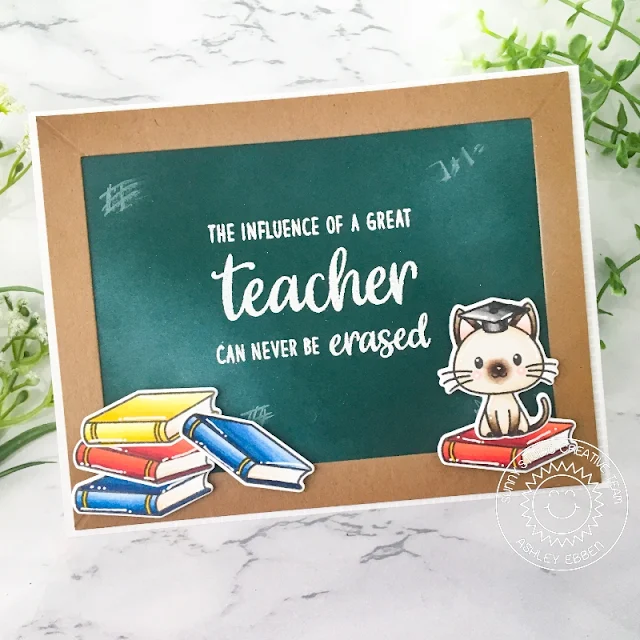
Hello friends! It's Ashley with a fun back to school card for you today! It's hard to believe the school year is already coming up soon! It will be my daughter's first year - she is going to prekindergarten! Time has flown way too fast! I know I'm going to need some cards ready for the teachers she will be spending time with, so why not get started now? I used the Teacher Appreciation stamp set and some other Sunny Studio supplies to create this old school chalkboard look. Yes, I know it's all about white boards and smart boards now, but the chalk is so cute!

Sunny Studio Stamps: Teacher Appreciation Grad Cat Teacher Card by Ashley Ebben

I started by randomly blending white pigment ink in soft patches onto dark green cardstock. l stamped the sentiment from Teacher Appreciation right in the center with VersaMark ink and embossed with white. I then used a white gel pen to make random marks around the outside and rubbed them with a cloth before they dried. This gave me that dirty, erased look like a chalkboard that pairs perfectly with the sentiment.

Sunny Studio Stamps: Teacher Appreciation Grad Cat Teacher Card by Ashley Ebben

I created a frame for the chalkboard with some kraft cardstock and the Stitched Rectangle dies. I scored the corner lines and blended a bit of Gathered Twigs Distress Ink to add depth to the lines. I attached the frame to the chalkboard, then added the whole thing to an A2 sized piece of grid paper from Subtle Grey Tones. I stamped the cat and book from Grad Cat and colored with Copics. I cut them out with the matching dies and finished the card by adding the images with foam tape for dimension.

Thank you so much for stopping by! Have a wonderful day!

Sunny Studio Supplies Used:

Teacher Appreciation Stamps
Shop at:
Sunny Studio
Picket Fence Border Dies
Shop at:
Sunny Studio
Stitched Rectangle Dies
Shop at:
Sunny Studio
Rustic Winter Dies
Rustic Winter Dies
Shop at:
Sunny Studio
Subtle Grey Tones Paper
Shop at:
Sunny Studio
Sweet Treats House Add-on
Shop at:
Sunny Studio
Grad Cat Stamps
Grad Cat Stamps
Shop at:
Sunny Studio
Grad Cat Dies
Grad Cat Dies
Shop at:
Sunny Studio
Slimline Nature Borders
Shop at:
Sunny Studio
Classic Sunburst Paper
Shop at:
Sunny Studio
Sleek Stripes Paper
Sleek Stripes Paper
Shop at:
Sunny Studio

Wednesday, June 30, 2021

Candy Shoppe Cards and Video Tutorial with Franci and Julia

Hi there! Franci here with you today with a sweet card showcasing the Candy Shoppe set. Aww I love this set so much! 

Sunny Studio Stamps: Candy Shoppe Beach Buddies Birthday Card by Franci Vignoli

First of all I created my card base out of white cardstock, then masked the front bottom and inked the top with Distress Ink.

Then I stamped, colored with Copics and die cut all my images from these sets: Candy Shoppe + coordinated dies and Beach Buddies + coordinated diesI love these little bears surrounded by sweets and candies, they're so cute! 

Sunny Studio Stamps: Candy Shoppe Beach Buddies Birthday Card by Franci Vignoli

I glued everything in place with foam adhesive, stamped my sentiment and added some details with a white gel pen. Finally I added some Birthday Cake Dot Sprinkles confetti here and there.

I'm so happy about how this card turned out and I hope you like it too :) Have a lovely day!

-------------------------------------------

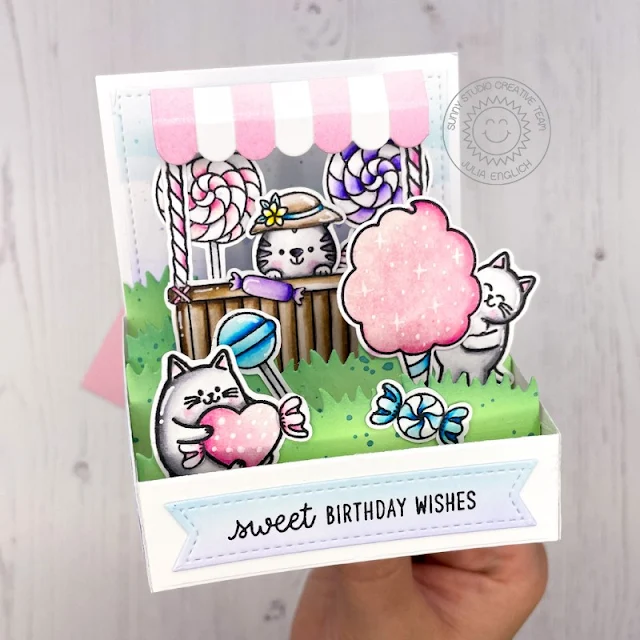
Hey crafty friends! It’s Julia here with sweet birthday box card!

Sunny Studio Stamps: Candy Shoppe Beach Buddies Meow & Furever Tiki Time Stitched Rectangle Dies Birthday Card by Julia Englich


First, I stamped out all of my adorable images from Candy ShoppeMeow & FureverBeach Buddies and Tiki Time onto Strathmore Bristol Smooth paper and I used Zig Clean Color Real Brush Markers to color them in. 

Sunny Studio Stamps: Candy Shoppe Beach Buddies Meow & Furever Tiki Time Stitched Rectangle Dies Birthday Card by Julia Englich

Then, to create the box I used a die set, but you can also do it without any specialty dies! You will need one back panel measuring 3 1/2 x 4 1/2", two side panels 2 1/2" long, 2 slanting downwards to 1" in height. Those side panels are scored at 1/2" on the taller side. Finally, for the front of the box you need a strip of cardstock 4 1/2 x 1 " scored at 1/2" and 4". For the inside grassy borders, the panels measure 4 1/4 x approx. 1" and they are scored at 3/8" and  3 7/8". For the background of my box, I used the second to largest of the Stitched Rectangle dies and I just trimmed a little bit off at the bottom.  

I ink blended the stitched panel using a cloud stencil and Distress Oxide inks. I also added the same ink colors to the sides of the box. For my sentiment strip, I used the banner dies from the Stitched Rectangle dies, added the same ink colors I used for the background and stamped the sentiment from Candy Shoppe in black.

Inks used: Tumbled Glass, Shaded Lilac, Spun Sugar, Kitsch Flamingo, Cracked Pistachio, Evergreen Bough Zig Markers used:  999, 904, 97, 94, 10; 64, 68; 52, 55; 200, 202; 803, 80;32, 31

Sunny Studio Stamps: Candy Shoppe Beach Buddies Meow & Furever Tiki Time Stitched Rectangle Dies Birthday Card by Julia Englich


To assemble the box, I added liquid glue to the flaps of the side pieces and adhered them to the back panel. I adhered my stitched background piece to the back and one of the grassy borders on top of that. Then, I added the front piece to the front of the left side panel and I also started adding my grassy hills with liquid glue to the inside of the left side panel. Once they had a bit of time to dry, I flipped the pieces over to the right, lined them up and added glue to all the flaps. Then I just had to close the right side panel onto the adhesive and give it some time to dry! I added the side panels and the sentiment banner to the outside of the box.

Sunny Studio Stamps: Candy Shoppe Beach Buddies Meow & Furever Tiki Time Stitched Rectangle Dies Birthday Card by Julia Englich


Finally, it was time to build my scene. I wanted to have a little candy stand, so I used the roof of the Sweet Treat House Add-On, the bottom of the tiki bar from Tiki Time and the twizzler sticks from Candy Shoppe to build it! I added all the accessories to the adorable little kitties and I adhered everything to the grassy borders inside the box!

Check out the video tutorial below to see how this card came together:


I had so much fun making this sweet box card and I really hope you like it! Thanks so much for stopping by today! Have an amazing week!

Sunny Studio Supplies Used:

Beach Buddies Stamps
Shop at:
Sunny Studio
Beach Buddies Dies
Beach Buddies Dies
Shop at:
Sunny Studio
Candy Shoppe Stamps
Candy Shoppe Stamps
Shop at:
Sunny Studio
Candy Shoppe Dies
Candy Shoppe Dies
Shop at:
Sunny Studio
Tiki Time Stamps
Tiki Time Stamps
Shop at:
Sunny Studio
Tiki Time Dies
Tiki Time Dies
Shop at:
Sunny Studio
Stitched Rectangle Dies
Shop at:
Sunny Studio
Sweet Treats House Add-on
Shop at:
Sunny Studio
Meow & Furever Stamps
Shop at:
Sunny Studio
Meow & Furever Dies
Meow & Furever Dies
Shop at:
Sunny Studio