Showing posts with label Stitched Arch Dies. Show all posts

Sunday, February 18, 2024

Spring Garden Die Focused Card with Tammy

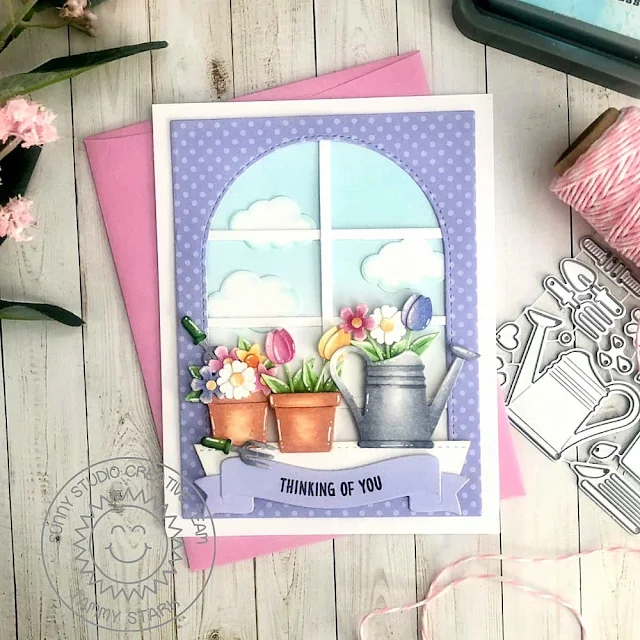
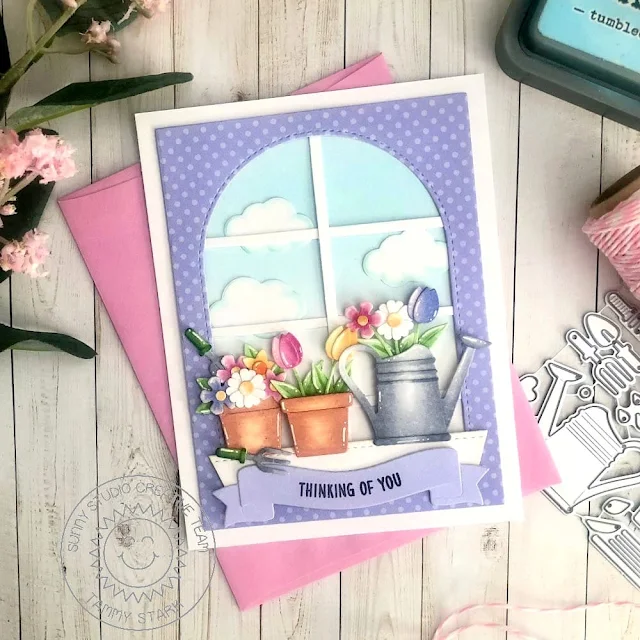
Hello friends! Tammy here sharing a Spring themed card, featuring the adorable Spring Garden Dies. 

Sunny Studio Stamps: Spring Garden Die Focused Thinking Of You Card by Tammy Stark (featuring Stitched Arch Dies, Slimline Dies, Brilliant Banners)

To begin, using the Spring Garden Dies, I die cut Bristol smooth cardstock and colored with Copic markers. I added some white highlights to the colored die cuts using a white gel pen.

Copic Colors Used:
Flower pots: E13, E11, E50
Watering can: C3, C1, C0, C00
Pink: RV55, RV52, RV00
Lavender: BV02, BV01, BV00, BV000
Yellow: Y23, Y21, YR30
Green: G43, G40

Sunny Studio Stamps: Spring Garden Die Focused Thinking Of You Card by Tammy Stark (featuring Stitched Arch Dies, Slimline Dies, Brilliant Banners)

Next, I cut a piece of lavender dot paper from the Spring Fever Paper to 4X5", then cut out a window using the largest of the Stitched Arch DiesI then cut 4 very thin strips of white cardstock and attached them on the back of the patterned paper to create the look of window panes. The windowsill was created using the thinnest pennant from the Slimline Pennant Dies, cutting the edges at an angle just slightly longer than the width of the window; then attaching it using foam tape. 

Sunny Studio Stamps: Spring Garden Die Focused Thinking Of You Card by Tammy Stark (featuring Stitched Arch Dies, Slimline Dies, Brilliant Banners)

Next, I cut a piece of Bristol smooth cardstock the same size as the patterned paper and blended it with Tumbled Glass Distress Oxide ink. I cut the clouds using the Plane Awesome Dies, attached them to the inked background, then glued the arched piece on top. The flower pots and watering can were attached to the card front with foam tape for dimension.

Lastly, I die cut a lavender banner using the Brilliant Banner 1 Dies, then stamped the sentiment in black ink from the Critters On the Go stamp set. I attached the banner using foam tape, then adhered it to a white A2 card base to complete my card.

Thanks for stopping by! Hugs!

Sunny Studio Supplies Used:

Plane Awesome Dies
Plane Awesome Dies
Shop at:
Sunny Studio
Stitched Arch Dies
Stitched Arch Dies
Shop at:
Sunny Studio
Slimline Pennant Dies
Shop at:
Sunny Studio
Critters on the Go Stamps
Shop at:
Sunny Studio
Spring Fever Paper
Spring Fever Paper
Shop at:
Sunny Studio
Brilliant Banner 1 Dies
Shop at:
Sunny Studio
Spring Garden Dies
Spring Garden Dies
Shop at:
Sunny Studio

Tuesday, February 6, 2024

Bighearted Bears Card with Isha

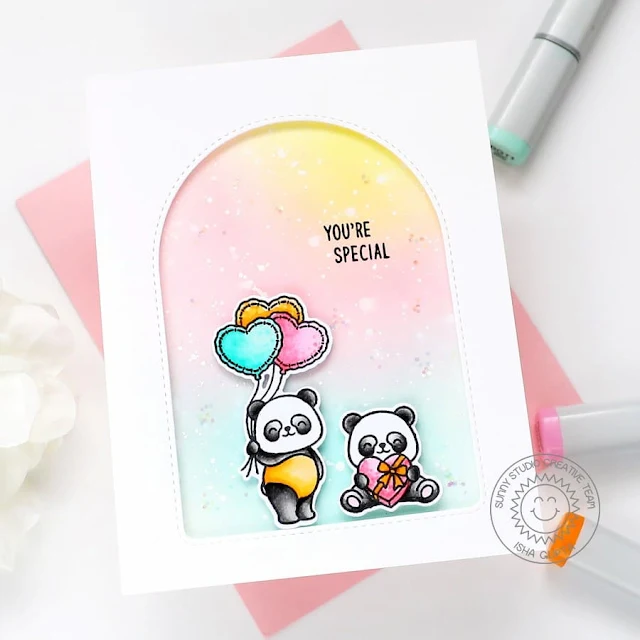
Hello everyone! Isha here today with yet another CAS card featuring the Bighearted Bears stamps and coordinating dies. CAS cards don't have to be one layer cards, they just need to have more white space and can tell a whole story with minimal things. I went for a soft pastel look as I am ready for spring and these colors are so close to my heart. The adorable images and the sentiment make this card so special :)

Sunny Studio Stamps: Bighearted Bears Card by Isha Gupta (featuring Stitched Arch Dies)

I started by sponging kitsch flamingo, squeezed lemonade and salvaged patina distress oxide inks to a white panel. Flick some water and white paint to it.

Die-cut the arc onto a white card panel using the Stitched Arch dies. Adhere it to the inked panel using 3d foam. 

Sunny Studio Stamps: Bighearted Bears Card by Isha Gupta (featuring Stitched Arch Dies)

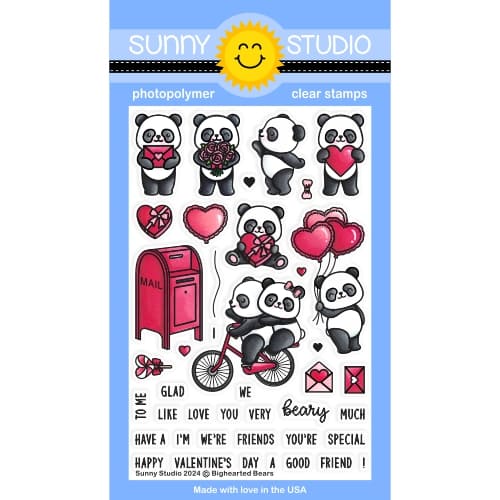
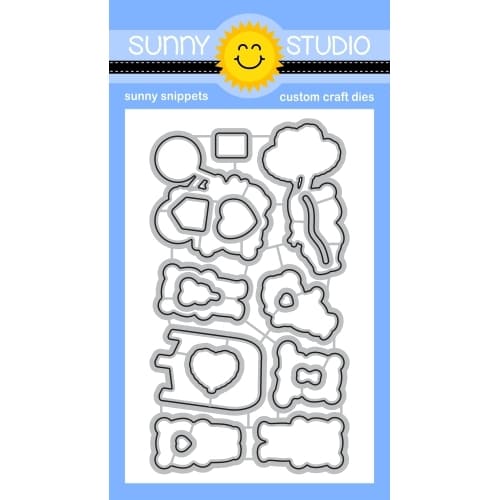
Stamp the images from the Bighearted Bears stamps, color using copic markers and die-cut using the coordinating dies. Adhere to the card and stamp the sentiment. 

To finish, I added some chunky glitter all over the inked panel. Thank you for dropping by and have a nice day!

Sunny Studio Supplies Used:

Stitched Arch Dies
Stitched Arch Dies
Shop at:
Sunny Studio
Bighearted Bears Stamps
Shop at:
Sunny Studio
Bighearted Bears Dies
Shop at:
Sunny Studio

Wednesday, December 13, 2023

Holiday Hugs Card with Gladys

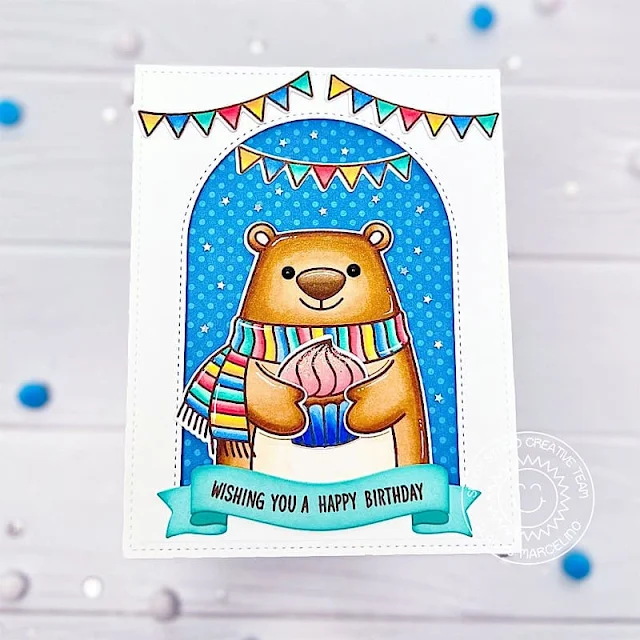
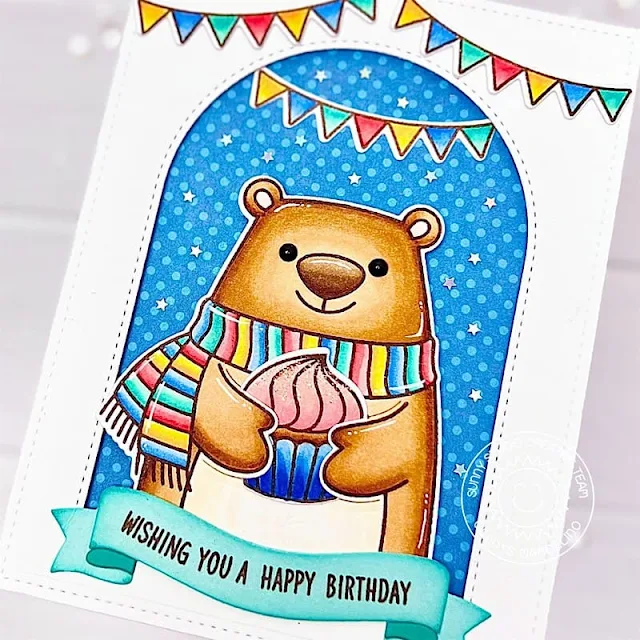
Hello crafty friends, Gladys here! I'm excited to be back on the blog with a birthday card using the Holiday Hugs stamp set. Since I have been creating a lot of holiday cards, I wanted to mixed it up and make a birthday card using this adorable bear.

Sunny Studio Stamps: Holiday Hugs Birthday Card by Gladys Marcelino (featuring Stitched Arch Dies, Brilliant Banners)

First, I stamped the bear and cupcake from the stamp set using alcohol friendly ink. I also stamped the banner from Panda Party. I colored them with Copic markers then used their coordinating dies to cut them out. Next, I used a stitched rectangle die to cut from white card stock and blue pattern paper from Critter Country paper pack. Then I used the largest Stitched Arch die to create the window on the white cardstock. 

Sunny Studio Stamps: Holiday Hugs Birthday Card by Gladys Marcelino (featuring Stitched Arch Dies, Brilliant Banners)

I backed the white cardstock with double sided foam tape and mounted it on the blue paper. I also added foam tape behind the bear to give dimension. For the sentiment I stamped it on colored cardstock and cut it from the Brilliant Banner 1 die. I inked the edges with peacock feather distress oxide ink to add some contrast. To complete my card I adhered the banners, a scattering of iridescent stars, and diamond stickles on the cupcake for some sparkle. 

Thanks so much for stopping by. Have a wonderful day everyone!

Sunny Studio Supplies Used:

Stitched Arch Dies
Stitched Arch Dies
Shop at:
Sunny Studio
Critter Country Paper
Shop at:
Sunny Studio
Panda Party Stamps
Panda Party Stamps
Shop at:
Sunny Studio
Panda Party Dies
Panda Party Dies
Shop at:
Sunny Studio
Brilliant Banner 1 Dies
Shop at:
Sunny Studio
Holiday Hugs Stamps
Holiday Hugs Stamps
Shop at:
Sunny Studio
Holiday Hugs Dies
Holiday Hugs Dies
Shop at:
Sunny Studio

Thursday, December 7, 2023

Bells & Baubles Shaker Ornament with Marine

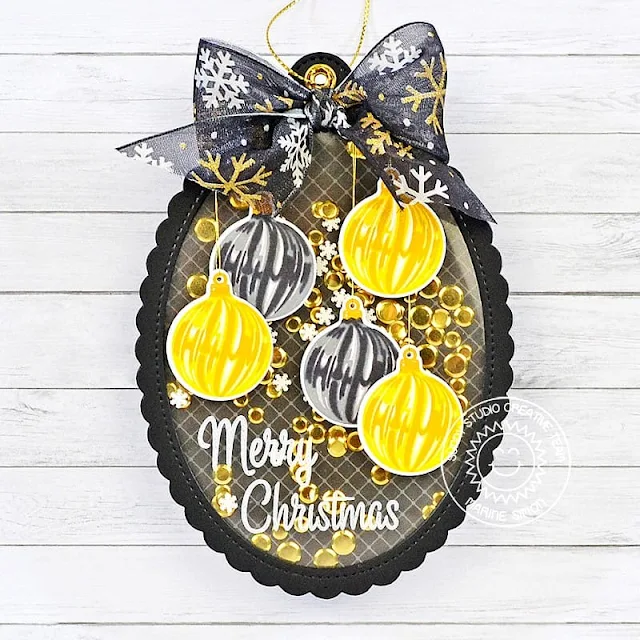
Hello crafty friends, Marine here, I'm so happy to be back on the blog with this shaker ornament showcasing Bells & Baubles. As you can see, I kind of went out of my comfort zone with this gold and black color palette, I'm more of a let-throw-all-the-colors-on-one-single-card kind of girl, but I was actually inspired by my friend and fellow crafter Bobbi Lemanski who recently shared a beautiful set of black + gold + white tags, and I thought it would be a fun challenge for me.

Sunny Studio Stamps: Bells & Baubles Shaker Christmas Ornament by Marine Simon (featuring Scalloped Oval Mat Dies, Stitched Oval Dies)

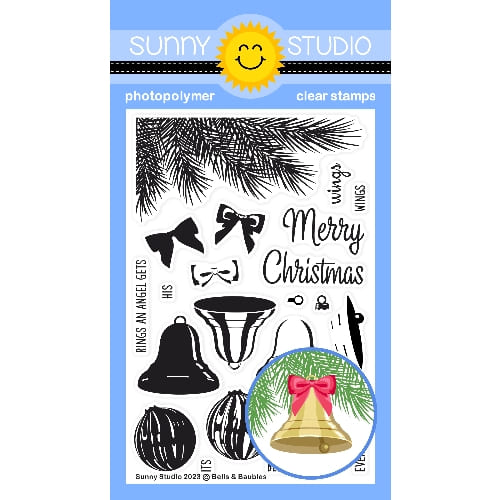
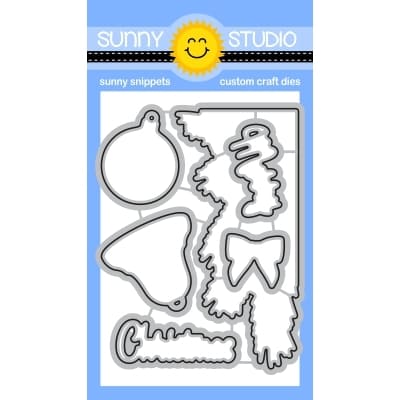
So I started off by stamping five baubles on 80lb Neenah solar white cardstock using Lawn Fawn premium dye inks. I stamped each image twice to get a nice impression, and then used the coordinating dies to cut everything. Here are the color combinations I picked:

 golden baubles: butter + sunflower + no. 2 pencil

 black baubles: manatee + hippo + black licorice

 toppers: no. 2 pencil

I cut a scalloped oval frame out of black cardstock using the largest die from Scalloped Oval Mat 1 and the largest die from Stitched Oval 2. I also cut an acetate panel using the largest die from Scalloped Oval Mat 1 again, and attached that acetate panel at the back of my black scalloped frame using liquid glue. I stamped my "Merry Christmas" greeting from Bells & Baubles at the bottom of the acetate panel using white stazon ink.

Sunny Studio Stamps: Bells & Baubles Shaker Christmas Ornament by Marine Simon (featuring Scalloped Oval Mat Dies, Stitched Oval Dies)

I attached the baubles directly on the acetate using 1mm foam squares, and added golden threads that I secured and stuck at the top back of the frame using thin pieces of tape. I added foam strips at the back of my frame, all along the oval shape, and poured my shaker material inside the acetate window: golden sequins from my stash, and White Snowflake Confetti.

Next I created the handle for my ornament. I cut two black pieces using the smallest die from Stitched Arch, and attached both elements back to back using liquid glue. I also cut two gold mirror eyelets using a die from Sliding Window, attached one of them on the front of my handle, and the second at the back.

Sunny Studio Stamps: Bells & Baubles Shaker Christmas Ornament by Marine Simon (featuring Scalloped Oval Mat Dies, Stitched Oval Dies)

Using the largest die from Scalloped Oval Mat 1 again, I cut a panel out of a Classic Sunburst black paper, and attached my handle piece at the top back using liquid glue. I cut another scalloped panel out of black cardstock that I glued at the back of the other, and then stuck that panel to the foam strips to totally close my shaker ornament.

To finish my ornament, I added golden thread on the handle, tied a bow using ribbon from my stash and attached it at the top of the frame using liquid glue. And that's it! I had a really good time making this ornament, and I think it would look amazing with traditional colors like red + green + gold, or even with wintery colors like teal + blue + silver. 

Thanks so much for stopping by, and see you next week!

Sunny Studio Supplies Used:

Sliding Window Dies
Sliding Window Dies
Shop at:
Sunny Studio
Stitched Arch Dies
Stitched Arch Dies
Shop at:
Sunny Studio
Classic Sunburst Paper
Shop at:
Sunny Studio
Scalloped Oval Mat 1 Dies
Shop at:
Sunny Studio
Stitched Oval 2 Dies
Shop at:
Sunny Studio
Bells & Baubles Stamps
Shop at:
Sunny Studio
Bells & Baubles Dies
Shop at:
Sunny Studio

Sunday, December 3, 2023

Love & Light Card with Rachel

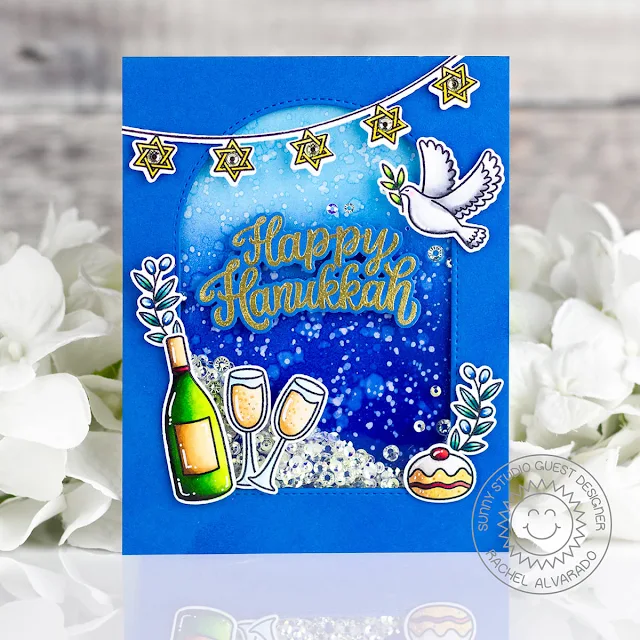
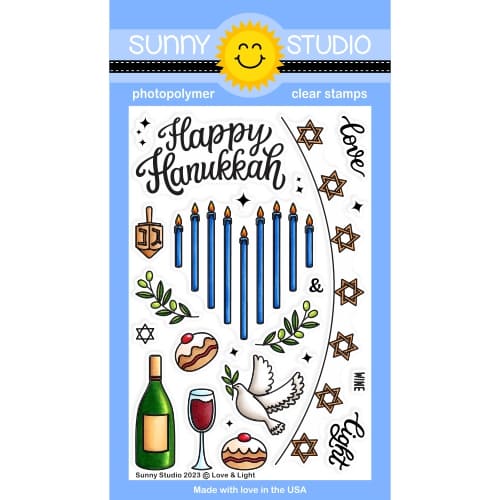
Hello crafty friends! It’s Rachel here with a festive shaker card featuring the Love & Light Stamp Set and coordinating dies.  

Sunny Studio Stamps: Love & Light Hanukkah Shaker Card by Rachel Alvarado (featuring Stitched Arch Dies)

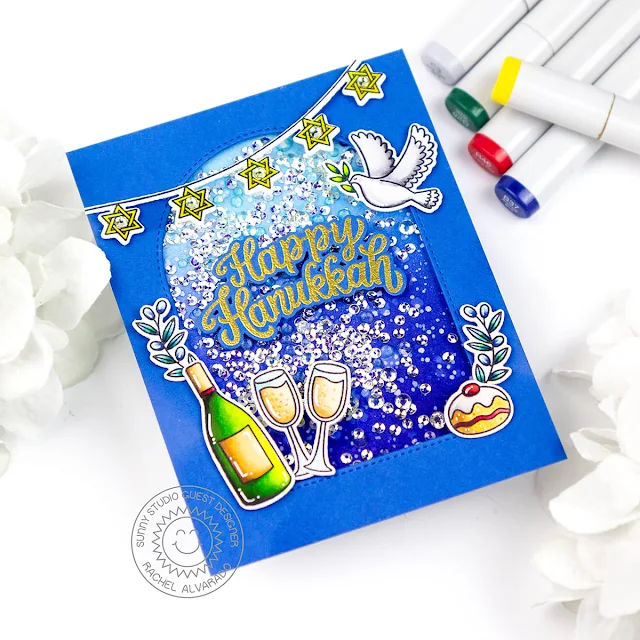
To create my card, I first stamped all my images onto a sheet of Neenah Solar White 100lb Card Stock with Memento Tuxedo Black Ink. I then used Copic alcohol markers to color them.

Copic Colors Used:

  • Blues: B00, B21, B23, B28
  • Greens: YG01, YG06, YG17, YG67
  • Dessert: Y21, Y23, E33; 0, W00, W1, W3, R46
  • Reds: R35, R46, R89
  • White: 0, C00, C1, C3

I trimmed my card base to 4.25” x 5.5” from a piece of blue card stock and die cut an arch-shaped window into this piece using the largest of the Stitched Arch Dies. I then adhered a piece of clear acetate behind the arched-window with some liquid adhesive. Next, I ink-blended a 4.25” x 5.5” piece of Neenah Solar White 110lb Card Stock with some Distress Inks (Black Soot, Chipped Sapphire, and Tumbled Glass.). To give this blending some texture, I then spattered some water drops onto this piece and blotted it dry with a paper towel.  I also added a few spatters of diluted Copic Opaque White Paint.  

Sunny Studio Stamps: Love & Light Hanukkah Shaker Card by Rachel Alvarado (featuring Stitched Arch Dies)

To create my shaker card, I added some Majestic Mini Sequins to my ink-blended piece and placed my card stock with the window on top of my base piece with some 3D foam adhesive tape. To finish my card, I heat embossed my sentiment with Fine Detail Gold Embossing Powder onto the same blue card stock that I had used for my card base. Lastly, I adhered all of my images with 3D foam adhesive squares for extra dimension.

Thanks so much for taking the time to stop by! Wishing you all a lovely day!

Sunny Studio Supplies Used:

Stitched Arch Dies
Stitched Arch Dies
Shop at:
Sunny Studio
Love & Light Stamps
Love & Light Stamps
Shop at:
Sunny Studio
Love & Light Dies
Love & Light Dies
Shop at:
Sunny Studio

Wednesday, November 29, 2023

Cozy Christmas Card with Gladys

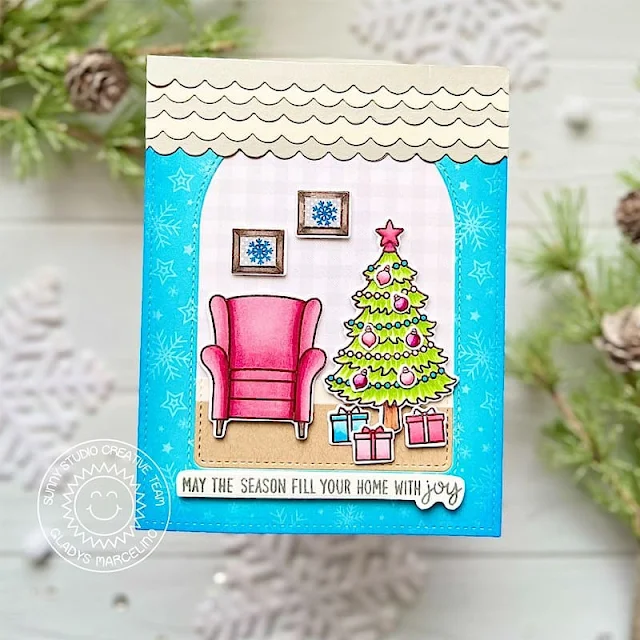
Hello crafty friends! Gladys here with a holiday card featuring the Cozy Christmas stamp set.

Sunny Studio Stamps: Cozy Christmas Holiday Card by Gladys Marcelino (featuring Stitched Arch Dies)

To start, I stamped the images from the Cozy Christmas set with alcohol friendly ink. I colored them using Copic markers then used the coordinating die to cut them out.

Next, I used an A2 size stitched rectangle die to cut the card panel out of the Joyful Holiday paper pack. I used two patterns, the blue snowflake background and gray plaid paper. I darken the edges of the blue paper using chipped sapphire distress oxide ink to add depth. Then I used the largest Stitched Arch die to cut the center creating a window for my scene.

Sunny Studio Stamps: Cozy Christmas Holiday Card by Gladys Marcelino (featuring Stitched Arch Dies)

To assemble the card, I cut a piece of kraft paper to ground the images. I backed the images with double side foam tape to give some dimension. I adhered all the elements within the arched panel. To add interest, I added scallops using the Sweet Treats House Add-On dies on the top panel to make it look like the roof top of the house. Finally, I stamped and adhered the sentiment to complete this cozy little Christmas scene.  

Thanks so much for stopping by the blog. Have a wonderful day!

Sunny Studio Supplies Used:

Sweet Treats House Add-on
Shop at:
Sunny Studio
Stitched Arch Dies
Stitched Arch Dies
Shop at:
Sunny Studio
Cozy Christmas Stamps
Shop at:
Sunny Studio
Cozy Christmas Dies
Cozy Christmas Dies
Shop at:
Sunny Studio
Joyful Holiday Paper
Shop at:
Sunny Studio

Friday, November 10, 2023

Love & Light Card with Tina

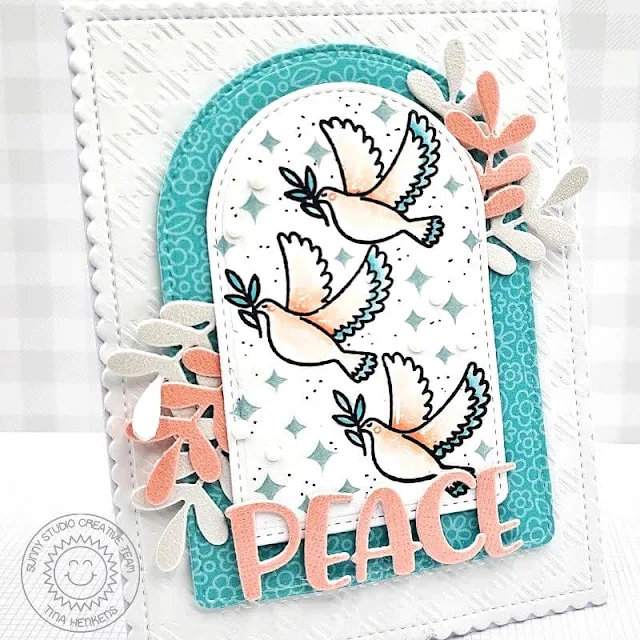
Hello crafty friends, it’s Tina and today I am featuring a card using the beautiful dove image from the Love & Light stamp and die set

Sunny Studio Stamps: Love & Light Card by Tina Henkens (featuring Chloe Alphabet Dies, Stitched Arch Dies, Winter Greenery Dies, Frilly Frame Dies)

The color palette for this project is kept very soft and pastel. I started by creating a white card base. Next I made a dry embossed panel using the Buffalo Plaid Folder for some elegant details in the background. This panel was cut with the outer die of the Frilly Frames Stripes die which gives a pretty stitched scalloped border to your card panel. 

The focal point of this card consists of two arched panels. I used the largest of the Stitched Arch dies to cut a beautiful teal flower paper from Flirty Flowers. A second arch was created from white card stock.

Smaller images like the dove and stars from the Love & Light stamp are perfect to make your own patterned background. I used a piece of scrap paper to figure out which layout would fit the best into the arch shape. All the coloring was done with Copic markers in soft shades of pink and teal. I added some details with a white gel pen.

Next, I stamped the stars onto the panel with Distress Oxide Speckled Egg, the perfect match for the teals and pinks in this project. A few dots with a black marker provided a ‘splattering effect’.

Sunny Studio Stamps: Love & Light Card by Tina Henkens (featuring Chloe Alphabet Dies, Stitched Arch Dies, Winter Greenery Dies, Frilly Frame Dies)

I love the look of the two layered arches, but adding some greenery on both sides of the design really enhances the card. I die cut several small branches from the Winter Greenery Dies from shiny pink and white card stock from my stash. I love this die set so much; I use it a lot in my cards. For my sentiment I created the word ‘peace’ using the beautiful letter dies from the Chloe Alphabet and the same shiny pink card stock as some of the branches. I stacked three layers to give the letters lots of dimension.

Finally, I added a few Pure White Jewels as embellishments and that finishes the card! Thank you for joining me and happy crafting!

Sunny Studio Supplies Used:

Flirty Flowers 6x6 Paper
Shop at:
Sunny Studio
Frilly Frames Stripes Die
Shop at:
Sunny Studio
Buffalo Plaid Embossing
Shop at:
Sunny Studio
Stitched Arch Dies
Stitched Arch Dies
Shop at:
Sunny Studio
Winter Greenery DIes
Shop at:
Sunny Studio
Love & Light Stamps
Love & Light Stamps
Shop at:
Sunny Studio
Love & Light Dies
Love & Light Dies
Shop at:
Sunny Studio

Monday, November 6, 2023

Feliz Navidad Card with Bobbi

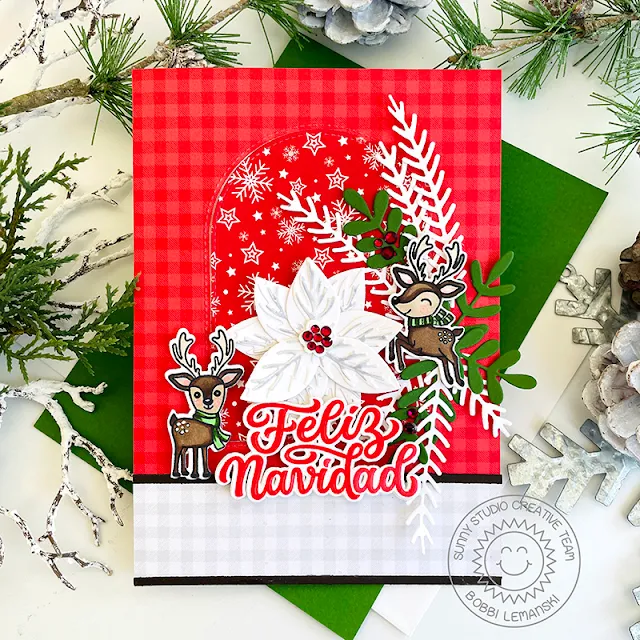
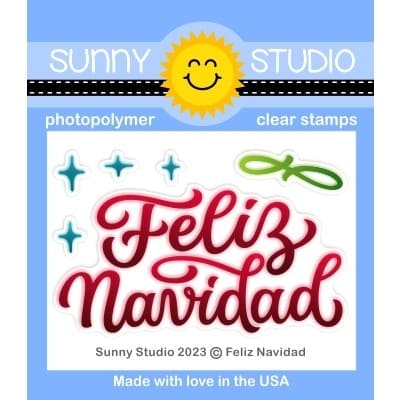
Hello friends. It’s Bobbi here, sharing a card featuring the new Feliz Navidad stamps and coordinating diesThis sentiment is bold and a generous size. It can be combined with other Christmas sets to make your holiday cards.

Sunny Studio Stamps: Feliz Navidad Holiday Card by Bobbi Lemanski (featuring Reindeer Games, Winter Greenery, Pristine Poinsettia Dies, Stitched Arch Dies)

I’m using the following Sunny Studio Stamps products:

Feliz Navidad stamps and coordinating dies

Reindeer Games stamps and coordinating dies

Winter Greenery dies

Pristine Poinsettia dies

Joyful Holiday Paper Pad

Stitched Arch dies


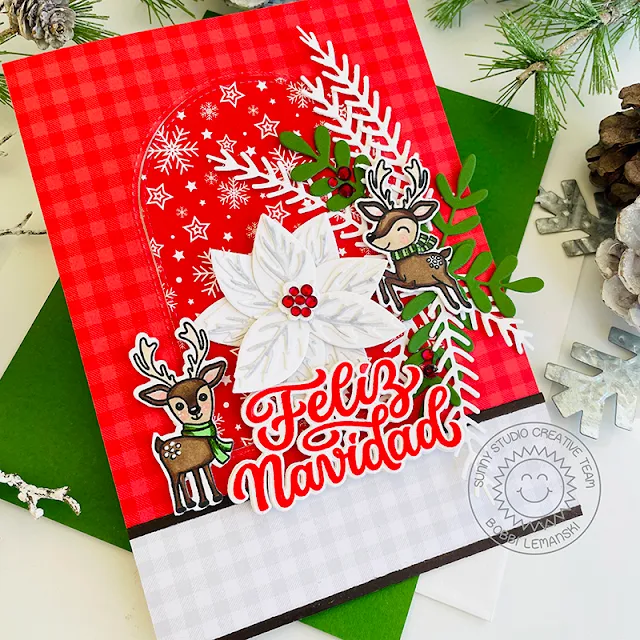
Sunny Studio Stamps: Feliz Navidad Holiday Card by Bobbi Lemanski (featuring Reindeer Games, Winter Greenery, Pristine Poinsettia Dies, Stitched Arch Dies)

To create this 5″ X 7″ card, I used festive paper from the Joyful Holiday paper pad and the largest arch die to create the background. I also stamped the sentiment in a bright red and cut it using the dies. I stacked four of the die cuts to make the sentiment stand out. I stamped the two deer, colored them using Copic Sketch Markers and cut them out using the dies. I used the following Copics:


  • Browns: E57, E55, E44, E43 and E42
  • Reds: R00, R22
  • Greens: YG67, YG17, YG03

I cut the foliage stems using the Winter Greenery Dies along with white and green cardstock. I also cut the Pristine Poinsettia – three layered sets of white cuts – and glued the layers together to make the large white poinsettia. I applied Copic C1 to the top layer of the petals. I also glued in some Ruby Red Jewels in the center of the poinsettia for a little sparkle.


Sunny Studio Stamps: Feliz Navidad Holiday Card by Bobbi Lemanski (featuring Reindeer Games, Winter Greenery, Pristine Poinsettia Dies, Stitched Arch Dies)

I assembled the card and used foam dots behind the deer to make them stand out. The poinsettia was glued in place in the center of the arch window. Greenery, the sentiment, deer and foliage were all added to the card front. I felt like the card needed a little more contrast so I also added 1/8″ strips of a dark brown cardstock above and below the checkered, gray paper.  More Ruby Read jewels were added to this card front to complete it.

Thanks for stopping by today. If you want to see more ideas and inspiration from me, subscribe to my blog, BobbiHartDesign.com. I’ll send you updates on new posts! You can also find me on Instagram as @BobbiHartDesign and on Facebook as BobbiHartDesign.

Sunny Studio Supplies Used:

Stitched Arch Dies
Stitched Arch Dies
Shop at:
Sunny Studio
Pristine Poinsettia Dies
Shop at:
Sunny Studio
Winter Greenery DIes
Shop at:
Sunny Studio
Reindeer Games Stamps
Shop at:
Sunny Studio
Reindeer Games Dies
Reindeer Games Dies
Shop at:
Sunny Studio
Joyful Holiday Paper
Shop at:
Sunny Studio
Feliz Navidad Stamps
Shop at:
Sunny Studio
Feliz Navidad Die
Feliz Navidad Die
Shop at:
Sunny Studio