Showing posts with label Spring Greenery Dies. Show all posts

Sunday, April 30, 2023

Special Day Card with Cathy

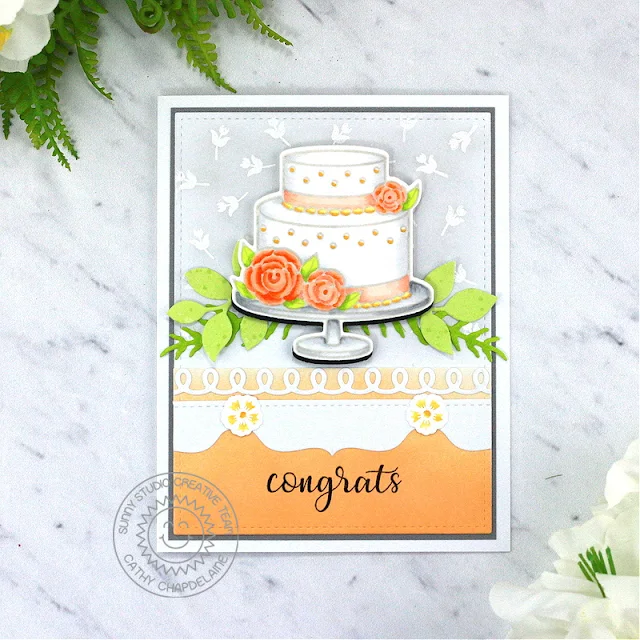
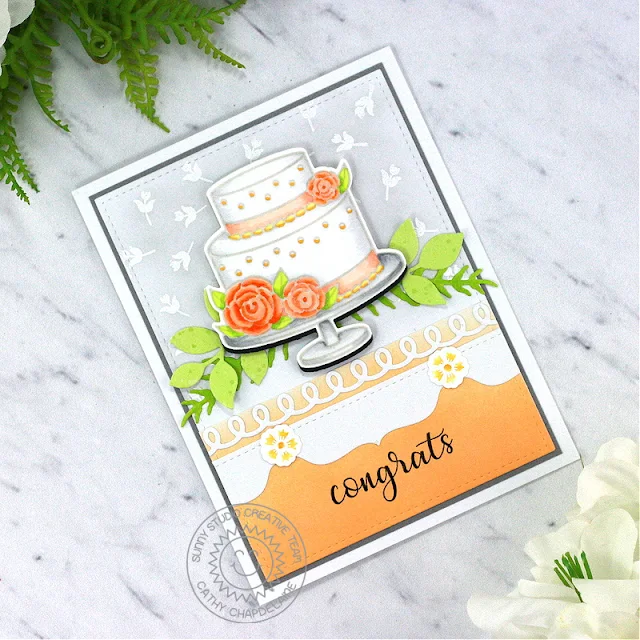
Hey friends! Cathy here today sharing a card featuring this gorgeous cake from the Special Day Stamps! I love a peachy orange/lime green color scheme as the weather gets warmer and I think this would make for a perfect summer wedding congrats card.

Sunny Studio Stamps: Special Day Wedding Card by Cathy Chapdelaine (featuring Icing Border Dies, Spring Greenery, Stitched Rectangle Dies)

I started this card by die-cutting a piece of white cardstock using the largest Stitched Rectangles Die. On the top half of the piece, I stamped a small rose from the Everything’s Rosy Stamps multiple times in Versamark ink and heat embossed them with white embossing powder. I then lightly inked over the roses with Lost Shadow Distress ink.

Next, I die-cut a second piece of white cardstock with the same Stitched Rectangle Die, cut it straight across at 2” and inked it in a gradient from light to dark using Dried Marigold Distress ink. I heat embossed the “congrats” sentiment from the Everything’s Rosy Stamps with black embossing powder 1/2" from the bottom of the cardstock.

Sunny Studio Stamps: Special Day Wedding Card by Cathy Chapdelaine (featuring Icing Border Dies, Spring Greenery, Stitched Rectangle Dies)

For a little extra fanciness, I die-cut an Icing Border Die from white cardstock, adhered it at the top of the Dried Marigold piece and trimmed the excess from the right and left edges. I also die-cut 3 tabs from the Notebook Tabs Dies from white cardstock, adhered one centered on the Dried Marigold piece below the Icing Border and adhered the other 2 tabs to each side, trimming the excess from the edges. To cover where the tabs meet, I stamped a flower from the Fabulous Flamingos Stamps twice on white cardstock using Versamark ink and heat embossed them with white embossing powder. I then used a water brush and painted the inside of the flowers using yellow and orange inks. I die-cut the flowers using the coordinating dies and adhered them where the tabs meet. I adhered the Dried Marigold piece to the bottom of the Stitched Rectangle die-cut, matted the piece on silver cardstock and adhered it to an A2 card base.

Sunny Studio Stamps: Special Day Wedding Card by Cathy Chapdelaine (featuring Icing Border Dies, Spring Greenery, Stitched Rectangle Dies)

Next, I inked 2 pieces of white cardstock (one with Twisted Citron Distress ink and one with Mowed Lawn Distress ink) and die-cut leaves using the Spring Greenery Dies. I adhered these above the Dried Marigold piece. To keep a light and airy feel to the card, I stamped the cake from the Special Day Stamps in light gray ink on Neenah Classic Crest 80lb solar white cardstock, colored it with Copics and die-cut it using the coordinating dies. To make the cake stand out a bit more and balance the black sentiment, I die-cut a piece of black cardstock with the coordinating cake die, cut the top portion of the cake off leaving just the cake stand portion and adhered the colored cake slightly overlapping the black die-cut. I then adhered the cake over the leaves with foam tape.

Sunny Studio Stamps: Special Day Wedding Card by Cathy Chapdelaine (featuring Icing Border Dies, Spring Greenery, Stitched Rectangle Dies)

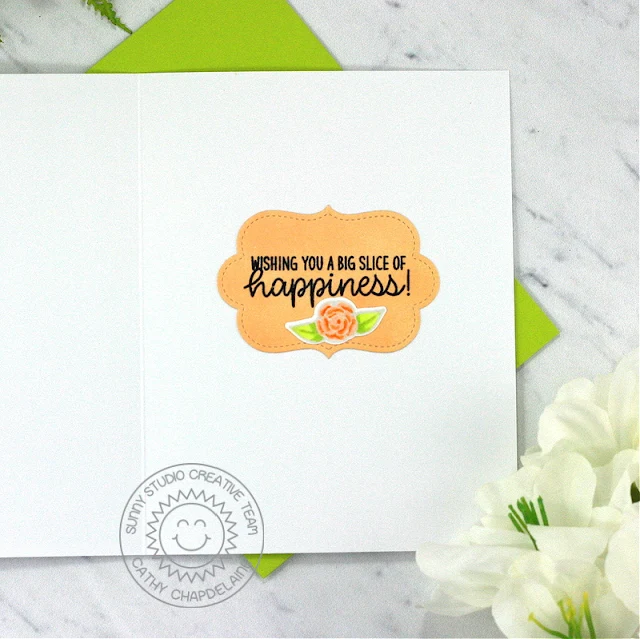
On the inside of the card, I heat embossed the sentiment from the Special Day Stamps with black embossing powder on white cardstock and die-cut it using a label die from the Sliding Window Dies. I then inked the die-cut with Dried Marigold Distress ink. I stamped a rose from the Special Day Stamps in light gray ink, colored it with Copics and die-cut it using the coordinating dies.

I hope you enjoyed and thanks for stopping by! For more inspiration, please visit my blog www.inkredibleadventures.com and you can also find me on Instagram as @cathy.chapdelaine.

Sunny Studio Supplies Used:

Stitched Rectangle Dies
Shop at:
Sunny Studio
Icing Border DIes
Icing Border DIes
Shop at:
Sunny Studio
Sliding Window Dies
Sliding Window Dies
Shop at:
Sunny Studio
Everything's Rosy Stamps
Shop at:
Sunny Studio
Fabulous Flamingos Stamps
Shop at:
Sunny Studio
Spring Greenery Dies
Shop at:
Sunny Studio
Notebook Tabs Dies
Notebook Tabs Dies
Shop at:
Sunny Studio
Special Day Stamps
Special Day Stamps
Shop at:
Sunny Studio
Special Day Dies
Special Day Dies
Shop at:
Sunny Studio

Friday, February 10, 2023

Big Bold Greetings Cards with Vanessa and Tina

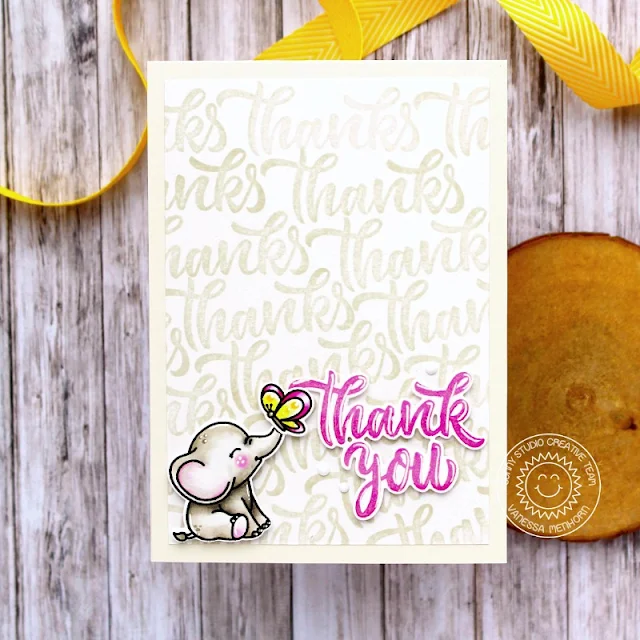
Hello to you! Vanessa here with a simple Thank You card using the Big Bold Greetings stamps.

Sunny Studio Stamps: Big Bold Greetings Baby Elephant Thank You Card by Vanessa Menhorn

I trimmed a panel of white cardstock slightly smaller than my card base and stamped the thanks with grey ink to create my patterned background. After I had adhered the panel to the card, I stamped the Baby Elephant and the Garden Fairy butterfly onto a piece of cardstock, colored everything with Copics, die-cut the elements with the matching dies and adhered them with foam tape.

Sunny Studio Stamps: Big Bold Greetings Baby Elephant Thank You Card by Vanessa Menhorn

Then I stamped the sentiment, die-cut it and added it to the card. Finally, I added white gems and used a white gel pen to add highlights.

I love big, bold greetings! Have a lovely weekend, see you next week!

--------------------------------------------

Hello crafty friends, it’s Tina with a sweet birthday card featuring the beautiful Big Bold Greetings stamp and die set. There are a lot of sentiments in this set which makes it a super versatile addition to your stash!

Sunny Studio Stamps: Big Bold Greetings Baby Elephant Happy Birthday Card by Tina (featuring Spring Greenery, Make A Wish, Frilly Frame Dies, Stitched Arch Dies)

Since you can never have enough birthday cards; I choose the ‘Happy Birthday’ and stamped it in a dark pink Memento ink. After die cutting the sentiment, I also cut two extra layers in white Neenah cardstock so I could stack them for dimension.

Next, I stamped and die cut all my images using the adorable elephants from Baby Elephants, the hats from Panda Party and the cake from Make A Wish. I used my Copics for the coloring, selecting bright Spring colors.

In my design I included a wreath arch made with large and small branches from the Spring Greenery dies. To decorate this arch I also cut a bunch of colorful little flowers from the Wonderful Windows die set. These flowers were the perfect size to scatter all over the greenery.

Sunny Studio Stamps: Big Bold Greetings Baby Elephant Happy Birthday Card by Tina (featuring Spring Greenery, Make A Wish, Frilly Frame Dies, Stitched Arch Dies)

My card panel was cut from a piece of Neenah Solar White paper using the Frilly Frame Eyelet Lace die. I really love this die as a panel because it has a lovely scalloped edge. I didn’t want my background to be too distracting, so I just added a hint of purple with a shiplap stencil from my stash and Distress Oxide Dusty Concord. 

Next I die cut an arch shape out of the panel using the largest of the Stitched Arched diesTo assemble the card, I first glued the remaining rectangle part of my panel directly to a white card base. Next, I mounted the stitched arch portion with foam tape to the base.

After building the greenery arch following the shape of the stitched arch, I added the little flowers and embellished them with a Pure White jewel to the centers. I completed the card by adhering the cake, elephants, and bold sentiment. 

Another birthday card ready to send!  Thank you for joining me and happy crafting!

Sunny Studio Supplies Used:

Make A Wish Stamps
Make A Wish Stamps
Shop at:
Sunny Studio
Make A Wish Dies
Make A Wish Dies
Shop at:
Sunny Studio
Frilly Frames-Eyelet Lace
Shop at:
Sunny Studio
Stitched Arch Dies
Stitched Arch Dies
Shop at:
Sunny Studio
Garden Fairy Stamps
Garden Fairy Stamps
Shop at:
Sunny Studio
Garden Fairy Dies
Garden Fairy Dies
Shop at:
Sunny Studio
Spring Greenery Dies
Shop at:
Sunny Studio
Baby Elephants Stamps
Shop at:
Sunny Studio
Baby Elephants Dies
Baby Elephants Dies
Shop at:
Sunny Studio
Big Bold Greetings Stamps
Shop at:
Sunny Studio
Big Bold Greetings Dies
Shop at:
Sunny Studio
Panda Party Stamps
Panda Party Stamps
Shop at:
Sunny Studio
Panda Party Dies
Panda Party Dies
Shop at:
Sunny Studio
Wonderful Windows Dies
Shop at:
Sunny Studio

Thursday, December 22, 2022

Holiday Gift Tags with Marine and Waleska

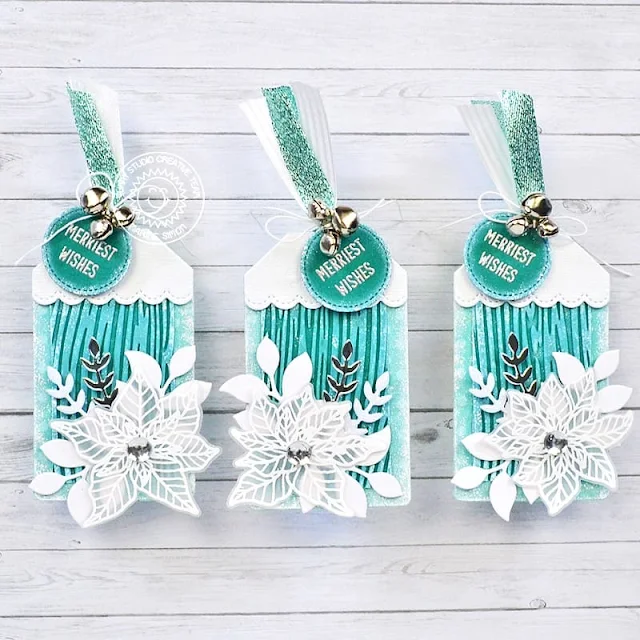
Hello crafty friends, Marine here with you today, I'm thrilled to be back on the blog with this set of three frosty tags! Once again, I went through my entire Sunny Studio collection to pick the different elements, and to create a frozen wintery look, I went for a teal + white + silver combo.

Sunny Studio Stamps: Mini Mat & Tag Die Holiday Gift Tags by Marine Simon (featuring Classy Christmas, Woodgrain Embossing Folder)

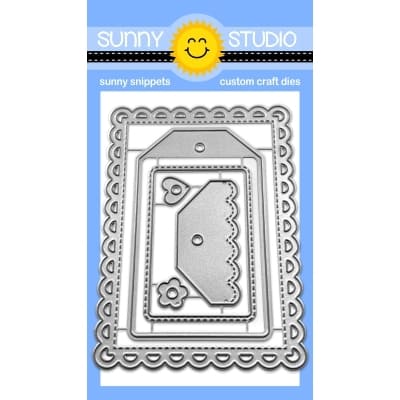
I started off by cutting three tags using a turquoise dotted pattern paper from the Dots & Stripes Pastels paper pack and the main die from the Mini Mat & Tag 3 die set. I also cut three smaller pieces out of a darker colored cardstock and another die from the Mini Mat & Tag 3 die set. I embossed those three darker pieces using the Woodgrain embossing folder, and then to give all those elements more interest, I added white pigment ink on the edges, as well as copic opaque white ink to emphasize the frozen look.

I cut three white toppers using another die from the Mini Mat & Tag 3 die set, and assembled a few things: I attached a small woodgrain panel in the center of each tag using double sided tape, and then a white topper at the very top of them using foam squares.

Sunny Studio Stamps: Mini Mat & Tag Die Holiday Gift Tags by Marine Simon (featuring Classy Christmas, Woodgrain Embossing Folder)

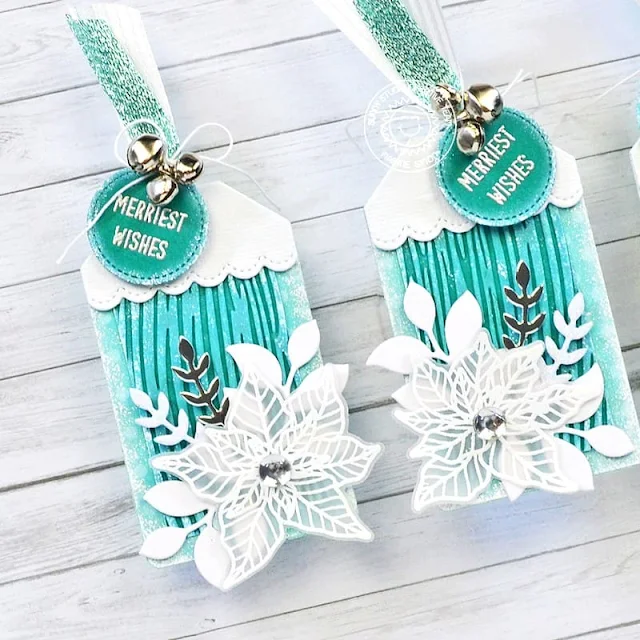
Next I stamped and cut all the elements to decorate the tags. I white heat embossed three poinsettias from Classy Christmas on vellum and cut them using the coordinating dies. I also cut a bunch of white, silver and white glittery leaves using dies from Pristine Poinsettia and Spring Greenery. And then I assembled and created a small cluster on each tag.

I cut three additional tags using the main die from the Mini Mat & Tag 3 die set and attached one at the back of each tag to give them a nice finishing touch. And then I added the last details.

Sunny Studio Stamps: Mini Mat & Tag Die Holiday Gift Tags by Marine Simon (featuring Classy Christmas, Woodgrain Embossing Folder)

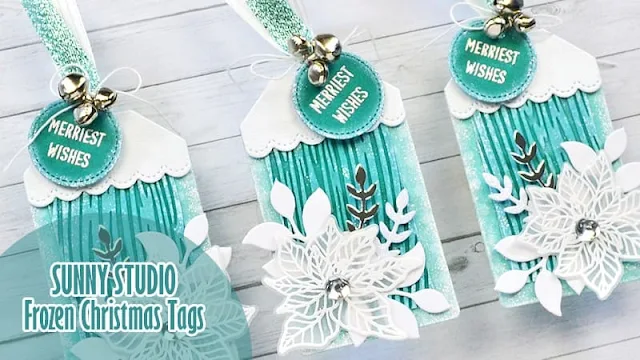
I cut three tiny silver circles using a die from the Comic Strip Everyday die set, glued one in the middle of each poinsettia, and added a clear droplet on top of each silver circle to bring more shine. I silver embossed three "Merriest Wishes" greetings from Reindeer Games on circle tags I cut using a die from the Sliding Window die set, and added white ink on those small tags to match the whole frosty look, and finally I attached those circle tags along with silver bells at the top of each tag using twine and ribbons.

Sunny Studio Stamps: Mini Mat & Tag Die Holiday Gift Tags by Marine Simon (featuring Classy Christmas, Woodgrain Embossing Folder)

And that's it! I hope you like those frozen tags, it was super fun to create them, very easy to mass produce I think! As always, you are more than welcome to watch the process video for more details (click on the image above). Thank you so much for watching, and have a very merry Christmas! See you next time!

-------------------------------------------

Hi Friends, Waleska here! Today I have a fun idea for all those last minute gift wrapping and tags for your gifts, they are simple and very easy to assemble I hope you like them! The Mini Mat & Tag #1 set is just adorable and I had so much fun piecing all this tags together with different colors of cardstock and different cute critters!


Sunny Studio Stamps: Mini Mat & Tag Die Holiday Gift Tags by Waleska Galindo (featuring Christmas Critters)

I started by cutting the main tags with white cardstock I then cut the top that comes with the set from different colors of cardstock from the Joyful Holiday Paper Pad. I cut four pieces of the rectangle from the Mini Mat & Tag 3 and inked them with oxide inks matching the colors I used for the tops of the tags. The Oxide Ink colors I used are: Picked Raspberry, Candied Apple, Peacock Feathers and Mowed Lawn.  I added water splashes and sparkle watercolor.


Sunny Studio Stamps: Mini Mat & Tag Die Holiday Gift Tags by Waleska Galindo (featuring Christmas Critters)


I then stamped and color the four cute critters from the 
Christmas Critters Stamp and adhere them to the inked pieces, finally I stamped the “To and From” from the Christmas Icons stamp set.


Sunny Studio Stamps: Mini Mat & Tag Die Holiday Gift Tags by Waleska Galindo (featuring Christmas Critters)


I love how adorable this cuties look peeking on this colorful tags! I hope you like them and can be inspired by them! Have a great rest of your day! Merry Christmas!

Sunny Studio Supplies Used:

Christmas Icons Stamps
Shop at:
Sunny Studio
Christmas Critters Stamps
Shop at:
Sunny Studio
Christmas Critters DIes
Shop at:
Sunny Studio
Comic Strip Everyday Dies
Shop at:
Sunny Studio
Sliding Window Dies
Sliding Window Dies
Shop at:
Sunny Studio
Dots & Stripes Pastels 6x6 Paper
Shop at:
Sunny Studio
Woodgrain Embossing
Woodgrain Embossing
Shop at:
Sunny Studio
Classy Christmas Stamps
Shop at:
Sunny Studio
Classy Christmas Dies
Shop at:
Sunny Studio
Pristine Poinsettia Dies
Shop at:
Sunny Studio
Spring Greenery Dies
Shop at:
Sunny Studio
Reindeer Games Stamps
Shop at:
Sunny Studio
Mini Mat & Tag 1 Dies
Shop at:
Sunny Studio
Mini Mat & Tag 3 Dies
Shop at:
Sunny Studio
Joyful Holiday Paper
Shop at:
Sunny Studio

Tuesday, August 16, 2022

Designer's Choice Cards with Isha and Kavya

Hello everyone! Isha here with a mixed media card as my designer's choice feature today. I love creating layers while still keeping it one layer. So I used various stamps and dies, even used the dies as stencils.

Sunny Studio Stamps: Spring Greenery Friendship Card by Isha Gupta (featuring Watering Can, Summer Greenery, Comic Strip Speech Bubble Dies, Scalloped Oval Mat Dies)

I started by creating the background panel by adding some inks to the gelli plate. Take the print onto a white card. I then stamped the butterflies from the Watering Can stamp, using the pink ink. Die-cut the leaves from the Spring Greenery dies, use these as a stencil to sponge some leaves onto the panel. Flick some black watercolor.

Stamp the butterflies from the Watering Can stamp, add touch of color using copic markers and die-cut using the coordinating dies. Add spectrum noir clear sparkle pen. die-cut leaves from the Summer Greenery dies, thrice from the white card and also vellum. Die-cut the oval from the Scalloped Oval Mat 3 dies, die-cut the word hugs in the center. Sponge some pink ink to the edges.

Sunny Studio Stamps: Spring Greenery Friendship Card by Isha Gupta (featuring Watering Can, Summer Greenery, Comic Strip Speech Bubble Dies, Scalloped Oval Mat Dies)

Die-cut the speech bubble from pink and yellow card using the Comic Strip Speech Bubbles dies, adhere the yellow to the pink slightly offset. Stamp the sentiment. Adhere the panel to the white card and adhere all the elements to it. I used 3d foam on some for added dimension.

Thank you for dropping by and have a nice day!

----------------------------------------------

Hi folks, Kavya here. I am back on the blog with another fun project! I love the layering stamps from SSS as they are just so realistic and so easy to use! 

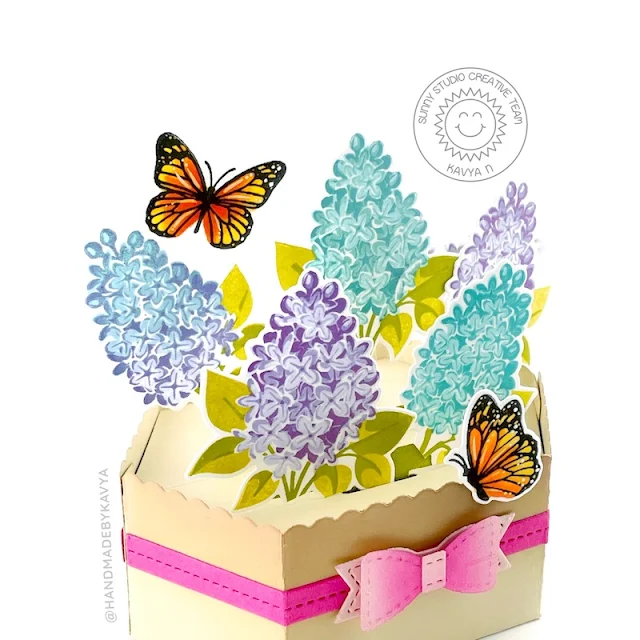
Sunny Studio Stamps: Lovely Lilacs Box Card by Kavya (featuring Watering Can)

I decided to pull out some of my favorite layering stamps from the latest release and create a fun 3D bouquet of flowers with the help of Lawn Fawn’s Platform die. I first created my platform base using LF’s die and some cardstock. 

Sunny Studio Stamps: Lovely Lilacs Box Card by Kavya (featuring Watering Can)

Then, I stamped and die cut the flowers and butterflies from Lovely Lilacs and Watering Can stamp sets. I added this to the platform die with the help of some double sided tape and some clear acetate (for support). I decided to not add a sentiment so that I can use it for any occasion. That’s it!

I hope you loved this super fun and easy project! Happy Crafting!

Sunny Studio Supplies Used:

Comic Strip Speech Bubble Dies
Shop at:
Sunny Studio
Scalloped Oval Mat 3 Dies
Shop at:
Sunny Studio
Spring Greenery Dies
Shop at:
Sunny Studio
Lovely Lilacs Stamps
Shop at:
Sunny Studio
Lovely Lilacs Dies
Lovely Lilacs Dies
Shop at:
Sunny Studio
Watering Can Stamps
Watering Can Stamps
Shop at:
Sunny Studio
Watering Can Dies
Watering Can Dies
Shop at:
Sunny Studio
Summer Greenery Die
Summer Greenery Die
Shop at:
Sunny Studio