Thursday, November 4, 2021

Chloe Number Die Focused Cards with Anja and Marine

Hello everyone, Anja here and today I'm featuring the Chloe Number Dies which allow you to easily personalize a birthday card. I created the card for a sweet girl which will be turning 12 soon.

Sunny Studio Stamps: Chloe Number Dies Scalloped Tag Dies Christmas Critters Birthday Card by Anja Bytiqi

I started off with a white square card base that measures 4.75" x 4.75". I really like the color combo of the All Is Bright 6x6 Paper pack. Not only are these happy colors great for your holiday projects but they also work for other occasions as well. I trimmed the striped paper to a 4.5"x4.5" size and adhered it to the card base.

With one of the Scalloped Tag Square Dies and the partial die cutting technique I created a scalloped square without the top hanger piece. I stamped the sentiment from the Inside Greetings Birthday set in VersaMark Ink and heat embossed it with silver embossing powder. Then I adhered the white scalloped square to the center of my card using foam tape.

Sunny Studio Stamps: Chloe Number Dies Scalloped Tag Dies Christmas Critters Birthday Card by Anja Bytiqi

Next, I stamped the images in Memento Tuxedo Black Ink. I picked the peeking cat and the big gift from the Christmas Critters set as well as the stack of gifts included in the Lazy Christmas set. I also added the small single gift (Holiday Express) and the heart balloon (Penguin Pals). All images were colored with Copic Markers and I used the coordinating dies to cut them out.

I assembled my little birthday scene by adhering the images with liquid glue. Finally, I die cut the numbers from glitter cardstock and put them on top of the red gift.

Thank you so much for stopping by! Hope you have a fabulous day!

-------------------------------------------------

Hey crafty friends, Marine here to share with you a super cute and fun safari birthday pop-up card. It was my first time coloring those cute critters and I had so much fun! And because we're celebrating a birthday with this card, I added a badge on the front with a number using the Chloe Number die set. I chose the number three, but depending on the person you're celebrating, child or grown up, you can add any number.

Sunny Studio Stamps: Chloe Number Dies Savanna Safari Sending Sunshine Birthday Card by Marine Simon

As always I gathered lots of images from different sets to build and create my little scene:
Savanna Safari for the critters
Seasonal Trees for the big palm trees
Sending Sunshine for the small palm trees
Best Fishes for the plants
Balloon Rides for the banner + party hats

The first thing I did was to stamp the images using an alcohol marker friendly black ink, and I colored them using my alcohol markers. And once everything (critters, leaves and palm trees) were done, I created the card base. I cut all the papers to build it, including a green pattern paper from the Sweater Weather 6x6 paper pack. And I invite you to watch the process video down below to see how I built the pop-up card. Explaining an interactive mechanism is always easier with a video.

Sunny Studio Stamps: Chloe Number Dies Savanna Safari Sending Sunshine Birthday Card by Marine Simon

So once the pop-up card was complete, I attached the images inside the card. And to stick them more easily and do a clean job, with no excess of glue, I used acetate. I cut pieces of acetate that I attached at the back of each image using glue dots, and then I attached the images inside the card by sticking the acetate pieces on the grass borders using glue dots again.

Sunny Studio Stamps: Chloe Number Dies Savanna Safari Sending Sunshine Birthday Card by Marine Simon

Next I created the small badge to put on the front of the card. I cut a scalloped circle out of a blue pattern paper using the smallest die from Scalloped Circle Mat 3, as well as a smaller circle out of the same kraft cardstock as the card base using a die from Wrap Around Box. I also cut the number three out of a yellow pattern paper using the Chloe Number die set. I layered those elements on top of each other, and stuck the badge on the front of the card using foam squares. The blue and yellow pattern papers I used to make this badge are from the Sweater Weather 6x6 paper pack.

And at the end, I thought it would be nice to make the card more festive so I stamped and colored some party hats  that I glued on each critter's head.

Sunny Studio Stamps: Chloe Number Dies Savanna Safari Sending Sunshine Birthday Card by Marine Simon

And that's it! Now let's celebrate someone special day with those cute little friends in the savanna! I leave you with the process video (click on the image above), feel welcome to check it out! Thanks for stopping by and see you next week!

Sunny Studio Supplies Used:

Christmas Critters Stamps
Shop at:
Sunny Studio
Christmas Critters DIes
Shop at:
Sunny Studio
Holiday Express Stamps
Shop at:
Sunny Studio
Holiday Express DIes
Shop at:
Sunny Studio
Lazy Christmas Stamps
Shop at:
Sunny Studio
Lazy Christmas Dies
Lazy Christmas Dies
Shop at:
Sunny Studio
Chloe Number Dies
Chloe Number Dies
Shop at:
Sunny Studio
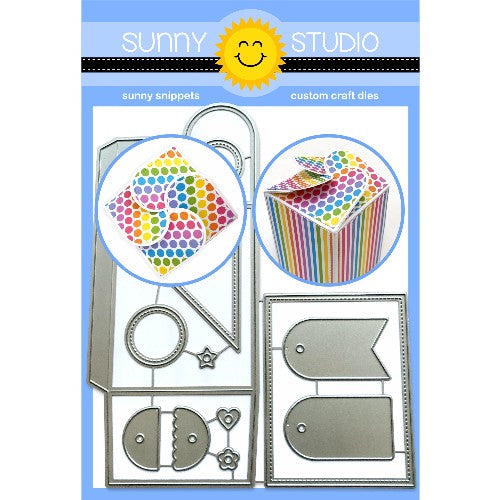
Wrap Around Box Die
Wrap Around Box Die
Shop at:
Sunny Studio
Best Fishes Stamps
Best Fishes Stamps
Shop at:
Sunny Studio
Best Fishes Dies
Best Fishes Dies
Shop at:
Sunny Studio
Seasonal Trees Stamps
Shop at:
Sunny Studio
Seaonal Trees Dies
Seaonal Trees Dies
Shop at:
Sunny Studio
Sending Sunshine Stamps
Shop at:
Sunny Studio
Sending Sunshine Dies
Shop at:
Sunny Studio
Scalloped Tags-Square
Shop at:
Sunny Studio
Savanna Safari Stamps
Shop at:
Sunny Studio
Savanna Safari Dies
Savanna Safari Dies
Shop at:
Sunny Studio
Penguin Pals Stamps
Penguin Pals Stamps
Shop at:
Sunny Studio
Penguin Pals Dies
Penguin Pals Dies
Shop at:
Sunny Studio
Balloon Rides Stamps
Shop at:
Sunny Studio
Balloon Rides Dies
Balloon Rides Dies
Shop at:
Sunny Studio
Inside Greetings Birthday
Shop at:
Sunny Studio
Scalloped Circle Mat 3 Dies
Shop at:
Sunny Studio
All Is Bright Paper
All Is Bright Paper
Shop at:
Sunny Studio
Sweater Weather Paper
Shop at:
Sunny Studio

Wednesday, November 3, 2021

Forest Tree Stencil Focused Cards with Julia and Franci

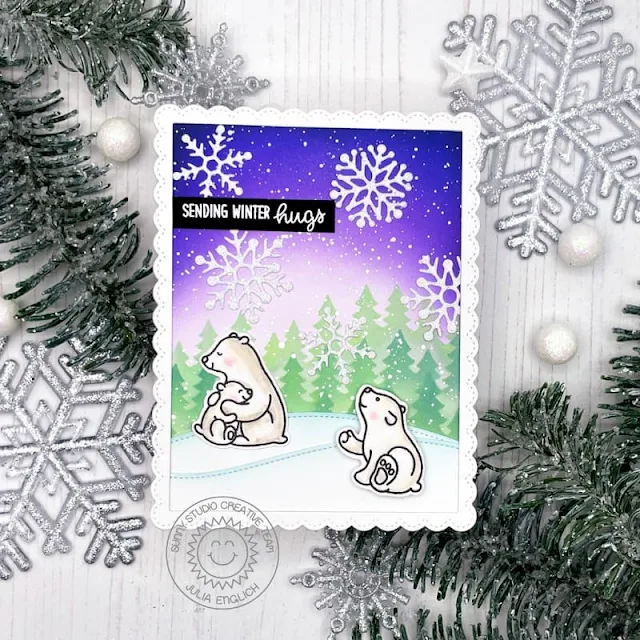
Hello friends! It’s Julia here and today I want to share this wintery scene card with you!

Sunny Studio Stamps: Forest Tree Stencils Bear Hugs Lacy Snowflake Dies Winter Themed Card by Julia Englich

First, I stamped my cute polar bears from Bear Hugs onto Bristol Smooth cardstock and I colored them in using Zig Clean Color Real Brush Markers.

I die-cut two hills using the Slimline Nature Borders as well as the largest of the Fancy Frames Rectangle out of white cardstock. I added a little bit of Salvaged Patina on the edge of the snowy hills for some definition. Then, it was time to create my background. I added a little bit of Milled Lavender to the center of my panel and after that, I used the Forest Tree Stencils to add three tree lines to the scene. For those, I used Cracked Pistachio and Evergreen Bough. I started with the lightest layer of color and stencil no. 3, then a little more intense color with stencil no. 2, and finally the darkest layer with stencil no. 1! Then, to finish the background, I ink blended the top of the panel with more Milled Lavender as well as Wilted Violet, Blueprint Sketch, Chipped Sapphire, and Black Soot. I also added lots of white splatters for a snowy look!

Sunny Studio Stamps: Forest Tree Stencils Bear Hugs Lacy Snowflake Dies Winter Themed Card by Julia Englich

I adhered the background to a card base and the hills on top. I also die-cut lots of Lacy Snowflakes and added those as well. I only added a little bit of glue to the center of the snowflakes, so they still have a bit of dimension on the edges! I layered the scalloped frame over the entire panel.

Finally, I heat embossed the sentiment onto a strip of black cardstock and I added my cute polar bears to the scene.

I absolutely love wintery scene cards and I had so much fun making this one. I really hope you like it. Have a wonderful week!

----------------------------------------------

Hi there! It's Franci here with you today, showcasing the Forest Tree stencil. This new 3 layers stencil is amazing to create your forest backgrounds so quickly! 

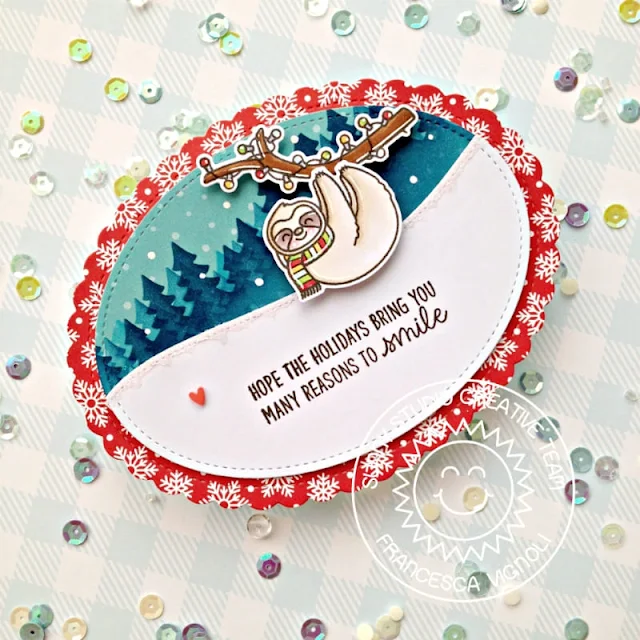
Sunny Studio Stamps: Forest Tree Stencils Lazy Christmas Stitched Oval Dies Winter Themed Card by Franci Vignoli

First of all I die cut all the panels out of white cardstock and patterned paper from the All Is Bright set using the Scalloped Oval Mat 1 Dies and the Stitched Oval Dies. Then I created a hill out of my white oval panel using the Slimline Nature Borders Dies.

Then I stamped my sentiment and my images from the Lazy Christmas set. I colored my sloth with Copics and die cut everything out with their coordinated dies.

Sunny Studio Stamps: Forest Tree Stencils Lazy Christmas Stitched Oval Dies Winter Themed Card by Franci Vignoli

I inked my forest onto the dotted light blue panel with different Distress inks, created a matching card base and assembled the card as shown. Finally I added some details with a white gel pen, a little heart confetti and some glitter. 

Hope you like this festive card as much as I do and thanks a lot for stopping by today! 

Sunny Studio Supplies Used:

Bear Hugs Stamps
Bear Hugs Stamps
Shop at:
Sunny Studio
Bear Hugs Dies
Bear Hugs Dies
Shop at:
Sunny Studio
Lazy Christmas Stamps
Shop at:
Sunny Studio
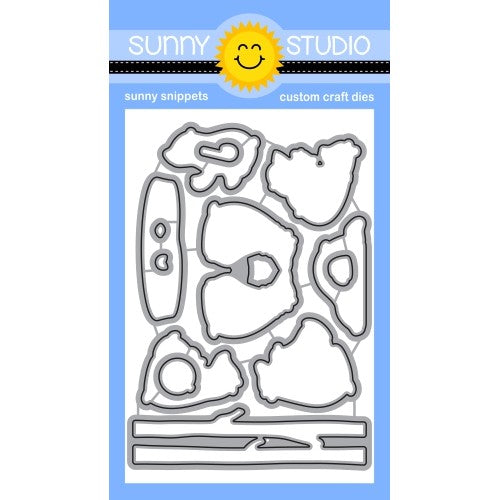
Lazy Christmas Dies
Lazy Christmas Dies
Shop at:
Sunny Studio
Lacy Snowflakes Die
Lacy Snowflakes Die
Shop at:
Sunny Studio
Fancy Frames- Rectangles
Shop at:
Sunny Studio
Stitched Oval Dies
Stitched Oval Dies
Shop at:
Sunny Studio
Slimline Nature Borders
Shop at:
Sunny Studio
Scalloped Oval Mat 1 Dies
Shop at:
Sunny Studio
Forest Trees Stencils
Shop at:
Sunny Studio
All Is Bright Paper
All Is Bright Paper
Shop at:
Sunny Studio

Tuesday, November 2, 2021

Pristine Poinsettia & Winter Greenery Ornament & Card with Kavya and Isha

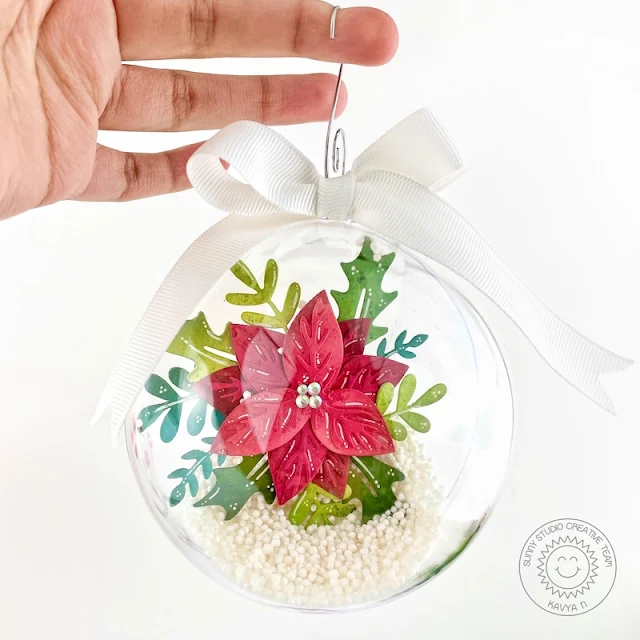
Hi folks, Kavya here. I am back on the blog with another fun project. It’s not a card this time but its definitely a fun way to use some Sunny Studio supplies! I had some fillable ornaments lying around so I decided use the new Pristine Poinsettia and Winter Greenery die to create a gorgeous ornament complete with faux snow.

Sunny Studio Stamps: Pristine Poinsettia Winter Greenery Christmas Ornament by Kavya

I first started off by die cutting the different layers of the poinsettia and greenery using different shades of red and green cardstock. I ink blend the edges using matching dye ink and splatter some green and red paint to make it more realistic! I also added some extra details using a white gel pen. 

Sunny Studio Stamps: Pristine Poinsettia Winter Greenery Christmas Ornament by Kavya

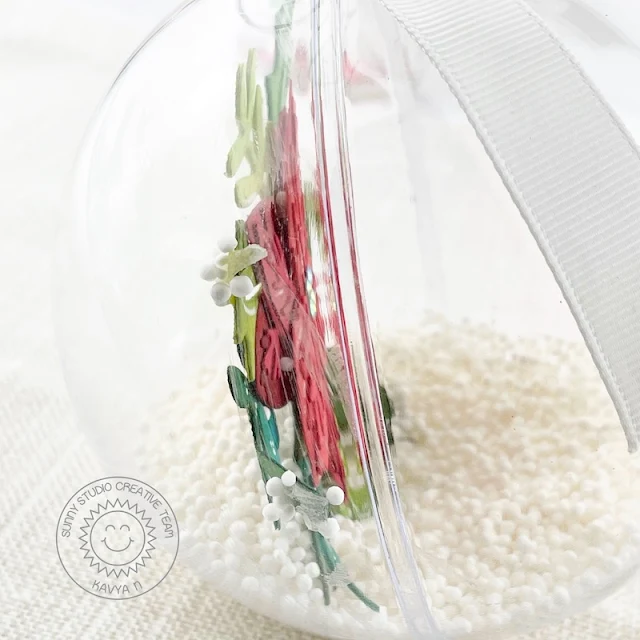
I wanted to add some faux snow but I didn’t have any at hand so I decided to see if I could find a substitute and I did. Can you guess what I used? Mini Tapioca balls from the kitchen! I bought these to make some dessert but never got around to it. I guess I was meant to craft with these! 

Sunny Studio Stamps: Pristine Poinsettia Winter Greenery Christmas Ornament by Kavya

For the ornament, I had some lying around from a craft kit but you can easily find them on Amazon or any big box crafts store. Just make sure it’s big enough for the poinsettias. Then, I finally closed the ornament and added a white bow to finish it off :) 

Sunny Studio Stamps: Pristine Poinsettia Winter Greenery Christmas Ornament by Kavya

I hope this inspires you to create your own unique Christmas ornaments! Happy Crafting!

--------------------------------------------------

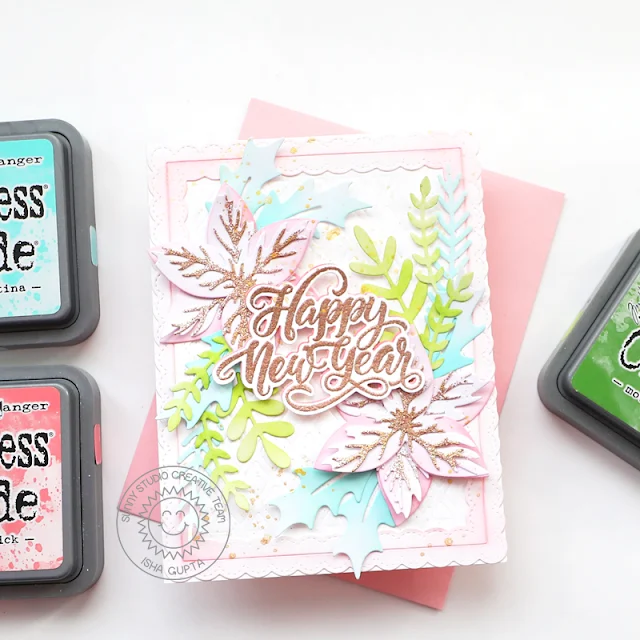
Hello everyone! Isha today with a pastel New Year card featuring our Pristine Poinsettia and Winter Greenery dies. I love to create white winter cards with a touch of color, hence the pastel colors. I also added extra dimension and details by embossing the card base using the Frilly Frames Lattice die.

Sunny Studio Stamps: Pristine Poinsettia Winter Greenery Frilly Frame Dies Seasons Greetings Christmas Card by Isha Gupta

I started by taking a white card base. I used the Frilly Frames Lattice die and used it to emboss the front panel. Die-cut a white cardstock using the Fancy Frames Rectangle.  Sponge some worn lipstick to these frames. Adhere to the card.

Sunny Studio Stamps: Pristine Poinsettia Winter Greenery Frilly Frame Dies Seasons Greetings Christmas Card by Isha Gupta

Die-cut some pieces using the Pristine Poinsettia and Winter Greenery dies from white cardstock. Sponge them using worn lipstick, salvaged patina and mowed lawn distress oxide inks. Emboss the center veins of the flowers using WOW! fools gold embossing glitter. Stack the flower pieces.

Sunny Studio Stamps: Pristine Poinsettia Winter Greenery Frilly Frame Dies Seasons Greetings Christmas Card by Isha Gupta

Adhere all the dies to the card as per my liking. Now, I stamped the sentiment from Season's Greetings stamp using Versamark ink and emboss using WOW! rose gold embossing powder. Die-cut using the coordinating dies. Adhere to the card using 3d foam. 

To finish, flick some gold paint. Thank you for dropping by. Have a nice day!

Sunny Studio Supplies Used:

Fancy Frames- Rectangles
Shop at:
Sunny Studio
Frilly Frames Lattice Dies
Shop at:
Sunny Studio
Season's Greetings Stamps
Shop at:
Sunny Studio
Season's Greetings Word Dies
Shop at:
Sunny Studio
Pristine Poinsettia Dies
Shop at:
Sunny Studio
Winter Greenery DIes
Shop at:
Sunny Studio

Monday, November 1, 2021

Christmas Critters Tags & Card with Mayra and Ashley

Hello everyone, Mayra here. Happy Monday and happy November!!! I am sharing a set of tags to share with you today. I used the adorable new Christmas Critters stamp set. 

Sunny Studio Stamps: Christmas Critters Stitched Circle Dies Scalloped Circle Mat Dies Christmas Tags by Mayra Duran-Hernandez

I began by coloring the images using Copic markers. I used R14, R24, R46, R59, and E09 for the red areas. E89, E87, E84, E55, E31, and E41 for the sloths.

Next, I used the Frilly Frames Eyelet Lace die to die-cut the base panels for the tags. I used the circles from the Stitched Circle Large and the Stitched Circle Small dies to die-cut the base for the tags and to create the frame for the tags design. To create the frame, I used the Scalloped Circle Mat 1 dies. I then used the tags from the Window Quad Square dies set, the Wrap Around Box dies, and the tag from the Sweet Treat Bag die set. 

Sunny Studio Stamps: Christmas Critters Stitched Circle Dies Scalloped Circle Mat Dies Christmas Tags by Mayra Duran-Hernandez

I then stamped the sentiments onto each of the separate tags. I used the sentiments from the Christmas CrittersLazy ChristmasInside Greetings-Holiday, and the Christmas Cookies stamp sets. 

I hope you enjoy the tags I created to share with you today. Thank you very much for taking the time to stop by. I hope you each have a wonderful and blessed day. 

-----------------------------------------

Hi friends! It’s Ashley today with a simple but still adorable Christmas card! The Christmas Critters set I used is full of options, so you could even create different versions of this same design!

Sunny Studio Stamps: Christmas Critters Stitched Rectangle Dies Christmas Garland Frame Dies Christmas Card by Ashley Ebben

I started by blending Distress Oxide inks in Bundled Sage, Pine Needles, and Black Soot onto white cardstock. I die cut the piece with the largest Stitched Rectangle for some subtle interest, then added it to a warm, light gray card base. 

I stamped the wreath and kitty from Christmas Critters in Lawn Fawn Jet Black ink and colored with Copics. I cut them out using the matching dies, then added them to my card front. I popped the kitty up with foam tape to give him a bit of dimension. 

Sunny Studio Stamps: Christmas Critters Stitched Rectangle Dies Christmas Garland Frame Dies Christmas Card by Ashley Ebben

For the sentiment, I stamped the “meowy” in VersaMark ink and embossed with gold. I cut the “Christmas” from the Christmas Garland Frame die set from gold glitter cardstock and used it to finish the sentiment. I finished by using a gold marker to add some dots and crosses to the background for interest. 

Thank you so much for stopping by! Have a wonderful day!

Sunny Studio Supplies Used:

Stitched Rectangle Dies
Shop at:
Sunny Studio
Christmas Cookies Stamps
Shop at:
Sunny Studio
Christmas Critters Stamps
Shop at:
Sunny Studio
Christmas Critters DIes
Shop at:
Sunny Studio
Lazy Christmas Stamps
Shop at:
Sunny Studio
Wrap Around Box Die
Wrap Around Box Die
Shop at:
Sunny Studio
Christmas Garland Frame
Shop at:
Sunny Studio
Sweet Treats Gift Bag
Shop at:
Sunny Studio
Window Quad Square Die
Shop at:
Sunny Studio
Inside Greetings-Holidays
Shop at:
Sunny Studio
Scalloped Circle Mat 1 Dies
Shop at:
Sunny Studio
Stitched Circle Small Dies
Shop at:
Sunny Studio
Stitched Circle Large Dies
Shop at:
Sunny Studio