Saturday, March 27, 2021

Eggs To Dye For & Layered Basket Cards with Leanne West

Hello Sunny Studio fans! Leanne here and I'm so happy to be back for a guest post today. After our long, cold mid-west winter, it was so refreshing to play with some fun spring stamps and pretty pastel colors. I have made a set of three spring cards to share. I always enjoy playing with Sunny Studio layered stamp sets. There's something so satisfying about about seeing the image come to life with each added layer. 

Sunny Studio Stamps: Eggs To Dye For Layered Basket Frilly Frame Dies Spring Themed Easter Basket Cards by Leanne West

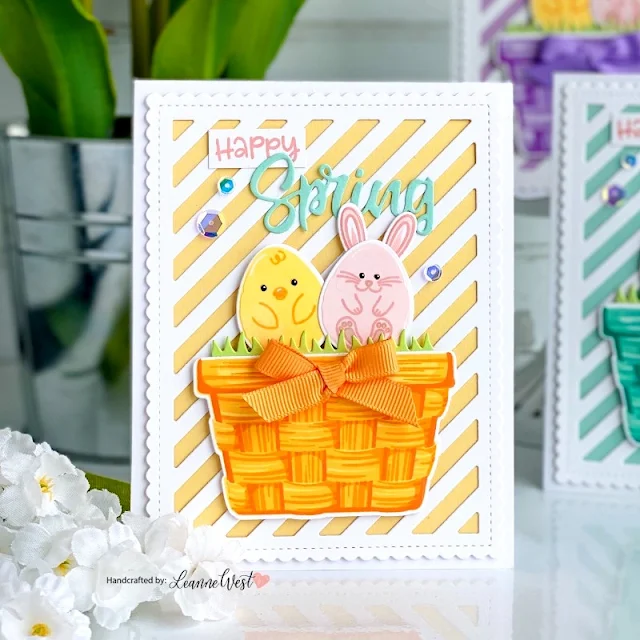
For my cards, I have used the Layered Basket and Eggs To Dye For sets to create my cute focal images. First I needed to decide on a background. I wanted something to add interest without taking away from the basket and eggs. I went with a die cut layered background that's super easy to create. I used the Frilly Frames Stripes die. I die cut the frame from white card stock and then backed it with pastel card stock in a color that would coordinate with the image colors. I then adhered the completed backgrounds to a white A2 sized card base.  

Sunny Studio Stamps: Eggs To Dye For Layered Basket Frilly Frame Dies Spring Themed Easter Basket Cards by Leanne West

Next I stamped out all the images. Since these are all layered images, I made sure each stamped layer was dry before I added the next. I think this is the most important thing you can do to ensure clean and crisp images. I use my heat gun to speed dry each layer because I'm impatient. I used Altenew ink cube sets for the baskets and eggs: Shades of Purple, Golden Sunset, Red Sunset, & Sea Shore.

Sunny Studio Stamps: Eggs To Dye For Layered Basket Frilly Frame Dies Spring Themed Easter Basket Cards by Leanne West

After die cutting the images, I added them to the center of the background with adhesive foam squares. The little grass border tucked into the basket is a die from the Sunny Sentiment die set. 

Sunny Studio Stamps: Eggs To Dye For Layered Basket Frilly Frame Dies Spring Themed Easter Basket Cards by Leanne West

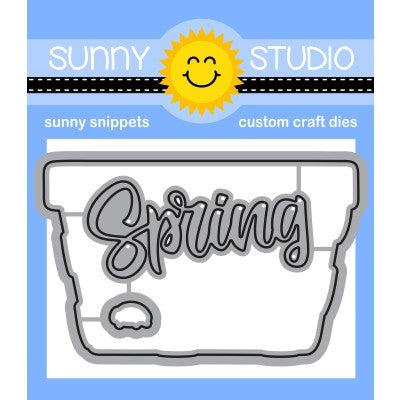
For the greeting, I die cut the word spring. This die is included with the Layered Basket die set. I stamped the word happy and simply trimmed it down into a small strip. When I added the egg basket, I made sure to leave enough room above it for the greeting. To complete the design, I added some extra embellishments. It just so happened that I had some grosgrain ribbon in colors that matched the baskets. I tied a little bow and added one to each basket with a glue dot. Lastly, I adhered some iridescent sequins for a little bit of sparkle.  

Thanks so much for joining me today. I'll be back in April with some fun project inspiration with Sunny Studio's summer release. Happy crafting!

Sunny Studio Supplies Used:

Frilly Frames Stripes Die
Shop at:
Sunny Studio
Eggs To Dye For Stamps
Shop at:
Sunny Studio
Eggs To Dye For Dies
Shop at:
Sunny Studio
Layered Basket Stamps
Shop at:
Sunny Studio
Layered Basket Dies
Layered Basket Dies
Shop at:
Sunny Studio

Friday, March 26, 2021

Layered Basket Cards with Candice and Kay

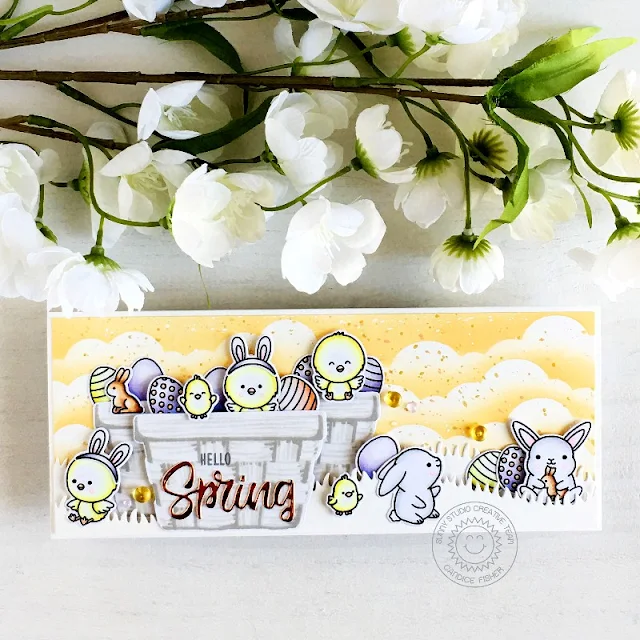
Hi! Candice back with you today to share a sweet Easter slimline card highlighting the cool Layered Basket stamp set!

Sunny Studio Stamps: Layered Basket Chubby Bunny Chickie Baby Spring Themed Cards by Candice Fisher

I used these Sunny Studio products to create my slimline design: 
Layered Basket stamps & coordinating dies
Chubby Bunny stamps & coordinating dies
Chickie Baby stamps & coordinating dies
Slimline Nature Border dies
Fall Kiddos stamps (hello)
Rainbow Droplets

I began my slimline with an 8 1/2 x 3 1/2 card base. For the background, I created a cloud slimline stencil and used it with dried marigold oxide ink. I then splattered with the dried marigold, gold shimmer spray, and white paint using a damp paintbrush.

Sunny Studio Stamps: Layered Basket Chubby Bunny Chickie Baby Spring Themed Cards by Candice Fisher

While I let that dry, I stamped the baskets using light grey inks and cut them out with the matching dies. Next, I stamped the chicks, eggs, and bunnies from the stamp sets listed above, colored them with Copic markers, and used the coordinating dies to cut them out. I tucked them in between 2 layers of white grass using glue and foam tape to add dimension. I finished with the stamped "hello" and die-cut "Spring" from copper foil paper and some yellow domes!

Thank you for visiting today!

-------------------------------------------

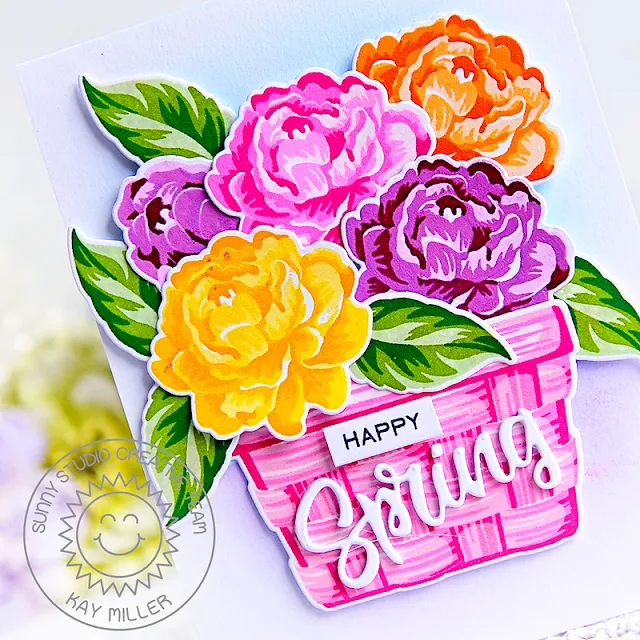
Hi there! Kay here, and I have a Spring card to share with you today featuring the new Layered Basket stamp set and the Layered Basket dies. I also had to fill my basket with those beautiful Camellias from the Captivating Camellias stamp set and Captivating Camellias dies.

Sunny Studio Stamps: Layered Basket Captivating Camellias Spring Themed Card by Kay Miller

For the background on my card, I blended some Wilted Violet and Salty Ocean Distress inks. I then stamped the Layered Basket, camellias and leaves using the following colors of ink:

Basket: Ballet Slipper, Sparkling Rose, Bubble Gum and Raspberry Bliss.
Leaves: Fresh Pear, Key Lime and Olive.
Yellow Flower: Lemon Whip, Sunshine, Sweet Mustard, Marigold
Pink Flower: Ballet Slipper, Sparkling Rose, Bubble Gum and Raspberry Bliss.
Purple Flower: Soft Lilac, Candy Vilolet, Lavender, Regal Kiss

Sunny Studio Stamps: Layered Basket Captivating Camellias Spring Themed Card by Kay Miller

After stamping, I cut everything out with the coordinating dies and added them to the card with foam tape. I then cut out the Spring sentiment which is included with the Layered Basket dies. I cut three of these and layered them together and then glued this to the basket with liquid glue. I stamped the small happy, which is included in the Captivating Camellias stamp set and added it to the basket with foam tape.

I hope you have enjoyed my card today! Thanks so much for stopping by!

Sunny Studio Supplies Used:

Fall Kiddos Stamps
Fall Kiddos Stamps
Shop at:
Sunny Studio
Chubby Bunny Stamps
Chubby Bunny Stamps
Shop at:
Sunny Studio
Chubby Bunny Dies
Chubby Bunny Dies
Shop at:
Sunny Studio
Chickie Baby Stamps
Chickie Baby Stamps
Shop at:
Sunny Studio
Chickie Baby Dies
Chickie Baby Dies
Shop at:
Sunny Studio
Slimline Nature Borders
Shop at:
Sunny Studio
Captivating Camellias Stamps
Shop at:
Sunny Studio
Captivating Camellias Dies
Shop at:
Sunny Studio
Layered Basket Stamps
Shop at:
Sunny Studio
Layered Basket Dies
Layered Basket Dies
Shop at:
Sunny Studio

Thursday, March 25, 2021

Scalloped Circle Mats Die Focused Cards with Anja and Vanessa

Hello everyone, Anja here and I have a cute CAS slimline card for you today featuring the Scalloped Circle Mat 1 Dies. The little critters that went on top of each patterned paper die-cut are from the Balloon Rides stamp set.

Sunny Studio Stamps: Scalloped Circle Mat Dies Balloon Rides Slimline Dies Everyday Card by Anja Byqyti

First, I created a white card base which is a bit taller than the stitched mat die from the Slimline Scalloped Frame Dies set. At the top half of the stitched panel, I blended a pastel rainbow using Distress Oxide Inks (Dusty Concord + Milled Lavender, Kitsch Flamingo + Spun Sugar, Tattered Rose, Mowed Lawn + Shabby Shutters, Tumbled Glass).

Sunny Studio Stamps: Scalloped Circle Mat Dies Balloon Rides Slimline Dies Everyday Card by Anja Byqyti

Next, I die cut five matching scalloped circles from polka dot paper (Dots & Stripes Pastels Paper) and adhered them to my ink blended background. I stamped the critters in Memento Tuxedo Black Ink and colored them with Copic Markers. I used the coordinating dies to cut them out.

Finally, I die cut the word 'congrats' from holographic cardstock and added silver star sequins to finish off my card.

Thank you so much for stopping by! Have a fabulous day!

--------------------------------------------

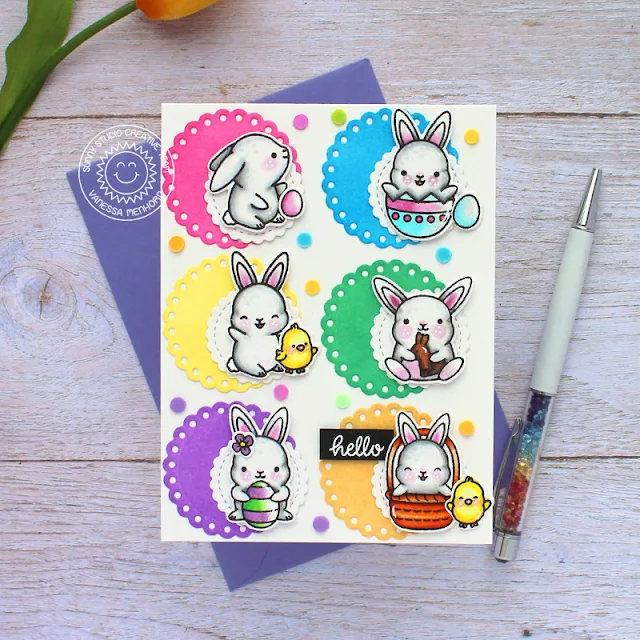
Hello to you! Vanessa here with another spring card using the Scalloped Circle Mat Dies. I love those little circles!

Sunny Studio Stamps: Scalloped Circle Mat Dies Chubby Bunny Everyday Card by Vanessa Menhorn

I first die-cut the circles from white cardstock, then I inked the larger ones with Picked Raspberry, Salty Ocean, Squeezed Lemonade, Lucky Clover, Wilted Violet and Dried Marigold Distress Oxide Inks. I layered a colored circle with a small white one and adhered these to the card base.

Supplies used:
Scalloped Circle Mat 2 Dies
Scalloped Circle Mat 3 Dies
Chubby Bunny Stamps + Dies
Birthday Cake Dot Sprinkles
Rainbow Dot Confetti

Sunny Studio Stamps: Scalloped Circle Mat Dies Chubby Bunny Everyday Card by Vanessa Menhorn

Now I stamped my images onto white cardstock, colored them with Copic markers, die-cut the elements with the matching dies and adhered everything to the card with foam tape.

Finally, I stamped the "hello" onto a strip of black cardstock, heat-embossed it with white embossing powder, trimmed it and added it to the card. Then I finished everything off with confetti.

These Bunnies are the cutest! I can totally identify with the one eating the chocolate :) Thanks for visiting today!

Sunny Studio Supplies Used:


Dots & Stripes Pastels 6x6 Paper
Shop at:
Sunny Studio
Chubby Bunny Stamps
Chubby Bunny Stamps
Shop at:
Sunny Studio
Chubby Bunny Dies
Chubby Bunny Dies
Shop at:
Sunny Studio
Slimline Scalloped Frame
Shop at:
Sunny Studio
Balloon Rides Stamps
Shop at:
Sunny Studio
Balloon Rides Dies
Balloon Rides Dies
Shop at:
Sunny Studio
Scalloped Circle Mat 1 Dies
Shop at:
Sunny Studio
Scalloped Circle Mat 2 Dies
Shop at:
Sunny Studio
Scalloped Circle Mat 3 Dies
Shop at:
Sunny Studio

Wednesday, March 24, 2021

Country Scenes Cards with Franci and Julia

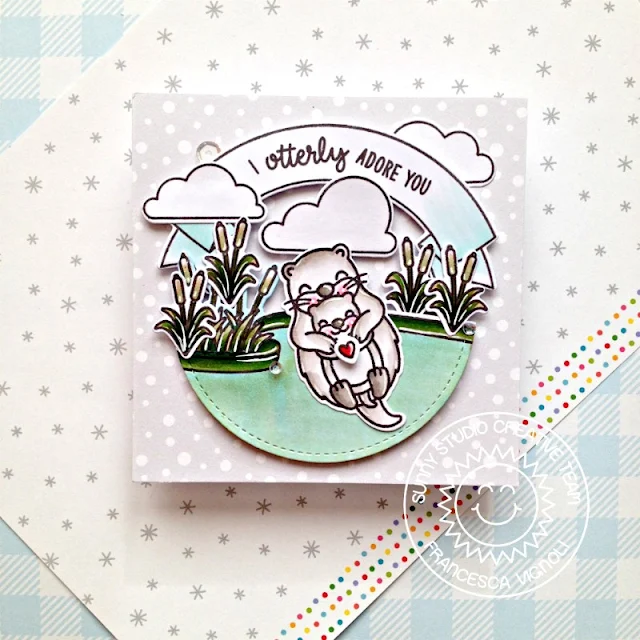
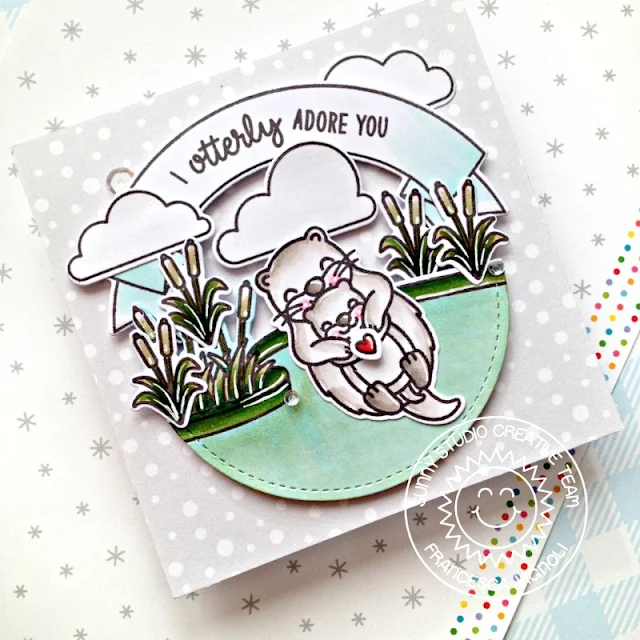
Hello there! It's Franci here, showcasing the Country Scenes set.  Aww these images are soooo cute! 

Sunny Studio Stamps: Country Scenes My Otter Half Stitched Circle Dies Card by Franci Vignoli

First of all I created my square card base out of white cardstock and I covered the front with some patterned paper from the Subtle Grey 6x6 paper set, then I die cut a circle out of white cardstock using the Stitched Circle Small Dies set and I stamped, colored with Copics and die cut my border out of it. 

Then I added more scene elements from these sets: My Otter Half coordinated diesBanner Basics coordinated diesSpring Showers + coordinated dies.

Sunny Studio Stamps: Country Scenes My Otter Half Stitched Circle Dies Card by Franci Vignoli

I colored everything with my Copics, added lots of details with a white gel pen and some sparkle with my Wink of Stella brush. I glued all the elements down with foam adhesive and added some clear sequins to finish up my design.

I hope you are now inspired to create and thanks a lot for stopping by today! 

------------------------------------------------

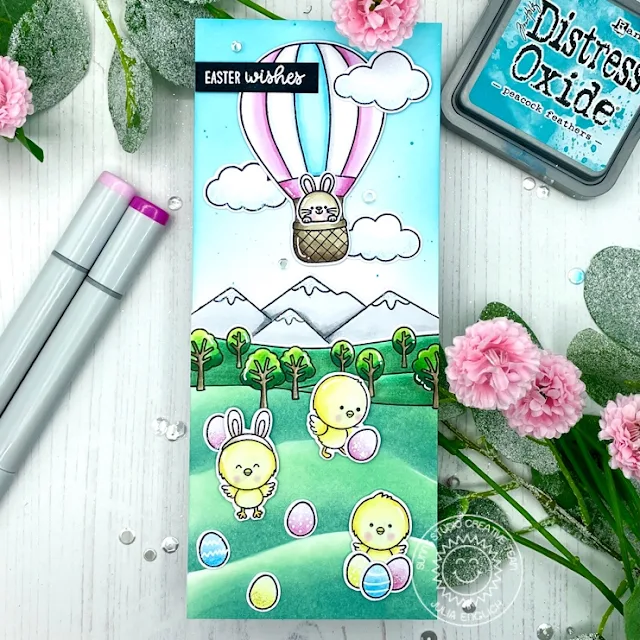
Hey crafty friends! It’s Julia here with a slimline scene card! Since it's is just around the corner, I really wanted to make another Easter card!

Sunny Studio Stamps: Country Scenes Balloon Rides Chickie Baby Card by Julia Englich


So, I started by stamping out my images from the Country Scenes, Balloon Rides, and Chickie Baby stamp sets. I really wanted to use just the mountain range from the Country Scenes behind hills, so I masked off the little trees in front with post it note tape, inked up the stamp and removed the tape, so that I could just stamp out the mountains. All the images were then colored in using Copic markers.

Sunny Studio Stamps: Country Scenes Balloon Rides Chickie Baby Card by Julia Englich


Then I cut down a panel of Bristol smooth cardstock to 3 1/2 x 8 1/2" and ink blended the top with Peacock Feathers and the bottom hills with Cracked Pistachio and Evergreen Bough. I attached my sweet little Easter bunny to the hot air balloon and the cute bunny ears to one of the chickies. I adhered all of the background images using liquid glue and for the hot air balloon and the chicks I used foam squares.

Sunny Studio Stamps: Country Scenes Balloon Rides Chickie Baby Card by Julia Englich

For my sentiment I stamped the word "Easter" from Eggs to Dye For and "wishes" from Garden Fairy and I heat embossed both in white onto black cardstock. To finish my card, I added lots of shimmer pen, white gel pen details, Stardust Stickles and a few clear sequins. I really hope you like it!

Copic Markers used: N0, N1, N3, N5, 0; E40, E42, E43, E44, E47; G02, G46; YG01, G14, G17, BG99; RV0000, RV52, RV55; Y000, Y00, Y02, Y17; BG0000; BG000; BG01, BG02.

Thank you so much for spending time with me today! Have a wonderful day!

Sunny Studio Supplies Used:

Subtle Grey Tones Paper
Shop at:
Sunny Studio
Banner Basics Stamps
Shop at:
Sunny Studio
Banner Basics Dies
Banner Basics Dies
Shop at:
Sunny Studio
Chickie Baby Stamps
Chickie Baby Stamps
Shop at:
Sunny Studio
Chickie Baby Dies
Chickie Baby Dies
Shop at:
Sunny Studio
Spring Showers Stamps
Shop at:
Sunny Studio
Spring Showers Dies
Spring Showers Dies
Shop at:
Sunny Studio
Balloon Rides Stamps
Shop at:
Sunny Studio
Balloon Rides Dies
Balloon Rides Dies
Shop at:
Sunny Studio
Country Scenes Stamps
Shop at:
Sunny Studio
Country Scenes Dies
Country Scenes Dies
Shop at:
Sunny Studio
Eggs To Dye For Stamps
Shop at:
Sunny Studio
Garden Fairy Stamps
Garden Fairy Stamps
Shop at:
Sunny Studio
My Otter Half Stamps
Shop at:
Sunny Studio
My Otter Half Dies
My Otter Half Dies
Shop at:
Sunny Studio
Stitched Circle Small Dies
Shop at:
Sunny Studio