Friday, December 25, 2020

Surfing Santa Cards and Video Tutorial with Franci and Candice

Hi there and Merry Merry Christmas! I hope you're having a lovely day celebrating the Holidays and I wish you all the joy and happiness for 2021! It's Franci here with you and I'm so very happy to celebrate with you today, with a fun interactive card that features the Surfing Santa mini set.

Sunny Studio Stamps: Surfing Santa Catch A Wave Dies Tropical Themed Christmas Card by Franci Vignoli

Fun fact: for today's project I was actually inspired by the TV news! Yes, cause every year, the day after Christmas as I watch the news with my family I always see how Christmas was celebrated in the world and all our friends from Australia are always at the beach, surfing in Santa costumes! Lol.

Sunny Studio Stamps: Surfing Santa Catch A Wave Dies Tropical Themed Christmas Card by Franci Vignoli

So I created this super fun interactive card (but also simple to make, I promise!) and I can't stop playing with my little Santa who can actually surf and move into the ocean waves.

To create this card I used the Surfing Santa set, it's coordinated dies, the Catch a Wave Dies and some basic shape dies.

Please take a look at how I created my card below and enjoy!


------------------------------------------

Hello and Merry Christmas my crafty friends! Candice here! I hope you are enjoying your day with family! I have one last tropical Christmas card to share with you today!

Sunny Studio Stamps: Surfing Santa Tropical Scenes Slimline Dies Tropical Themed Christmas Card by Candice Fisher

I used these Sunny Studio products for my card:

I began my slimline with an 8 1/2 x 3 1/2 card base. For the background, I repeatedly stamped the palm tree silhouette with Orange Cream Altenew ink on orange cardstock and trimmed with the scalloped border die. I then heat embossed the sentiment in white on the bottom panel.

Sunny Studio Stamps: Surfing Santa Tropical Scenes Slimline Dies Tropical Themed Christmas Card by Candice Fisher

Next, I stamped all my tropical images from the sets listed above, colored them with Copic markers and used the matching dies to cut out. I lightly inked a sunset with dried marigold directly onto the card base and layered the images onto blue cardstocks, some cut from the wave die. I finished with some blue snowflakes, clear domes and Nuvo drops!

Thank you for stopping by today and enjoy the rest of your holiday!

Sunny Studio Supplies Used:

Catch A Wave Dies
Catch A Wave Dies
Shop at:
Sunny Studio
Sealiously Sweet Stamps
Shop at:
Sunny Studio
Sealiously Sweet Dies
Shop at:
Sunny Studio
Tropical Scenes Stamps
Shop at:
Sunny Studio
Tropical Scenes Dies
Shop at:
Sunny Studio
Slimline Basic Borders
Shop at:
Sunny Studio
Slimline Nature Borders
Shop at:
Sunny Studio
Surfing Santa Stamps
Shop at:
Sunny Studio
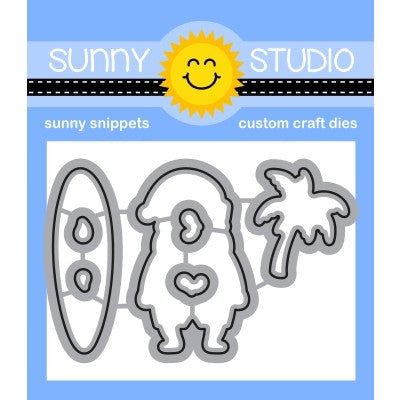
Surfing Santa Dies
Surfing Santa Dies
Shop at:
Sunny Studio

Thursday, December 24, 2020

Classy Christmas Cards with Vanessa and Anja

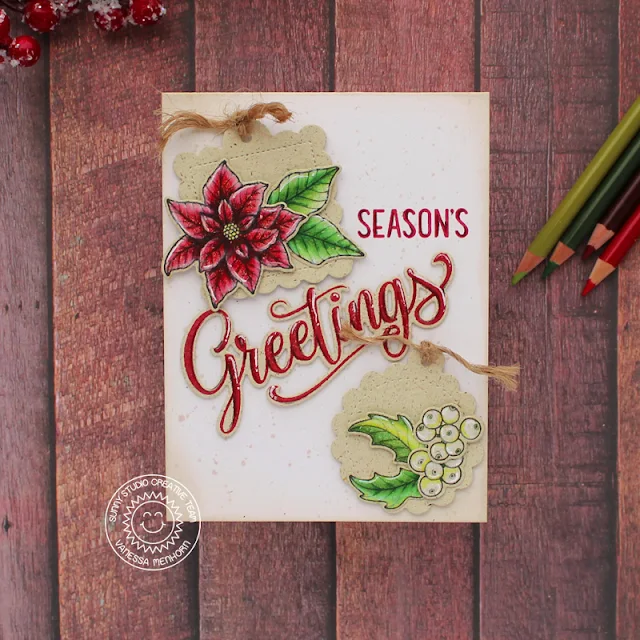
Hello to you! Vanessa here with a vintage style Christmas card using Classy Christmas.

Sunny Studio Stamps: Classy Christmas Season's Greetings Scalloped Tag Dies Christmas Cards by Vanessa Menhorn

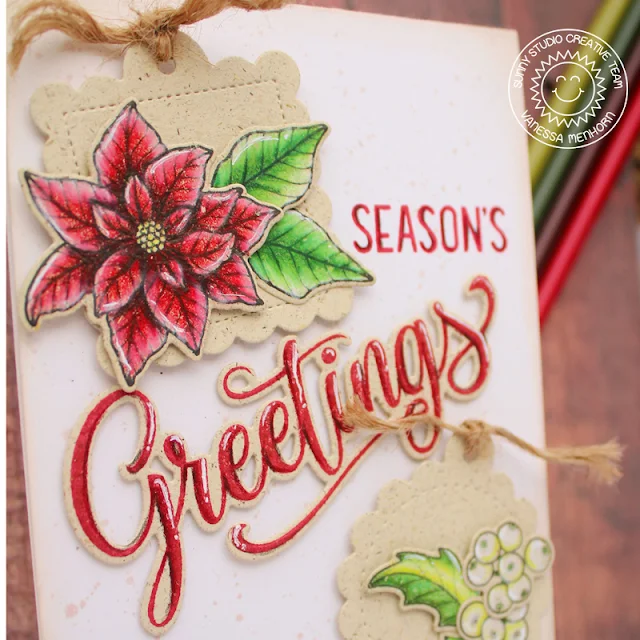
For this card, I first inked the edges of a rustic cream card base with cream ink and applied ink droplets. Then I die-cut two tags from the package box of my favorite tea. I love the paper they use for the package and didn't want to throw it away. Now I stamped the images onto another piece of the paper and colored them with colored pencils. After adding highlights with a white gel pen, I die-cut the elements with the matching dies and arranged them onto the tags. 

Stamps and dies used today:
Classy Christmas stamps dies (images)
Season's Greetings stamps + dies (sentiment)
Scalloped Tag Square Dies (tags)

Sunny Studio Stamps: Classy Christmas Season's Greetings Scalloped Tag Dies Christmas Cards by Vanessa Menhorn

I tied-on rustic twine to the tags and adhered them with foam tape. Then I stamped the "greetings" with red ink, added shadows with the colored pencils and highlights with the white gel pen, die-cut the word and adhered it. Finally, I stamped "season's" onto the card.

I am wishing you and your loved ones a wonderful Christmas! Thank you for stopping by!

--------------------------------------------------

Hello everyone, Anja here today and since it is Christmas Eve, I have the matching card for you, showcasing the beautiful Classy Christmas Stamps.

Sunny Studio Stamps: Classy Christmas Christmas Card by Anja Bytyqi

I started off with a white A2 card base and adhered a navy blue cardstock panel which is slightly smaller. Next, I die cut a thin white frame to use as a decorative design element for my cluster of stamped images.

Sunny Studio Stamps: Classy Christmas Christmas Card by Anja Bytyqi

The images were stamped in Memento Tuxedo Black Ink and colored with Copic markers. For the tree branch sprigs I used three tones of green dye inks. I used the coordinating dies to cut everything out and arranged the images at the bottom of the card. Finally, I stamped the sentiment from the Merry Mice set in VersaMark Ink and heat embossed it with white embossing powder.

Thank you so much for stopping by! Wishing you all a very Merry Christmas!

Sunny Studio Supplies Used:

Season's Greetings Stamps
Shop at:
Sunny Studio
Season's Greetings Dies
Shop at:
Sunny Studio
Merry Mice Stamps
Merry Mice Stamps
Shop at:
Sunny Studio
Scalloped Tags-Square
Shop at:
Sunny Studio
Classy Christmas Stamps
Shop at:
Sunny Studio
Classy Christmas Dies
Shop at:
Sunny Studio